Wall Art Guide, Wall Art Tutoriels
3D Glass Wall Art: Sculptural Blown Glass Designs
Mar
So I’ve been installing blown glass wall art for like 3 years now and honestly the first time I hung one I was absolutely terrified I’d drop it. My hands were literally shaking because this piece cost more than my monthly grocery budget and I kept thinking about all those YouTube fail videos.
The thing about sculptural glass is that it’s way more forgiving than you’d think, but also you really can’t wing it. You gotta respect the weight distribution because these pieces aren’t flat paintings. They’ve got depth and curves and sometimes parts that stick out like 8 inches from the wall.
Weight Is Everything and Also Kinda Deceptive
First thing, ignore what the product description says about weight. I mean don’t completely ignore it, but like, a 15-pound glass sculpture feels different than a 15-pound mirror. The weight is distributed weird. I learned this when I installed this gorgeous cobalt blue piece in a client’s dining room and used the hanging system I’d normally use for a canvas that weight and… yeah it lasted about two days before I got a panicked call.
You need to find studs. I know everyone says this about everything but with glass it’s not optional unless the piece is under 5 pounds which honestly most sculptural blown glass isn’t gonna be. I use this ancient stud finder I got from my dad that beeps like a smoke detector and my cat absolutely hates it but it works better than the fancy one I bought last year.
The Hardware Situation Nobody Talks About
Okay so the mounting hardware that comes with blown glass pieces is usually pretty good, but here’s what I actually use:
- Heavy duty picture hanging hooks rated for at least double the weight of your piece
- Wall anchors if you absolutely cannot hit a stud, but get the toggle bolt kind not those plastic ribbed ones
- D-rings or wire on the back, depending on what the artist installed
- Felt pads for the bottom corners so it doesn’t scratch your wall when it settles
- A level that’s at least 12 inches long because those tiny keychain ones are useless
I also keep museum putty around which sounds excessive but sometimes these pieces have parts that vibrate slightly if someone slams a door and that tiny bit of putty between the glass and wall stops it from making that awful clicking sound.
Measuring and Placement That Won’t Make You Redo Everything
This is gonna sound weird but I take like 20 photos before I commit to drilling. I’ll hold the piece up, take a photo, move it six inches left, take another photo. Then I text them to myself and look at them on my phone while standing back. Your eyes lie to you when you’re up close holding something.
The standard rule is center the piece at 57 inches from the floor which is apparently average eye height but honestly I think that’s too low for sculptural glass because you want people to see the dimensional aspects. I usually go 60-62 inches for the center point unless it’s going above furniture.
Oh and another thing, lighting makes or breaks these pieces. I installed this incredible amber and gold blown glass sculpture in a hallway with no natural light and it just looked… brown. We added a picture light above it and suddenly you could see all the layers and bubbles and it was actually worth what they paid for it.
The Actual Installation Process I Use
So you’ve found your spot and marked where the studs are. Here’s my actual process:
Mark the center point where you want the middle of the piece to be. Then measure the hanging hardware on the back of your glass piece, how far down from the top edge is the wire or D-rings? Subtract that measurement from your center point and mark that spot, that’s where your hook goes.
Wait I forgot to mention, if your piece has a wire across the back, measure how much the wire will sag when the piece is hanging. Hold it up by the wire and see where the actual hanging point ends up. This changes everything and I forgot to do this once and had to redrink everything two inches higher.
For studs, I drill a pilot hole first. Always. Even though it takes an extra 3 minutes. Then screw in your hook or hanger, making sure it’s going in straight because if it angles down the piece will tilt forward and glass tilting forward is not a vibe you want.
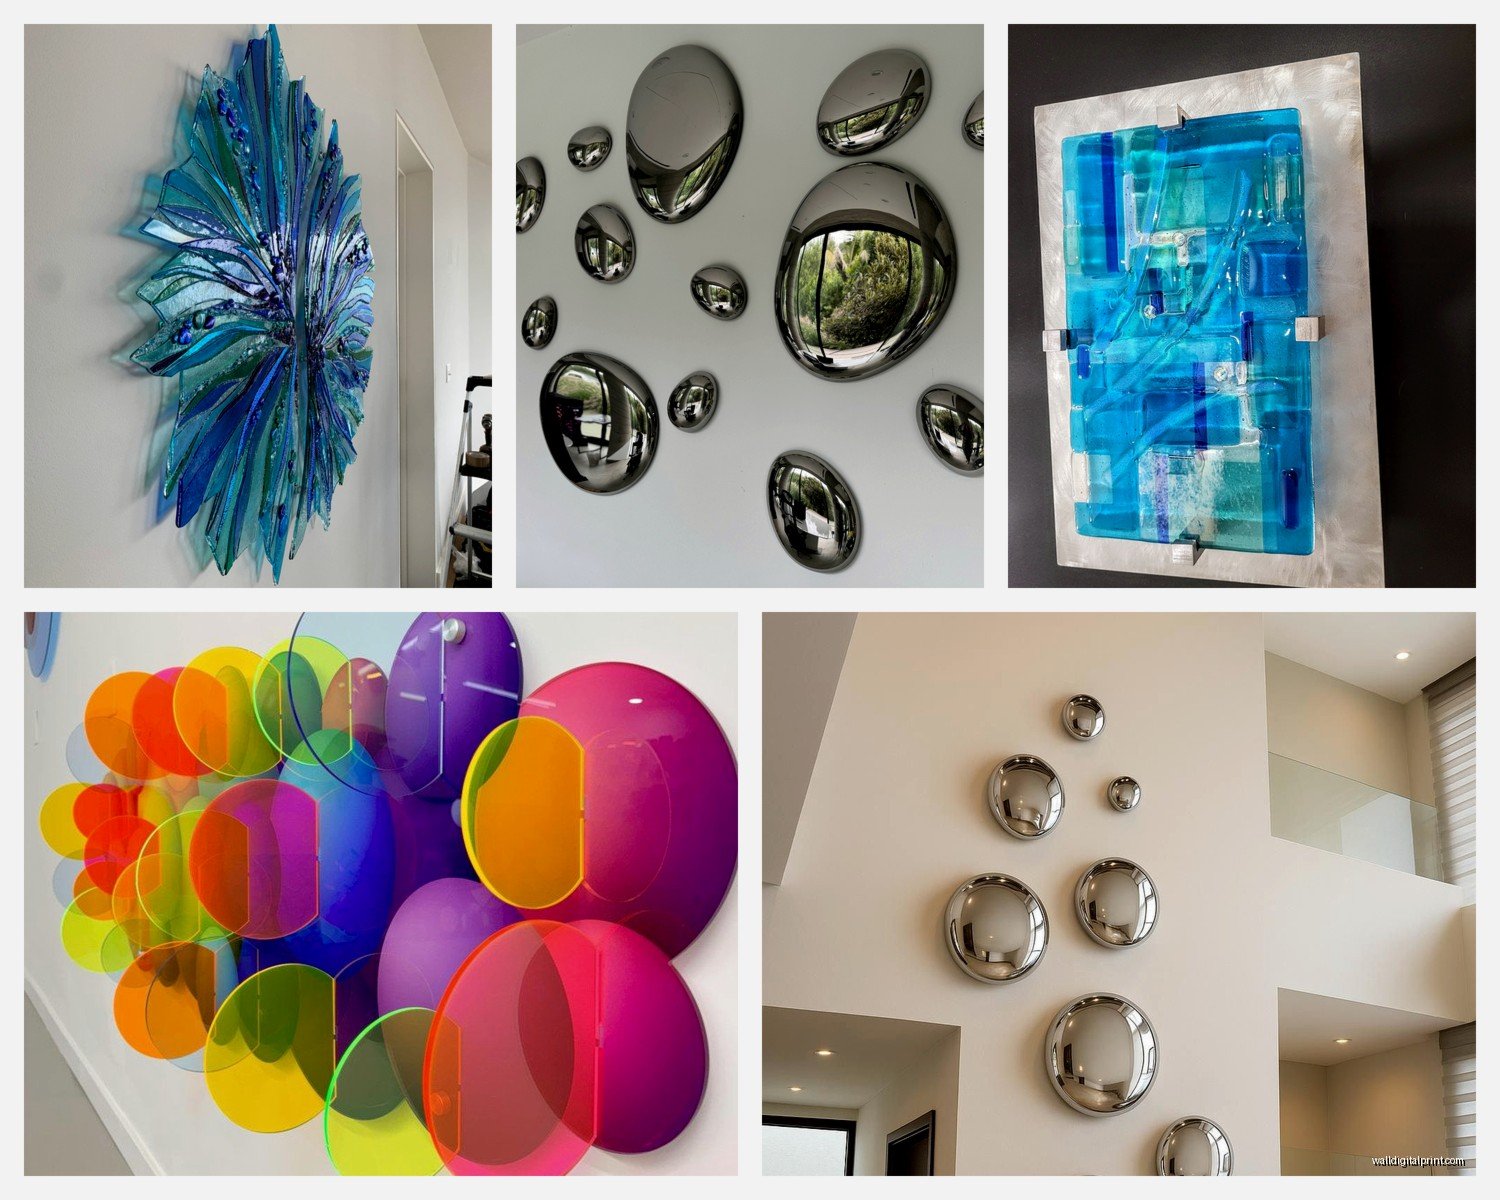
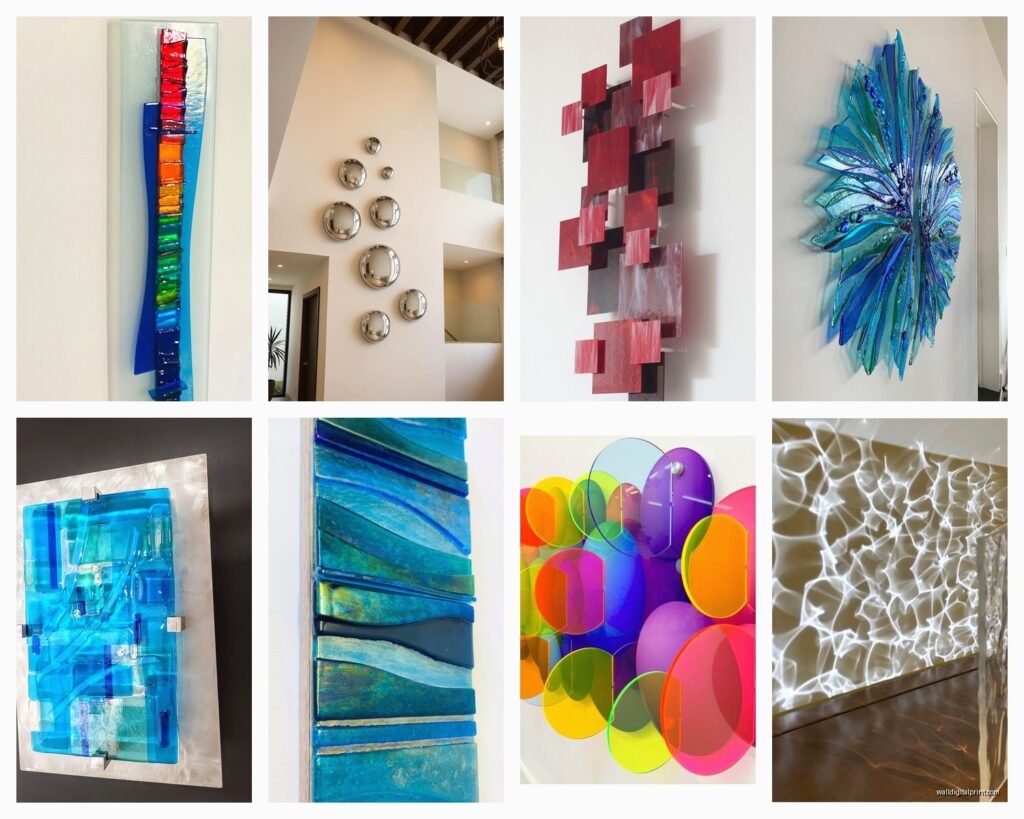
Different Types of Blown Glass Wall Sculptures
Not all glass wall art hangs the same way and I wish someone had told me this earlier.
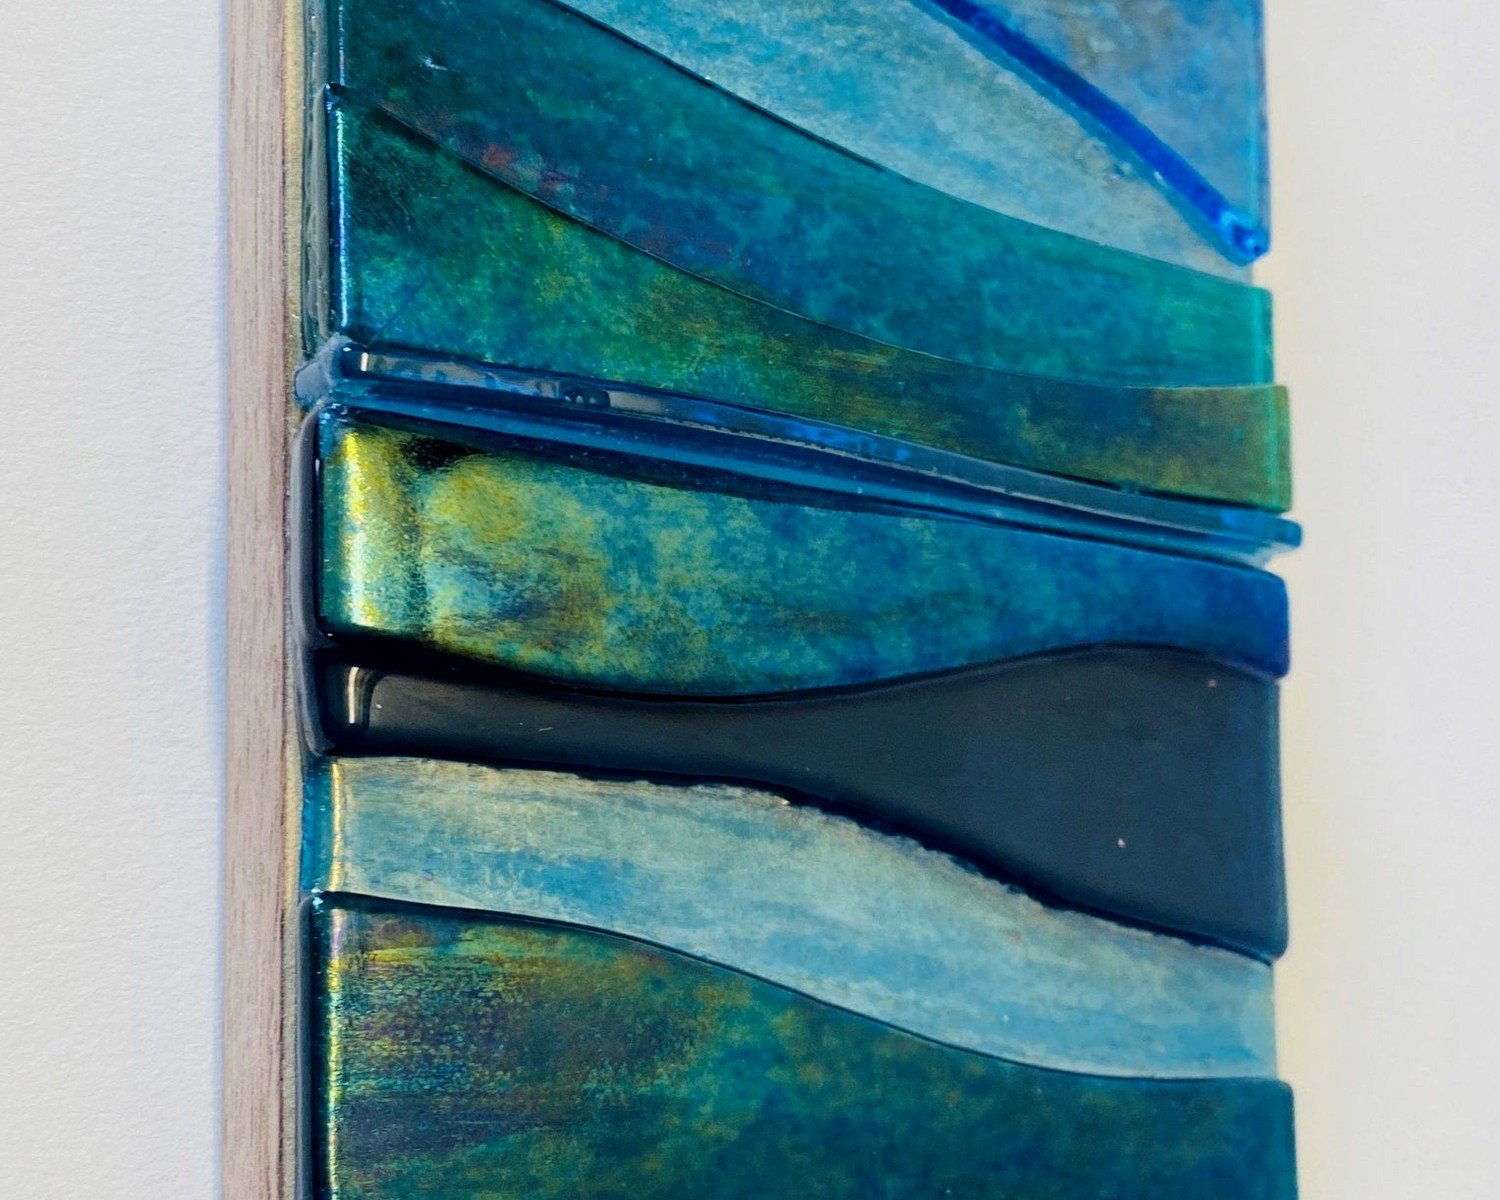
Flat-Backed Pieces
These are the easiest. They have a relatively flat back even though the front is all sculptural and dramatic. Usually they’ll have D-rings or a wire system. Hang them like you’d hang a heavy framed piece. The main thing is making sure they sit flush against the wall because any gap and you’ll see shadows that look weird.
Irregular Shaped Pieces
These are the ones that look like frozen waves or organic shapes. They might have multiple hanging points or a custom bracket system. I did one last month that had three separate hanging points and you had to get all three level or the whole thing twisted. Took me 45 minutes and I definitely said some words my neighbors probably heard.
The trick with these is to make a paper template. Trace the back of the piece onto kraft paper, mark where all the hanging points are, tape the paper to your wall, and drill through the paper. Then tear the paper away. It’s old school but it works.
Cluster Installations
Multiple pieces arranged together. This is where it gets fun but also where you can really mess up the visual balance. I lay them out on the floor first in the exact arrangement, take a photo from above, then recreate that on the wall.
Start with the center or largest piece first, get that perfectly placed, then work outward. The spacing between pieces matters more than you think. Too close and they compete with each other, too far and they don’t read as a collection. I usually do 3-4 inches between pieces but it depends on the colors and shapes.
Dealing With Different Wall Types
Drywall is standard and pretty straightforward if you hit studs. But I’ve had to install glass on basically every surface at this point.
Plaster walls are actually great because they’re solid, but you need masonry bits to drill and it makes so much dust. Like, so much dust. Cover everything.
Brick or concrete, you need a hammer drill and concrete anchors. I usually try to talk clients out of putting blown glass on exposed brick because the texture behind the glass creates weird shadows, but sometimes they really want it and okay fine.
Tile is terrifying. You need a special tile bit, you have to tape the spot first so the bit doesn’t slip, and you drill on low speed. I’ve only cracked one tile doing this but I still get nervous every single time. My hands definitely shake more than they did with that first installation.
Maintenance Stuff Nobody Thinks About
Blown glass collects dust in all those curves and crevices. You can’t just wipe it down like a regular painting. I use a soft makeup brush to get into detailed areas and a microfiber cloth for the main surfaces. Never use glass cleaner directly on the piece, spray it on your cloth first.
Every few months, check the hanging hardware. Glass is heavy and constant weight can loosen screws over time. Just give everything a gentle wiggle test, if anything feels loose, tighten it up.
What Can Actually Go Wrong
The worst thing I’ve seen is someone installed a heavy piece with just drywall anchors, no studs. It held for like six months then fell in the middle of the night. The glass shattered obviously but it also damaged the drywall and the hardwood floor. Insurance covered the glass but not the floor damage because it was considered improper installation.
Temperature changes can affect glass but it’s usually not an issue unless you’re putting it like directly above a heating vent or in a spot where sun hits it for hours creating a hot spot. The glass won’t melt or anything but extreme temperature swings can sometimes cause stress fractures over years.
Picking the Right Piece for Your Space
Scale is everything. People always want bigger pieces than their space can handle. A good rule is your glass art should take up about two-thirds to three-quarters the width of the furniture below it, or if it’s on a blank wall, think about the wall in thirds and don’t go bigger than one-third unless it’s specifically meant to be a statement wall.
Color-wise, blown glass shows up differently depending on your lighting. Warm white bulbs make reds and ambers pop, cool white makes blues and greens more vibrant. I always ask to see photos of pieces in different lighting before committing because that teal piece might look completely different in your space.
Oh and think about sightlines. Blown glass is sculptural so you want to place it where people can see it from angles, not just straight on. A piece in a hallway that you only see from one direction isn’t using the medium to its full potential. I like putting them on walls you approach from the side or in corners where you walk past them.
Budget Reality Check
Sculptural blown glass is expensive, like there’s no way around it. Small pieces start around $200-300, medium pieces are $500-1200, and large statement pieces can easily be $2000-5000 or more. You’re paying for the artist’s skill, the materials, the fact that each piece is unique, and honestly the risk factor because glassblowing has a high failure rate.
If you’re on a budget, look for emerging artists at local galleries or art school sales. The quality can be just as good but the prices are way more reasonable. I got this amazing piece from a graduate student show for $180 that would easily cost $600 from an established artist.
Estate sales sometimes have blown glass but you gotta be careful it’s not damaged. Check for any cracks, chips, or cloudiness. And make sure it’s actually art glass and not just a decorative piece from Home Goods, which is fine too but different price points.
Common Mistakes I See All the Time
Hanging glass too high. People treat it like regular art but you want to be able to see into the sculptural elements, not just see the bottom of them.
Using the wrong lighting. If you invest in a $800 glass sculpture and light it with a harsh overhead LED, you’re missing like 60% of what makes it special.
Putting it in direct sunlight without thinking about fading. The glass won’t fade but anything behind it might, and the UV exposure over years can affect the wire or hanging materials.
Not considering the view from other rooms. Glass can catch light and create reflections or colored light spots in adjacent spaces. Sometimes this is amazing, sometimes it’s annoying. Think it through.
Grouping too many colors together. Glass is vibrant and three different colorful pieces near each other can look chaotic. I usually stick with a color family or use clear/neutral pieces as buffers.
Anyway that’s basically everything I’ve learned from installing probably 50+ blown glass pieces at this point. The main thing is just take your time with the installation part because rushing is when mistakes happen and mistakes with glass are expensive. Let me know if you have questions about specific pieces you’re looking at, I’m usually pretty good at spotting quality vs overpriced stuff.