Wall Art Guide, Wall Art Tutoriels
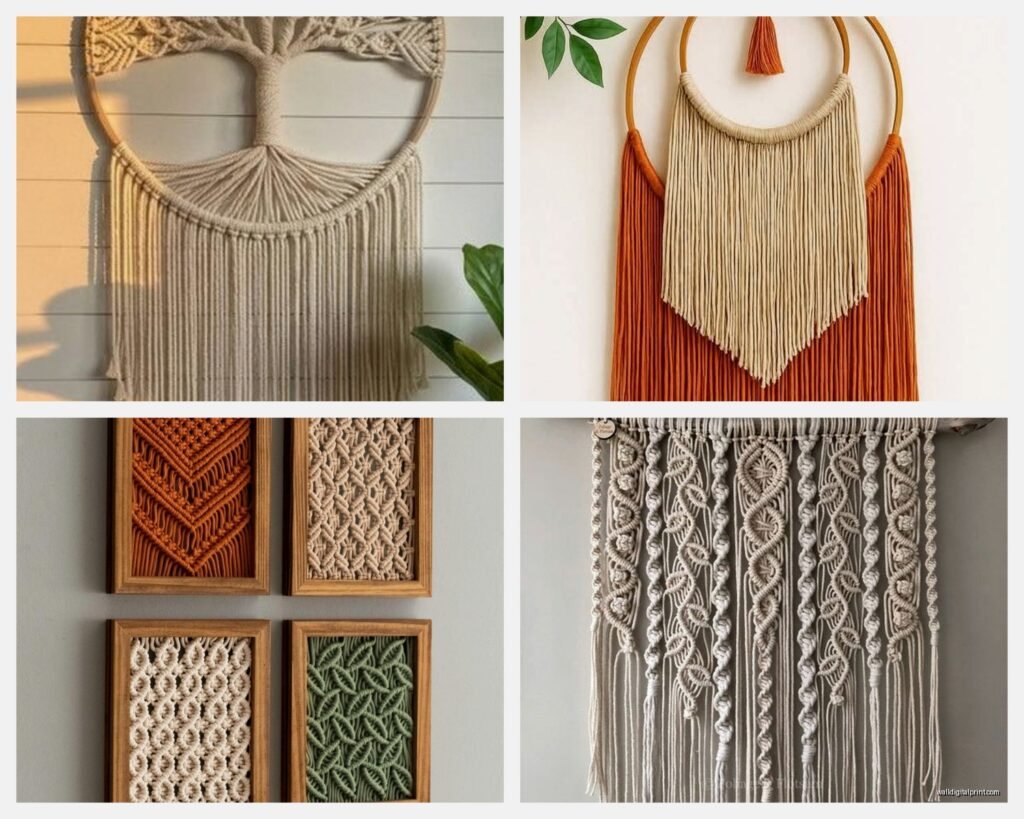
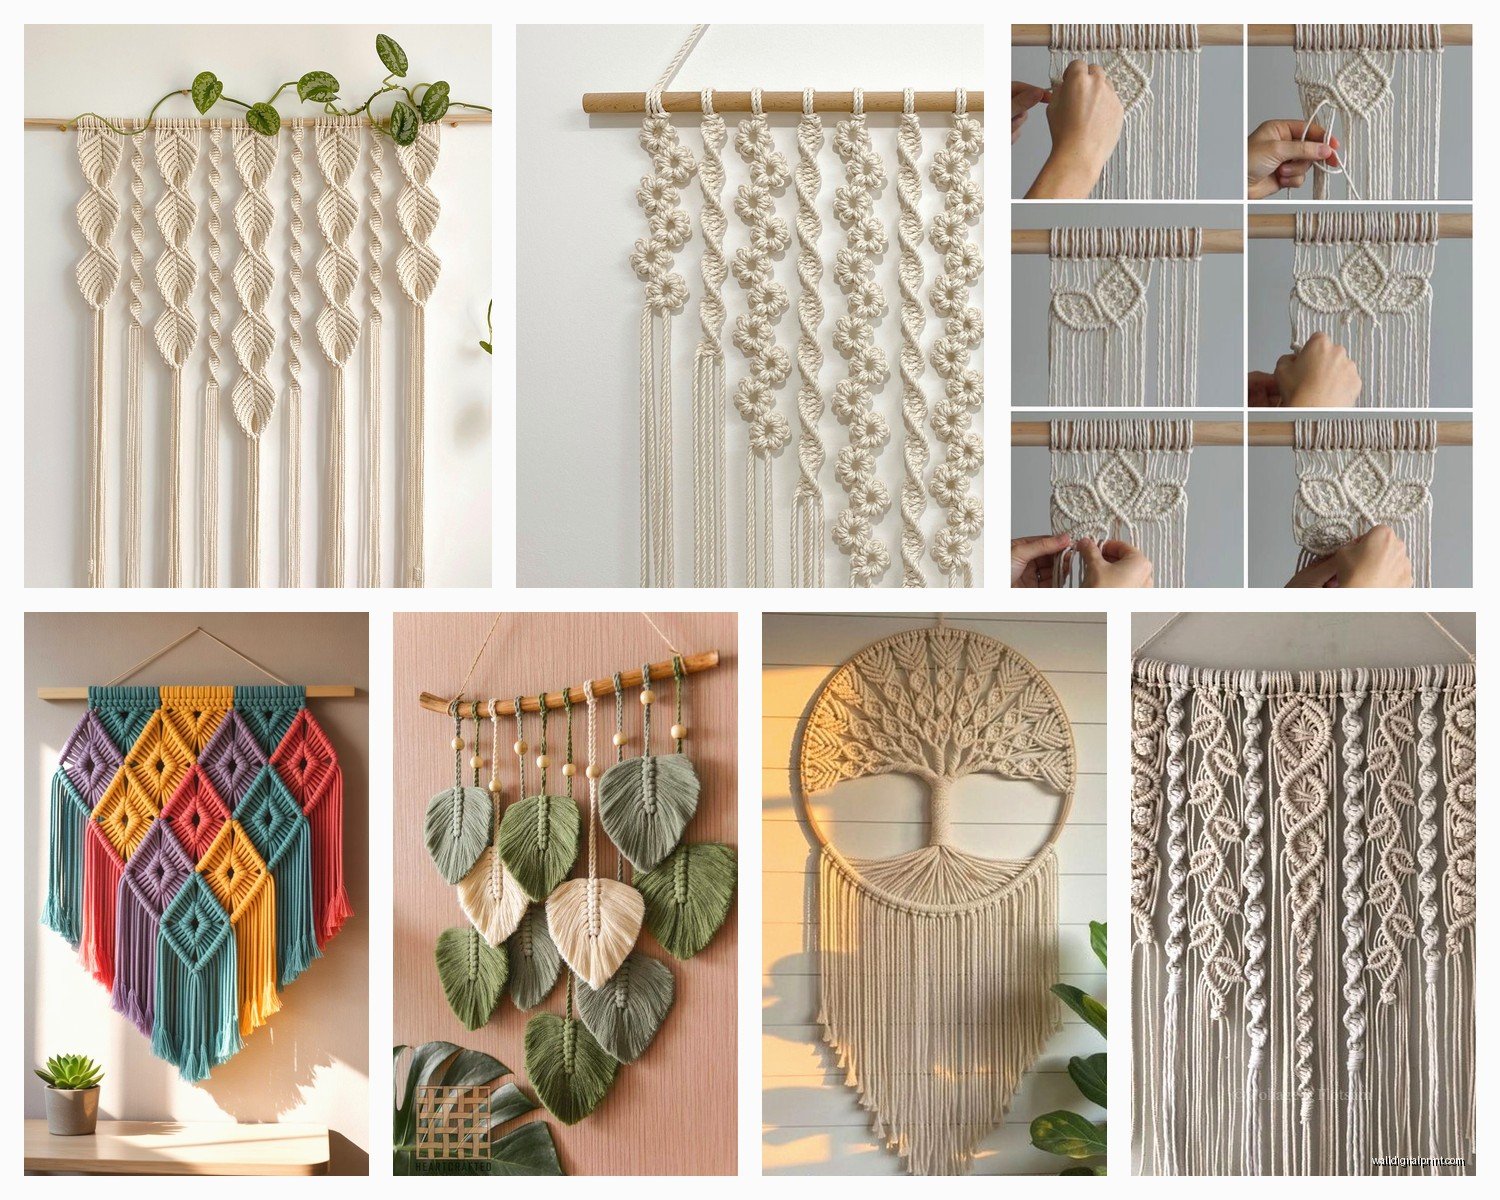
Macrame Wall Art: Knotted Fiber Bohemian Hangings
Mar
So I’ve been making macrame wall hangings for like three years now and honestly the material choices can get overwhelming real fast. Let me just dump everything I know because I literally spent last Tuesday untangling six different types of cord while my cat knocked over my coffee.
The Cord Situation – What Actually Works
Okay so first thing, the type of cord you pick is gonna make or break your whole project. I learned this the hard way when I used some cheap synthetic rope from the hardware store and it looked like… well, it looked bad.
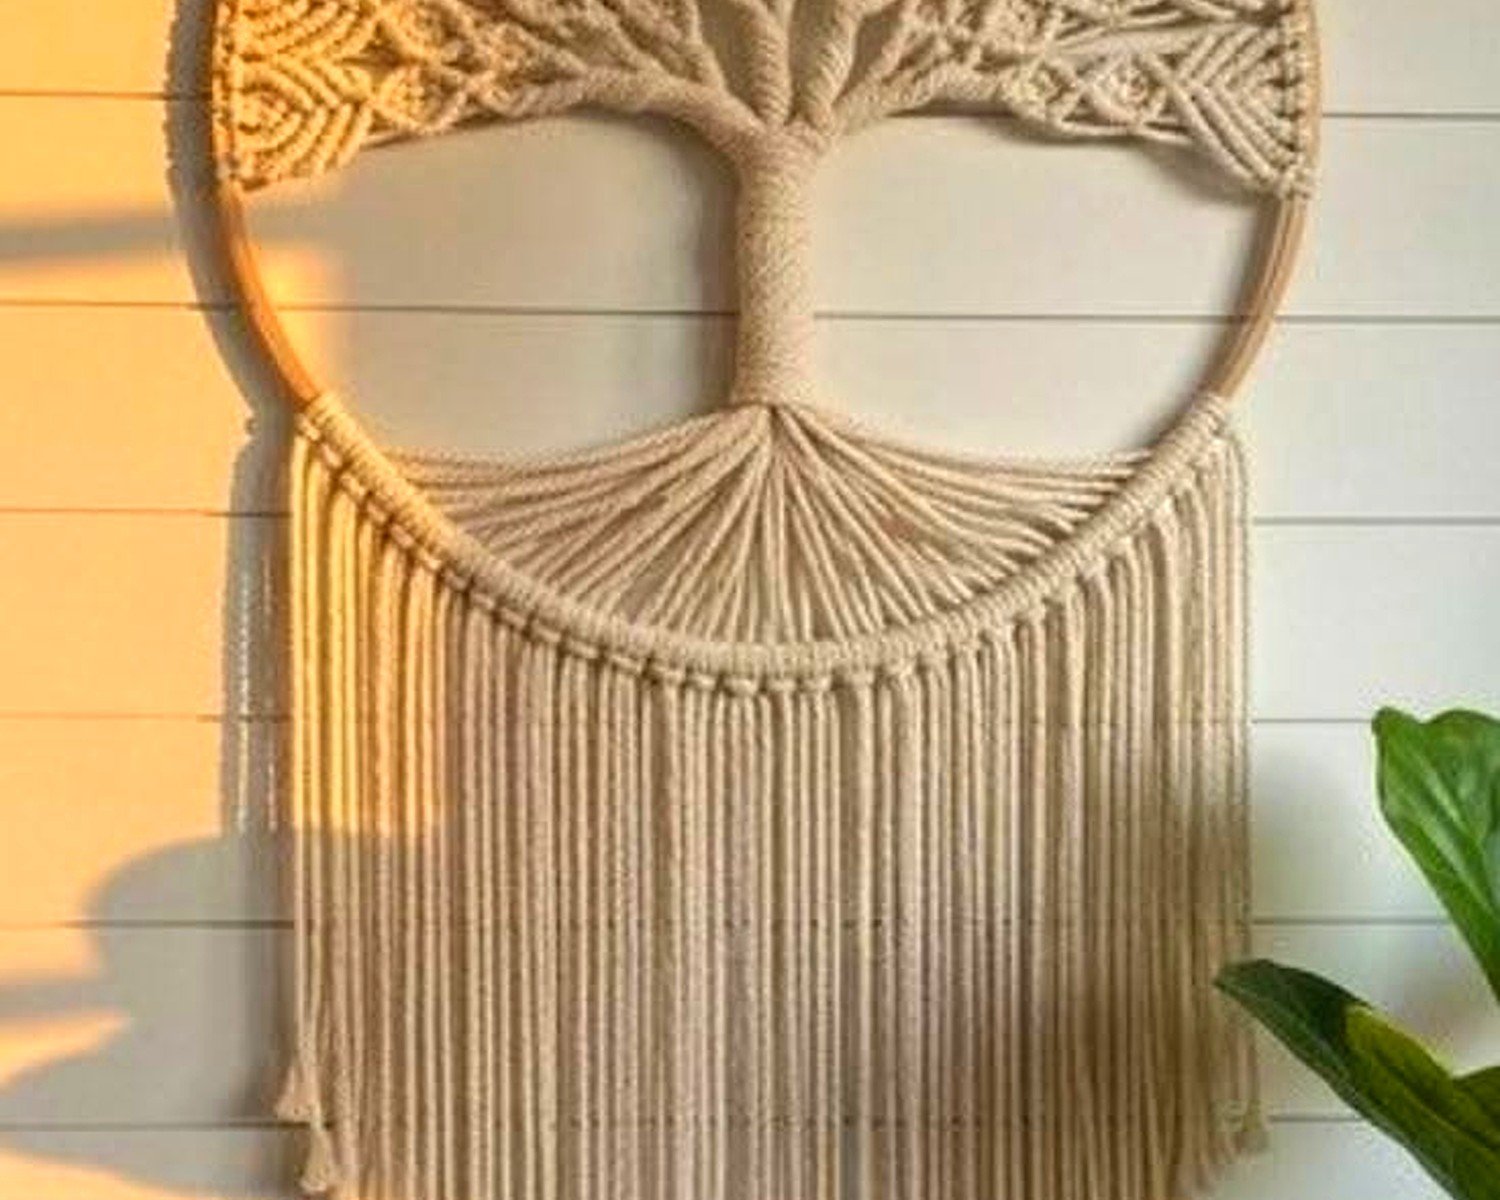
Cotton rope is your best friend. Specifically single-strand cotton cord. It comes in different thicknesses – 3mm, 4mm, 5mm, and up to like 9mm if you’re doing something massive. For your first project, grab 4mm or 5mm. The 3mm stuff is beautiful but it takes FOREVER and your hands will hurt. I made a 3-foot wall hanging with 3mm cord once and couldn’t open a jar for two days after.
Three-ply cotton cord is also super popular and honestly it’s what I use most now. It’s twisted instead of braided, and when you’re done knotting you can unravel the ends to create that gorgeous fringe effect everyone loves. The unraveling part is weirdly therapeutic? I do it while watching reality TV and it’s perfect.
Braided cotton cord looks cleaner and more modern. Less bohemian, more contemporary. I used this for a client who wanted something “boho but make it sophisticated” and it worked perfectly in her minimalist bedroom.
Synthetic vs Natural Fibers
Here’s the thing about synthetic cords like polypropylene or nylon – they’re cheaper and they don’t absorb moisture, which sounds great until you realize they’re also slippery as hell and don’t hold knots as nicely. Plus they can look kinda plasticky in certain lights. I only use synthetic if it’s going outside where cotton would get moldy.
Jute and hemp are options too but they’re scratchy and the texture is very… rustic? Like if you want that really earthy vibe, sure, but I find them harder to work with because they’re not as pliable.
How Much Cord You Actually Need
This is where everyone messes up including me literally every time. The general rule is to cut your cords about 4 times the length of your finished piece. So if you want a hanging that’s 3 feet long, you need cords that are 12 feet each. BUT and this is important, that’s just for the vertical cords.
I usually add an extra foot or two because running out of cord halfway through a knot is the actual worst. You can’t just tie on more – well you can but it looks messy and you’ll know it’s there forever.
For a beginner wall hanging maybe 2 feet wide and 3 feet long, I’d get like 200-250 feet of cord total. Yeah it sounds like a lot. You’ll have leftovers but better that than being short.
Where to Buy This Stuff
Ganxxet on Etsy has amazing cotton cord and they ship fast. Bochiknot is another good one. For cheaper options honestly Amazon has some decent 4mm cotton rope – I got this brand called XEWNEGTZI or something impossible to pronounce and it was actually pretty good quality for like $25 for 200 feet.
Don’t buy the super cheap stuff that’s like $10 for 500 feet. It’s gonna be inconsistent thickness and probably scratchy. Your hands will hate you.
Tools and Hardware You’re Gonna Need
Okay so beyond the cord, here’s what I keep in my macrame box:
- Scissors that can actually cut through thick cord (my fabric scissors do NOT work, learned that one)
- Measuring tape
- A dowel rod or branch for hanging – I get mine from craft stores or literally pick up fallen branches from my parents’ yard
- Masking tape or clips to hold cords in place
- A comb or wire brush for fringing
- S-hooks if you want to hang it immediately
The dowel situation is interesting because you can go super rustic with a natural branch or clean and modern with a wooden dowel or even a copper pipe. I’ve used everything from driftwood to curtain rods. Just make sure it’s sturdy enough to hold the weight of all that cord because wet cotton is HEAVY if you ever need to wash it.
Basic Knots You Need to Know
There are like a million macrame knots but honestly you only need to know like four to make something impressive looking. This is gonna sound weird but I learned all of these from YouTube videos at like 2am when I couldn’t sleep.
Lark’s Head Knot
This is how you attach your cords to the dowel. Fold your cord in half, put the loop over the dowel, then pull the ends through the loop. That’s it. You’ll do this like 20-30 times depending on how wide your piece is.
Square Knot
This is THE macrame knot. Once you get this down you can make probably 80% of the patterns out there. You need four cords – the two middle ones stay still (filler cords) and the two outer ones do all the work. Take the left cord over the middle cords and under the right cord. Then take the right cord under the middle cords and up through the loop on the left. Then you reverse it – right cord over and under, left cord under and through. One square knot done.
I’m not gonna lie, this one took me like an hour to figure out because every tutorial explained it differently and my brain couldn’t process it. Just keep trying different videos until one clicks.
Half Square Knot (Spiral Stitch)
Same as above but you only do the first half over and over without reversing. It creates this cool spiral effect. I use this for plant hangers mostly but it looks cool in wall hangings too as an accent.
Double Half Hitch
This one creates diagonal or horizontal lines and it’s super useful for adding structure. You basically wrap your working cord around a filler cord twice. It sounds simple but getting the tension right took me a while.
Planning Your Design (Or Not)
Some people sketch out their whole design first. I am not those people. I usually have a vague idea like “I want a triangle shape with some fringe at the bottom” and then I just start knotting and see what happens.
That said, if you’re a planner, there are tons of free patterns online. The blog “Love and Renovations” has some good beginner ones. Or just search “free macrame pattern” on Pinterest and you’ll get like a thousand options.
One thing I do recommend – think about negative space. The empty areas are just as important as the knotted parts. Some of my favorite pieces have big open sections where the cords just hang straight.
Actually Making the Thing
Okay so you’ve got your materials, you know your knots, now what. Here’s my actual process:
Hang your dowel somewhere you can work on it vertically. I use a curtain rod in my spare room but I’ve also used a coat rack, a ladder, even a sturdy plant hook. You need gravity to help with tension.
Attach all your cords with lark’s head knots. I usually do an even number because most patterns work in pairs or groups of four. For a small-medium wall hanging maybe 16-24 cords.
Start knotting from the top down. I usually do a row of square knots across the whole piece first to establish the width and give everything structure. Then I branch out into whatever pattern I’m feeling.
Keep your tension consistent. This is the hardest part honestly. Too tight and your piece will curl and bunch up. Too loose and it looks sloppy. You kinda have to feel it out but generally you want it snug but not strangling the filler cords.
Common Mistakes I Still Make
Not measuring my cords properly and running out (happens constantly). Starting with too ambitious of a pattern and giving up halfway through. Not securing my dowel well enough and having the whole thing crash down – that happened last month and my dog thought it was a new toy.
Oh and another thing, sometimes your knots will twist to one side and you’ll think you’re doing it wrong but actually that’s just what happens with square knots. You can alternate the starting side to keep it straighter or just embrace the twist.
Finishing Touches and Fringe
So you’ve done all your knotting and now you’ve got these long cords hanging at the bottom. You can leave them as is, trim them straight across, or do the fancy fringe thing.
For fringe, if you used 3-ply cord, you untwist each strand and then brush it out with a pet brush or wire brush. It creates this fluffy, feathery effect that looks really professional. Takes forever though. Like I said, good TV watching activity.
Trim everything to your desired length. I use fabric scissors for this and cut at a slight angle to create a more natural looking edge. Some people get super precise with this and measure every strand. I eyeball it and trim as I go until it looks right.
You can also add beads, driftwood pieces, feathers, whatever. I’ve woven in dried flowers before for a client’s wedding backdrop. Just thread them onto the cords before you start knotting or weave them in after.
Hanging and Care
For hanging, I usually attach a piece of twine or leather cord to each end of the dowel and tie it in a loop. Make sure it’s strong enough to hold the weight. Cotton macrame gets surprisingly heavy especially if it’s a large piece.
Hang it with a nail or hook strong enough to support it. I’ve had pieces fall because I used those adhesive hooks and yeah, don’t do that.
Care-wise, cotton will absorb odors and dust over time. You can vacuum it gently with a brush attachment or take it outside and shake it out. If it really needs cleaning, hand wash in cold water with mild detergent and lay flat to dry. Don’t wring it out or you’ll mess up all your knots.
Time and Cost Reality Check
A small wall hanging maybe 2×2 feet will take you anywhere from 3-6 hours depending on the complexity and how fast you work. Larger pieces can take days. That massive one in my living room took me probably 15 hours spread over a week.
Cost-wise, materials for a medium project run about $30-50. The cord is the expensive part. Dowels are cheap, you can use stuff you already have for tools.
Is it cheaper than buying one? Honestly not really when you factor in your time. But there’s something satisfying about making it yourself and you can customize it exactly how you want.
Troubleshooting Weird Issues
If your piece is curling, your tension is probably too tight. Also make sure you’re alternating which side you start your square knots on.
If knots are sliding around, you might need to switch to a cotton with more texture or tighten up your technique.
If you hate how it’s turning out halfway through, honestly just cut your losses and start over. I’ve done this multiple times. It’s frustrating but better than finishing something you don’t like.
Wait I forgot to mention – take breaks. Your hands will cramp up especially when you’re first starting. I set a timer for every 45 minutes to stretch my fingers and wrists.
Also good lighting is crucial. I tried working on a piece in my dimly lit living room once and kept making mistakes because I couldn’t see what I was doing properly.
Anyway that’s basically everything I know about macrame wall art materials and making them. It’s one of those crafts that seems complicated but once you get the basic knots down it’s actually pretty intuitive. Plus you can zone out and just knot for hours which is honestly therapeutic.