Wall Art Guide, Wall Art Tutoriels
Seagrass Wall Art: Natural Fiber Coastal Designs
Mar
So I’ve been totally obsessed with seagrass wall art lately and honestly it started because a client wanted “coastal but not nautical” which like…okay I get it but also that’s basically the same thing? Anyway, seagrass turned out to be the perfect solution and now I can’t stop putting it everywhere.
What You’re Actually Working With
Seagrass is basically dried aquatic plants woven into stuff. The texture is rougher than you’d think if you’ve never touched it – kind of scratchy but in a good way? It comes in these natural tan/beige/brown shades that you can’t really replicate with anything else. The fibers catch light differently throughout the day which is why it works so well as wall art versus just like, a basket.
The main types you’ll see are water hyacinth (technically different but sold alongside seagrass), actual seagrass, and banana leaf fiber. Water hyacinth is chunkier and has more texture variation. True seagrass is finer and more uniform. Banana leaf is somewhere in between but darker usually.
Where to Actually Buy This Stuff
Okay so West Elm has those round seagrass wall hangings that everyone gets – they’re fine but kinda basic at this point. I’ve found better stuff at:
- World Market – genuinely good prices, like $30-80 range, decent quality
- Etsy sellers from Bali and Vietnam – this is where you get unique pieces but shipping takes forever
- Target’s Opalhouse line sometimes has them
- Local import stores if you have any – I found an amazing piece for $45 at this random place near me
The Etsy route is gonna give you the most interesting designs but you’re waiting 3-4 weeks minimum. I ordered this gorgeous fan-shaped piece in March and it arrived in April and the client was like “where’s the art” for three weeks straight.
Hanging These Things Without Losing Your Mind
This is where it gets tricky because seagrass art is LIGHT but also kind of awkward. Most pieces come with a loop or hanging mechanism already attached, but sometimes it’s just…not secure enough?
Command strips work for smaller pieces under 2 pounds. I use the picture hanging strips, the ones that can hold 3-4 pounds. Press them on for like 30 seconds, wait an hour before hanging. My dog knocked one off the wall once when it wasn’t fully adhered and I’m still annoyed about it.
For bigger statement pieces you’re gonna need actual nails or hooks. The 3M hooks with the sticky backing don’t work well because the weight distribution is weird with woven pieces. Get proper picture hooks – the ones that angle into the wall. Use a level because these pieces are so organic-looking that if they’re crooked it’s REALLY obvious somehow.
The Humidity Thing Nobody Tells You
So seagrass absorbs moisture from the air. In humid climates it gets softer and in dry climates it gets more brittle. I learned this the hard way when a client in Florida called me saying her wall art was “drooping” and I was like what do you mean drooping, it’s wall art. But yeah, it actually was sagging because of humidity.
If you’re in a humid area, hang it where air circulates. Don’t put it in a bathroom even though it seems coastal and beachy – it’ll get moldy. I’ve seen it happen. Not cute.
Dry climate people – you might notice the fibers getting crunchy or shedding little bits. Totally normal. You can lightly mist it with water every few months if it seems like it’s getting too dry and brittle.
Styling These Without Looking Like a Pier 1 Exploded
The trick with seagrass wall art is not going full tiki bar, you know? I usually pair it with:
Modern elements – clean-lined furniture, simple frames, nothing else overly textured on the same wall. The seagrass becomes the texture moment.
Neutral backgrounds – white walls obviously, but also greige, soft gray, even a muted sage green works. I tried it on a navy wall once and it just disappeared.
Minimal other decor – maybe one plant, maybe a simple shelf. Not more baskets, not more woven things, definitely not rope accents too.
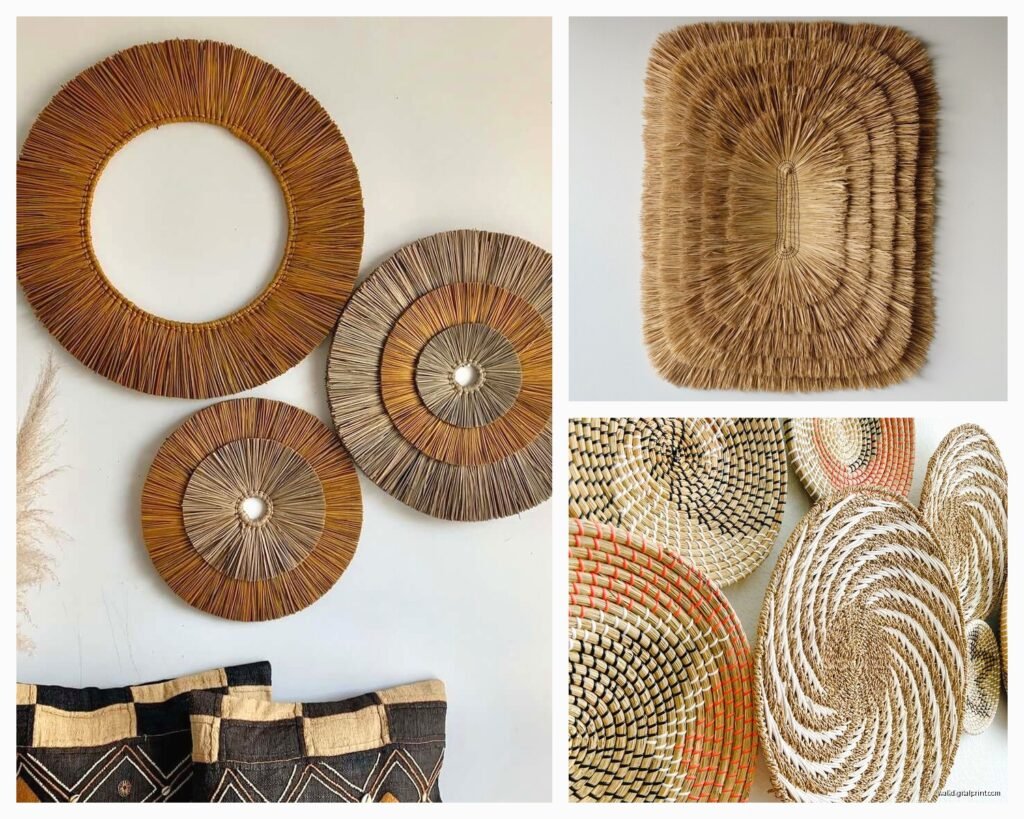
I did a whole gallery wall last month with three different seagrass pieces in varying sizes and shapes – circle, fan, and rectangular panel. Kept everything else in the room super minimal. Looked expensive, cost like $200 total.
Shapes and What Actually Works Where
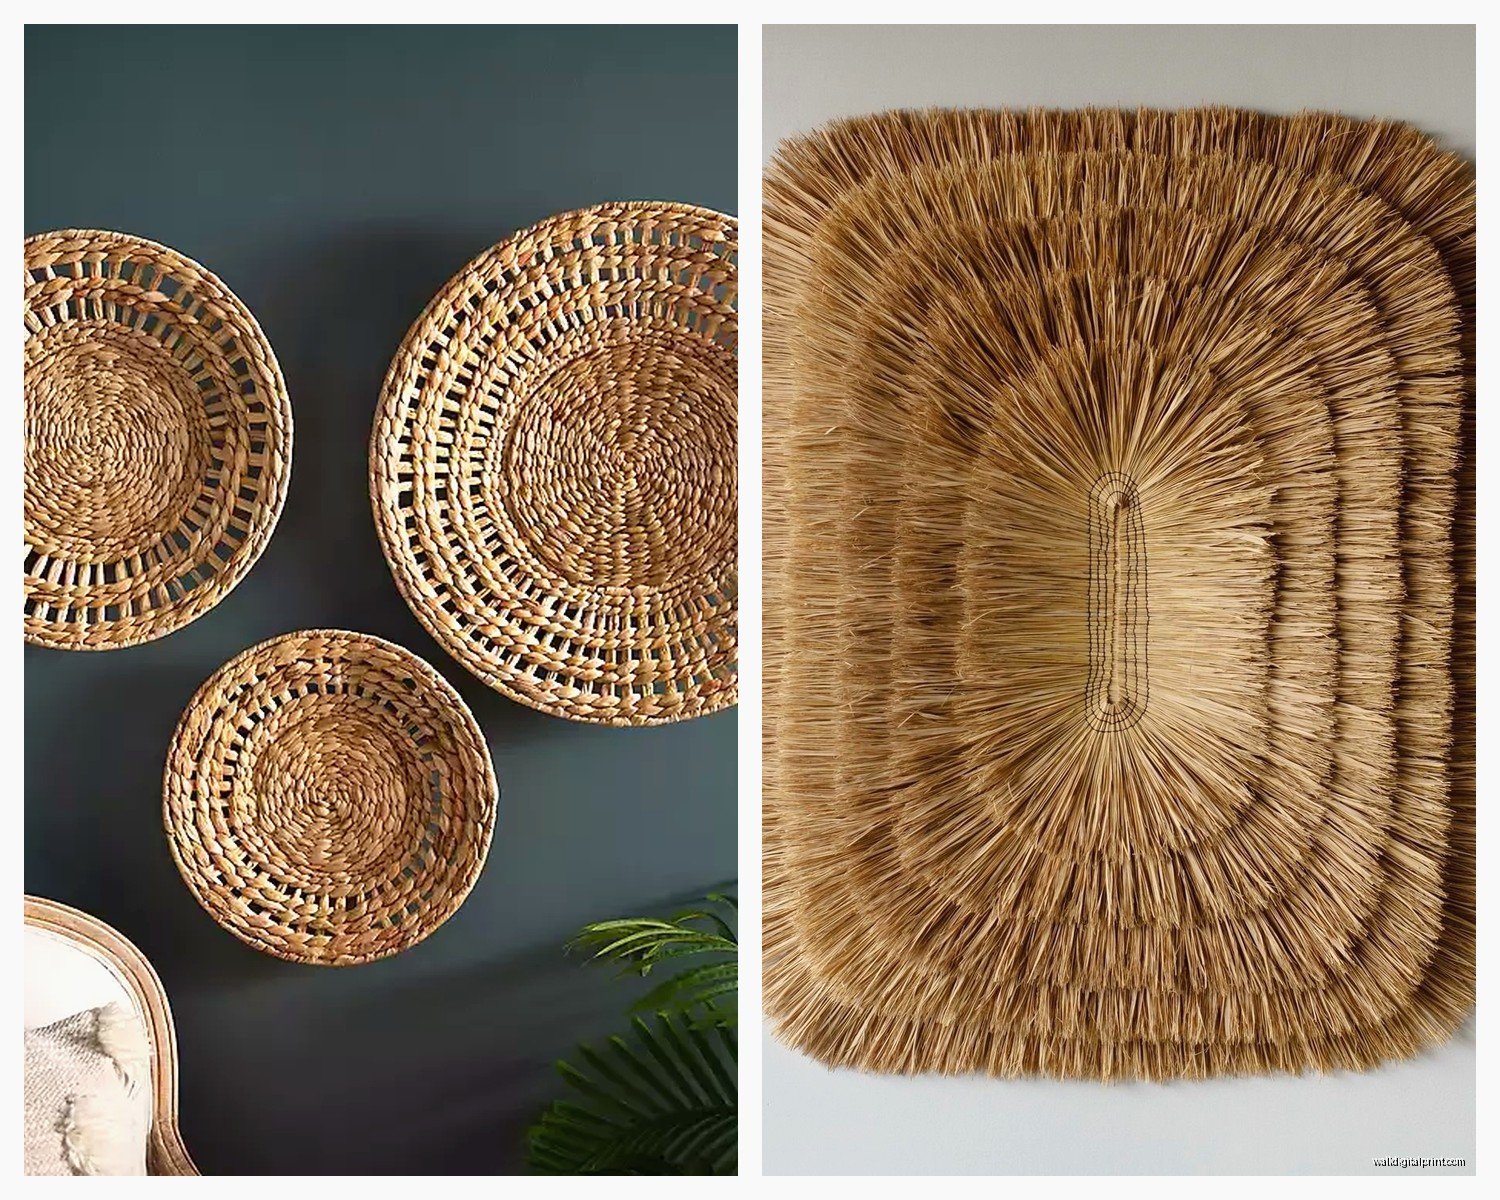
Round/circular pieces are the most common and honestly the easiest to work with. They fill space nicely above a bed or sofa. Go bigger than you think – I usually do 24-30 inches diameter for over a queen bed.
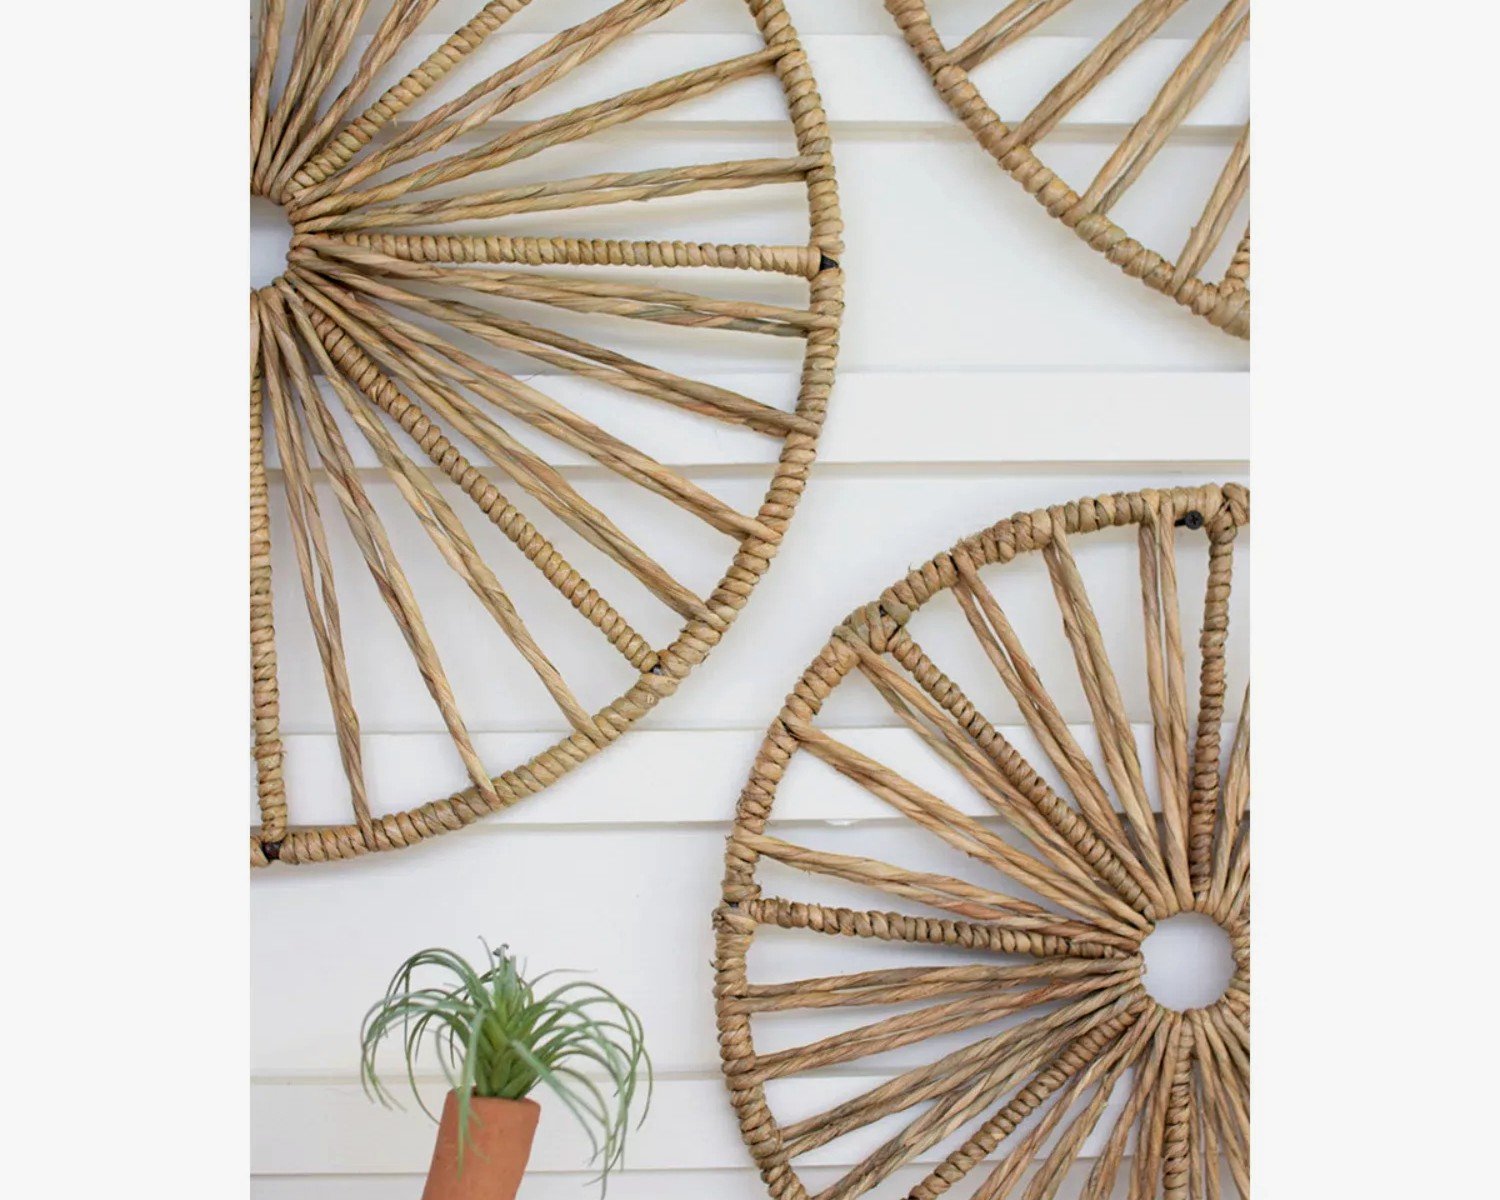
Fan or sunburst shapes are having a moment right now. They’re more dramatic, work well in entryways or as a focal point. These need more wall space around them to breathe though.
Rectangular panels or grids are harder to find but super cool when you do. I have one that’s like a grid of woven squares and it reads almost modern? Great for dining rooms.
Asymmetrical organic shapes – these are usually handmade Etsy finds. More expensive but totally unique. I bought one that looks like abstract leaves and I actually kept it for myself instead of a client which like…probably shouldn’t admit that but whatever.
Size Guidelines That Actually Help
Over a sofa: aim for 2/3 the width of your sofa or create a grouping that hits that proportion. A single small piece looks sad and floaty.
Over a bed: go for something 30-40 inches if it’s a single piece. Or do two matching pieces spaced apart.
In an entryway: you can go BOLD here. Big statement piece, 36 inches or larger.
Wait I forgot to mention – these shed a little when you first get them. Like little fiber bits will fall off for the first week or so. Just vacuum underneath it, not a big deal but kinda annoying.
Mixing Seagrass with Other Materials
This is where you can get creative or make it look like a HomeGoods threw up on your wall, so be careful.
Works well with:
- Wood – natural wood tones, not too matchy though
- White ceramic or pottery
- Simple black frames
- Linen textiles
- Concrete or stone textures
Doesn’t work well with:
- Rattan furniture (too much texture competition)
- Jute rugs in the same space (again, texture overload)
- Macrame – this is controversial but I stand by it, it’s too much fiber art
- Anything shiny or metallic right next to it
I had a client who wanted seagrass wall art AND a jute rug AND rattan chairs and I had to be like…we need to pick two max. We went with seagrass art and the jute rug, got different chairs. Much better.
Maintenance is Basically Nothing But Here’s What to Know
Dust with a soft brush attachment on your vacuum on low suction. Or use a duster. That’s it. Don’t wet clean it unless you absolutely have to.
If it gets actually dirty (kids threw something at it, whatever), use a barely damp cloth and dab, don’t rub. Let it air dry completely.
Sunlight will fade it over time but honestly the fading looks good? It gets this weathered look that’s even more coastal. I wouldn’t worry about it unless it’s in direct harsh sun all day.
My cat tried to scratch one once and surprisingly didn’t do much damage. The texture isn’t satisfying for them I guess. Dogs don’t care about wall art in my experience unless it’s really low and they’re jumping at it.
DIY Seagrass Wall Art If You’re Feeling Crafty
Okay so funny story, I tried to make my own once because I found bulk seagrass material at a craft store and thought how hard can it be. Pretty hard actually. But doable if you’re patient.
You need:
- Seagrass rope or braid material
- Hot glue gun with LOTS of glue sticks
- Something circular to wrap around – I used a hula hoop which worked perfectly
- Wire for hanging mechanism
- Scissors
Basically you wrap the seagrass around itself in a spiral, gluing as you go. Start from the center and work outward. It takes forever and your fingers will hurt from the hot glue gun. Took me like three hours to make a 20-inch circle while watching The Crown which I’m way too late to but whatever.
It’s cheaper than buying pre-made but not by a huge margin when you factor in your time. I’d only DIY if you want a specific size or shape you can’t find.
The Color Thing
Natural seagrass is tan/beige/brown. You can find dyed versions – I’ve seen white, black, even blue. Personally I think the dyed ones lose some of the natural charm but the white-dyed pieces can look really elegant in the right space.
If you want darker, look for pieces that mix in banana leaf or darker water hyacinth. These come naturally darker brown, almost chocolate colored.
Some pieces have painted accents – like geometric patterns or stripes. These read more bohemian/eclectic. Fine if that’s your vibe but harder to style without it looking too busy.
Budget Breakdown Reality Check
Small pieces (under 18 inches): $25-50
Medium pieces (18-30 inches): $50-120
Large statement pieces (30+ inches): $100-250
Custom or artisan pieces: $200-500+
I usually tell clients to budget around $100-150 for a good quality piece that’ll make an impact. You can find cheaper at Target but the weaving quality isn’t as tight and they don’t last as long.
The most I’ve spent on a single seagrass piece was $280 for this massive fan-shaped thing that’s like 48 inches wide. Worth it because it completely transformed the space and the client loved it but yeah, that’s the high end.
Common Problems and Fixes
It’s shedding constantly – this should stop after a week or two. If it doesn’t, the quality is probably not great. You can try spraying it lightly with hairspray to seal the fibers but honestly just return it.
It smells weird – new seagrass can smell earthy or musty. Air it outside for a day or two. The smell goes away. Don’t use air freshener on it, that makes it worse somehow.
The hanging loop broke – add your own with wire or strong twine. Thread it through the weaving at sturdy points, not just one spot.
It’s warping – probably humidity. Move it to a drier spot or use a dehumidifier in that room.
Anyway that’s basically everything I’ve learned from working with this stuff constantly. It’s such an easy way to add texture and coastal vibes without being too literal about it. Just don’t overdo the beach theme and you’ll be fine.