Wall Art Guide, Wall Art Tutoriels
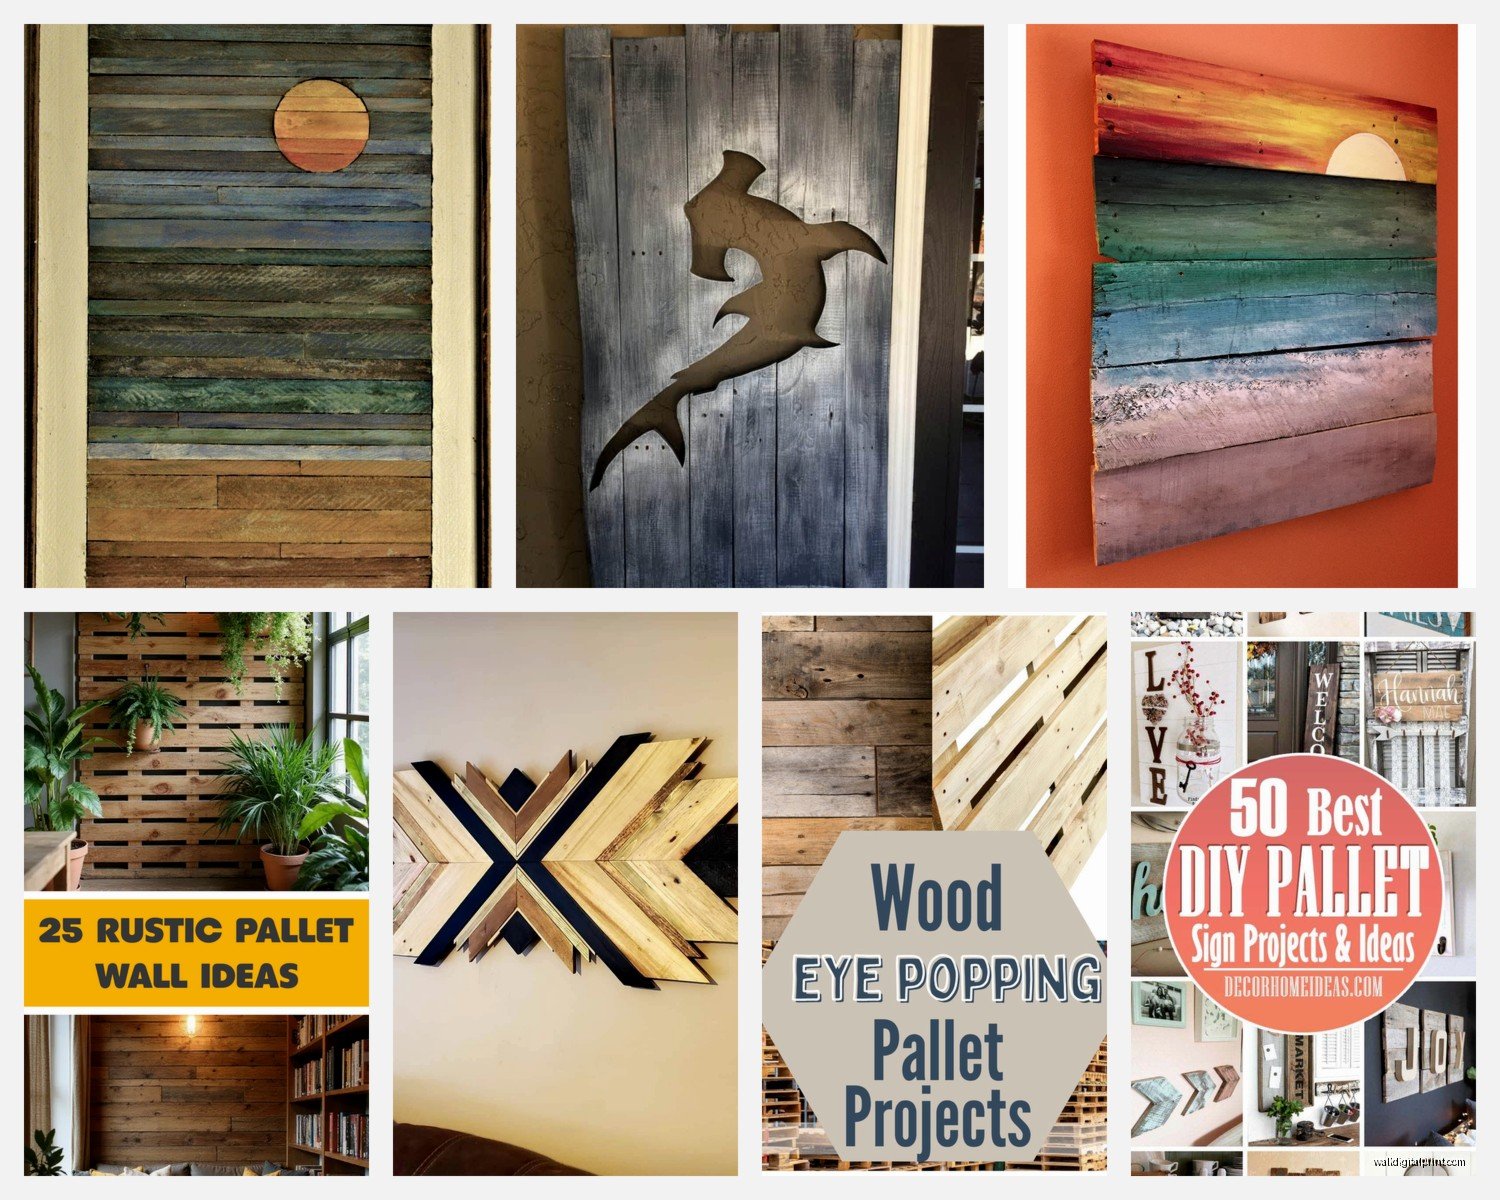
Pallet Wall Art: Reclaimed Wood Rustic DIY Designs
Mar
So I’ve been working with pallet wood for like three years now and honestly it’s one of those things where you think it’ll be super easy until you’re standing in your garage covered in sawdust wondering why you didn’t just buy something from West Elm.
Finding the Right Pallets
Okay first thing – not all pallets are created equal and some are literally treated with chemicals you do NOT want on your wall. Look for the HT stamp which means heat treated. Avoid anything marked MB because that’s methyl bromide and yeah, no thanks. I learned this the hard way when I grabbed three pallets from behind a grocery store and my studio smelled like chemicals for two weeks.
Best places to find them: small local businesses, garden centers, construction sites if you ask nicely. Facebook Marketplace always has people giving them away. This guy in my neighborhood literally had 47 pallets he was desperate to get rid of – I took 8 and still have 3 in my garage taking up space my partner keeps complaining about.
The blue pallets you see everywhere? Those are CHEP pallets and technically you’re supposed to return them so maybe skip those unless you wanna deal with that situation.
What You Actually Need (Tools and Supplies)
- Pry bar or cat’s paw (the tool, not my actual cat Luna who just walked across my keyboard)
- Hammer
- Reciprocating saw or circular saw – honestly the reciprocating saw changed my life for this
- Sandpaper or orbital sander (80 grit, 120 grit, 220 grit)
- Safety glasses because splinters in your eye are not cute
- Work gloves
- Wood glue
- Finish nailer or hammer and small nails
- Stain or paint if you want
- Polyurethane or wax finish
- Picture hanging hardware or French cleats
The reciprocating saw thing – I resisted buying one for SO long because I thought my circular saw would be fine but trying to cut through rusty nails with a circular saw is just… don’t. I got a Ryobi one on sale for like $60 and it’s perfect.
Breaking Down Pallets Without Losing Your Mind
There’s like seventeen YouTube videos showing you the “easy” way to dismantle pallets and honestly most of them are lying. Here’s what actually works:
Cut the boards on either side of where they’re nailed to the support blocks. Use your reciprocating saw with a metal-cutting blade that can handle hitting nails. You’ll waste a few inches of wood but you’ll save literally hours of prying and swearing.
If you DO want to pry them apart because you need longer boards, work slowly. Start at one end, get the pry bar under the board, lift gently. The second you try to rush it, the board splits. I’ve probably split 40 boards by being impatient.
oh and another thing – wear gloves the entire time. I have a scar on my palm from a nail that was sticking out at a weird angle that I didn’t see. Pallets are basically splinter delivery systems.
Cleaning and Prep Work
This is the boring part but also kinda necessary unless you want dirt and possible spider eggs on your wall which… no judgment but probably not.
Pressure wash them outside if you can. Let them dry completely – like actually completely, not just surface dry. I once didn’t wait long enough and the boards warped after I’d already nailed them up. Had to redo the whole thing.
If you don’t have a pressure washer, scrub them down with a stiff brush and soapy water. Some people use vinegar and water which works but your workspace will smell like salad dressing for a day.
Sanding Is Not Optional
I know you’re gonna be tempted to skip this. Don’t. Even if you want a rustic look, you still need to sand off the rough splinters and dirt that’s embedded in the wood.
Start with 80 grit to get the rough stuff. Then 120 grit. If you’re doing something more refined, finish with 220 grit. An orbital sander makes this so much faster but I did my first project by hand while watching The Great British Baking Show and it took forever.
Sand with the grain. Going against it just creates scratches that’ll show up when you stain.
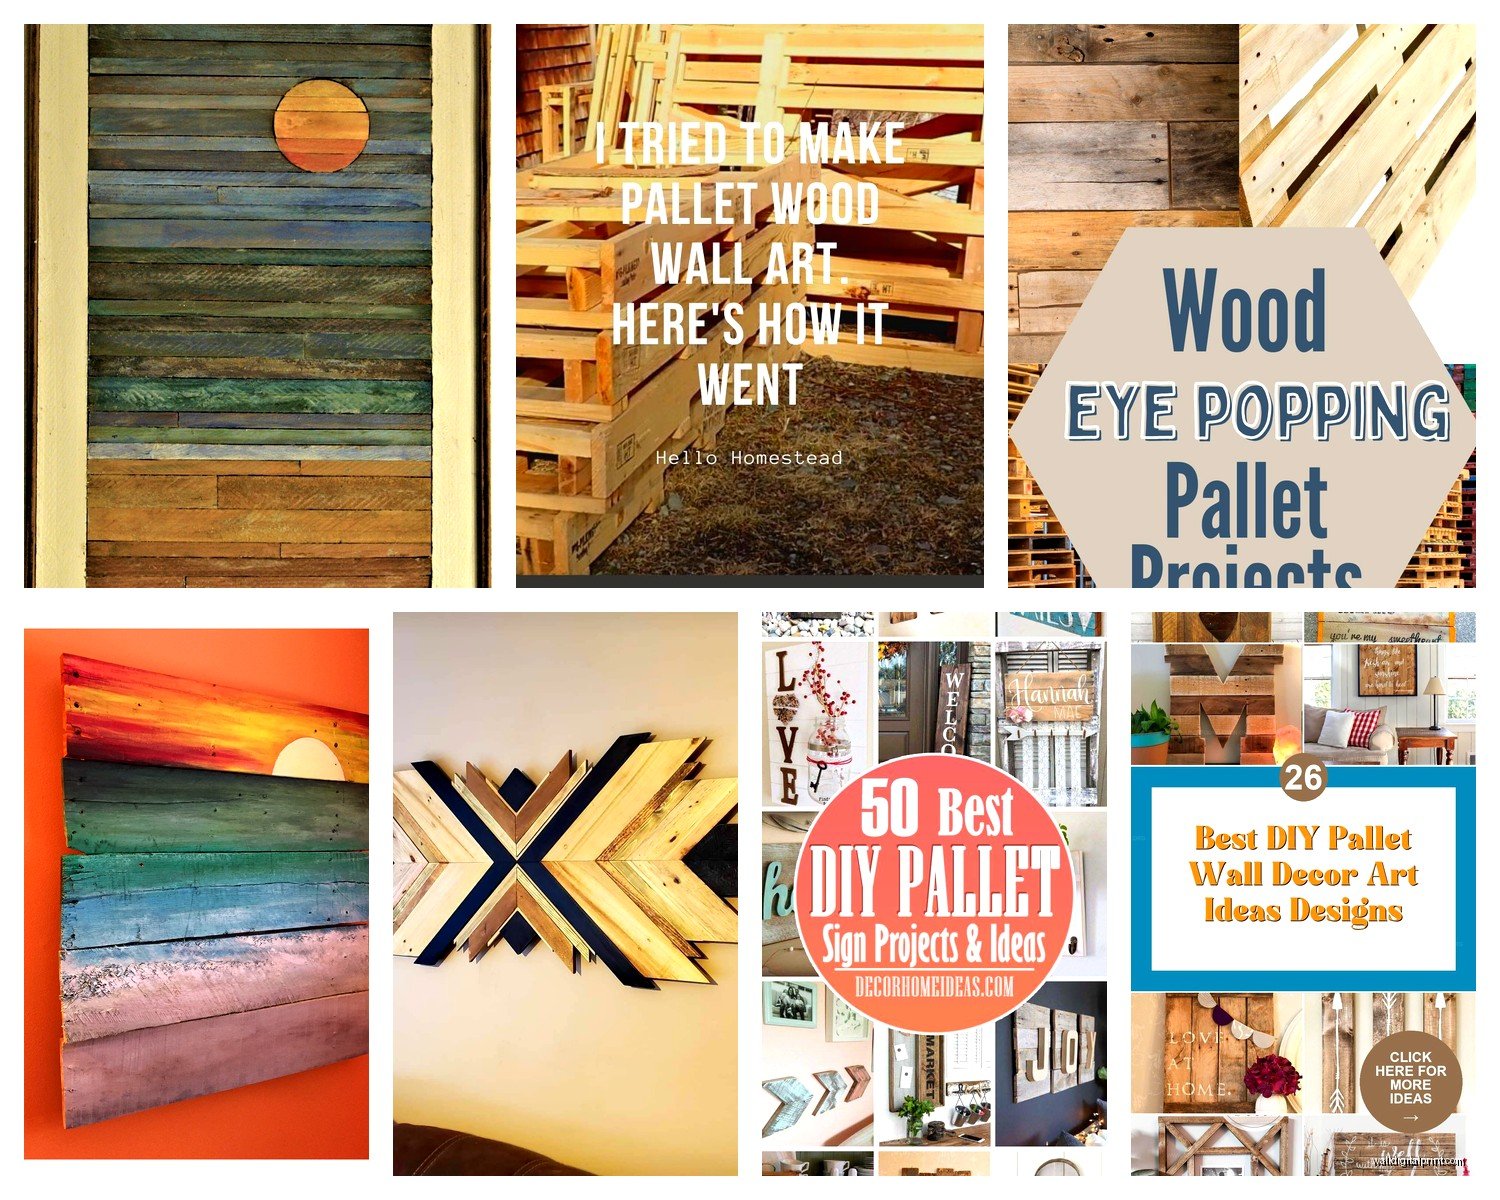
Design Ideas That Actually Work
Okay so funny story, my first pallet wall art was supposed to be this geometric mountain design and it ended up looking like abstract triangles that my friend said looked like teeth. So maybe sketch your design first.
Horizontal Plank Design
This is the easiest. Cut your boards to the same width (or varying widths if you want dimension). Arrange them horizontally, alternating the wood tones. You can make them all flush or have some sticking out further than others for a 3D effect.
I did one that was 4 feet wide and used boards ranging from 3-6 inches tall. The variation in color from different pallets made it look intentional instead of like I just grabbed random wood.
Herringbone Pattern
More advanced but looks expensive. Cut your boards into equal lengths – I usually do 18-20 inches. Arrange them in a V pattern, alternating direction. This one takes FOREVER to measure and cut but the result is pretty stunning.
Pro tip: make a template for the angle cuts so you’re not measuring every single piece. I use a piece of cardboard with the angle marked.
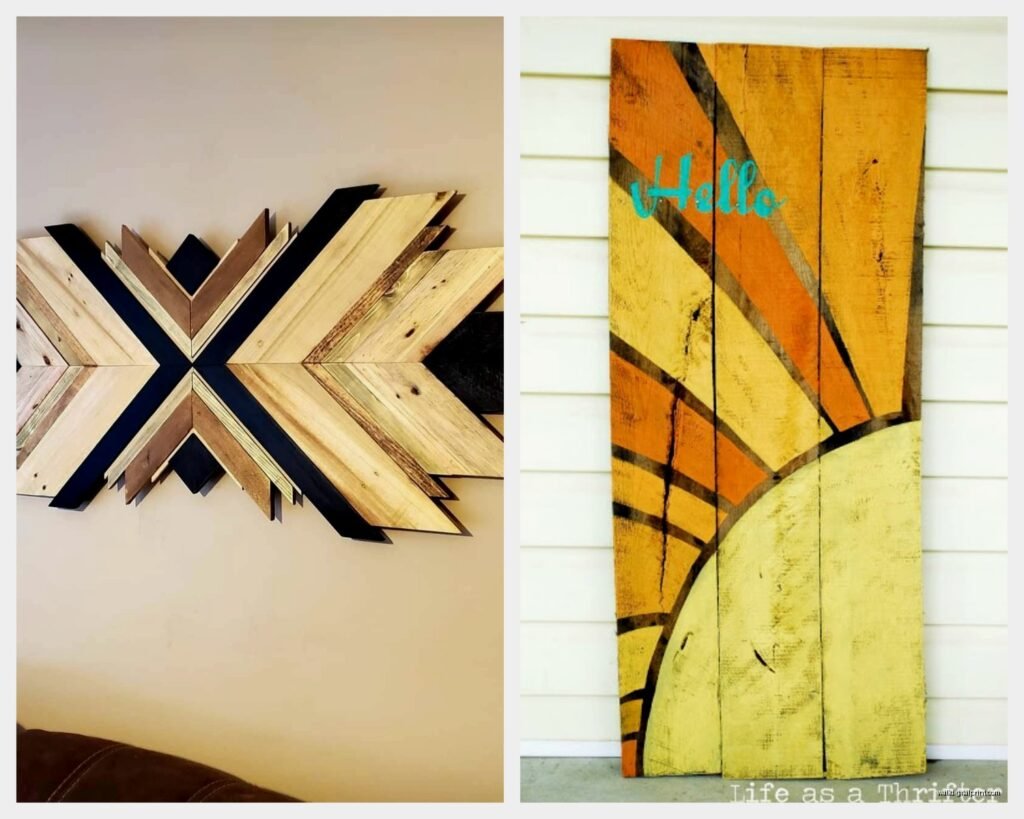
Geometric Designs
Triangles, hexagons, chevrons – these all work. The key is precise cutting and a lot of patience. I made a hexagon pattern for a client’s nursery and it took me three days of measuring and cutting. Use a miter saw for clean angles.
Quote or Word Art
Cut boards to size for your background, then use thinner strips to create letters. Or you can router out letters if you have that equipment. I’ve also seen people use vinyl lettering on top which is kinda cheating but also looks good so whatever works.
Assembly Methods
There’s a few ways to do this depending on if you want it permanent or removable.
Backing Board Method: Attach all your pallet pieces to a plywood backing using wood glue and a finish nailer. This creates one solid piece you can hang like a regular picture. Easier to hang but heavier.
I use 1/2 inch plywood for anything under 3 feet. Go thicker for bigger pieces or they’ll bow.
Direct Wall Mount: Find your studs (stud finder is like $12, just get one), attach a level horizontal board to the wall, then nail your pallet pieces directly to that board and the wall. More permanent but you don’t have the weight of a backing board.
French Cleat System: This is my favorite for bigger pieces. Two beveled pieces of wood – one on the wall, one on the back of your art. They hook together and can hold a ton of weight. Super secure and you can easily take it down if needed.
Finishing Options
Raw wood looks good but it’ll continue to age and can be dusty. Here’s what I’ve tried:
Stain: Enhances the natural grain. I usually mix a few different stain colors on different boards for variation. Minwax has those little sample jars which are perfect for testing. My go-to combo is Special Walnut, Weathered Oak, and leaving some boards natural.
Apply with a brush or rag, wipe off excess after a few minutes. Let it dry completely before topcoat.
Paint: Watered-down paint gives a whitewash effect that’s really popular. Mix white paint with water (like 1:1 ratio), brush on, wipe off. You can also do full coverage paint but then you’re kinda losing the wood texture.
Whitewash: Different from paint – you can buy actual whitewash or make it with lime. Gives that beachy driftwood look. I did this for a coastal themed piece and it turned out really soft and pretty.
Topcoat: Always seal it. Polyurethane (water-based doesn’t yellow), wax, or Danish oil. I usually do two coats of matte poly. Protects from dust and makes cleaning easier.
wait I forgot to mention – if you’re doing a topcoat, make sure your stain is 100% dry first. I got impatient once and the poly made the stain streak. Waited 24 hours minimum now.
Hanging Heavy Wall Art Safely
Pallet art gets heavy fast. A 3×4 foot piece can easily be 30-40 pounds with a backing board.
Always hang into studs if possible. If you can’t hit studs, use heavy duty anchors rated for way more than your piece weighs. I use the toggle bolt style anchors and they’ve never failed me.
For the French cleat system, that top board needs to be screwed into at least two studs. Non-negotiable.
Level everything. A crooked piece of art just looks bad and will bother you forever. I use a 4-foot level and take my time.
Common Problems I’ve Dealt With
Warping: Happens when wood isn’t fully dry or you don’t secure it properly. Use enough fasteners and make sure boards are dry before assembly.
Splitting: Pre-drill holes if you’re nailing near the ends of boards. The wood is old and brittle.
Color Inconsistency: This can be good or bad depending on your design. If you want more uniform color, sand more aggressively and use a wood conditioner before staining.
Nail Holes and Gaps: Wood filler is your friend. I use the stainable kind and apply it after assembly but before staining. Some people like the holes for character which is fine too.
Smell: Some pallets just smell funky. If airing out and cleaning doesn’t help, seal the back with primer before hanging. Had to do this with some pallets that smelled like onions for some reason.
Cost Breakdown
This is actually way cheaper than you’d think if you’re patient.
Pallets: Free to $10 each
Plywood backing: $25-50 depending on size
Hardware and fasteners: $15-30
Sandpaper: $10
Stain/finish: $15-40
Tools if you don’t have them: $100-200 (but you’ll use them for other projects)
My first project cost me about $75 total and I already had most tools. Way less than buying similar art which runs $200-500 easy.
Time Investment Reality Check
Don’t start this the day before you need it done. A medium size piece (3×3 feet) takes me:
- 2-3 hours to dismantle pallets and select boards
- 2 hours to clean and prep
- 3-4 hours to sand
- 1-2 hours to cut and arrange
- 2 hours to assemble
- 1 hour to finish (plus drying time between coats)
- 30 minutes to hang
That’s like 12-15 hours of actual work spread over several days because of drying time. First project? Add 50% more time because you’re figuring things out.
The mess is also real. Do this in a garage or outside if possible. I tried doing prep work in my apartment once and found sawdust in weird places for months.
Making It Look Intentional Not Random
The difference between “rustic reclaimed art” and “why did you nail trash to the wall” is smaller than you think.
Keep your color palette limited – maybe 3-4 wood tones max. Too much variation looks chaotic.
Make sure your cuts are straight and clean. Rough edges are fine, crooked cuts are not.
Step back frequently while assembling. What looks good up close might look weird from 10 feet away.
Consider the room it’s going in. A huge dark wood piece might be too heavy for a small light room. I made this mistake in a client’s bathroom and it just made the space feel smaller.
Anyway that’s basically everything I’ve learned from doing way too many of these projects. The first one will probably take you forever and you’ll question your life choices but the second one goes way faster. Just start with something small – like 2×2 feet – before you commit to covering an entire wall.
My partner just reminded me I promised to finish the one I started for our bedroom like two months ago so I should probably go do that instead of typing this but you get the idea. It’s really not that complicated once you actually start, just gotta commit to the mess and the time.