Wall Art Guide, Wall Art Tutoriels
Leather Wall Art: Textured Hide Material Rustic Designs
Mar
So I’ve been working with leather wall art for probably three years now and honestly it’s one of those materials that either looks incredibly expensive and intentional or like someone just stapled a jacket to the wall, there’s not much in between.
The thing about leather hide for wall installations is you really gotta understand what you’re buying because “leather wall art” can mean like five different things. I learned this the hard way when a client ordered what they thought was full-grain leather panels and received bonded leather that started peeling within months. Not cute.
Types of Leather You’ll Actually Encounter
Full-grain leather is your top tier option and yeah it’s expensive but for wall art it’s actually worth it because you’re not dealing with wear and tear like furniture. The natural texture shows through completely, all those marks and variations that make it interesting. I used a full-grain cowhide piece in my own dining room and three years later it still looks exactly the same, maybe even better with the patina.
Top-grain is the next level down and honestly for most wall applications it works perfectly fine. They sand off some imperfections so it’s more uniform which some people actually prefer. Less rustic, more refined. Had a client who wanted that super clean modern ranch aesthetic and top-grain was perfect because it didn’t compete with everything else in the room.
Then there’s bonded leather which is basically leather scraps glued together with polyurethane and I’m gonna be real with you, skip this for wall art. It doesn’t age well, it can peel, and the whole point of leather on your wall is that gorgeous texture and this just doesn’t deliver.
Hide Types and What They Mean for Your Space
Cowhide is the most common and versatile. Comes in tons of colors naturally or dyed, relatively affordable, durable. The texture is substantial without being too aggressive. I’ve worked with Brazilian cowhides mostly and they tend to have really beautiful consistent grain patterns.
Goat leather is thinner and has this really distinctive pebbled texture that photographs amazingly. It’s great for smaller pieces or if you’re doing like a grid installation where you want texture but not overwhelming heaviness. My friend used goat leather hexagons in her entryway and the way light hits them throughout the day is actually stunning.
Buffalo hide is thicker and more rugged with deeper grain patterns. This is your go-to for that serious rustic cabin vibe. I specified buffalo leather panels for a mountain house project last year and they paired perfectly with reclaimed wood beams. The imperfections in buffalo hide are more pronounced which can either be exactly what you want or too much depending on your space.
Deerskin is softer and more supple, less structured than cow or buffalo. Honestly I don’t see it used as much for wall art because it doesn’t hold its shape as well when mounted, but for smaller framed pieces where it’s supported it can be really beautiful.
Texture Techniques and Treatments
Okay so this is where it gets interesting because the texture is really what makes leather wall art work. Flat smooth leather on a wall is just… it’s fine but it’s not doing much.
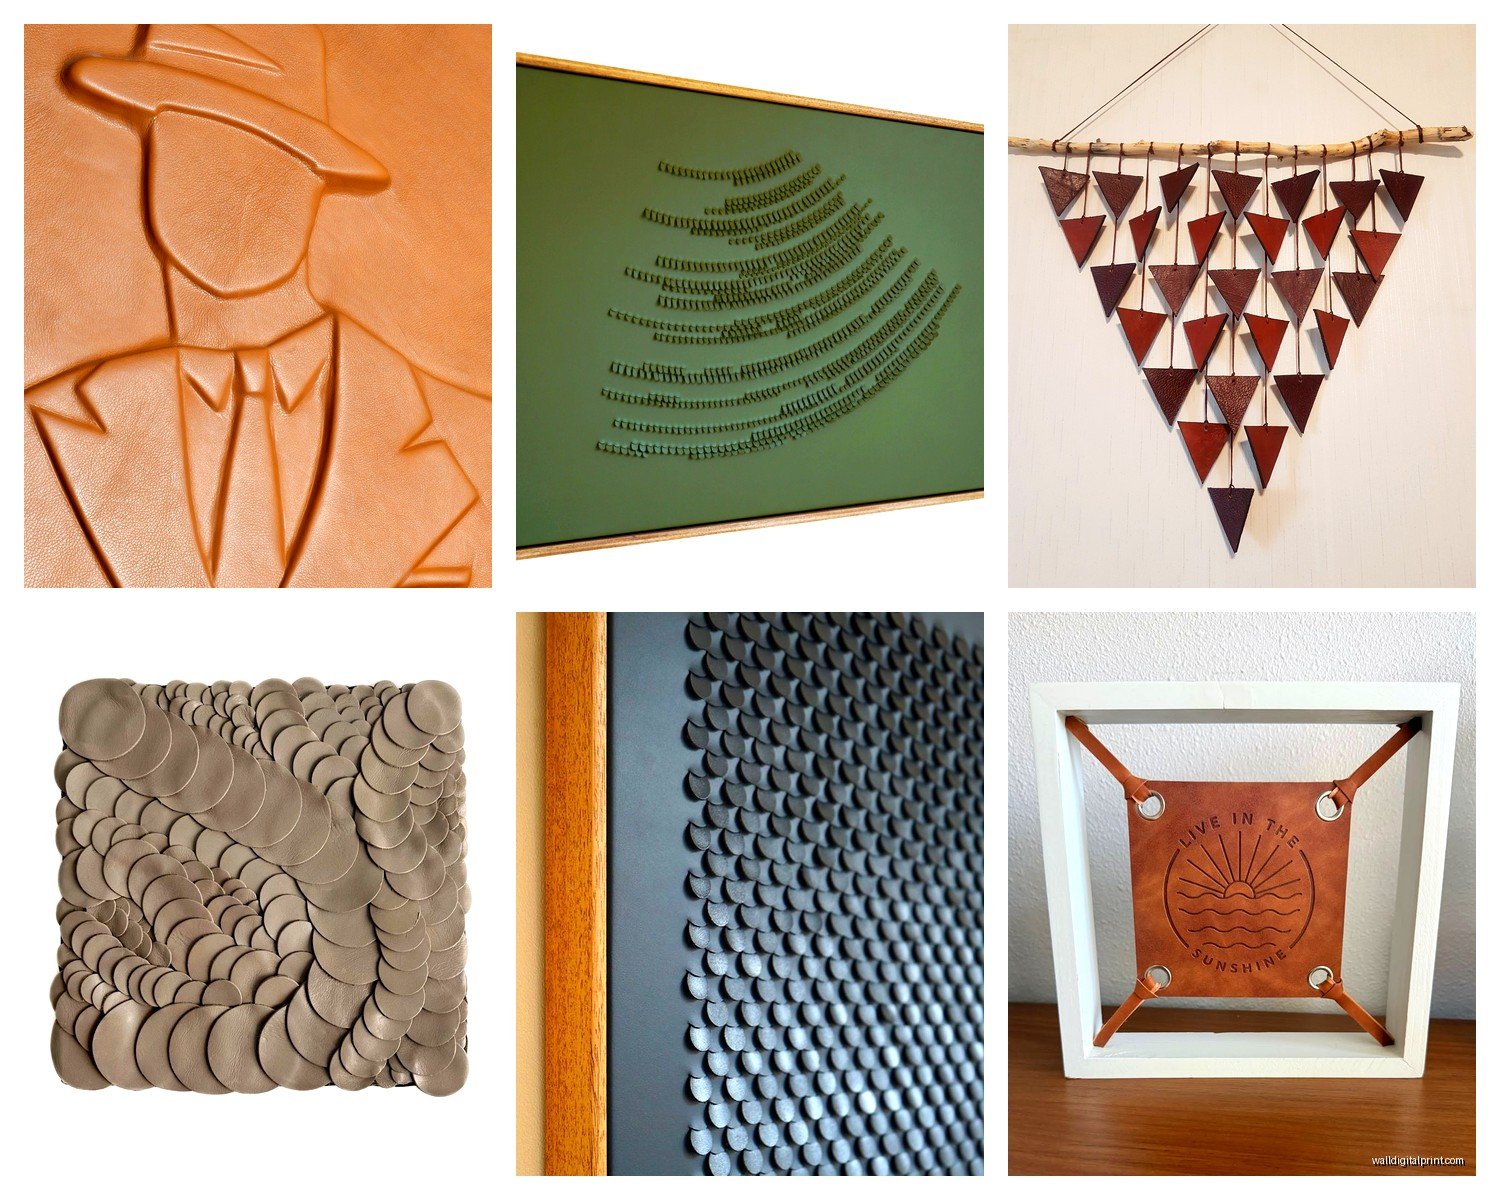
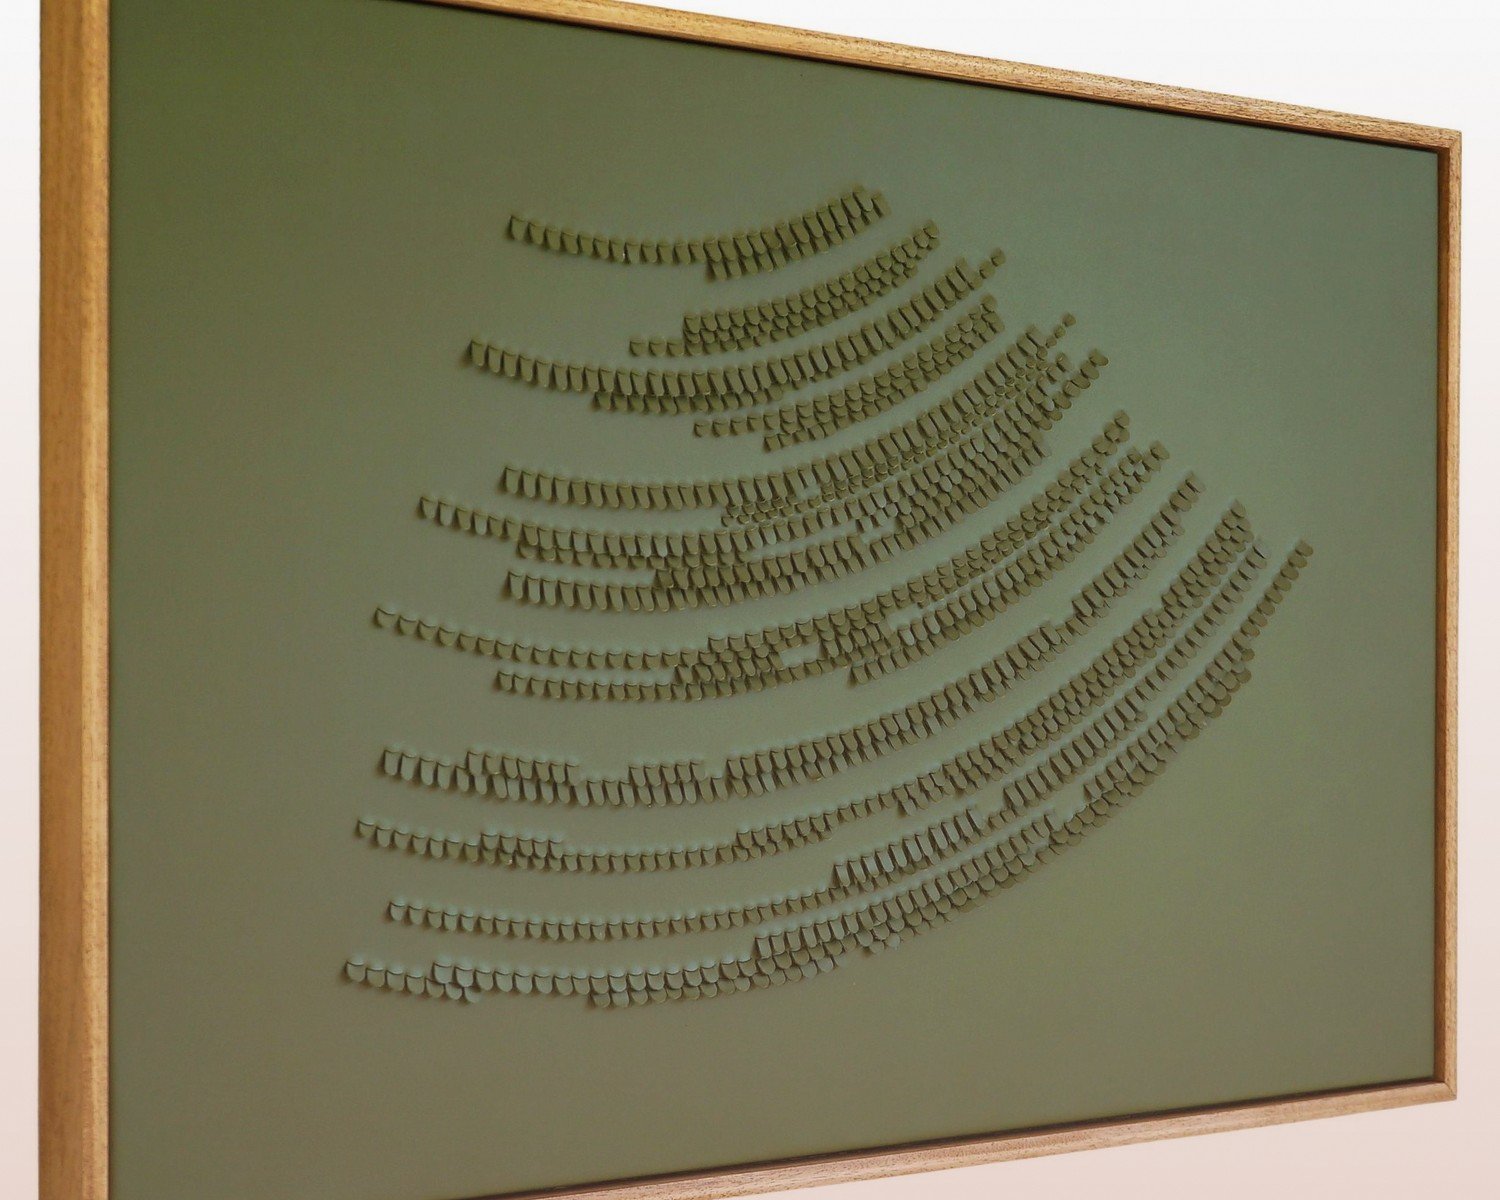
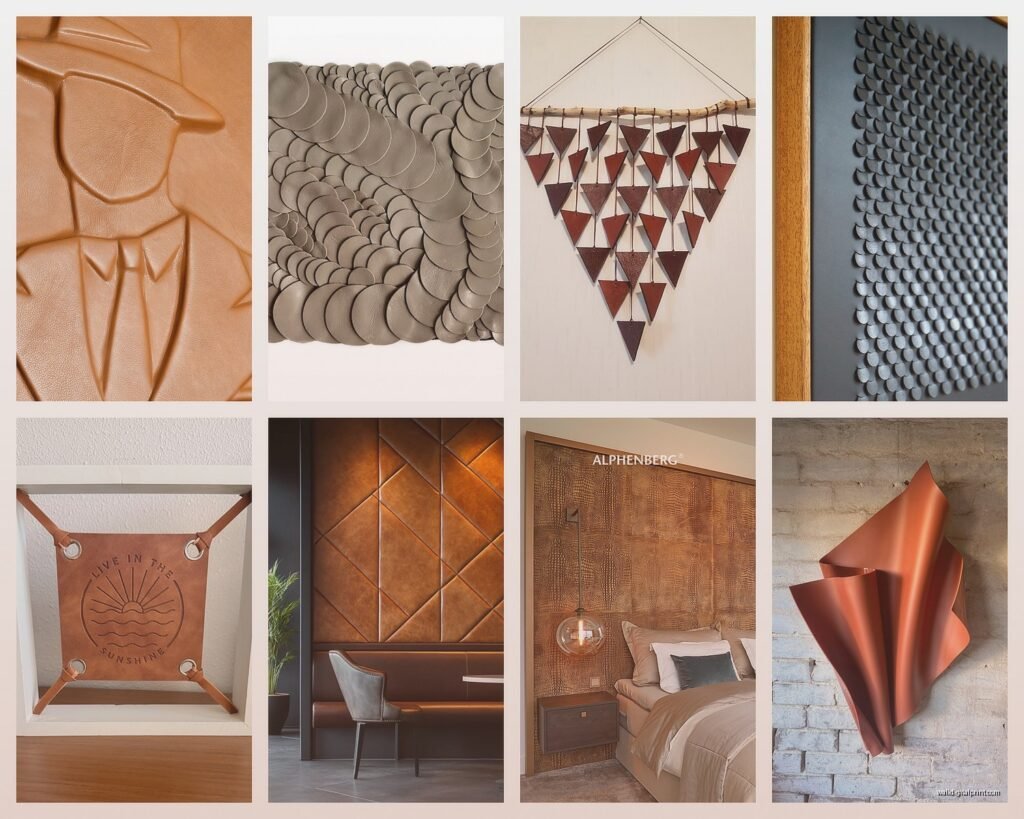
Embossed leather has patterns pressed into it and you can get everything from geometric designs to faux crocodile texture. I’m not usually a fan of the fake animal textures because why not just use actual textured leather, but geometric embossing can be really architectural and cool. Used some with a linear pattern behind a console table once and it read almost like wood grain from a distance.
Tooled leather is hand-carved with designs and this is very western, very specific aesthetic. If you’re going for Spanish colonial or Santa Fe style this is your material. But it’s also really easy to make a space feel costumey with tooled leather so you gotta balance it carefully. Maybe one statement piece rather than covering a whole wall.
Natural texture variations are honestly my favorite approach. Just let the leather be leather with all its scars and marks and grain patterns. This works especially well with larger hide pieces where you can appreciate the organic shape and natural edge. I watched my dog destroy a throw pillow while I was mounting one of these pieces last month and honestly the imperfection in the leather made me stress about it less.
Distressed finishes give leather that worn vintage look and can be gorgeous but make sure it’s actually quality leather that’s been distressed not just cheap material trying to hide flaws. You can usually tell by the price point and also by touching it, quality distressed leather still feels substantial.
Mounting Methods That Actually Work
This is crucial because leather is heavy and you can’t just use command strips or whatever.
For stretched leather panels think of it like canvas stretching. You need a wooden frame, usually pine or poplar, and you’re pulling the leather taut and stapling it to the back. The leather needs to be slightly damp when you stretch it so it dries tight. I use a spray bottle with water, nothing fancy. Staple from the center of each side outward to distribute tension evenly.
Direct wall mounting with adhesive is possible but you need the right product. I use a combination of contact cement for the main adhesion and then hidden screws at stress points for heavier pieces. The contact cement I’ve had the best luck with is Weldwood, you apply it to both surfaces, let it get tacky, then press together. It’s permanent though so measure twice obviously.
Framed leather works well for smaller pieces or when you want a more formal presentation. You can treat it basically like fabric or paper, mounting it to backing board with acid-free adhesive then framing normally. Just make sure the frame is deep enough to accommodate the leather thickness.
Hanging hide pieces with the natural edge showing is probably the most dramatic option. You’re basically just securing the top edge and letting gravity do the work. I drill small holes along the top edge and use leather cord or metal grommets to hang it from a rod or directly from wall hooks. The organic edge and natural drape create incredible shadow lines.
Weight Considerations You Can’t Ignore
A full cowhide can weigh like 15 to 20 pounds depending on size and thickness. Your mounting system needs to handle that. I always use wall anchors rated for at least twice the actual weight, going into studs whenever possible. Had one piece start pulling away from drywall anchors during installation and it was not a fun moment.
For really large installations I sometimes create a cleat system, basically French cleats where one piece mounts to the wall and another to the back of the leather frame and they interlock. Super secure and you can adjust positioning easily.
Color and Finish Options
Natural leather colors range from cream to tan to deep brown depending on the animal and tanning process. These are honestly the most versatile because they warm up a space without demanding attention.
Dyed leather opens up the full spectrum and you can find or commission basically any color. I’ve used deep charcoal gray, rich burgundy, even a dusty blue for a coastal project. The key with dyed leather is making sure it’s aniline dye that penetrates the material rather than surface coating that can crack or peel.
Metallic finishes are having a moment right now and I’m here for it when done right. Gold or copper leather catches light beautifully and adds glamour without being shiny-shiny. There’s a subtle depth to metallic leather that’s different from metallic paint or wallpaper.
Matte versus glossy is mostly personal preference but I tend toward matte for rustic designs because glossy reads more modern and polished. Glossy can also show imperfections more obviously.
Sizing and Layout Planning
Okay so funny story, I once ordered leather panels for what I thought was an 8-foot wall and turned out the client measured wrong and it was 10 feet. Leather isn’t like wallpaper where you can just order more of the same dye lot, each hide is unique. Always add at least 10% to your measurements for trimming and mistakes.
Single large hide pieces make a statement but you’re limited by the size of the animal obviously. A full cowhide might be 6 by 7 feet with irregular edges. This works beautifully as a focal point but you need the wall space and the right room scale.
Paneled installations give you more flexibility and you can create whatever size you need. I usually go with panels between 18 to 36 inches for visual balance. Too small and it gets busy, too large and you lose the panel effect. Spacing between panels matters too, I typically use half-inch to one-inch gaps so each piece reads individually.
Grid patterns work well with uniform leather squares or rectangles. This is more contemporary than rustic but you can still get that material warmth. Did a project with 12-inch leather squares in a herringbone pattern last fall and it was gorgeous, though mounting all those individual pieces was honestly tedious.
Organic layouts with irregular hide shapes embrace the natural form and create drama. This is your most rustic option. You might overlap edges slightly or leave gaps between pieces, following the natural contours of the hides.
Maintenance Real Talk
Leather wall art is actually pretty low maintenance compared to upholstered pieces because nobody’s sitting on it or spilling wine on it. But you do need to know a few things.
Dusting regularly with a soft cloth or vacuum brush attachment prevents buildup. I do this maybe once a month or whenever I notice dust accumulating. Leather has texture that can trap dust more than a smooth surface.
Conditioning maybe once or twice a year keeps the leather from drying out and cracking. I use Lexol leather conditioner, just a thin coat applied with a soft cloth, let it absorb for 15 minutes then buff off excess. Don’t over-condition though because that can make leather look greasy or dark.
Keep it away from direct heat sources like radiators or heating vents. Learned this one the hard way in my first apartment where I had a leather piece above a baseboard heater and it dried out and cracked within a year.
Humidity matters more than you’d think. Too dry and leather cracks, too humid and you risk mold especially with natural untreated hides. I’ve only dealt with mold once and it was in a basement installation where moisture was already an issue. If your space has humidity problems address those before installing leather.
Sunlight will fade and damage leather over time so avoid placing pieces in direct sun or use UV-filtering window treatments. I have a client with a leather installation on a west-facing wall and we added solar shades that filter UV while still letting in light.
Where to Source Quality Pieces
Local leather suppliers and tanners are honestly your best bet for quality and being able to see and touch before buying. I have a supplier about an hour away that I visit maybe quarterly to hand-select hides for projects. You pay a bit more than online but there are no surprises.
Online retailers like Leather Hide Store and Montana Leather Company have good reputations and return policies. I’ve ordered from both multiple times. The photography is usually accurate and they provide measurements and thickness specifications.
Etsy has tons of artisans creating leather wall art and you can find really unique pieces. Just read reviews carefully and ask questions about materials and construction before ordering. I found an amazing maker who does custom tooled leather panels and their work is exceptional.
Antique and vintage shops sometimes have old leather pieces that can be repurposed. I’ve found vintage leather samples, old luggage leather, even leather from furniture that can be cut and mounted. This gives you patina and character you can’t get with new material.
Cost Expectations
Real leather wall art isn’t cheap and if you see something super inexpensive it’s probably bonded leather or faux leather which defeats the whole purpose.
Small framed pieces maybe 12 by 12 inches start around $100 to $200 for quality materials and construction. Mid-size panels like 24 by 36 inches run $300 to $600 depending on leather type and finish. Full hide pieces can easily be $500 to $1500 or more for premium hides.
Custom work obviously costs more but you get exactly what you want sized and finished for your space. I usually budget about 30% more for custom versus ready-made pieces.
Installation Tips from Someone Who’s Done This Too Many Times
Always do a test mount before the final installation. I tape pieces up temporarily to check placement and scale. Leather is heavy and permanent once mounted so you wanna be sure.
Mark your studs clearly before starting. I use painter’s tape to mark stud locations so I can reference them throughout installation without having to keep finding them with a stud finder.
Have someone help you with large pieces because positioning heavy leather while drilling or stapling is basically impossible alone. My partner has held more leather hides than they ever expected to in life.
Step back frequently to check alignment and spacing. When you’re up close focused on mounting it’s easy to get crooked or uneven. I step back every few minutes to verify everything looks right from viewing distance.
Use a level constantly, like obsessively. Leather’s natural texture can create optical illusions that make things look straight when they’re not.
Styling Around Leather Wall Art
The rustic vibe of leather works obviously with wood, metal, and natural materials. But it can also be really interesting in more unexpected contexts. I’ve used leather wall art in modern spaces with concrete and glass and the contrast is striking.
Keep surrounding decor relatively simple because leather has so much inherent texture and visual interest. You don’t need a ton of other stuff competing for attention.
Lighting makes a huge difference with leather. Use directional lighting to highlight texture and create shadow play. I usually do a combination of ambient and accent lighting with leather installations.
okay I think that covers most of what you need to know. The main thing is just don’t cheap out on materials because bad leather on your wall is worse than no leather on your wall, and make sure your mounting is secure because having a heavy hide fall off the wall at 2am is not an experience I recommend