Wall Art Guide, Wall Art Tutoriels
White Plaster Wall Art: Pure Relief Sculptural Designs
Mar
So I’ve been absolutely obsessed with white plaster wall art lately and honestly it started because I picked up this piece at a flea market that turned out to be actual plaster relief and not resin like I thought. Game changer. Let me break down what I’ve learned because the materials make such a huge difference and nobody really talks about that.
The Plaster Itself – What Actually Works
Okay so first thing, not all plaster is created equal and this matters more than you’d think. I’ve tested like six different types at this point because my cat knocked over my first attempt and I had to start over anyway.
Plaster of Paris is what most people start with. It’s cheap, you can get it at any craft store, and it sets pretty fast. But here’s the thing—it’s also super brittle once it dries. I made this gorgeous abstract wave design and it chipped when I was mounting it. So frustrating. It works fine for smaller pieces or things that’ll stay protected behind glass, but for actual wall-mounted relief sculptures, you’re gonna want something stronger.
Hydrocal is where it’s at if you want durability. It’s a gypsum cement that’s way harder than regular plaster. Takes a bit longer to set which actually gives you more working time for details. I use Hydrocal White or FGR-95 depending on the project. The FGR-95 is harder but also heavier, so you gotta think about what your wall can support.
Pottery plaster is another option that sits somewhere in between. It’s smoother than Plaster of Paris and less likely to crack. I used USG No. 1 Pottery Plaster for this geometric piece I did last month and the surface finish was just… chef’s kiss. Really takes detail well.
Mixing Ratios Nobody Tells You About
This is gonna sound weird but I keep a kitchen scale in my studio now because eyeballing plaster ratios is how you end up with weak sculptures. The general rule is about 2 parts plaster to 1 part water by weight, but it varies.
For Plaster of Paris I do like 1.25 to 1.5 pounds of plaster per cup of water. For Hydrocal you want it slightly thicker, so more like 1.5 to 1.8 pounds per cup. Always add plaster to water, never the other way around. Let it slake for like two minutes before you stir. This prevents lumps and air bubbles which will absolutely ruin your relief details.
Creating the Actual Relief Design
Wait I forgot to mention—you need to decide if you’re doing positive or negative relief first because the process is totally different.
Negative relief (where the design goes into the surface) is easier for beginners honestly. You create a mold and pour plaster into it. I use:
- Foam board carved with clay tools
- Oil-based clay pressed into a frame
- Silicone molds if I’m doing multiples
- Even heavy cardboard with hot glue details works
For the mold release I’ve tried everything from cooking spray to actual mold release products. Petroleum jelly works surprisingly well but it can leave a slight texture. The professional stuff like Mann Ease Release is worth it if you’re doing multiple pieces.
Positive relief (where stuff sticks out from the surface) is more sculptural. You’re basically building up layers. I pour a base layer first, let it set to like a soft cheese consistency, then add details on top. You can carve into it, press objects into it, or build up with additional plaster.
Tools You Actually Need
My client canceled last Thursday so I spent an hour organizing my plaster tools and realized I only actually use like half of them regularly:
- Flexible mixing bowl (the plaster pops right out when it dries)
- Putty knives in different sizes
- Clay loop tools for carving
- Wooden modeling tools
- A good dust mask because plaster dust is no joke
- Sandpaper in various grits (80, 120, 220)
- A small spray bottle with water
Oh and another thing—silicone spatulas are amazing for smoothing wet plaster. The kind you use for baking. They don’t leave marks like metal tools do.
Building a Base Structure
For anything bigger than like 12 inches you need backing support or it’ll crack from its own weight. I learned this the hard way.
Wood panels work great. I use birch plywood, half-inch thick usually. Sand it down, seal it with a couple coats of gesso or shellac so it doesn’t absorb moisture from the plaster. You can attach a wire hanging system to the back before you start.
Wire mesh or burlap embedded in the plaster adds reinforcement. Pour your first layer, press in the mesh while it’s still wet, then add more plaster on top. It’s like rebar for your art basically.
For really large pieces I’ve started using foam insulation board as the core. It’s lightweight and you can carve it to create depth variations, then skim coat plaster over it. This piece I did that was like 36 by 48 inches would’ve weighed a million pounds if it was solid plaster.
Techniques for Different Textures
This is where it gets fun honestly. The texture variations you can get with white plaster are insane.
Smooth finish: Pour thin layers, let each one set completely, sand between coats with progressively finer grit paper. I go 80, then 120, then 220, sometimes even 400 if I want it really polished. Wet sanding with 400 grit gives you this almost marble-like surface.
Rough organic texture: Apply thicker plaster with a palette knife or even your hands (wear gloves). Don’t smooth it out. You can press bubble wrap into it, drag a comb through it, stipple it with a sponge. I was watching The Bear while working on this one piece and just kept stabbing at it with a fork and it created the coolest texture.
Carved details: Let the plaster set to leather-hard (firm but not totally dry) and carve into it. This is maybe 30-45 minutes after pouring depending on thickness and humidity. You can get really precise lines this way.
Layered dimensional effect: This is my favorite lately. Build up multiple thin layers at different stages. First layer dries completely, second layer goes on in certain areas only, maybe a third layer for high points. Creates actual depth and shadow play.
Finishing and Sealing
Okay so your piece is dry, which takes like 24-48 hours for small pieces, up to a week for thick ones. Don’t rush this or it’ll crack.
Sanding is tedious but necessary. I do it outside now because the dust situation is real. Start with rough grit to shape, finish with fine grit to smooth. Wear that dust mask seriously.
Some people paint their plaster but I’m obsessed with keeping it pure white. The thing is, raw plaster is kind of chalky and will absorb dirt and oils from the air. You gotta seal it.
Acrylic sealer works fine for pieces that won’t be touched much. I use a matte finish spray sealer, multiple thin coats. The matte keeps that plaster look instead of making it shiny.
Wax is better for pieces you might touch or that are in high-traffic areas. I use clear paste wax, buff it in with a soft cloth. It gives a subtle sheen that actually looks really beautiful and protects against fingerprints and dust.
Shellac is old school but effective. Dewaxed blonde shellac keeps things white and adds durability. Mix it thin, apply with a brush, sand lightly between coats.
Keeping It Actually White
White plaster yellows over time especially in humid environments or with UV exposure. I’ve noticed pieces near windows develop this cream color after a few months.
- UV-protective sealer helps if it’s getting sun exposure
- Keep humidity below 60% if possible
- Dust regularly with a soft brush
- If it does yellow, you can carefully sand and reseal
Mounting Without Destroying Your Walls
This is important because plaster is heavy and nobody wants it falling off the wall at 3am.
For smaller pieces under 5 pounds, heavy-duty picture hanging strips work. The Command brand ones rated for like 16 pounds. Use multiple sets.
Medium pieces need wall anchors. I use toggle bolts in drywall or masonry anchors in plaster walls (ironic right?). Pre-drill your holes, don’t just screw directly in.
Large heavy pieces need serious support. I attach a french cleat system to the back of the wooden base panel. One piece screws into wall studs, the other attaches to your art, they hook together. Super secure and you can easily remove the piece if needed.
Common Problems I’ve Dealt With
Cracking: Usually happens from drying too fast or mixing too thin. If you get small cracks, mix a tiny bit of plaster really thin (like heavy cream consistency) and work it into the crack with a palette knife. Sand smooth when dry.
Air bubbles: Tap your mold or base panel firmly after pouring to bring bubbles to the surface. Or mix your plaster slower to incorporate less air in the first place.
Weak spots: Means your ratio was off or it didn’t cure fully. Not much you can do except remake it honestly. I’ve tried reinforcing with epoxy resin but it never looks quite right.
Pieces breaking during demolding: Use more mold release next time and wait longer before demolding. Also consider if your design has undercuts that make it hard to release.
Design Ideas That Actually Work
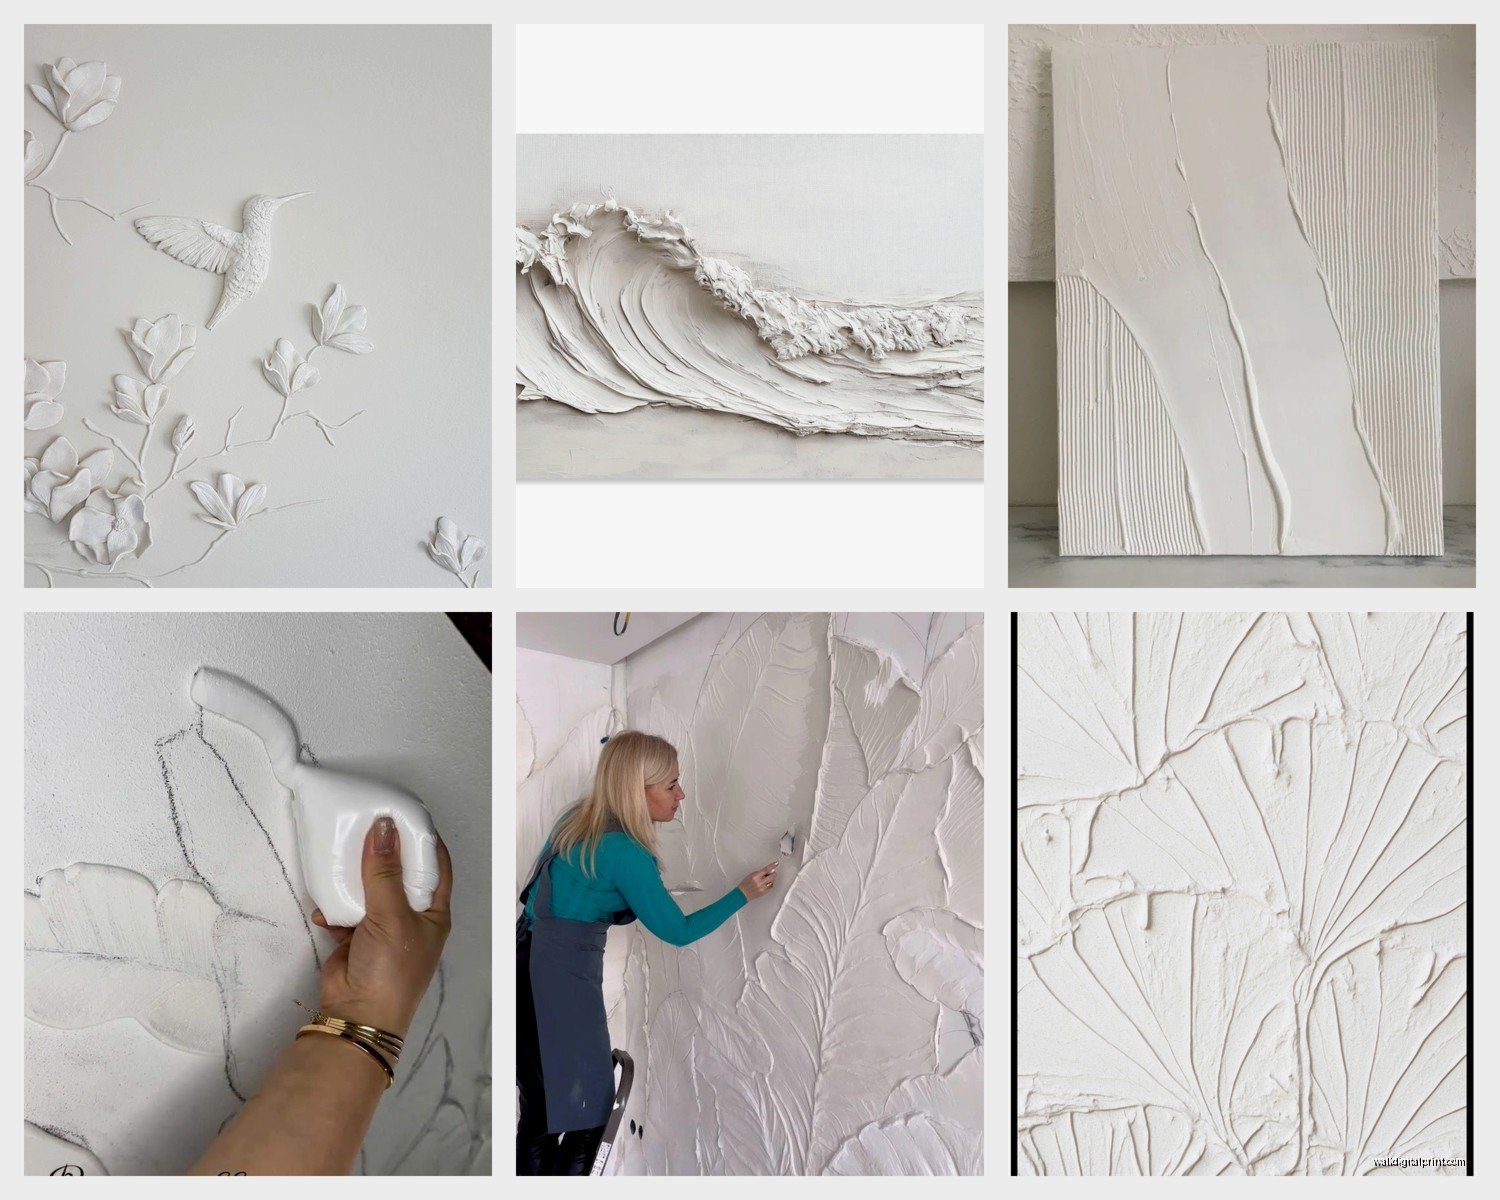
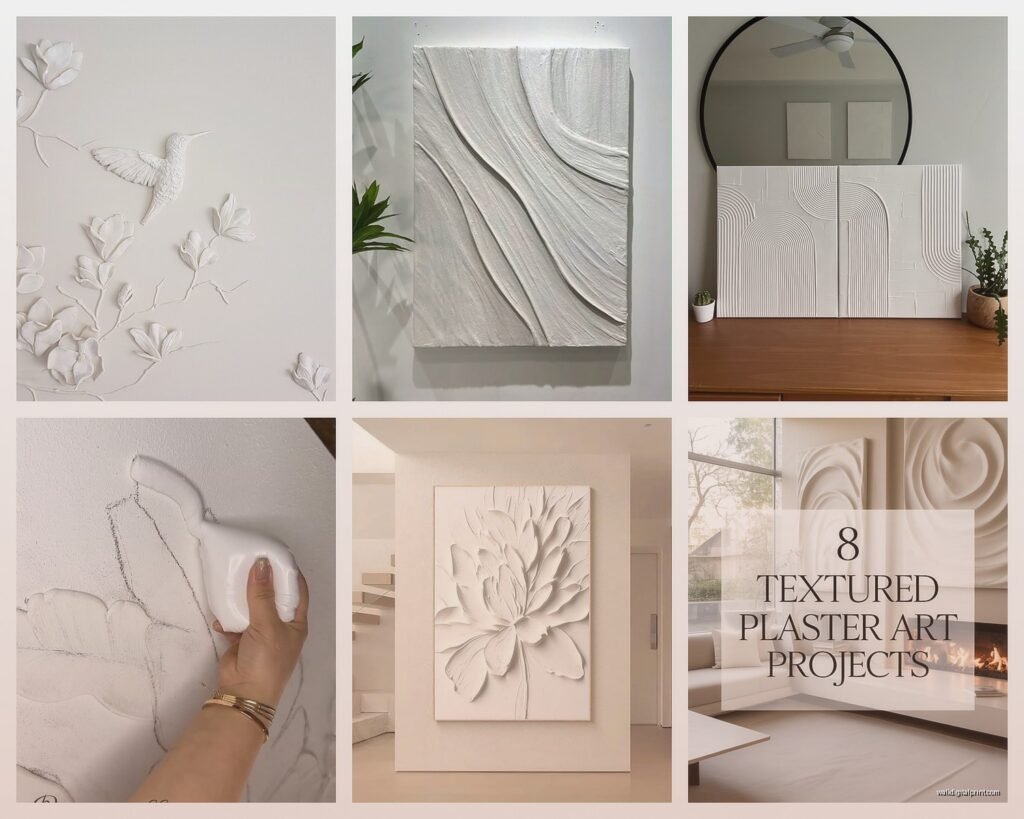
Abstract organic shapes are super forgiving and look expensive. Think like undulating waves, cellular patterns, topographic layers.
Geometric patterns need more precision but the clean lines look incredible in white plaster. I did this whole grid of recessed squares at different depths that catches light beautifully.
Botanical impressions are gorgeous—press actual leaves or flowers into soft plaster, remove them once it sets, you get these detailed relief prints.
Text and typography work well too. You can carve letters or use stencils with built-up plaster around them.
Oh wait, combining materials is something I’ve been experimenting with. Embedding metal leaf in certain areas, or mixing in marble dust for slight color variation, or even pressing gold wire into the surface for subtle lines. Keeps it mostly white but adds interest.
The key with white plaster relief is really about the shadows and light play. Position it where it’ll get interesting light during the day. Near a window, under a picture light, wherever creates depth and movement.
I’m working on this massive piece right now that’s like 8 feet wide with these undulating horizontal waves and honestly the scale makes such a difference. Sometimes you just gotta go big. Anyway that’s basically everything I’ve figured out so far with this stuff.