Wall Art Guide, Wall Art Tutoriels
Rope Wall Art: Nautical Twisted Fiber Natural Designs
Mar
So I’ve been working with rope wall art for like three years now and honestly it started because a client wanted “coastal but not basic” and I panicked and bought every type of rope I could find at the craft store and just… experimented.
The Rope Types That Actually Matter
Okay so first thing – not all rope is created equal and some of it looks amazing in photos but is a nightmare to work with. Let me break down what I’ve actually used:
Cotton rope is gonna be your best friend for most projects. It’s soft, doesn’t smell weird, and comes in different thicknesses. I usually work with 6mm for detailed stuff and 10mm when I want something chunkier. The natural color is this gorgeous off-white that works with literally everything. You can also get it in those trendy colors but honestly the natural looks more expensive.
Manila rope is the classic nautical look – that tan/brown fiber that smells like… well, like rope. It’s stiffer than cotton which makes it hold shapes better but also makes your hands kinda rough after working with it for a while. I learned this the hard way when I spent six hours making a giant wall hanging and my hands looked like I’d been rock climbing. Worth it though.
Jute is similar to manila but softer and it sheds EVERYWHERE. Like I’m still finding jute fibers in my studio from a project I did last month. But it photographs beautifully and has this really organic texture. Just maybe don’t work with it while wearing black pants.
Sisal – I’ve only used this a few times because it’s scratchy and kinda stiff but if you want something really structured it’s perfect. Also holds up outdoors better than cotton if you’re thinking covered patio situation.
Tools You Actually Need
You don’t need a ton of stuff which is nice. Here’s what’s in my rope art kit:
- Sharp scissors or rope cutter (regular scissors get dull SO fast)
- Hot glue gun – the high-temp kind, not the wimpy craft one
- Measuring tape because eyeballing it leads to crooked designs (ask me how I know)
- Pins or small nails for holding rope in place while you work
- Lighter for sealing rope ends so they don’t unravel
- Wood glue if you’re attaching to wood backing
Oh and another thing – get yourself a cutting mat if you’re doing this on any surface you care about. I ruined my coffee table with glue drips and rope fiber ground into the finish.
The Backing Situation
This is gonna sound obvious but you need something to attach your rope to unless you’re doing a hanging macrame-style piece. I’ve tried a bunch of options:
Plywood is cheap and sturdy. I usually get the 1/4 inch stuff from Home Depot and have them cut it to size because I drive a sedan and full sheets don’t fit. You’ll want to paint or stain it first unless you’re covering the whole thing with rope.
Canvas boards work great for smaller pieces. The texture gives the glue something to grip. I did this whole series of 12×12 rope designs on canvas boards and they sold really well at a local art market.
Driftwood or reclaimed wood – okay this is more advanced but if you can find good pieces it looks AMAZING. I have this driftwood piece in my living room with rope wrapped around it in this spiral pattern and people always ask about it. Found the wood at the beach, let it dry for like two weeks, then went to town.
Design Ideas That Actually Work
Wait I forgot to mention – sketch your design first. I use graph paper because I’m bad at keeping proportions right otherwise. Doesn’t have to be fancy, just a rough idea of where the rope goes.
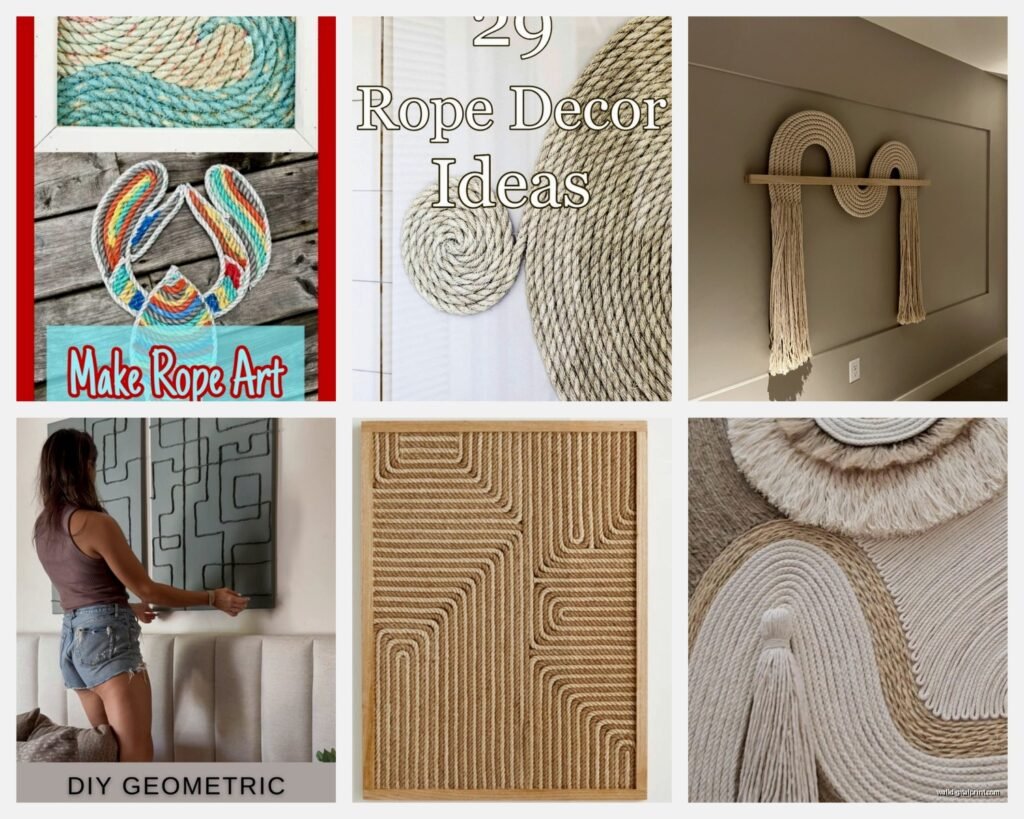
Spiral Designs
These are probably the easiest to start with. You literally just coil the rope from the center outward in a spiral. Use hot glue every few inches to keep it in place. The trick is keeping even spacing between the coils – I use a pencil as a spacer, just slide it along as I go.
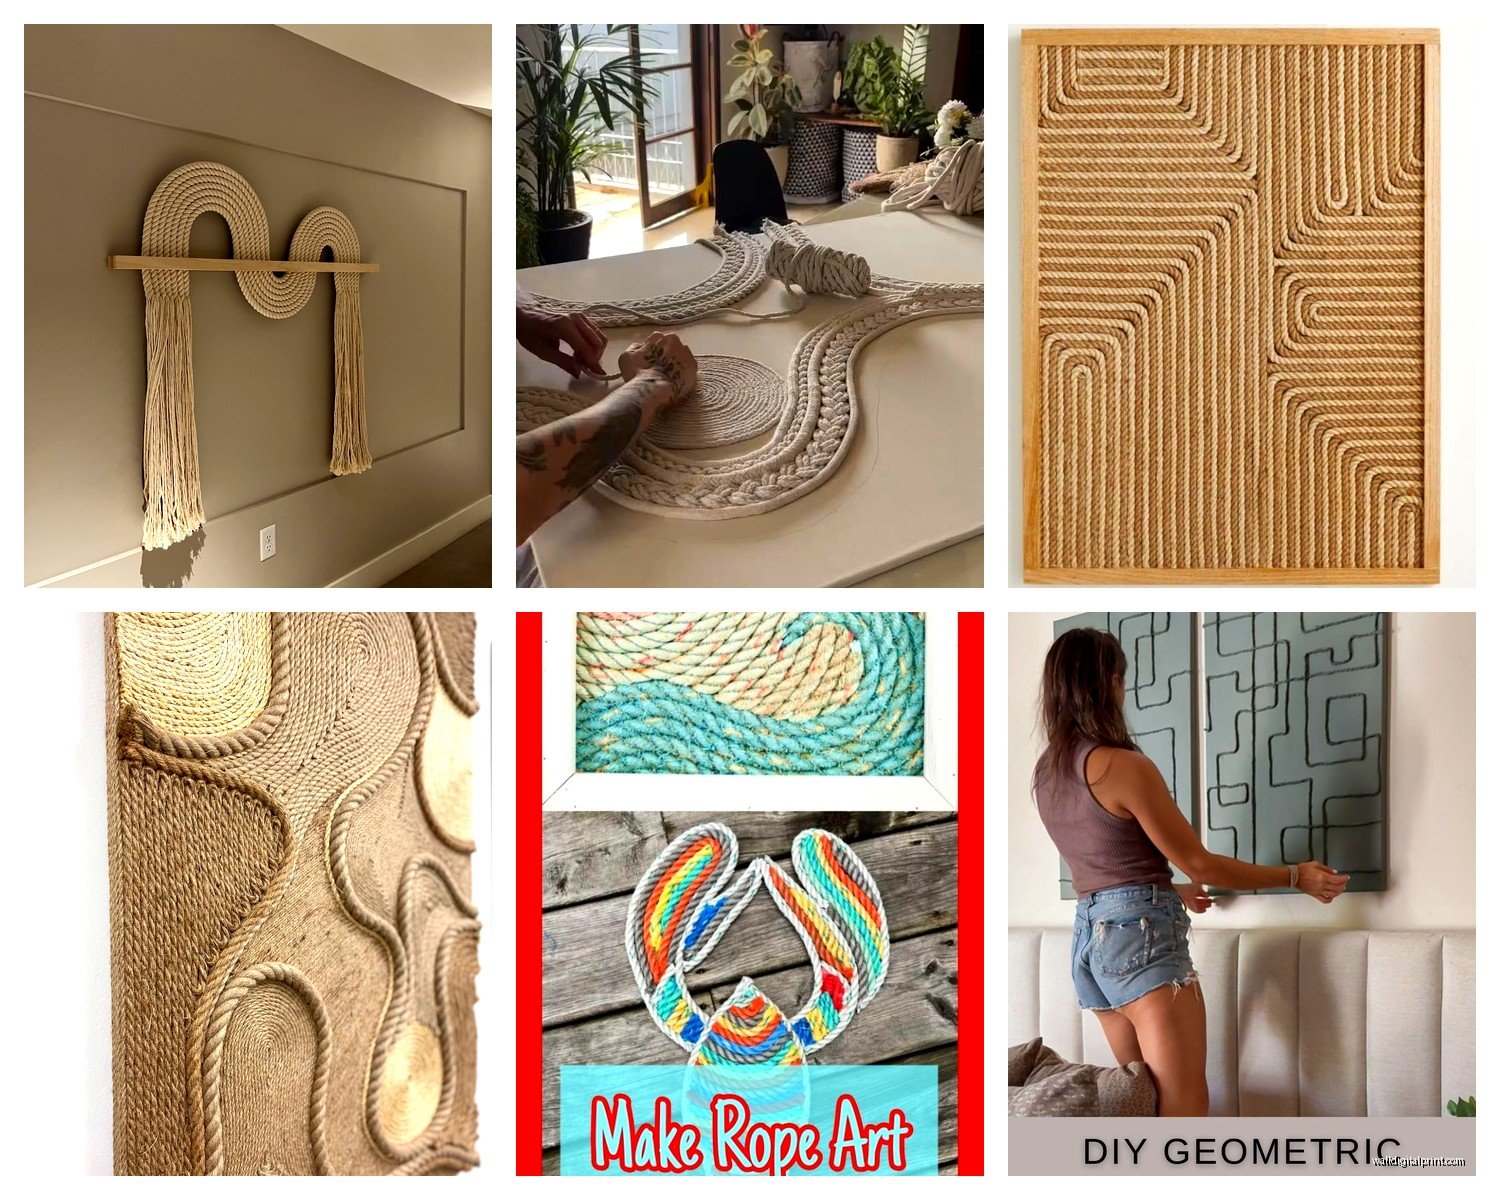
I made one of these with 10mm cotton rope on a round wood base and it turned out so good. Took maybe two hours including drying time. My cat knocked it off the wall three times before I figured out I needed better hanging hardware though.
Geometric Patterns
Triangles, hexagons, that kind of thing. These need more planning but look super modern. What I do is mark out the shape with pins first, then lay the rope along the lines. For sharp corners you gotta cut and restart the rope – trying to bend it around corners looks messy.
Pro tip: when you cut rope for corners, angle the cuts so they fit together better. Like a 45-degree cut instead of straight across.
Word or Letter Designs
Okay so funny story – someone commissioned me to make their kid’s name in rope and I thought it would be easy but curves are HARD. Cotton rope works better for this because it’s more flexible. You’ll need to use a lot of pins to hold the shape while the glue dries.
Script fonts are easier than blocky letters because you can do them in one continuous piece mostly. Block letters mean lots of cutting and matching ends.
Nautical Knots as Art
This is where manila rope really shines. Learn a few basic knots – monkey’s fist, figure eight, carrick bend – and mount them on a backing. I did a series of these with different knots on individual wood squares and hung them in a grid. Super nautical without being too literal about it.
YouTube is your friend for learning knots. I watched this one guy’s channel while eating dinner for like a week straight and now I can tie way too many knots.
Actually Making the Thing
Let’s talk process because this is where people usually mess up.
Step 1: Prep your backing. Paint it, stain it, seal it, whatever you’re doing. Let it dry completely. I’ve definitely glued rope to wet paint before and it just… doesn’t work.
Step 2: Mark your design lightly with pencil. These marks will be covered by rope so don’t worry about it being perfect.
Step 3: Cut your rope pieces if you’re doing a geometric design. Cut them longer than you think you need because you can trim but you can’t add length.
Step 4: Seal the ends with a lighter. Just a quick pass through the flame so the fibers melt together slightly. Don’t hold it in the flame or you’ll catch the whole thing on fire (yep, did that once).
Step 5: Start gluing. I usually do a thin line of glue on the backing, press the rope down, hold for a few seconds. For hot glue you gotta work fast because it sets quick.
If you’re using wood glue it takes longer but you have more time to adjust. I prefer hot glue for most stuff because I’m impatient but wood glue is stronger for pieces that’ll get touched a lot.
The Glue Debate
This is gonna sound weird but I’ve tested like eight different adhesives and here’s what actually works:
Hot glue: Fast, strong enough for wall art, shows through natural rope a bit but you can’t really see it. Best for cotton and manila rope on wood.
Wood glue: Stronger bond, takes forever to dry, can soak through thinner rope and discolor it. Good for jute and sisal.
E6000: Industrial strength, smells terrible, takes 24 hours to cure fully, but it’s basically permanent. I use this for outdoor pieces or anything that needs to be really durable.
Fabric glue: Doesn’t work. Tried it once, the rope just fell off. Don’t waste your money.
Finishing Touches
Once your design is glued and dry you gotta think about hanging it. Regular picture hanging wire works for lighter pieces. For anything over like 3 pounds I use D-rings screwed into the backing with heavy duty picture wire.
Some people like to seal the whole thing with a clear spray but honestly I don’t usually bother unless it’s going somewhere that’ll get dusty. The natural rope texture is part of the appeal.
If you want to add color you can paint rope before or after assembling but it changes the texture. I did one piece with ombre rope – dyed it with fabric dye in sections – and it looked cool but was a huge hassle. Probably not worth it unless you’re really committed to a specific color scheme.
Common Problems I’ve Run Into
Rope unraveling: Seal those ends! Every single one. I got lazy on a project once and three months later it looked all frayed and messy.
Uneven spacing: Use a spacer tool or mark guidelines. Your eye will lie to you about what’s even.
Glue showing: Use less than you think you need. You can always add more but removing dried glue from rope is impossible.
Rope twisting: Some rope wants to twist as you lay it. Pin it down frequently to keep it flat, or embrace the twist if it looks good.
Wrong rope thickness: Thicker isn’t always better. I tried to make a detailed design with 12mm rope once and it just looked chunky and weird. Match the rope thickness to the scale of your design.
Where to Actually Buy Rope
Craft stores are convenient but expensive. I get most of my stuff from Amazon now – there are sellers who do bulk rope for way cheaper. My client canceled last week so I spent an hour comparing prices and you can get 200 feet of 6mm cotton rope for like $25 if you shop around.
Hardware stores have good manila and sisal but limited colors. Etsy has specialty dyed rope but it’s pricey.
For backing materials just hit up Home Depot or Lowe’s. Their scrap wood section sometimes has perfect pieces for cheap.
Size Considerations
Start small if you’re new to this. Like 12×12 or 16×16. I made the mistake of trying a 4 foot piece as my first project and it took forever and my arms hurt from holding the glue gun.
Bigger pieces need thicker rope or they look stringy. As a general rule: under 18 inches use 6mm, 18-36 inches use 8-10mm, bigger than that go 10mm or thicker.
Styling These Things
Okay so you made the art, now what? Rope wall art works best in spaces that already have natural textures – wood furniture, linen fabrics, plants. It can look out of place in super modern sleek spaces unless you do a really geometric design.
I usually hang them over beds, on accent walls, in bathrooms (they hold up fine in humidity), entryways. They’re lightweight enough that command strips work for smaller pieces which renters love.
Group small rope pieces together gallery wall style. Mix in some other textures like woven baskets or macrame. Don’t go overboard though – I saw someone’s house once that had rope art in every single room and it was too much.
The natural color works with basically any color scheme but looks especially good with whites, blues, greens, and warm woods. That whole coastal grandmother aesthetic everyone’s into right now.
Anyway that’s basically everything I know about rope wall art from actually making and selling these things. The best way to learn is honestly just to try it – get some rope and glue and mess around. Your first one probably won’t be perfect but you’ll figure out what works. I still have my first attempt in a closet somewhere and it’s hilariously bad but you gotta start somewhere right?