Wall Art Guide, Wall Art Tutoriels
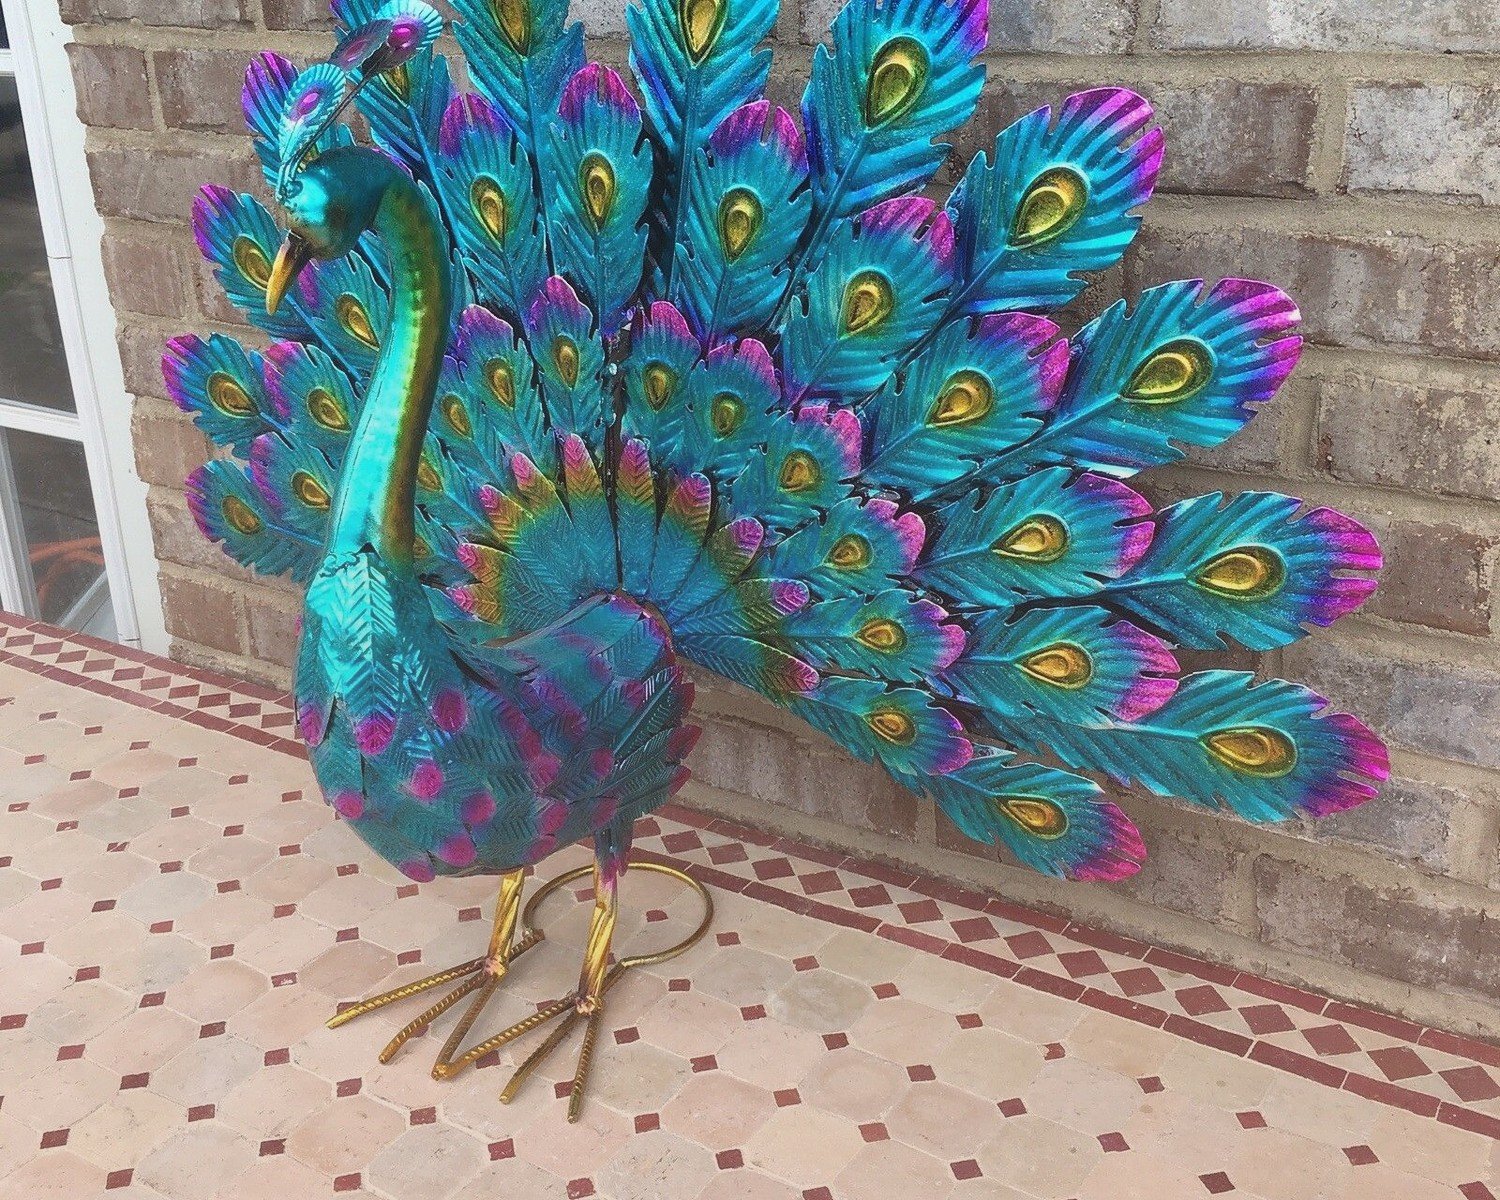
Peacock Metal Wall Art: Sculptural Colorful Bird Designs
Mar
So I’ve been down this peacock metal wall art rabbit hole for like three months now because a client wanted something “dramatic but not tacky” and honestly that’s when I discovered there’s SO much more to these pieces than those gaudy things your aunt has from HomeGoods.
First thing you gotta know is the material actually matters way more than I thought. Most peacock pieces come in either iron, aluminum, or steel, and they age completely differently. Iron develops this gorgeous patina over time if you’re into that aged look, but it’s heavy as hell and you need serious anchors. I learned this the hard way when one partially ripped out of my client’s drywall because I underestimated the weight. Aluminum is lighter and won’t rust, but it can look cheap if the craftsmanship isn’t there. Steel sits in the middle – decent weight, holds detail well, but you want powder-coated or it’ll rust in humid areas.
The powder coating thing is huge actually. I was staging a beach house last year and the homeowner insisted on metal art near the windows… within six months the non-coated piece started showing rust spots. Powder coating creates this protective layer that’s baked on, not just painted. When you’re shopping, flip the piece over or check the product specs – it should specifically say powder-coated or weather-resistant coating.
Size Considerations That Nobody Talks About
Okay so funny story, I bought this absolutely stunning 48-inch peacock for my own living room without actually measuring the wall space properly because I was watching The Crown and got distracted. The tail feathers extended way further than I expected and it ended up overlapping my window trim. Peacock art is deceptive because the body might be compact but those tail feathers fan out like crazy.
Here’s what actually works: measure your wall width and height obviously, but then subtract at least 8-10 inches from your available space for the tail spread. Most designs have feathers that curve outward and you need breathing room. A 36-inch peacock typically needs about 44-46 inches of actual wall space when you account for the full spread.
For standard walls (8-foot ceilings), I usually recommend nothing larger than 40 inches unless you’re doing a feature wall situation. Anything bigger starts overwhelming residential spaces unless you’ve got like cathedral ceilings or a really large blank wall situation going on.
Color Finishes and What They Actually Look Like IRL
The photos online are such liars about metal finishes. I’ve ordered probably 15 different pieces at this point and the color representation is maybe 60% accurate at best.
Metallic/Natural Metal Finishes:
These are usually bronze, copper, silver, or brass tones. They photograph really warm and glowy but in person they’re more muted. Bronze reads almost brown in low light. Copper develops a greenish patina if it’s real copper (most aren’t, they’re copper-toned paint). Silver/brushed metal shows every fingerprint and dust particle – learned that one when my cat decided the tail feathers were a toy.
Hand-Painted Options:
This is where it gets interesting. The traditional peacock colors – teals, blues, greens, purples – can either look amazing or like a carnival depending on the paint quality. Cheaper pieces use flat paint that looks plasticky. What you want is either metallic paint that has depth or multiple layers with shading. I have one piece that’s hand-painted with like five different blue tones and it actually looks dimensional.
The multi-colored glitter or jewel-toned ones with embedded glass or crystals… they’re very specific taste. I had a client who loved hers but honestly it catches light in this disco ball way that’s not for everyone. Great for maximalist spaces or if you’re going for that Bollywood-inspired look.
Patina and Aged Finishes:
These are having a moment right now. Verdigris (that blue-green aged copper look) or rust-effect finishes give you instant vintage vibes. They work really well in industrial, farmhouse, or eclectic spaces. The thing is they’re usually painted to look aged rather than actually aged, so the effect can wear off over time if it’s not sealed properly.
Construction Methods That Affect Durability
Wait I forgot to mention this earlier but it’s super important – how the piece is actually constructed changes everything about how it holds up and looks on your wall.
Laser-Cut Metal:
This is the cleanest, most precise method. The edges are sharp and detailed, perfect for intricate feather designs. Most modern pieces use this. The downside is they can look a bit flat if there’s no additional sculpting or layering.
Hand-Hammered or Embossed:
These have actual dimension and texture. Someone literally shaped the metal to create depth in the feathers and body. They catch light differently throughout the day which is cool, but they’re pricier and heavier. I have one that’s hand-hammered copper and the way the feathers have actual ridges and curves makes such a difference.
Layered Construction:
This is my favorite technique. Multiple pieces of metal are layered on top of each other at different depths, creating a 3D effect. The tail feathers might have three layers, each cut slightly differently and spaced apart with small spacers. This creates actual shadows and depth. When you’re looking at product photos, check if you can see gaps or spacing between elements – that’s your clue it’s layered.
Wire Work:
Some designs incorporate wire for delicate details like the eye feathers or decorative elements. These are beautiful but fragile. Not great if you have kids or pets who might bump into it.
Installation Reality Check
Okay so this is gonna sound weird but I’ve installed enough of these to know that the hanging hardware they include is usually inadequate. Like criminally inadequate.
Most peacock pieces come with these tiny sawtooth hangers or basic D-rings that are fine for lightweight frames but not for metal sculpture. Here’s what I actually use:
For pieces under 10 pounds on drywall: heavy-duty picture hangers rated for at least 20 pounds, or toggle bolts if I can’t find a stud.
For pieces 10-25 pounds: I’m finding studs and using wood screws directly into the stud, or heavy-duty toggle bolts if studs aren’t where I need them. I usually add felt pads to the back bottom corners so the piece doesn’t scratch the wall when it settles.
For pieces over 25 pounds: French cleats or heavy-duty mounting brackets. The piece needs to be secured at multiple points. I’ve seen too many disasters from people trusting a single hanging point.
The tail feathers create weird weight distribution too – the center of gravity isn’t where you think it is. I always hold the piece up first to find the natural balance point before deciding where to attach hangers.
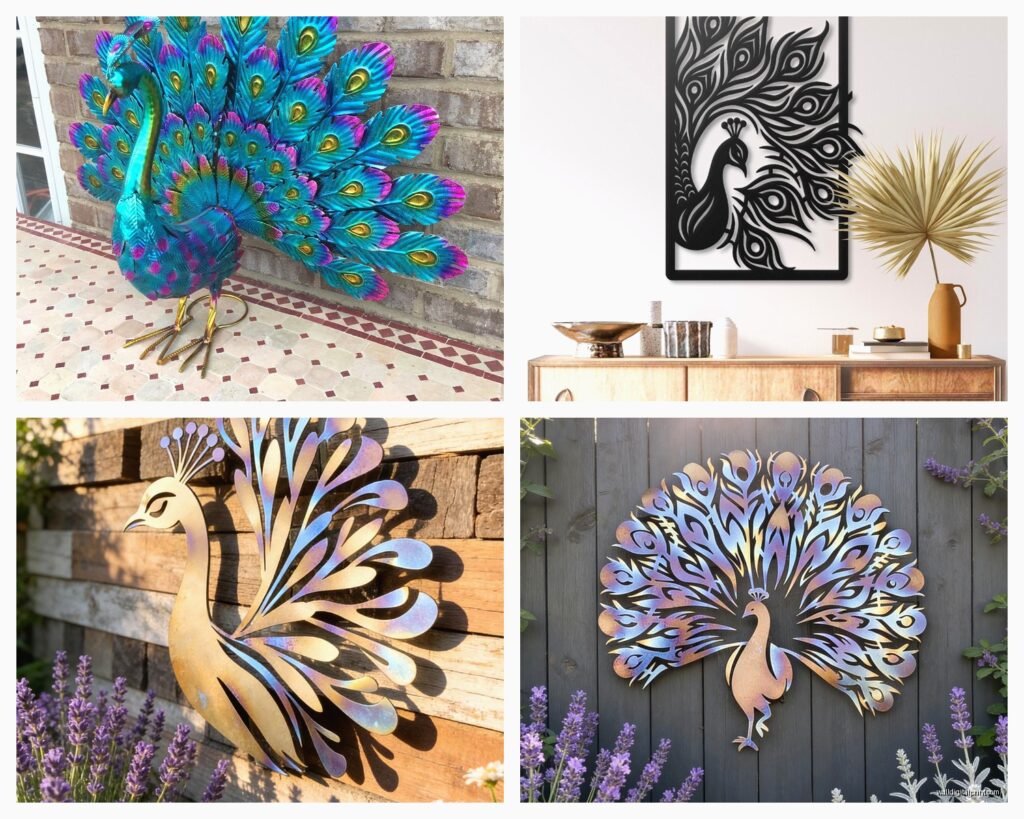
Style Variations Beyond Traditional
So there’s like this whole world of peacock designs that aren’t the classic full-spread tail view everyone thinks of.
Profile/Side View Peacocks:
These show the bird from the side, often with the head turned and tail trailing down. They’re more vertical and work great in narrow wall spaces like hallways or between windows. Less dramatic but more elegant somehow.
Abstract Interpretations:
Just the suggestion of a peacock – maybe just the eye feathers in a circular pattern or geometric shapes that reference peacock colors. These work in modern spaces where a literal peacock would be too traditional.
Peacock Feather Clusters:
Not the full bird, just a grouping of tail feathers. These are super versatile and you can do multiples in a gallery wall situation. I used three separate feather pieces in a client’s bedroom and it looked way more sophisticated than one big bird.
Mated Pairs or Multiple Birds:
Some designs show two peacocks together or a peacock with a peahen. These are larger scale and make more of a statement, good for really big walls or outdoor spaces.
Maintenance Nobody Mentions
My dog sheds like crazy so I’ve become an expert at cleaning these things. Dust collects in all those feather details and it’s annoying.
For regular dusting, a microfiber cloth works okay on smooth surfaces but you need a soft brush for detailed areas. I use a clean paintbrush to get into the crevices. Compressed air works great too if you’ve got it.
For actual cleaning: mild soap and water with a soft cloth, then dry immediately. Don’t use harsh cleaners or abrasive materials – they’ll strip finishes. If you have a powder-coated piece, it’s pretty durable but still don’t go crazy with chemicals.
The painted finishes can fade over time especially in direct sunlight. UV protection spray can help but honestly if it’s in a sunny spot, expect some color shift over a few years.
Where to Actually Buy Quality Pieces
I’ve ordered from everywhere at this point. Wayfair and Overstock have huge selections but quality is hit or miss – read reviews carefully and look for mentions of actual weight and material thickness. Amazon is similar, lots of options but you’re gambling on quality.
Etsy has amazing handcrafted options from individual metal artists. More expensive but the craftsmanship is usually way better. I found this artist in India who does incredible hand-painted pieces with actual depth and shading, not just flat color.
HomeGoods and TJ Maxx sometimes have decent pieces at good prices but it’s totally random what they’ll have. I check whenever I’m there because occasionally you find something great.
For high-end stuff, Anthropologie and West Elm carry some beautiful options that are pricier but consistently good quality. CB2 has more modern interpretations if you want something less traditional.
Local metal artists and craft fairs are actually great sources. You can see the piece in person, feel the weight, check the construction. Plus you’re supporting individual artists which is cool.
Placement Ideas That Actually Work
I’ve tried these in basically every room type at this point. Living room above the sofa is obvious but make sure you have at least 6-8 inches clearance above the sofa back.
Dining rooms are surprisingly great for peacock art – there’s something fancy and decorative about them that fits the formal dining vibe. I did one above a sideboard and it looked amazing.
Bedrooms work if you go for the more elegant designs rather than super colorful ones. A bronze or copper-toned piece above the bed adds that sculptural element without being too loud.
Outdoor covered spaces like patios or porches are perfect if you have weather-resistant pieces. The movement of the design works really well outdoors.
Entryways and hallways need the vertical profile designs usually, unless you have a really wide entry wall.
Oh and another thing – these look really good with proper lighting. If you can add a picture light or position it where natural light hits it during the day, the dimensional details really pop. I installed uplighting below one piece and the shadows the tail feathers cast were incredible.
I gotta say though, the biggest mistake people make is buying one that’s too small for their space. When in doubt, go bigger than you think you need. A too-small peacock just looks lost on a large wall, but an oversized one makes a statement even if it feels scary at first.
The other thing is considering your existing decor colors – if you have a specific color scheme going, look for pieces that pull in at least one of your existing colors so it feels cohesive rather than random.
Anyway that’s basically everything I’ve learned through trial and error and lots of client projects. These pieces can be absolutely stunning when you get the right one for your space and install it properly.