Wall Art Guide, Wall Art Tutoriels
Sound Diffuser Wall Art: Acoustic Panel Functional Design

Apr
So I’ve been down this rabbit hole for like three months now because one of my clients wanted their home office to look less “corporate acoustic foam” and more “actual design piece” and honestly it turned into this whole thing where I tested way too many materials.
The Basic Material Breakdown Nobody Tells You Upfront
Okay so acoustic panels that actually look good come down to basically three material categories and they all do slightly different things. There’s wood slat diffusers, fabric-wrapped absorbers, and then these newer polyester fiber panels that everyone’s obsessed with on Instagram but like… they’re not all created equal.
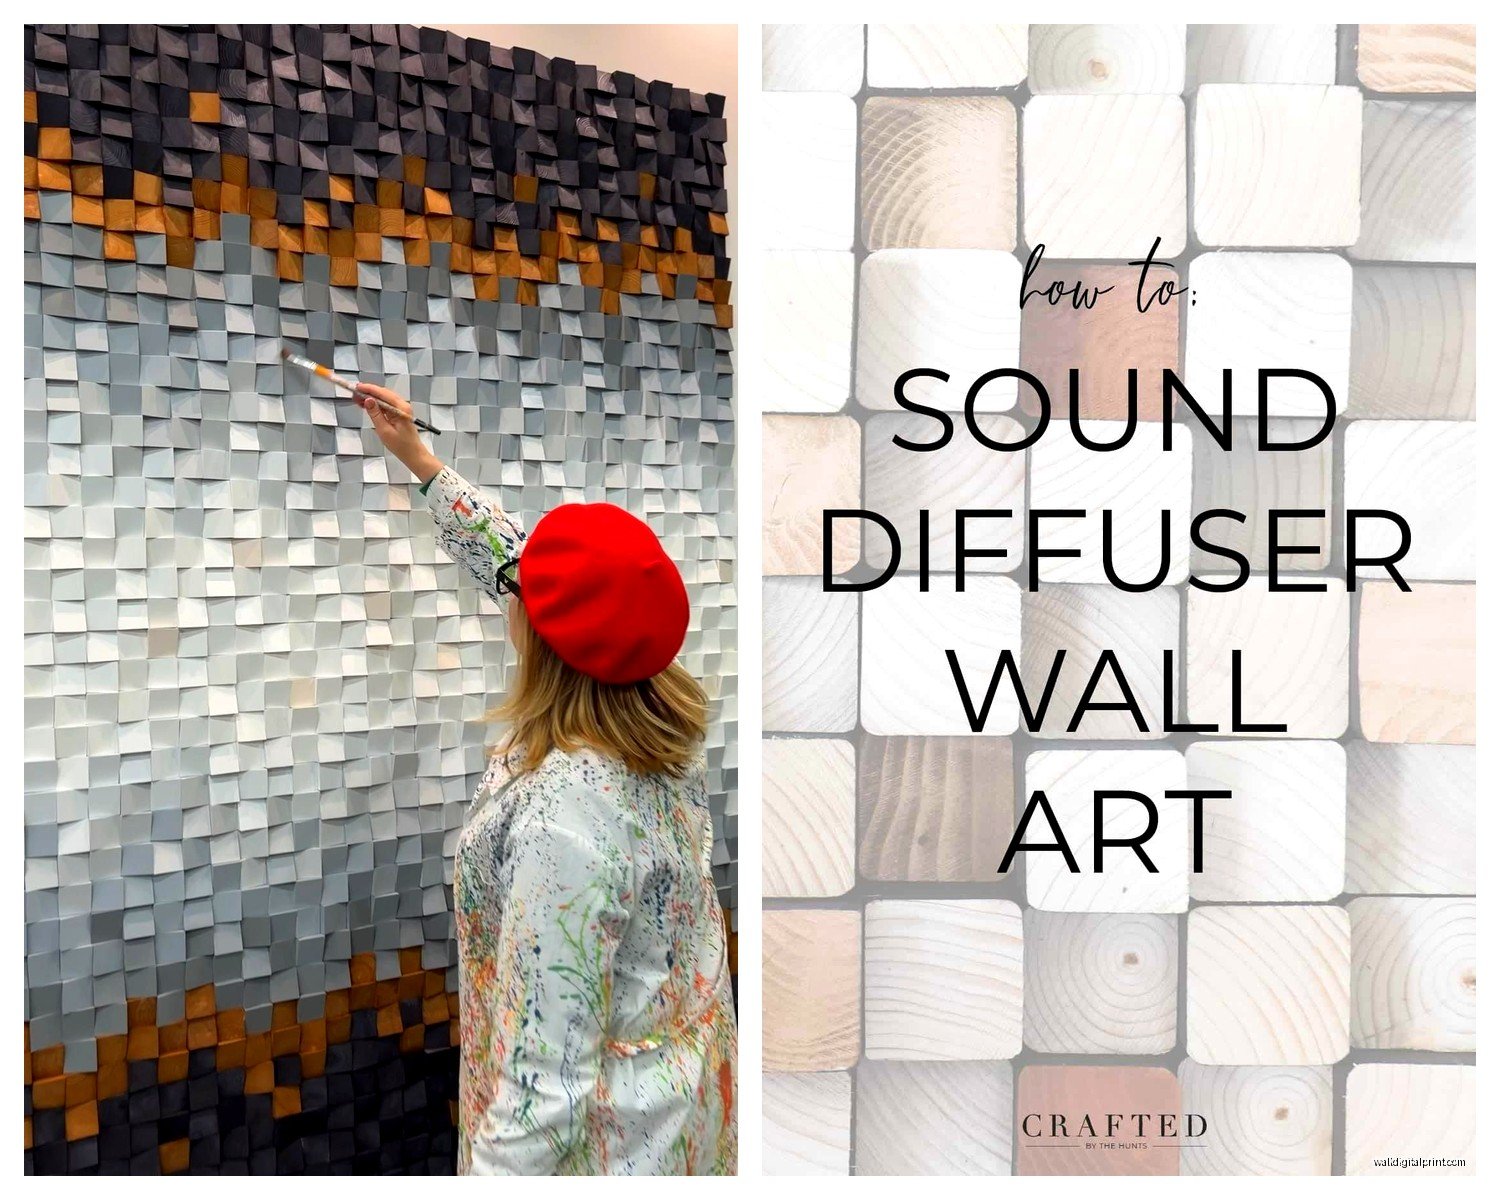
Wood slat diffusers are what you want if you’re dealing with flutter echo or that weird boxy sound. They scatter sound waves instead of just absorbing them. I used cedar on a living room project last year and the smell was amazing for like two weeks but then my client’s cat kept trying to scratch it so we had to mount them higher. The thing with wood is you need the slats spaced specifically—usually between 0.5 to 2 inches apart depending on what frequencies you’re trying to diffuse. I usually go with 1 inch spacing because it handles mid-range frequencies which is where most speech and music lives.
Wood Types That Actually Work
- Pine: cheap, easy to stain, but kinda soft so it dents if you’re not careful during installation
- Oak: looks expensive because it is, but holds up forever and you can get these gorgeous grain patterns
- Walnut: my personal favorite for that mid-century vibe everyone wants right now
- Maple: super hard, takes paint well if you want color
- Cedar: smells great, naturally resistant to moisture so good for basements
The backing material matters just as much as the slats though. Most people use MDF or plywood as the base, and then you’re gonna want to add some kind of acoustic felt or foam behind it. I learned this the hard way when my first DIY attempt just looked pretty but did absolutely nothing for the sound.
Fabric-Wrapped Panels Are Where I Started
These are the ones that look like giant framed art pieces and honestly they’re the easiest to make look intentional in a space. The core is usually rockwool or fiberglass—I know, sounds itchy and terrible, but it works incredibly well for absorption.
Rockwool is denser and handles lower frequencies better. It’s also fire-resistant which is why you see it in commercial spaces. But it’s heavier and you need proper wall anchors. I used Roxul Safe’n’Sound for a home theater project and each panel weighed like 8 pounds.
Fiberglass is lighter and cheaper but you gotta be careful during construction because that stuff gets everywhere. Wear a mask and long sleeves or you’ll be itchy for days. Been there.
Fabric Choices That Don’t Look Cheap
The fabric is where you make it look like actual art instead of studio equipment. You need something acoustically transparent—basically the sound needs to pass through to hit the absorptive core. Test it by holding it up to your mouth and talking through it. If it muffles your voice significantly, it’s too dense.
I’ve used:
- Guilford of Maine FR701: this is the industry standard, comes in like 60 colors, flame-retardant
- Linen: looks amazing and casual but make sure it’s not too tightly woven
- Burlap: very on-trend right now for that organic look, naturally loose weave
- Cotton duck canvas: takes dye really well if you want custom colors
- Polyester blends: wrinkle-resistant which matters more than you’d think
Oh and another thing—you can totally use printed fabric or even create photo prints on acoustically transparent material. I did a whole gallery wall for a client where three of the “art pieces” were actually acoustic panels with printed botanical illustrations. Nobody could tell the difference.
Polyester Fiber Panels Are Having a Moment
These are made from recycled plastic bottles usually and they come in every color imaginable. Brands like Acoustimac and ATS Acoustics sell them pre-made, or you can buy the raw material and cut it yourself.
The cool thing is they’re naturally sound-absorptive without needing a fabric wrap, so you get this clean monolithic look. They’re also way lighter than rockwool panels—like 2-3 pounds for a 2×4 foot panel. And they don’t irritate your skin which is honestly a huge plus.
I tested the 2-inch thickness versus 1-inch and the difference is noticeable if you’re dealing with bass frequencies. For general sound dampening in a living space though, 1-inch works fine and looks less bulky on the wall.
Installation Approaches I’ve Actually Used
Okay so this is gonna sound weird but the way you mount these matters almost as much as the material itself. If you mount a panel flat against the wall, it works okay. If you leave a 1-2 inch air gap behind it, the performance improves significantly especially for lower frequencies.
I use these methods depending on the situation:
- Z-clips: French cleat system, super secure, easy to remove and reposition
- Command strips: only for lightweight polyester panels, not my favorite but works for renters
- Wooden frame standoffs: creates that floating effect and the air gap I mentioned
- Direct adhesive: spray adhesive works for fabric-wrapped panels going on smooth walls
My client canceled last Tuesday so I spent an hour comparing Z-clip brands and honestly the Hangman brand ones are worth the extra few dollars. The cheaper versions from Amazon don’t grip as well.
DIY Construction That Won’t Fall Apart
If you’re building these yourself—which honestly saves so much money—here’s the process I follow. You need a frame first, usually made from 1×4 or 1×3 wood boards. I use pine because it’s cheap and you’re covering it anyway.
Cut your frame pieces, join them with wood glue and brad nails or screws. Make sure it’s square by measuring the diagonals. Cut your acoustic material to fit inside the frame—it should be snug but not compressed. Compressed acoustic material loses effectiveness.
For fabric-wrapped panels, stretch your fabric over the front and staple it to the back of the frame. Start in the middle of each side and work toward the corners, pulling it taut. The corners are annoying—I do hospital corners like you’re making a bed. There’s probably a better way but this is what works for me.
The Stuff I Keep In My Supply Kit
- Staple gun with 3/8-inch staples
- Spray adhesive (3M Super 77)
- Acoustic sealant for gaps
- Utility knife with fresh blades
- Measuring tape and carpenter’s square
- Eye hooks and picture wire for hanging
- Sandpaper for smoothing frame edges
Wait I forgot to mention—if you’re doing wood slat diffusers, the pattern matters. Random spacing works better than uniform spacing for breaking up sound waves. There are actually mathematical formulas for optimal diffusion patterns but honestly I just vary my slat spacing between 0.5 and 1.5 inches randomly and it works fine for residential applications.
Mixing Absorption and Diffusion
This is where it gets interesting. You don’t want a room that’s completely dead-sounding—that’s actually uncomfortable. You want a mix of absorptive panels and diffusive panels. The rule I follow is like 60/40 or 70/30 absorption to diffusion.
Put absorbers at first reflection points—the spots on walls where sound bounces directly from speakers to your ears. This is usually on the side walls in a living room or behind a desk in an office. Put diffusers on the back wall or anywhere you want to maintain some liveliness in the room.
I’m watching this restoration show right now where they’re refinishing old furniture and it’s making me think about how wood finishes affect acoustic properties. Matte finishes diffuse sound better than high-gloss finishes. So if you’re doing wood panels, skip the polyurethane or use a matte version.
Color and Pattern Strategies
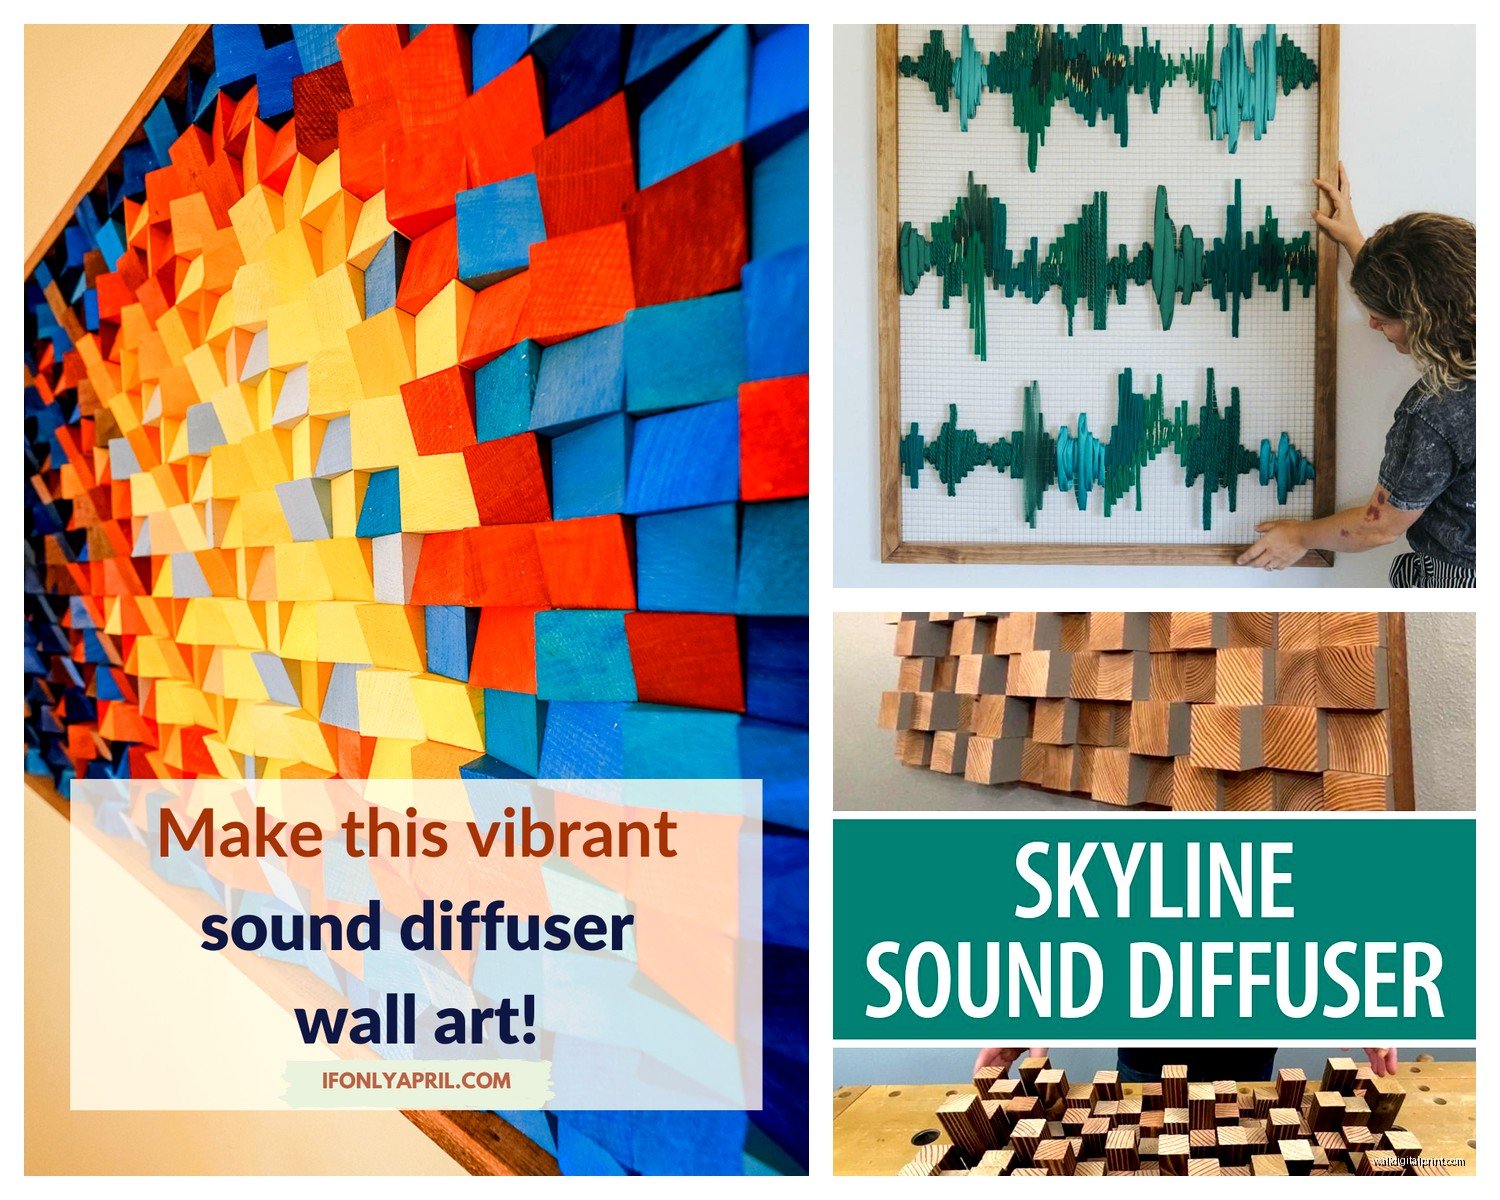
Since these are also art pieces, you gotta think about the visual composition. I group panels in odd numbers—three or five looks more dynamic than two or four. Vary the sizes too. A grid of identical panels reads as “acoustic treatment” but a collection of different sized panels in coordinating colors reads as “curated wall art.”
Colors matter for the room vibe obviously, but also lighter colors make a space feel bigger while darker colors add drama. I did a deep charcoal gray set for a home studio and it made the room feel like a proper creative space.
You can also do geometric patterns with different colored panels. I arranged hexagonal polyester panels in an ombre effect once—light gray to dark gray to black. Looked amazing and people always asked about it.
Actual Performance Testing
So here’s the thing nobody really talks about—unless you have professional acoustic measurement equipment, you’re mostly going by feel. I use a decibel meter app on my phone (not super accurate but good enough) and just clap in the room before and after installation.
Before panels, you’ll hear a longer reverb tail and maybe some echo. After panels, the clap should sound tighter and more controlled. If you’re treating a home theater, dialogue should be clearer. If it’s an office, video calls should have less of that hollow sound.
The biggest difference I’ve noticed is in rooms with hard surfaces—hardwood floors, big windows, minimal furniture. Those rooms desperately need acoustic treatment. A carpeted room with curtains and upholstered furniture already has some natural absorption happening.
Common Mistakes I’ve Made So You Don’t Have To
- Using fabric that’s too thick—it blocked sound from reaching the absorptive core
- Not leaving an air gap behind panels—performance was mediocre
- Mounting everything at ear height—you need coverage at different heights
- Only treating one wall—sound bounces everywhere so you need strategic placement
- Making panels too small—bigger panels are more effective for lower frequencies
- Ignoring the ceiling—it’s a huge reflective surface that people forget about
Oh and corners are super important. Bass frequencies accumulate in corners so putting absorptive panels there makes a noticeable difference. You can buy corner bass traps or just mount regular panels across the corner at an angle.
Budget Breakdown From My Projects
DIY fabric-wrapped panel using rockwool, pine frame, and budget fabric runs about $25-35 per 2×4 foot panel. Pre-made versions are like $80-150 each so you’re saving significant money.
Wood slat diffusers are more expensive because of the material and labor. A 2×4 foot walnut slat panel costs me around $60-80 in materials to build. Pre-made versions are easily $200-400.
Polyester fiber panels are middle-ground. Raw material is about $15-20 per 2×4 foot sheet, but you need a frame still so add another $10-15. Pre-made are $50-100.
For a typical living room I usually spec 6-8 panels total. So you’re looking at $150-280 for DIY fabric-wrapped, or $300-800 for pre-made depending on what route you go.
Where to Source Materials
I order rockwool from home improvement stores—it’s sold as insulation. Acoustic fabric from online retailers like ATS Acoustics or Acoustimac. Wood from local lumber yards because you can hand-select pieces with nice grain patterns. Polyester fiber panels from GIK Acoustics or direct from manufacturers.
Amazon has a bunch of options but quality is really variable. I’ve gotten panels where the fabric was wrinkled or the frame was warped. Better to go with specialized acoustic retailers even if it costs a bit more.
This is gonna sound random but I found amazing linen fabric at a local upholstery shop that was way cheaper than buying “acoustic fabric” online. Just test it first to make sure it’s acoustically transparent and you’re good to go.
The key is making these functional pieces look intentional in your space rather than like you’re trying to soundproof a recording studio. Mix them with regular art, vary the arrangements, choose colors that complement your existing decor, and most people won’t even realize they’re serving a functional purpose beyond looking good.