Wall Art Guide, Wall Art Tutoriels
Pressed Flower Wall Art: Dried Preserved Botanical Art
Aug
So I’ve been totally obsessed with pressed flower art lately and honestly it’s one of those things that looks way more complicated than it actually is. Like, my neighbor saw the piece I made for my dining room and assumed I bought it from some fancy botanical gallery but nope, just me, some flowers from the farmers market, and way too much time on a rainy Sunday.
Getting Your Flowers Ready
Okay so first thing, you gotta pick the right flowers. This matters SO much more than I thought it would. I learned this the hard way when I tried pressing some gorgeous peonies and they just turned into brown mush. Thick, water-heavy flowers are basically your enemy here.
What actually works: pansies, violas, cosmos, daisies, Queen Anne’s lace, ferns, and those delicate wildflowers you see everywhere. Flat-ish flowers are your best friends. I’ve had amazing luck with larkspur too, the colors stay vibrant for like ever.
The timing thing is crucial and I keep forgetting to mention this to people. You want flowers that are just about to hit their peak, not fully open and definitely not starting to wilt. Morning is best after the dew dries because moisture is gonna be your problem later.
Methods I’ve Actually Tried
The book method is classic for a reason. Heavy books, parchment paper or plain printer paper on both sides of the flower, stack more books on top. But here’s what nobody tells you, you need to change the paper every couple days or you get mold. Found that out when I opened my college textbook (finally putting it to use) and discovered fuzzy science experiments instead of pretty flowers.
I switched to using my flower press which honestly you can grab one for like $20-30 on Amazon. The one I have is just wooden boards with screws and cardboard layers. Way easier to check on things and swap out the moisture-absorbing papers without disturbing everything.
Oh and another thing, the microwave method exists and people swear by it but I’ve had mixed results. You put flowers between paper, microwave in short bursts, but I scorched an entire batch of violets trying to speed things up before a client meeting. My kitchen smelled like burnt garden for days.
The Actual Pressing Process
This is gonna sound obvious but arrange your flowers how you want them BEFORE pressing because once they’re flat and dried, moving them around gets tricky. They become super fragile, like one wrong move and your perfect daisy is now confetti.
If you’re using a book or press, layer it like this: cardboard or blotter paper, then parchment paper, your flower, another parchment paper, more cardboard. The cardboard absorbs moisture which is the whole point.
Wait time is usually 2-4 weeks. I know, I know, it feels like forever. I’m the worst at waiting so I usually have multiple batches going at different stages. Label them with dates using sticky notes because you will 100% forget when you started.
Testing for Dryness
The flower should feel papery and crispy, not leathery or bendable. If it’s still flexible at all, it needs more time. I rushed a batch once and they turned moldy inside the frame within a month, had to redo the whole thing.
Actually Making the Wall Art
Okay so funny story, I bought like five different types of frames before figuring out what actually works. You need frames with space between the glass and backing, or shadow box frames work great. Regular flat frames can crush delicate petals.
For backgrounds, I’ve used:
- Watercolor paper in cream or white (my go-to)
- Linen fabric stretched over cardboard
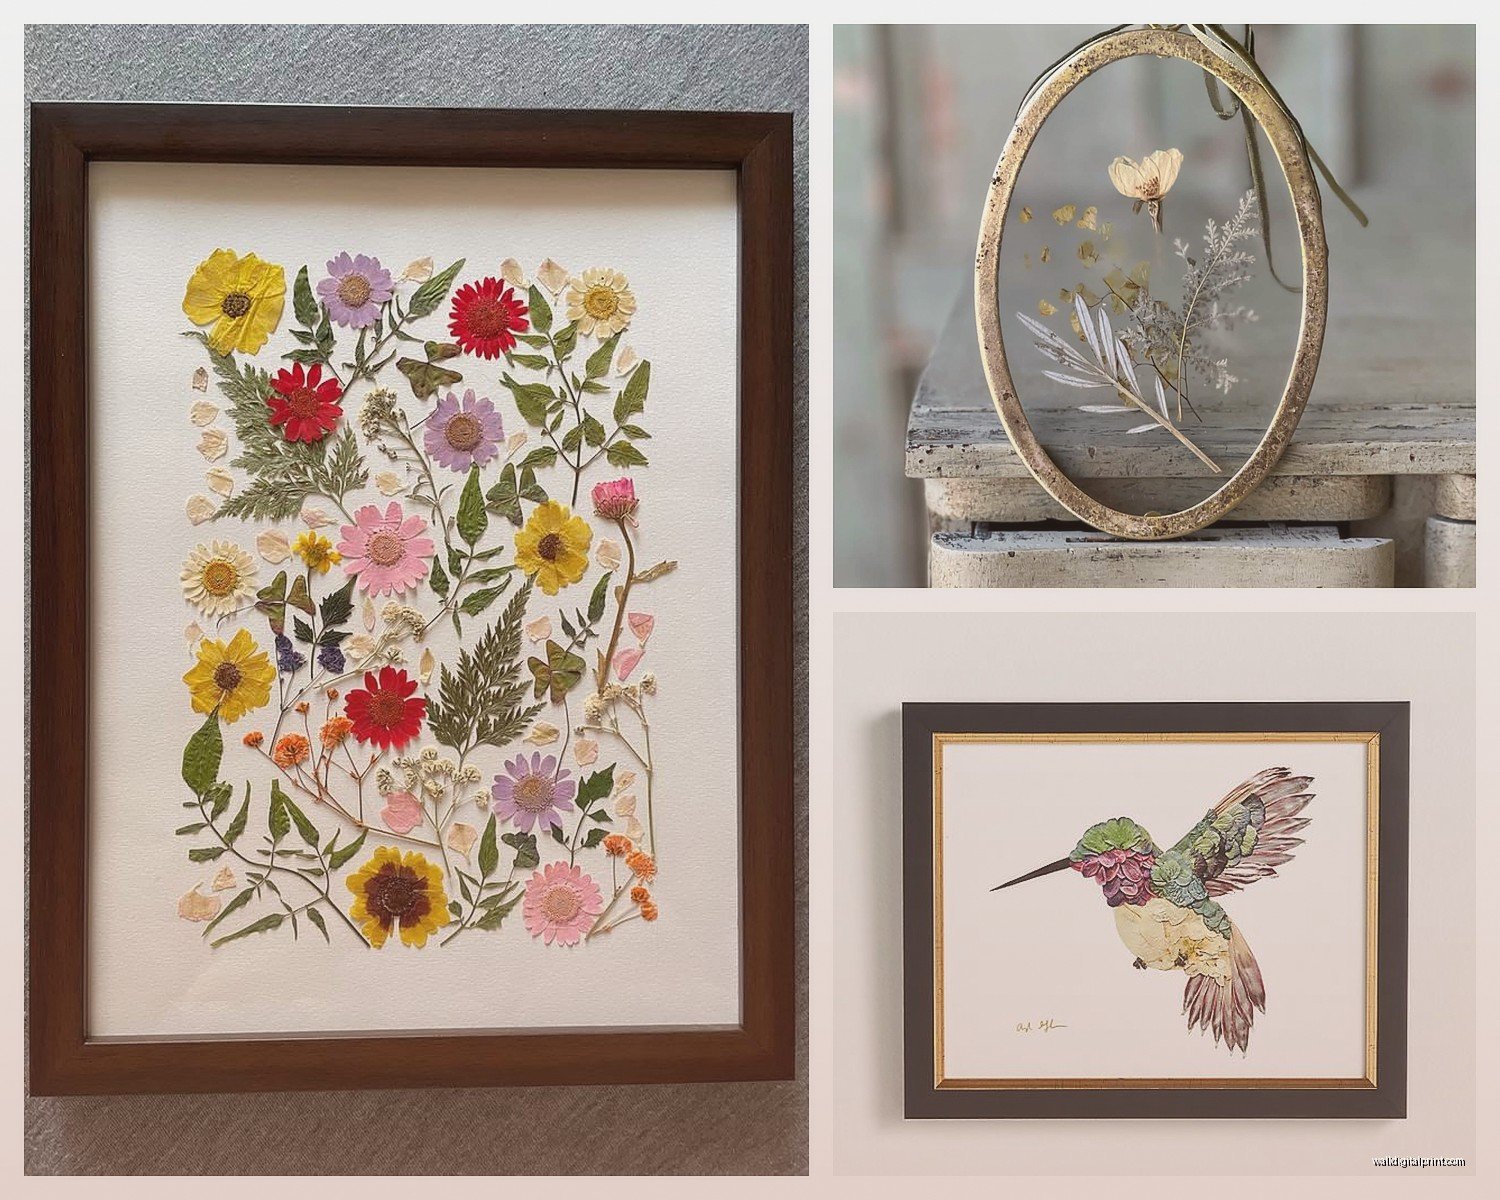
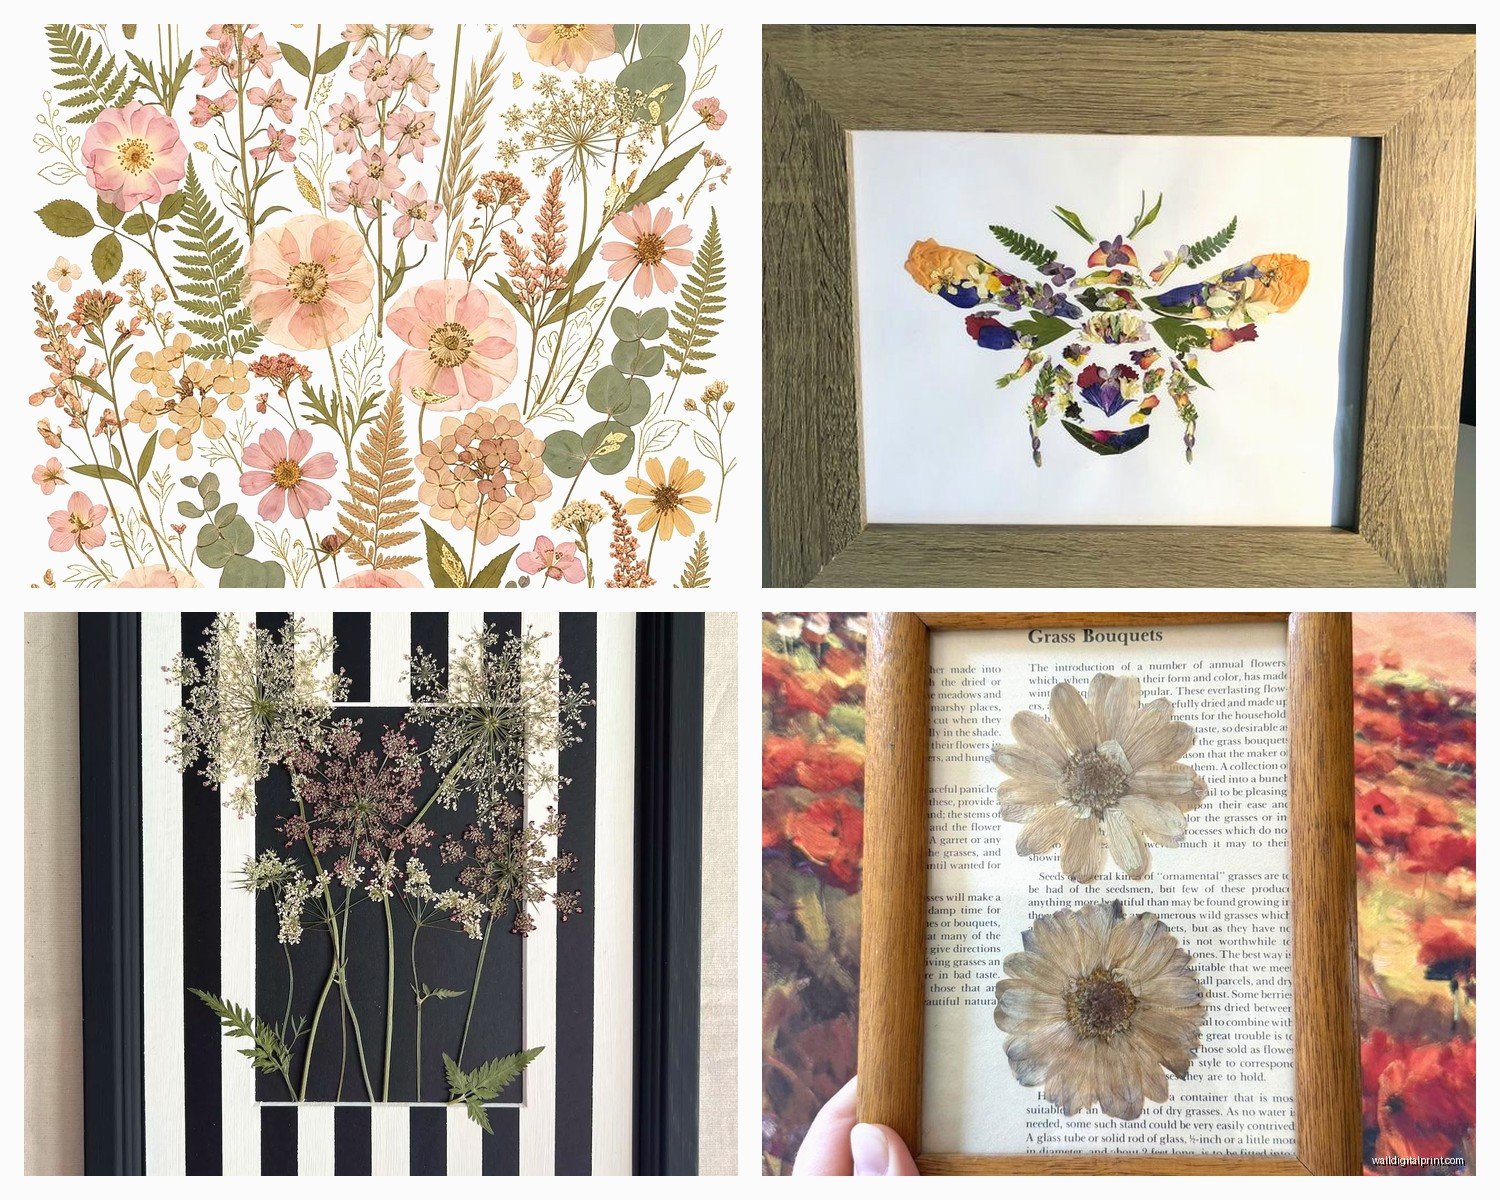
- Vintage book pages for a layered look
- Plain cardstock but it can look kinda cheap honestly
The arrangement part is where you can totally zone out in a good way. I usually turn on something mindless (been rewatching The Office for the millionth time) and just play around with layouts. Take photos of different arrangements before committing because once you glue them down, that’s it.
Adhesive Options That Won’t Ruin Everything
This took me forever to figure out. Regular glue is too wet and will wrinkle your flowers. What actually works:
PVA glue applied with a toothpick in tiny dots. Just the tiniest amount on the back of the flower, press gently. My hands were shaking the first time I did this because pressed flowers are SO delicate but you get the hang of it.
Double-sided tape works for sturdier elements like ferns or leaves. Cut tiny pieces, way smaller than you think you need.
Spray adhesive is what I use now for bigger projects but you gotta be careful. Light coat on the background paper, let it get tacky, then place flowers. Work in a ventilated area because that stuff is intense. My cat ran out of the room the first time I used it.
Design Ideas That Actually Look Good
I’ve seen so many pressed flower projects that look cluttered or too Pinterest-y. What works in real homes:
Simple botanical specimens, like one or three flowers arranged scientifically with handwritten labels underneath. Very apothecary vibes, works in modern spaces.
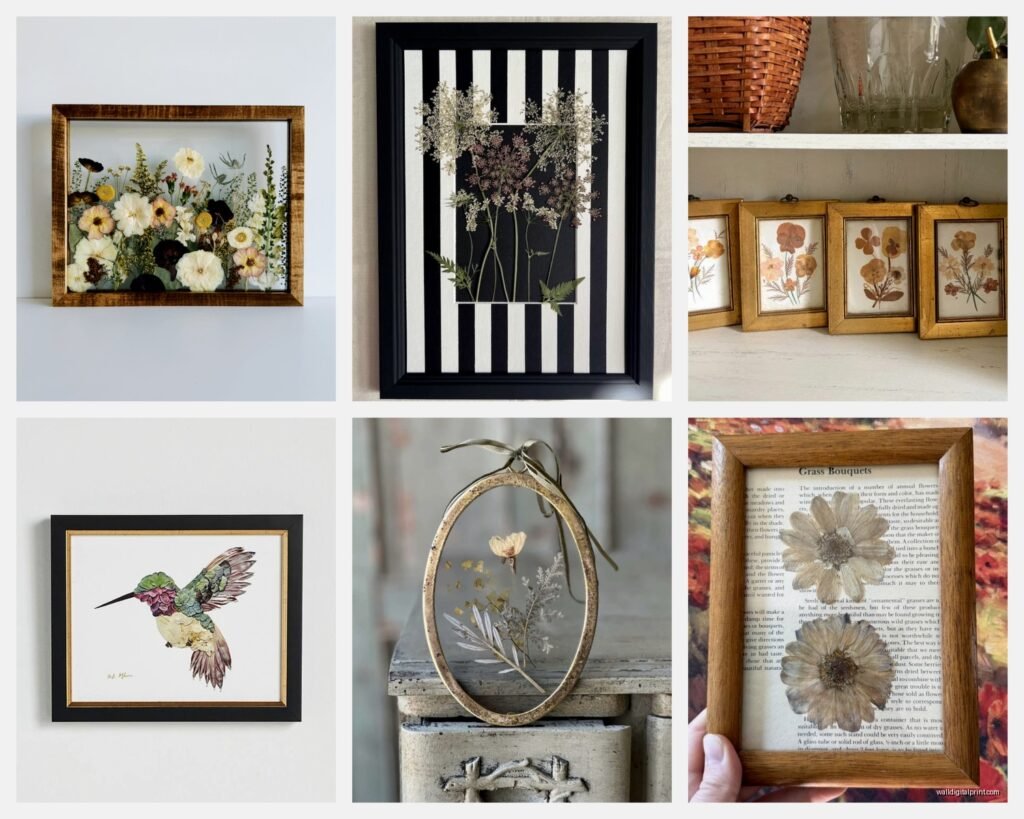
Symmetrical arrangements in matching frames as a gallery wall. I did this for a client’s hallway with five frames, each with a different flower type, all the same size and background. Looked expensive, cost maybe $60 total to make.
Wildflower meadow style where you layer different elements to create depth. This is more advanced but gorgeous. You arrange flowers and grasses like they’re growing naturally, with some elements overlapping.
Wait I forgot to mention, pressing leaves in fall is AMAZING. The colors stay pretty true and they’re already flatter than most flowers. Maple leaves, ginkgo, ferns, all beautiful.
Color Preservation Tricks
Some flowers just lose their color no matter what you do. Reds and pinks can turn brownish. But I’ve found that:
Blue and purple flowers hold their color best. Delphiniums stay that gorgeous blue basically forever.
Yellow flowers usually stay bright. Black-eyed Susans, coreopsis, all good choices.
White flowers can yellow over time but if you press them quickly and keep them out of direct sunlight, they stay pretty white.
You can use silica gel in the pressing process for better color retention but honestly it’s more work and for wall art that’s behind glass anyway, the regular method works fine.
Framing and Preservation
UV-protective glass is worth it if you’re spending time on a big piece. Regular glass works too but your art will fade faster in bright rooms. I learned this when a piece in my south-facing window looked totally washed out after six months.
Seal the back of your frame completely. I use kraft paper and double-sided tape to create a dust barrier. Sounds extra but it keeps bugs out and prevents moisture from getting in.
Don’t hang these in bathrooms or kitchens where humidity changes a lot. My first attempt in a bathroom got condensation inside the glass and the whole thing was ruined.
The Mounting Process
Once your design is glued down and completely dry (give it 24 hours), you’re gonna carefully place it in the frame. This part makes me nervous every single time because if you drop it or the glass shifts wrong, you can damage petals.
Have everything ready: clean glass, frame backing, your artwork, and those little points or tabs that hold everything together. Work on a clean surface with good lighting.
Place the glass in the frame first, then carefully lower your artwork onto it face-down, then add the backing. Secure with the frame hardware. Don’t rush this part.
Troubleshooting Common Problems
Flowers turning brown during pressing usually means too much moisture. Change your absorbent papers more frequently, like every 2-3 days for the first week.
Petals falling off after pressing means they weren’t dry enough or you’re handling them too roughly. Use tweezers for delicate positioning.
Mold is the WORST and it happens when there’s any moisture trapped. If you see even a tiny spot, you gotta toss that flower and start over.
Fading happens over time no matter what, but keeping artwork out of direct sunlight helps a ton. I rotate my pieces seasonally so nothing gets overexposed.
Where to Source Materials
Your own garden is obviously the best because it’s free and you can pick at the perfect time. I don’t have a huge garden but I’ve got a little cutting patch now just for pressing.
Farmers markets have amazing flowers and they’re usually fresher than grocery store bouquets. I tell the vendors I’m pressing them and sometimes they’ll point me to varieties that work well.
Wildflower foraging is fun but be mindful of what’s protected or private property. I found an amazing spot near my mom’s place with tons of Queen Anne’s lace and wild grasses.
Grocery store bouquets can work but avoid the ones with that flower food in the water, they’re often treated with stuff that affects drying. Simple bunches work best.
Advanced Techniques I’m Still Learning
Layering pressed flowers with other elements like vintage stamps, handwriting, or ephemera creates really unique pieces. I’m experimenting with this for art fair stuff.
Three-dimensional arrangements where you build up layers in a deep shadow box. Haven’t perfected this yet but when it works it’s stunning.
Resin coating is a whole other thing that preserves flowers in a hard, glossy finish. I tried this once and it was a disaster, definitely need more practice with mixing ratios and bubble removal.
The key thing I wish someone had told me at the beginning is just to start simple. One flower, one frame, see how it goes. I got overwhelmed looking at elaborate Pinterest boards and almost didn’t start at all. But honestly my favorite piece is still one of the first ones I made, just three purple violas in a simple white frame. Sometimes less really is more, as annoying as that sounds.
Make sure you date your pieces on the back too, it’s actually cool to look back and see when you made something. I wrote details about where the flowers came from on some of mine and it’s become this nice little record of different seasons and places.