Wall Art Guide, Wall Art Tutoriels
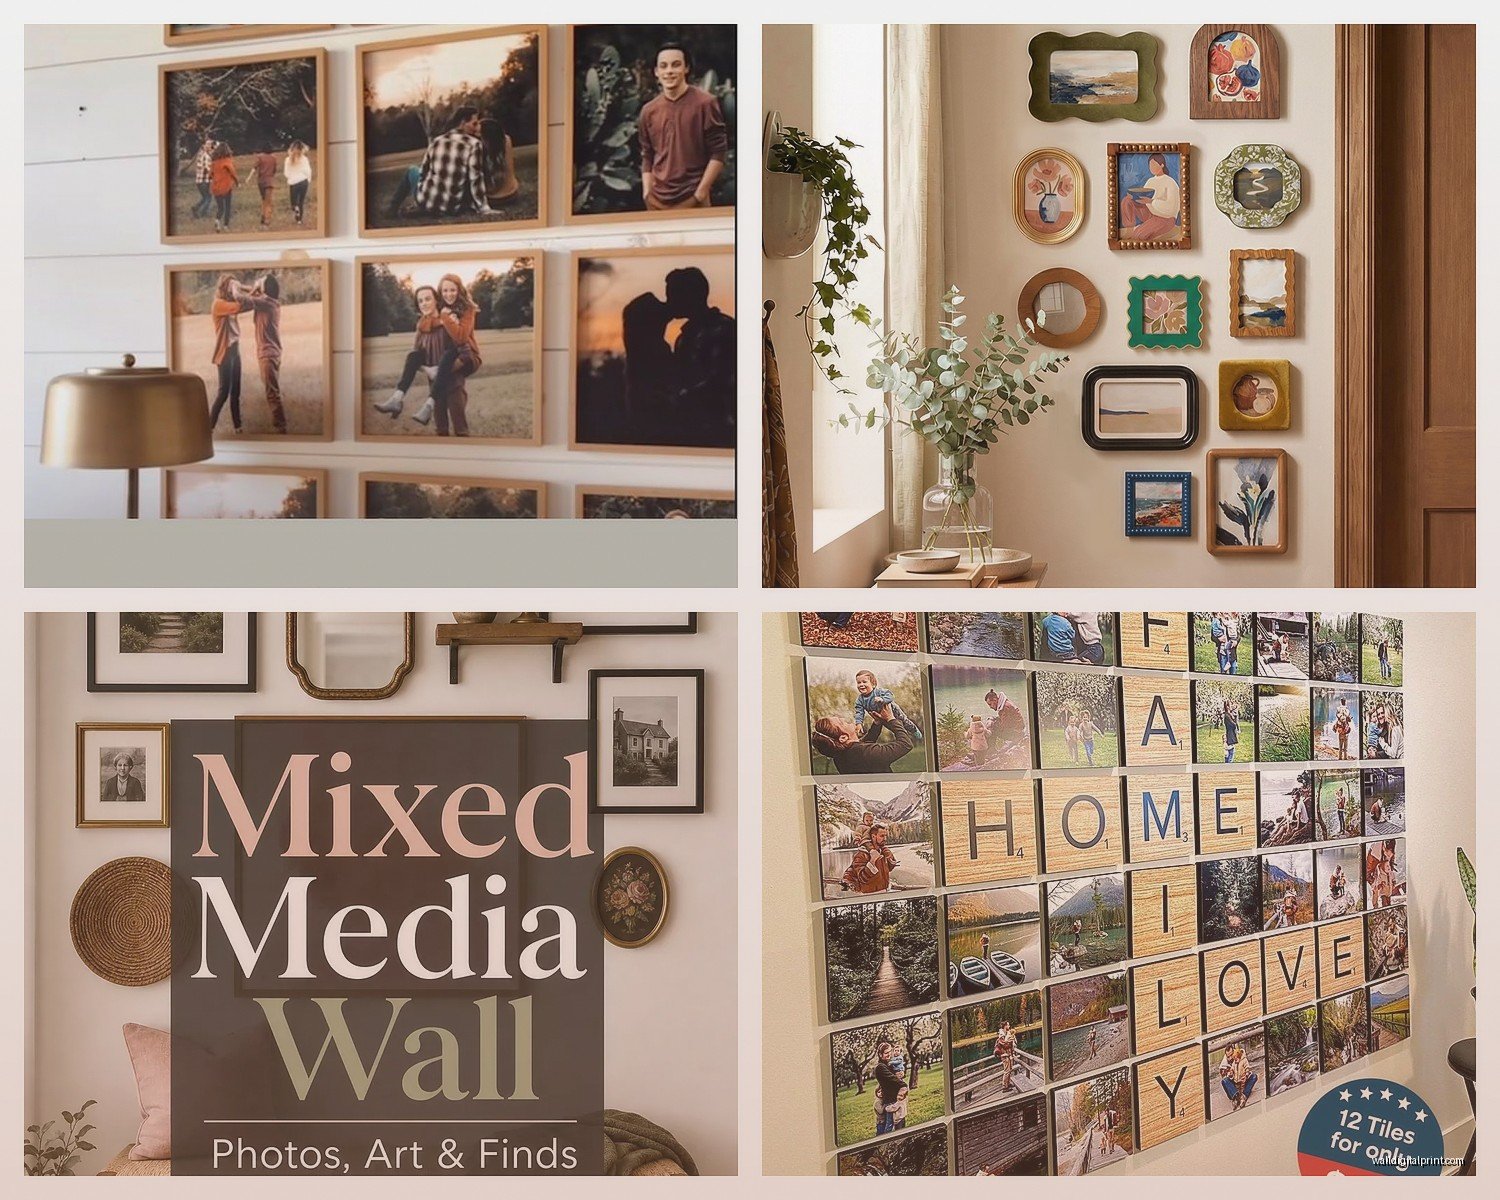
Mixtiles Wall Art: Peel & Stick Photo Tile Brand

Oct
So I’ve been using Mixtiles for like three years now and honestly they’re one of those things I recommend constantly because they actually work the way they’re supposed to. Which is rare, right?
Basically they’re these foam-backed photo tiles that stick to your wall without nails or damage, and you can move them around which is huge for someone like me who changes gallery walls every few months. Let me just walk you through the actual practical stuff because the marketing makes it sound simpler than it is.
Ordering Is Weirdly Addictive
Okay so first thing, you upload photos through their app or website. The app is honestly better because you can see your phone photos right there. Quality matters here and I learned this the hard way. Your photo needs to be at least 400×400 pixels but honestly go higher. I made the mistake of using an Instagram screenshot once and it looked pixelated as hell when it arrived.
They come in three sizes. The 8×8 is their standard and it’s $9 for your first one, then they do this sliding scale thing where the more you buy the cheaper they get. I think it drops to like $6 each if you buy a bunch? The math gets confusing but basically stock up if you’re doing a whole wall.
The 12×12 and 16×16 are newer and honestly the 12×12 is my sweet spot for statement pieces. They’re more expensive but the impact is worth it if you’ve got a really stunning photo.
Photo Selection Tips Nobody Tells You
Here’s what I figured out after wasting money on tiles I never hung. High contrast photos work best. Like if you have a really light, airy photo with lots of white space, it’s gonna look washed out on the wall. The printing is good but it’s not fine art printing, you know?
I do best with photos that have:
- Clear subjects, not super busy backgrounds
- Good color saturation already
- Faces that are close enough to see
- Architecture or landscapes with strong lines
My sister sent me this photo of her kids that was backlit and when it arrived you could barely see their faces. So now I tell everyone, if you’re squinting at your phone to see details, it’s not gonna magically get better printed.
Oh and another thing, they automatically crop to square which seems obvious but I’ve had clients freak out because someone’s head got cut off. You can adjust the crop in the app but double check it because the default isn’t always smart about what to include.
The Actual Sticking Process
Okay so they arrive in like a week usually, packed pretty well. Each one has this backing you peel off and then these sticky strips on the back. This is where people mess up.
Your wall needs to be clean. Like actually clean, not just “looks fine” clean. I wipe the spot with a slightly damp cloth and let it dry completely. If you stick it on dusty wall or over textured paint… it’s gonna fall. Mine have only fallen twice and both times it was because I rushed this step.
The sticky strips are strong but not like industrial adhesive strong. They work on:
- Flat or eggshell paint
- Smooth wallpaper
- Smooth tiles
- Glass
They do NOT work well on:
- Textured walls, that knockdown texture or orange peel stuff
- Brick even though their marketing shows it
- Freshly painted walls, wait like 3 weeks minimum
I had a client with that really textured plaster situation and we tried Mixtiles and they just slowly slid down the wall over a few days. It was actually kind of funny in a frustrating way.
Repositioning Is Real But Limited
They say you can move them and you can, but there’s a limit. I’d say you get maybe 3-5 really good sticks out of one tile. After that the adhesive gets weaker and picks up dust and lint. So plan your layout before you start slapping them up randomly.
What I do is use painter’s tape to mark where I want them first. Or sometimes I cut paper squares the same size and tape those up to see the spacing. Sounds excessive but it’s way better than having to move them six times and ruining the stickiness.
Layout Strategy That Actually Works
This is where my art curator brain kicks in. Gallery walls stress people out but Mixtiles make it easier because you can adjust as you go, at least at first.
For a classic grid, leave about 2 inches between each tile. That’s roughly three fingers width if you’re eyeballing it. Sounds precise but it looks intentional and clean.
For the more organic scattered look which is super popular right now, you want variety in spacing but not random. I usually cluster them tighter in the middle and spread them out toward the edges. The trick is to not have any two tiles touch but keep the overall shape defined.
My formula for a wall that’s like 6 feet wide:
- Start with your favorite photo in an off center position, not dead middle
- Add tiles around it, keeping varied spacing
- Step back literally every two tiles
- Mix sizes if you’re using different ones, don’t put all the big ones together
Oh wait I forgot to mention, corners are your friend. If you’re stuck on how to arrange them, starting in a corner and building out feels more natural than trying to center everything.
Color Coordination Thing
This is gonna sound weird but the color of your wall matters more than you think. White walls make the photos pop obviously but can also make the collection feel disconnected. I’ve noticed on my gray-blue walls the Mixtiles look more cohesive even with totally different photos.
If your photos are all over the place style-wise, stick to black and white. Mixtiles prints black and white really well actually, better than some colors. I converted a bunch of random travel photos to black and white and suddenly they looked like a curated collection instead of a mess.
You can also theme by color. Like all photos with blue tones, or warm sunset colors. Sounds restrictive but it’s a cheat code for making things look professional.
The边 Border Situation
So Mixtiles has a white border around each photo automatically. You can’t get borderless which annoyed me at first but honestly it works. It creates separation between tiles and makes them read as individual pieces.
Some people hate the border and I get it. If you’re one of those people, Mixtiles probably isn’t your thing. There are other peel and stick options without borders but I haven’t tested them as thoroughly.
Real Talk About Durability
I’ve had some Mixtiles up for two years now and they’re fine. The foam backing doesn’t yellow or warp. The print quality holds up, no fading that I’ve noticed even on a wall that gets afternoon sun.
But here’s the thing, if you have cats… my cat Milo knocked three off the wall before I moved them higher. Dogs jumping, kids running by, they can get bumped off if they’re low. I keep them above 4 feet now.
Humidity is also a factor. My bathroom Mixtiles (yeah I put some in there) started peeling at the corners after like six months. Bathrooms with showers are too humid. Powder rooms are probably fine but I’d avoid main bathrooms.
When They Fall Or Won’t Stick
Okay so if one falls, don’t panic. The tile itself is usually fine. The sticky strips are the problem. You can buy replacement adhesive strips but honestly I just use heavy duty double sided tape. The 3M mounting squares work great, just stick them on the back where the old strips were.
If it won’t stick initially, the wall is probably the issue. You can try:
- Cleaning more thoroughly with rubbing alcohol
- Waiting longer if the paint is new
- Adding extra adhesive yourself before applying
- Accepting that maybe your wall texture isn’t compatible
I’ve also used Command strips as backup on heavier tiles or textured walls. Stick the Command strip to the wall first, then stick the Mixtile to that. It’s an extra step but it works.
Removing Them Without Damage
This is actually where Mixtiles shine. You peel them off slowly from one corner, like you’re peeling a sticker. Go slow and at an angle. I’ve removed probably fifty at this point and never pulled paint off.
If there’s residue left, it rubs off with your finger or a tiny bit of rubbing alcohol. Way easier than dealing with nail holes or Command strip damage which can actually rip paint.
Cost Analysis Because It Adds Up
So here’s the financial reality. If you’re doing one or two tiles, super affordable. But a full gallery wall of like fifteen tiles? You’re looking at maybe $100-120. That’s not cheap for what’s essentially printed foam squares.
Compare that to printing photos at Costco for like $3 and framing them… except then you need frames which are $10-30 each plus the hassle of hanging. So Mixtiles actually compete pretty well on convenience.
I tell people if you’re the type who likes to change your decor seasonally or you rent, Mixtiles make sense. If you want something permanent, maybe invest in real framed prints.
The subscription thing they push is only worth it if you’re constantly updating photos. I tried it for a while and ended up with too many tiles I didn’t need.
Design Mistakes I See Constantly
Going too small with the arrangement. Like three little 8×8 tiles on a huge wall looks sad and lost. You need at least 7-9 tiles minimum to make an impact, or use the bigger sizes.
All landscape photos in squares. It crops weird and you lose the composition. Square photos or portraits work better for the format.
Hanging them too high. The center of your arrangement should be around 57-60 inches from the floor, which is standard gallery height. People always hang stuff too high because they’re thinking about their own height when they should think about average eye level.
Not editing photos first. I run everything through even just the phone editing tools to boost contrast and saturation slightly. Makes a noticeable difference in the final product.
Alternative Uses I’ve Tried
Behind a shelf arrangement, peeking out behind plants and objects. Creates depth and looks intentional.
On the side of a bookshelf. Sounds weird but it turns the furniture itself into a display piece.
Temporary headboard situation. I did a grid of twelve tiles above a bed and it looked way more expensive than it was.
In a closet or inside cabinet doors. My friend did this with photos of her kids’ artwork and I thought that was genius.
Comparing to Actual Competitors
Snapbox does similar tiles but they’re slightly cheaper and the quality isn’t quite as good in my experience. The adhesive failed faster.
Parabo Press has the sticky foam prints too and honestly they’re comparable. Sometimes better sales.
Shutterfly and other photo sites do canvas or wood prints that are peel and stick but they’re pricier and not as easy to reposition.
Regular framed photos obviously look more traditional and “nice” but the flexibility thing is real. I change my Mixtile walls every few months and that would be impossible with framed stuff.
The Customer Service Experience
I’ve contacted them twice, once for a tile that arrived damaged and once because an order was wrong. Both times they just sent replacements without hassle. Pretty standard good customer service, nothing amazing but nothing terrible either.
Shipping is usually fast, like 5-7 days. I did have one order take three weeks during the holidays but that’s expected.
Bottom Line Practical Advice
If you’re sitting there wondering if you should try them, get the first tile deal where it’s super cheap and test it. Put it somewhere low stakes to see how you like the quality and if it sticks to your walls.
If you’re gonna do a gallery wall, order more than you think you need because you’ll wanna play with arrangements. You can always use extras elsewhere or gift them honestly.
Prep your walls properly, plan your layout at least roughly, and don’t expect fine art quality. They’re really good for what they are which is flexible, damage-free photo displays that look pretty decent.
I keep coming back to them because for rentals or people who get bored easily or anyone who’s not ready to commit to drilling holes everywhere, they just make sense. Not perfect but genuinely useful.