Wall Art Guide, Wall Art Tutoriels
Christmas Tree Wall Art: Holiday Evergreen Festive Decor

Nov
So I’ve been completely obsessed with Christmas tree wall art lately and honestly it started because my apartment has zero floor space for a real tree and I was like, okay what are my actual options here that don’t look desperate.
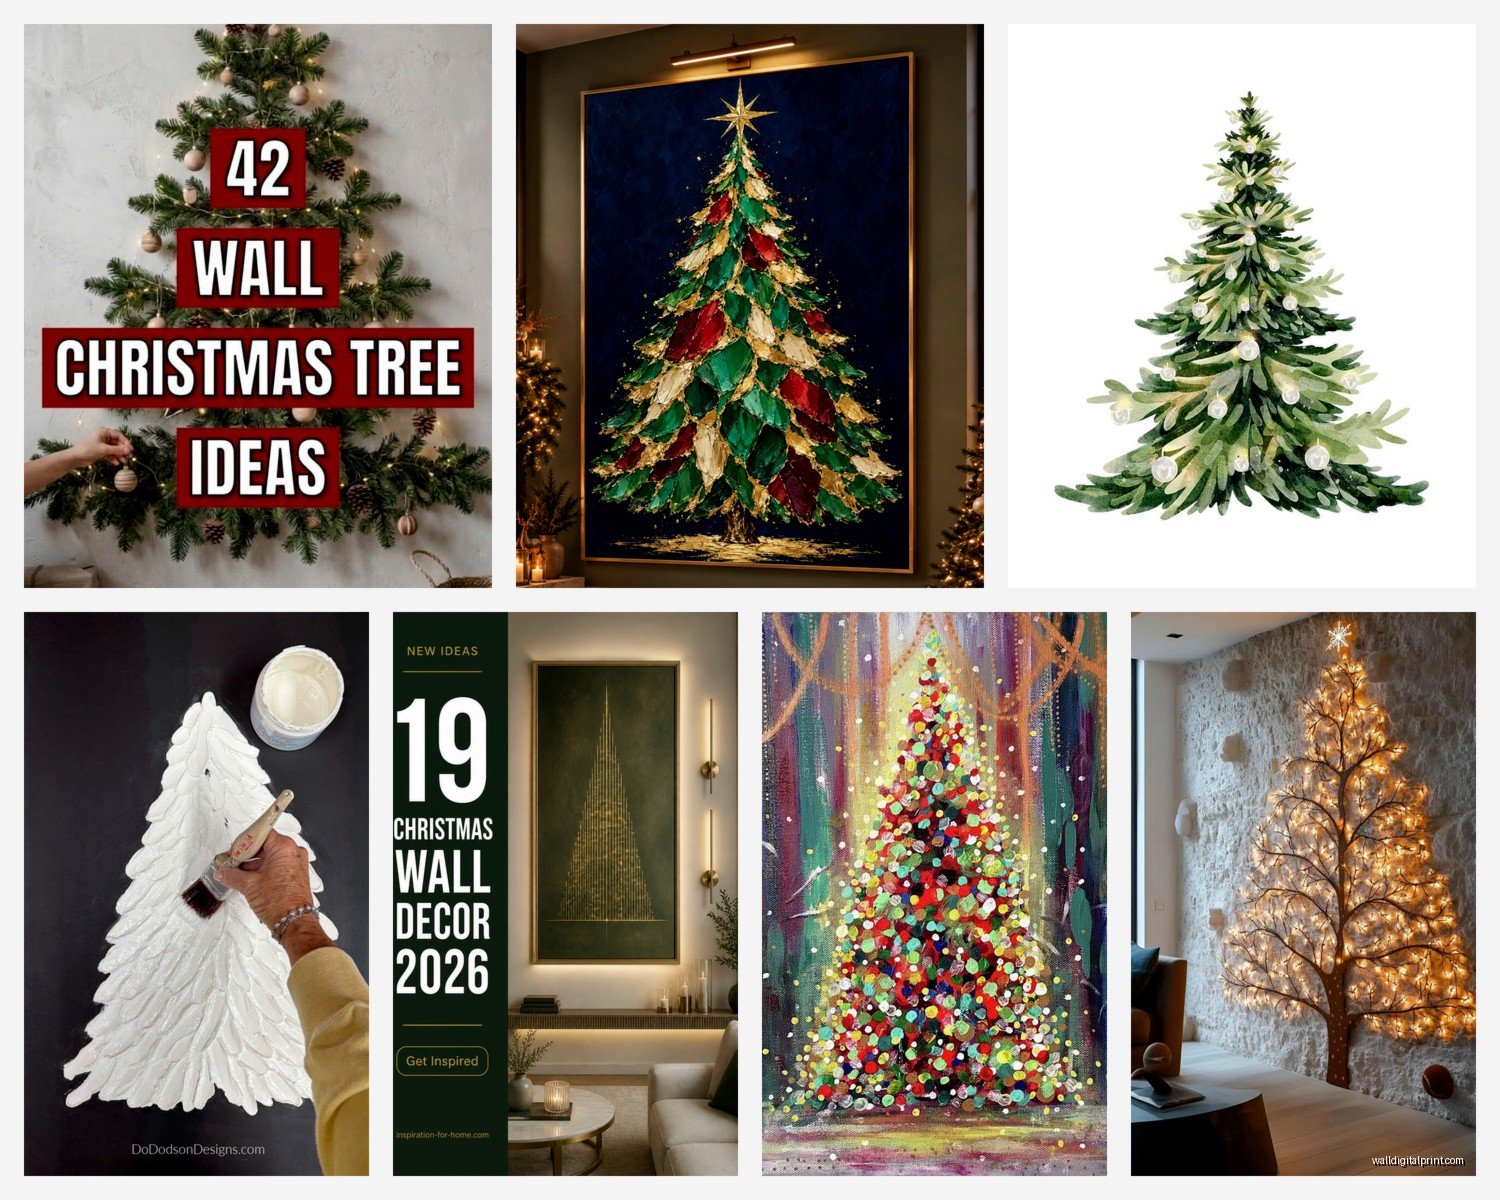
First thing you gotta know is there are basically three categories of tree wall art that actually work. There’s the flat stuff (posters, prints, decals), the dimensional stuff (wood cutouts, metal pieces), and the totally DIY route where you’re literally making a tree shape on your wall from whatever materials. I’ve tried all three and each has its weird pros and cons.
The Flat Wall Art Route
Okay so prints and posters are obviously the easiest. I found this amazing vintage-style botanical print of an evergreen on Etsy last year and just stuck it in a gold frame from Target. Cost me maybe $45 total? The trick with prints is you want something that feels like actual art, not just a clipart Christmas tree. Look for things with interesting textures or unexpected color palettes. I saw one that was this gorgeous deep green watercolor tree with gold speckles and it looked way more elevated than the typical red and green situation.
Canvas prints are another option but here’s the thing nobody tells you – the quality varies SO MUCH. I ordered one from Amazon that looked amazing in the listing and when it arrived the colors were all washed out and weird. My friend Sarah swears by CanvasPop or Shutterfly for custom canvas prints if you wanna go that route. She uploaded this cool minimalist line drawing of a pine tree and it actually turned out really nice.
Wall decals are where things get interesting though. I was super skeptical because they seemed kinda cheap? But then I used one in a client’s nursery (they wanted holiday decor that wasn’t permanent) and it was shockingly good. The vinyl ones from companies like WallPops or RoomMates peel off clean without damaging paint. You can find tree decals that are just the outline, or full-color ones, or even these cool geometric designs that suggest a tree shape without being literal about it.
Application Tips for Decals
Real talk, applying these takes patience. Clean your wall first with just water and let it dry completely. Use a level or you’ll end up with a crooked tree and it’ll drive you insane. I learned this the hard way when my cat knocked over my coffee mid-application and I just rushed through the rest and yeah, it was tilted like 3 degrees and I saw it every single day until I peeled it off.
The trick is to start from the center and work outward, smoothing as you go with a credit card or squeegee. Air bubbles are gonna happen but you can usually push them to the edges.
Dimensional Wall Art
This is where you get actual depth and shadow which makes it feel more like a real design element. I’m obsessed with wooden tree wall art right now. You can find these laser-cut plywood trees on Etsy or even at Hobby Lobby during the holidays. Some are painted, some are raw wood, some have this cool burnt edge treatment.
I installed a 3-foot tall wooden tree in my dining room last December and the way it catches light is actually beautiful. You need proper wall anchors for anything heavy though – don’t just use the little nails that come with it unless you want your tree on the floor at 2am. I use these EZ Ancor ones that twist right into drywall.
Metal tree wall art is another direction. I curated a show last year that included this incredible wrought iron tree sculpture and it was stunning but also like $400 so not exactly budget-friendly. Target and World Market usually have more affordable metal tree designs during the holidays. They’re lighter than wood usually, so easier to hang.
The Shelf Tree Situation
Wait I forgot to mention this earlier but it’s technically wall art – you can get these tree-shaped shelving units that serve double duty. They’re shaped like a Christmas tree but have little shelves where you can display ornaments or tiny decorations. I saw one at Urban Outfitters that was actually cute and functional. My only issue is they can look cluttered really fast if you overload them, so less is more.
DIY Wall Tree Ideas That Actually Work
Okay so funny story, I was watching The Great British Baking Show at like 11pm one night and scrolling Pinterest and fell down this rabbit hole of DIY wall trees and some of them are genuinely genius while others look absolutely unhinged.
Washi Tape Trees
This is probably the easiest and most renter-friendly option. You literally just use washi tape to create a tree outline on your wall. I did this in my home office in metallic gold tape and it took maybe 20 minutes. The key is to map it out first with painters tape to get your proportions right, then replace with the decorative washi tape.
You can keep it simple with just an outline or get fancy and create a filled-in tree with multiple strips. Add some battery-operated string lights along the tape lines and it actually looks intentional. Washi tape peels off clean so you’re not risking your security deposit.
String Light Trees
Speaking of lights – you can create an entire tree shape using just string lights tacked to the wall. I’ve done this in a guest bedroom and it’s very whimsical without being over the top. You need clear command hooks or small nails to create anchor points, then drape your lights in a tree shape.
The trick is to use warm white lights, not the multicolor ones unless you’re going for a specific vibe. And get lights with a timer function so you don’t have to remember to turn them on and off. I use these Brightown ones from Amazon that have a 6-hour timer.
Branch and Ornament Trees
This one requires a bit more effort but looks really organic and cool. You collect branches (or buy them from the craft store if you’re not into foraging), arrange them in a tree shape on your wall from largest at bottom to smallest at top, and secure them with nails or command strips. Then hang ornaments from the branches.
I did a version of this with painted white branches and silver ornaments for a client’s entryway and it was gorgeous. Very Scandinavian minimalist. The annoying part is getting the branches to lay flat against the wall – you might need to trim them or use multiple attachment points per branch.
Fabric or Ribbon Trees
You can create a tree using ribbons in various lengths attached to a wooden dowel or branch at the top. This works especially well if you find ribbons in coordinating patterns and colors. Attach the dowel to the wall, then hang ribbons in graduated lengths to create the tree shape.
I haven’t personally done this but my friend Jamie did it in her daughter’s room with velvet ribbons in jewel tones and it looked expensive even though she spent like $30 total at the fabric store.
Gallery Wall Approach
Oh and another thing – instead of one big tree piece, you can do a gallery wall with a holiday theme that includes tree imagery among other winter elements. I did this in my living room because I couldn’t commit to just one style. I mixed a vintage tree print with some framed sheet music of carols, a small evergreen branch under glass, and a few other botanical prints.
The trick with gallery walls is odd numbers work better and you want varying sizes. Start with your largest piece and build around it. I use these Command picture hanging strips for everything because I change my art seasonally and don’t wanna deal with a million nail holes.
What Actually Works in Different Spaces
So depending on where you’re putting this, different options make more sense. In a small apartment or bedroom, go with something flat like a print or decal because you don’t wanna overwhelm the space. I learned this after putting a massive dimensional wooden tree in a tiny powder room and it just felt aggressive.
For living rooms or dining areas where you want more impact, dimensional pieces or larger DIY installations work great. These are your main gathering spaces during the holidays anyway so it makes sense to go bigger.
In kids rooms, definitely stick with removable options like decals or washi tape trees because their tastes change constantly. Also anything with actual lights needs to be battery-operated for safety unless you can hardwire it properly.
Unexpected Spaces
I’ve put tree wall art in some weird spots that actually worked really well. Above a desk in a home office – creates a festive vibe without taking up desk space. In a hallway or landing where you have a blank wall – these transitional spaces are perfect for seasonal decor. Even in a bathroom if it’s large enough – I did a small vintage tree print in an ornate frame above the toilet in my guest bath and people always comment on it.
Color and Style Considerations
This is gonna sound weird but the color palette you choose matters way more than the actual tree design. A traditional green tree in red and gold looks totally different than the same tree shape in navy and silver or blush pink and copper.
I’m really into non-traditional color schemes for Christmas lately. Sage green with cream and natural wood tones feels very current. Deep burgundy with emerald and brass is elegant without being stuffy. Even all-white or monochromatic schemes can work if you play with texture.
Think about what already exists in your space. If you have a lot of warm wood tones, a tree in similar warm colors will feel cohesive. Cool gray walls? Try a tree with silver or icy blue accents.
Lighting Your Wall Tree
Whether you buy something or DIY it, lighting makes such a difference. If your tree art is dimensional, put a picture light or wall sconce above it to create shadow and depth. Battery-operated fairy lights can be draped around frames or woven through dimensional pieces.
I use these tiny battery packs with copper wire lights – you can hide the battery pack behind the art and just have delicate twinkly lights visible. They’re like $12 for a pack of two on Amazon.
For flat art, backlighting can be cool if it’s in a frame with some depth. LED strip lights behind a canvas create this nice glow effect.
Mixing Tree Wall Art with Other Decor
Your tree wall art doesn’t have to exist in isolation. I usually style the area around it with complementary pieces. A small console table underneath with a few candles and a bowl of ornaments. Some garland draped nearby. Maybe a wreath on an adjacent wall.
The wall tree becomes your anchor piece and everything else supports it. Just don’t go overboard – you want it to feel curated not chaotic. I usually stick to three or four additional elements max.
Storage and Reusability
One thing I love about wall art versus a real tree is storage is so much easier. Prints and canvas pieces stack flat. Decals can be carefully removed and stored on their backing paper if you’re gentle (I’ve reused the same decal for three years now). Dimensional pieces need a bit more space but still way less than a box of traditional tree stuff.
I keep all my holiday wall art in one of those under-bed storage containers. Everything’s wrapped in tissue paper and it takes up maybe a quarter of the space my old artificial tree used to require.
Okay I think that covers most of what I’ve learned through way too much trial and error with this stuff. The main thing is just pick something that feels right for your space and don’t overthink it – it’s only up for like six weeks anyway so even if it’s not perfect it’s temporary. And honestly some of my favorite holiday decor moments have been the imperfect DIY attempts that had personality even if they weren’t Pinterest-perfect.