Wall Art Guide, Wall Art Tutoriels
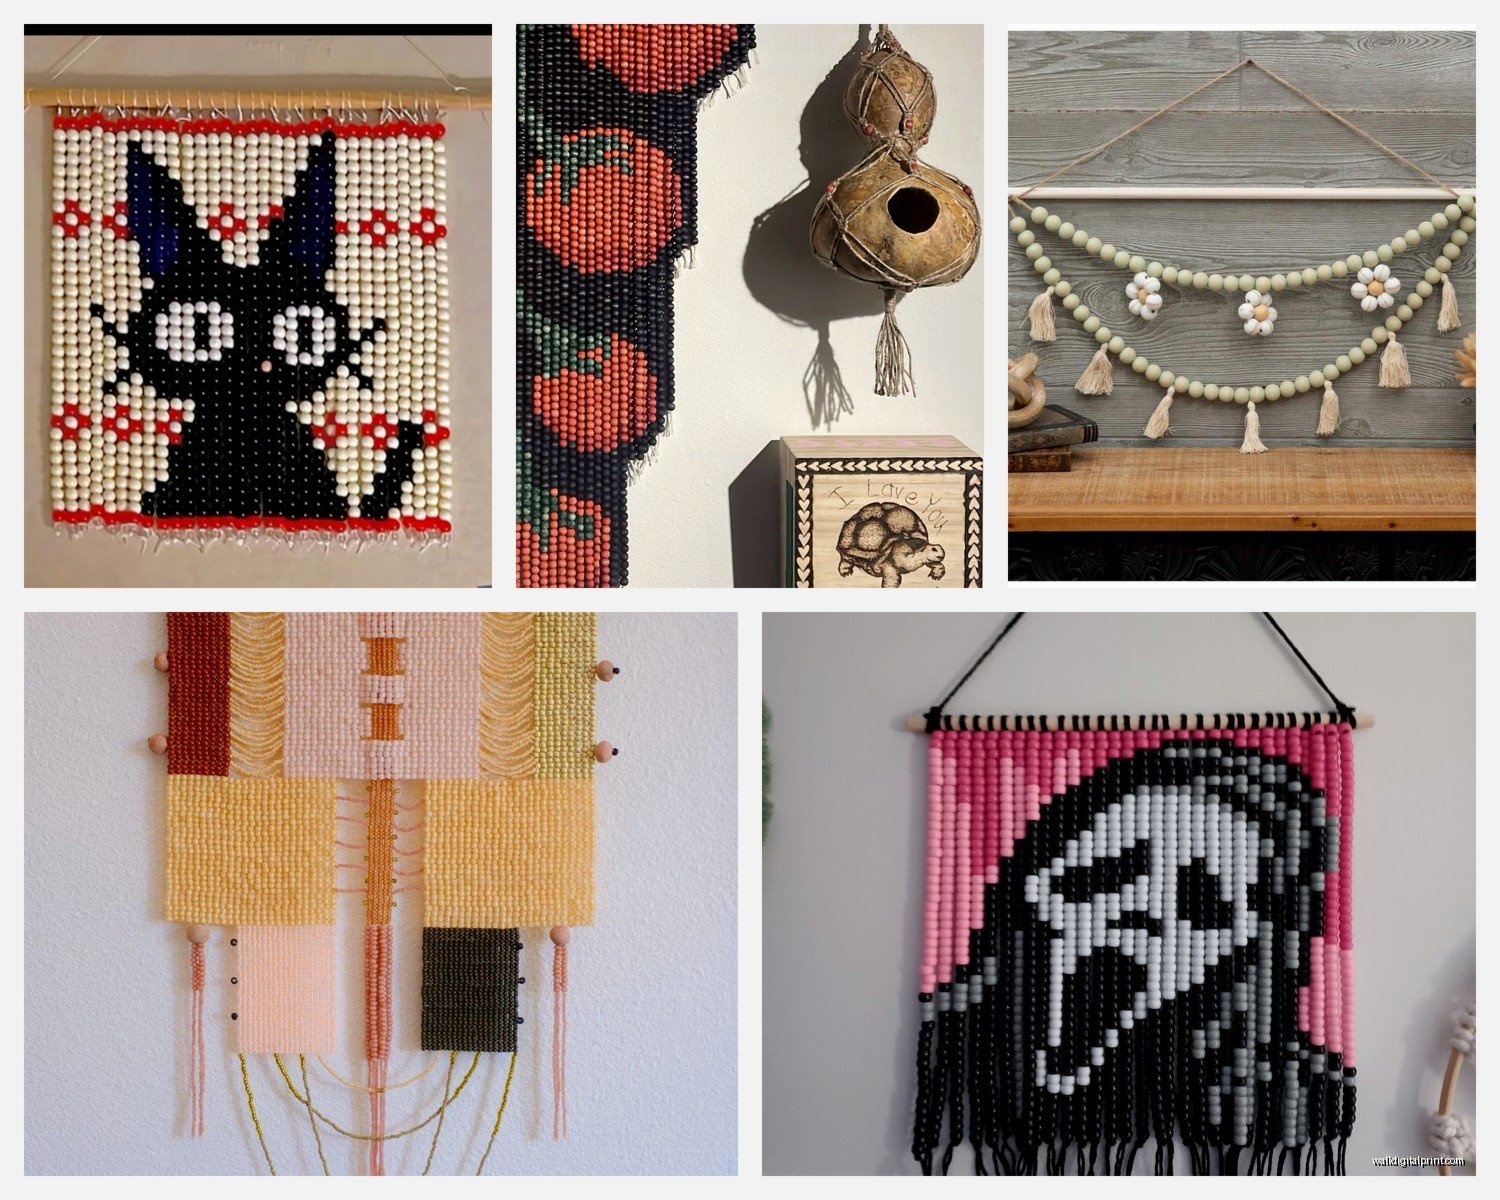
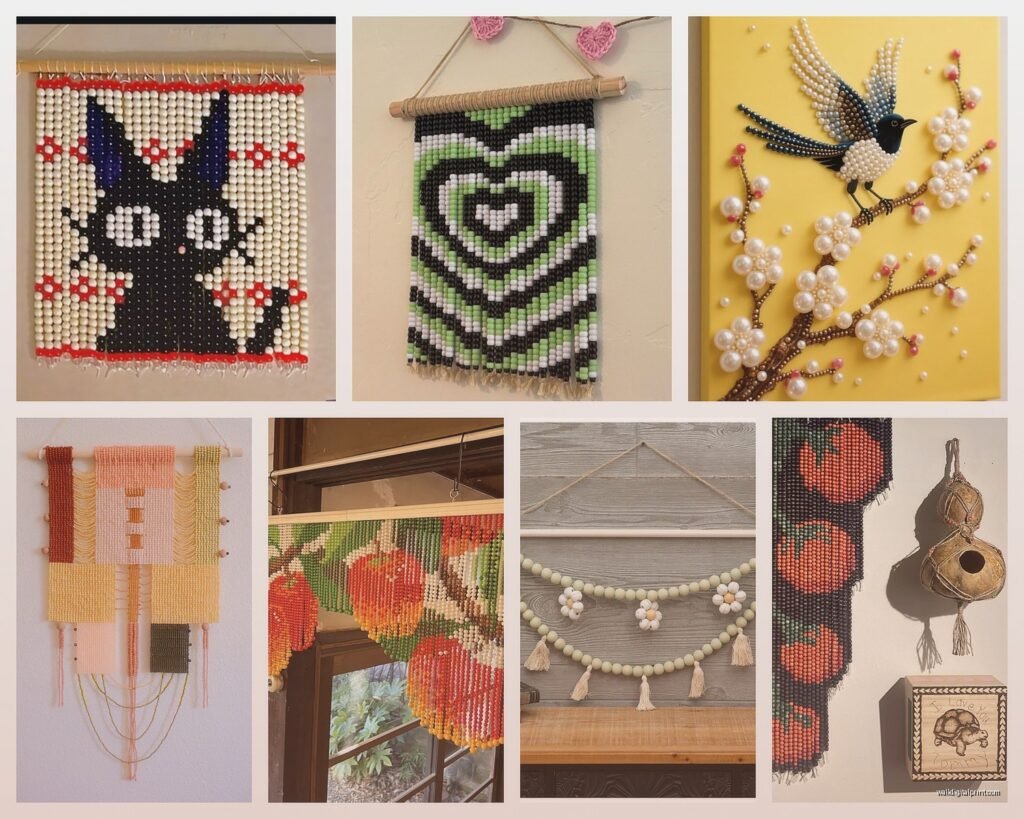
Beaded Wall Art: Handcrafted Bead String Textile Designs
Mar
So I’ve been deep into beaded wall art lately and honestly it’s one of those things where the materials matter SO much more than you’d think. Like, I assumed all beads were basically the same when I started but yeah no, that was wrong.
Getting Your Beads Sorted Out First
Okay so the base material of your beads is gonna determine everything. Wood beads are my go-to for like 90% of projects because they’re lightweight and you can get them in bulk without selling a kidney. I order mine from this supplier on Etsy—can’t remember the name right now, it’s saved on my laptop—but they do these unfinished natural wood beads in every size from 6mm to like 30mm. The unfinished ones are clutch because you can stain them, paint them, leave them natural, whatever.
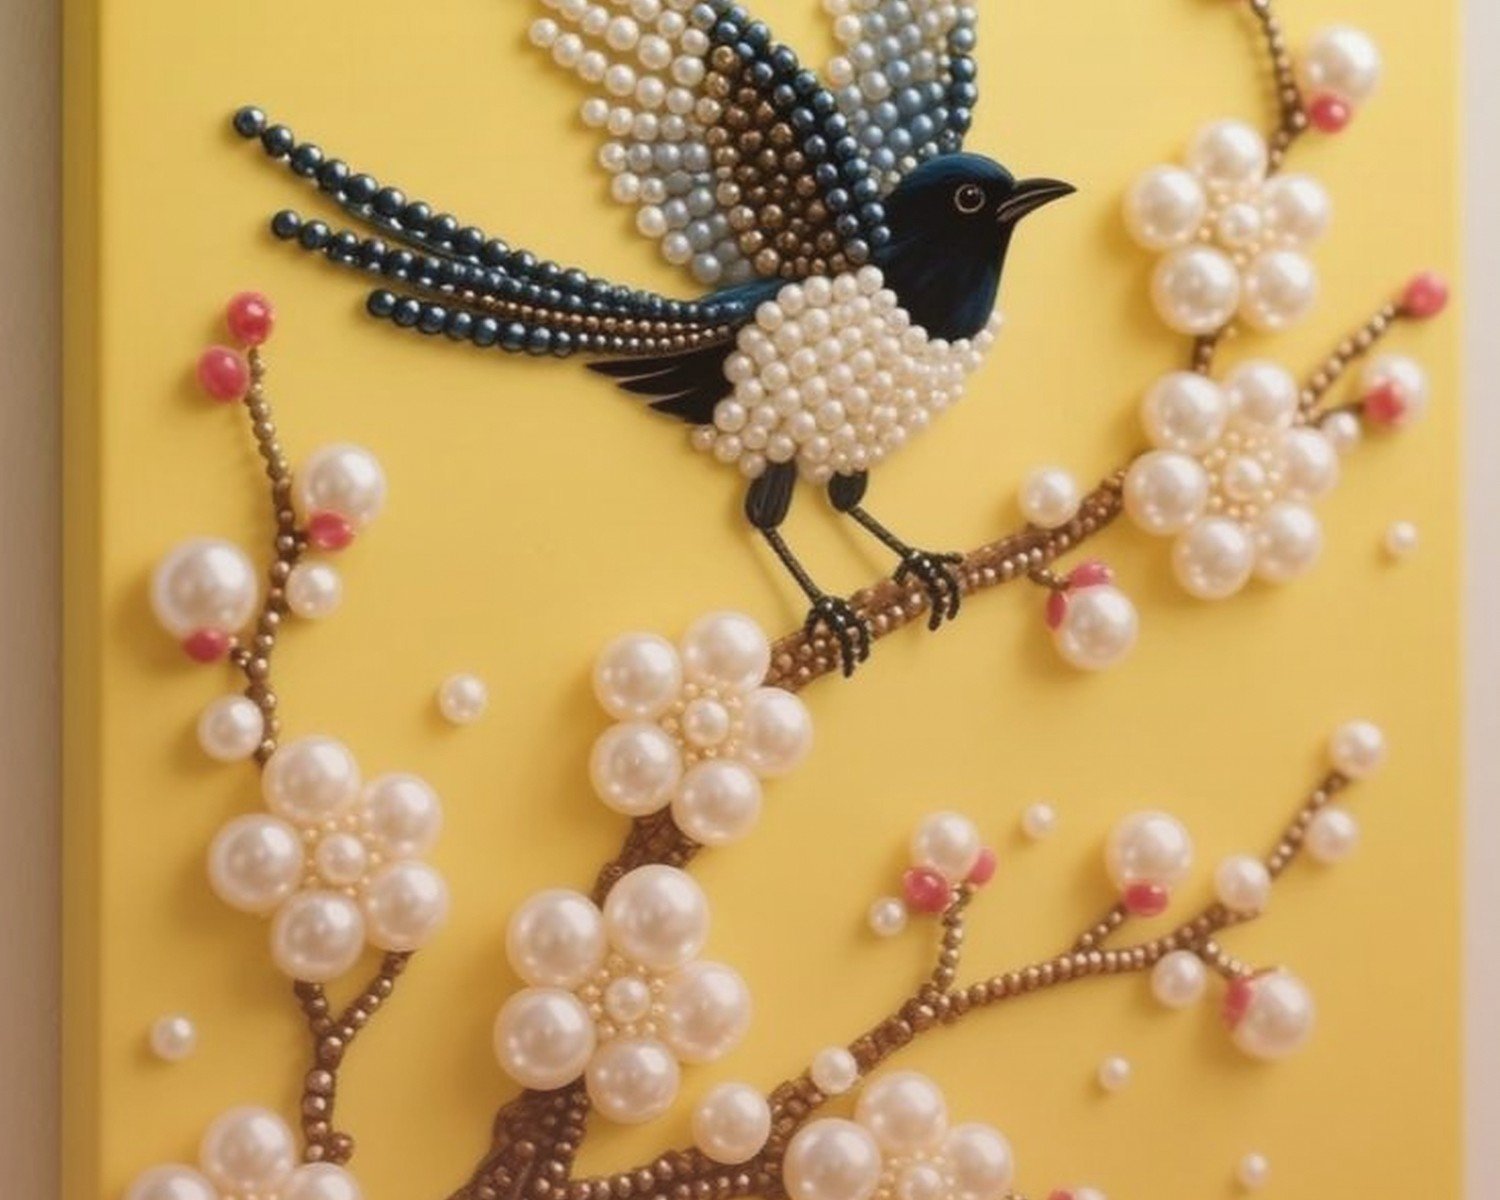
Glass beads look gorgeous but here’s the thing nobody tells you: they get HEAVY fast. I made this whole macramé-bead hybrid piece last year with glass beads and the tension on the wall mount was insane. Had to reinforce it twice. They catch light beautifully though, so for smaller accent pieces or if you’re mixing materials, totally worth it. Just… don’t go all glass unless you’re mounting into a stud.
Ceramic beads are kind of the middle ground? Heavier than wood, lighter than glass, and they come in these amazing glazed finishes. I found some turquoise ceramic rounds at a craft fair that I’m literally obsessed with. The downside is they’re usually pricier and the holes can be inconsistent, which is annoying when you’re trying to thread them quickly.
Plastic beads and acrylic
Look, I’m not gonna be a snob about plastic beads. Sometimes they’re exactly what you need, especially for bohemian or kids’ room pieces where you want bright colors and zero worry about breakage. Acrylic beads specifically can look really modern and clean. Just check the hole size because cheap plastic beads sometimes have these tiny holes that don’t fit standard cord.
String, Cord, Thread—Whatever You Wanna Call It
This is where I made SO many mistakes early on. The string you use literally makes or breaks the whole piece, and I mean that both figuratively and literally because I’ve had pieces break.
Cotton cord is beautiful for that natural, textured look. I use 3mm single-twist cotton cord for most wall hangings. It’s soft enough to knot easily but strong enough to hold a decent amount of beads. The single-twist shows texture better than braided, which photographs really well if you’re doing this for a blog or to sell. My cat keeps trying to attack any cotton cord I leave out so I have to work in the bedroom with the door closed which is actually where I am right now.
Waxed cotton thread
Oh and another thing—waxed cotton thread is amazing for more delicate, intricate designs. It comes in like a million colors and the wax coating makes it stiff enough to thread beads without a needle most of the time. I use 1mm waxed cotton for smaller beads and detailed work. It doesn’t fray which is honestly such a relief when you’re trying to thread 47 tiny beads and your regular cotton is just… disintegrating.
Hemp cord gives you that really earthy, organic vibe. It’s strong as hell, which is great, but it can be kinda rough on your hands if you’re working with it for hours. I learned this the hard way during a weekend where I tried to finish three pieces and my fingers were literally raw. Now I use hemp for structural elements or when I need extra strength, but I mix it with softer materials.
Leather cord and suede
Leather cord is gorgeous but expensive and you gotta be careful with weight. Real leather stretches over time, so if you’re making something with heavy beads, it’ll start to sag eventually. Faux suede cord is cheaper and doesn’t stretch as much, plus it comes in tons of colors. I use 3mm faux suede for modern minimalist pieces—looks really clean and sophisticated.
Wire is a whole different category but worth mentioning. Jewelry wire or craft wire lets you create shapes and structures that hang differently than string. I use 20-gauge wire for bead garlands that I want to have specific curves or spirals. You need wire cutters and maybe round-nose pliers for this, which I didn’t have at first and tried using kitchen scissors and yeah that was dumb.
The Base Structure Stuff
You need something to hang everything from, right? Driftwood is my absolute favorite for natural designs. I collect it from the beach when I visit my sister or you can buy it online. Look for pieces that are already smoothed by water because otherwise you’re gonna be sanding forever. I usually go for pieces between 12-24 inches depending on the scale I want.
Dowel rods are the clean, modern option. You can get them at any hardware store in whatever diameter and length you need. I keep a bunch of 1/2 inch and 3/4 inch dowels around. Sometimes I stain them, sometimes I wrap them in cord first, sometimes I leave them raw. One trick I figured out: if you want a really smooth finish, sand them with 220-grit sandpaper even if they seem smooth already.
Metal rods or copper piping create this industrial-chic look that’s really popular right now. The copper develops this patina over time which is cool but you gotta seal it if you don’t want it to turn your wall green. I use a clear acrylic sealer, just spray it outside because the fumes are no joke.
Embroidery hoops
Wait I forgot to mention embroidery hoops—these are great for circular designs. You can find wooden ones at craft stores in sizes from like 4 inches to 20 inches. I usually remove the hardware and just use the inner hoop, wrapping it with cord or leaving it natural. The outer hoop with the tightening mechanism can be useful if you’re incorporating actual fabric or weaving.
Adhesives and Hardware You’ll Actually Need
E6000 is my ride-or-die adhesive for beaded work. It’s an industrial-strength craft glue that dries clear and flexible. I use it to secure knots, attach beads permanently, or reinforce connections. The smell is intense though, so work in a ventilated area or you’ll get a headache. Takes about 24 hours to fully cure but it’s worth the wait.
Hot glue guns are faster but less permanent. I use hot glue for temporary installations or pieces I might want to change later. Low-temp glue guns are better if you’re working with delicate materials that might melt.
For actually hanging stuff on the wall, you need proper hardware. D-rings or sawtooth hangers on the back of your support rod work for lighter pieces. Anything over like 5 pounds and I’m using wall anchors or mounting directly into studs. I learned this when a piece fell off the wall at 3am and scared me half to death.
Picture hanging wire
Picture hanging wire is super useful for creating the actual hanging mechanism. I thread it through holes I drill in dowels or wrap it around driftwood. Get the kind rated for at least 20 pounds even if your piece is lighter—better safe than having it crash down.
Tools That Make Life Easier
You don’t need a ton of tools but the right ones make everything faster. Sharp scissors are obvious but get fabric scissors, not your kitchen ones. I have three pairs now because I keep losing them.
A tape measure and ruler are essential for planning lengths. I use a flexible tape measure because it’s easier to measure curves and irregular driftwood pieces.
Bead stoppers or clothespins—okay so funny story, I was working on this piece and kept having beads slide off the end while I was arranging them, and I was getting so frustrated until I realized I could just clip a clothespin on the end. Revolutionary. Now I have actual bead stoppers which are basically fancy spring clips but clothespins work fine.
Needles for beading
Beading needles are these long, thin needles that fit through small bead holes. I have a pack of assorted sizes. The really thin ones (size 12 or 13) can bend or break easily, so I buy them in bulk. Sometimes I use a twisted wire needle which is flexible and you can thread thicker cord through it.
A drill with small bits if you’re working with wood beads and want to enlarge holes or if you’re mounting hardware. My cordless drill is probably my most-used tool across all my projects.
Pliers—you want at least needle-nose pliers for wire work and tightening connections. I also have round-nose pliers for making loops in wire.
Planning Your Design Without Losing Your Mind
I sketch everything first, even if it’s just a rough idea. Graph paper helps if you want to plan spacing and proportions. I take a photo of my sketch on my phone so I can reference it while working without getting paper messy.
Lay everything out before you commit. I use a cork board and pins to arrange beads and cord in the pattern I want. This saves SO much frustration because you can see what works before you start knotting and gluing everything permanently.
Color theory matters more than I thought it would. I use the 60-30-10 rule from interior design—60% dominant color, 30% secondary color, 10% accent. Keeps things from looking chaotic unless chaos is what you’re going for, which is valid too.
Measuring cord lengths
Always cut cord longer than you think you need. I usually add at least 12 inches extra for knots and adjustments. You can trim excess but you can’t add length easily. Well, you can knot pieces together but it looks messy.
For vertical strands, measure from your hanging rod to where you want the bottom to hit, then multiply by 2.5 or even 3. This accounts for knots and the length you lose when beads are added.
Finishing Techniques That Look Professional
Tassel endings are classic and actually pretty easy. Take like 15-20 strands of cord, fold them in half, wrap another piece around the top section about an inch down, and trim the bottom evenly. I use a piece of cardboard as a template to wrap the cord around so all the strands are the same length.
Fringe endings are even simpler—just leave cord ends loose and trim them at an angle or straight across. I use fabric scissors for clean cuts.
Wrapped endings where you wrap the end of a cord strand around itself or another strand create this finished look. Secure with a dot of E6000 inside the wrap.
Sealing and protecting
If you’re using natural materials like wood beads or driftwood, consider sealing them. Polyurethane spray works well for a protective coat. I do this for pieces that might be in humid environments like bathrooms.
For cotton cord that might fray, I sometimes use a tiny bit of clear nail polish on the cut ends. This is gonna sound weird but it works better than most fabric sealers I’ve tried.
Common Problems I’ve Dealt With
Beads sliding around on the cord is annoying. Solution: tie a small knot on either side of each bead or use a tiny dot of hot glue to secure them in place. The knot method looks more intentional and handcrafted.
Uneven strand lengths happen to everyone. I fix this by either trimming everything to match the shortest strand or embracing the asymmetry and making it look intentional. Honestly the second option usually looks better.
Cord twisting as you work drives me crazy. To prevent this, let the piece hang freely every so often and allow the cord to untwist naturally. Don’t try to force it straight because it’ll just twist again.
Weight distribution issues—if your piece is heavier on one side, it’ll hang crooked. Balance it by adjusting bead placement or adding weight to the lighter side. Sometimes I add a hidden washer or two inside larger beads to balance things out.
The biggest thing I’ve learned is that beaded wall art is super forgiving. If something doesn’t work, you can usually unknot it and start over, or incorporate the “mistake” into a new design direction. I’ve had some of my favorite pieces come from complete accidents where I dropped beads and they landed in a pattern I liked better than my original plan.
Also keep your workspace organized because I currently have beads in like seven different containers and I spent twenty minutes yesterday looking for these specific wooden rounds that were literally right in front of me the whole time. My organizational skills are clearly still a work in progress but at least the actual beading part I’ve got down.