Wall Art Guide, Wall Art Tutoriels
Black Wire Wall Art: Minimalist Metal Line Sculptures
Mar
So I’ve been obsessing over black wire wall art lately and honestly it started because I hung one piece wrong in my own apartment and it looked absolutely terrible for like three weeks before I fixed it. But now I’ve installed probably 30+ pieces for clients and myself, so let me tell you what actually works.
Picking the Right Piece for Your Space
First thing – not all wire art is created equal. You’ve got your super thin delicate stuff that’s basically just one continuous line, then there’s the chunky geometric pieces that are more structured. The thin stuff (like under 2mm wire) reads really well from a distance but up close it can look kinda cheap if the welds are sloppy. I learned this the hard way with a face profile piece I got on Etsy that looked amazing in photos but the connection points were… rough.
For living rooms or anywhere you’re viewing from like 6+ feet away, go thinner. 1.5-2mm wire diameter is perfect. For entryways or above a bed where you’re gonna be closer, 3-4mm looks more substantial and intentional.
Size Guidelines That Actually Make Sense
Okay so everyone says “measure your wall” but here’s what I tell clients – your wire art should take up about 60-75% of the width of the furniture below it. So if you’ve got a 72-inch sofa, you want your art (or grouping of art) to be around 45-54 inches wide.
But here’s the thing with wire art specifically – it’s SO minimal that you can actually go bigger than you would with a framed print. Like, a 48-inch wire sculpture doesn’t feel as heavy as a 48-inch canvas because there’s literal space in between the lines. My cat actually tried to jump through one once thinking it was empty wall space, so there’s that.
Height-wise, hang the center about 57-60 inches from the floor. This is standard gallery height and it just works. Don’t overthink it.
What to Look for Quality-Wise
I’ve bought wire art from Amazon, Etsy, West Elm, CB2, and random Instagram shops. The quality difference is wild. Here’s what separates good from garbage:
Weld points – These should be smooth and barely visible. Run your finger over them (carefully). If they’re sharp or have weird blobs, it’s gonna look amateur on your wall.
Powder coating vs paint – Powder coated black wire doesn’t chip. Regular paint absolutely will, especially at the connection points. Ask the seller which they use. Powder coating costs more but it’s worth it.
Wire gauge consistency – The whole piece should use the same thickness wire unless it’s intentionally designed otherwise. I got this abstract piece once where the wire thickness varied randomly and it just looked like a mistake.
Mounting hardware – Should come with keyhole hangers or D-rings already attached. If they’re sending you a piece of wire art with no mounting solution, that’s a red flag.
Actually Hanging These Things
Alright so this is where I screwed up initially. Wire sculptures are weirdly tricky because they’re lightweight but awkward. Most pieces under 5 pounds can go up with Command strips honestly, but here’s my method:
For pieces with keyhole hangers (the little slot things on back), use regular picture hanging hooks rated for 20 pounds even if your piece weighs like 2 pounds. The issue isn’t weight, it’s that wire art tends to be larger format and you don’t want it sliding around.
The Level Situation
Wire art is UNFORGIVING with crooked hanging. Like a framed picture you might not notice is 2 degrees off, but a geometric wire piece? You’ll see it immediately. I use a laser level now (got one for $23 on Amazon during Prime Day) but a regular bubble level works.
Mark your spot, double-check with the level, then mark again. I’m serious – I’ve patched so many unnecessary holes because I rushed this step.
Oh and another thing – if you’re hanging multiple pieces as a gallery wall, lay them out on the floor first and take a photo from above. Then measure the spacing between pieces. I aim for 2-3 inches between wire sculptures, slightly more than I’d do with frames because the negative space is part of the design.
Wall Type Matters
Drywall is easy – standard picture hooks work great. Plaster walls (common in older buildings) need special hooks or wall anchors. I once tried hanging a large wire face sculpture in a 1920s apartment with regular hooks and it literally fell off the wall during a showing. Not my finest moment.
For plaster, use those screw-in anchors or the ones that look like little wings. And definitely hit a stud if you can find one, especially for pieces over 3 feet in any direction.
Brick or concrete – you’re gonna need a masonry bit and proper anchors. Or do what I did in my studio and use those adhesive strips rated for 16 pounds. Four of them hold my biggest wire piece (a 40-inch abstract line drawing) and it hasn’t budged in 8 months.
Styling Around Wire Art
The whole point of these minimal metal sculptures is that they don’t compete with other stuff, but you can still overwhelm them. I see this all the time where someone buys a beautiful simple line drawing and then surrounds it with busy wallpaper and a million other things.
Wire art reads best against:
- Solid color walls – white, cream, grey, even black
- Subtle textured walls like grasscloth or very fine patterns
- Exposed brick if the mortar lines aren’t too crazy
It does NOT work well against:
- Busy wallpaper (the lines get lost)
- Wood paneling with strong grain patterns
- Super dark walls unless the wire has dimension/shadow depth
Wait I forgot to mention – lighting is huge with these pieces. They cast the coolest shadows if you position them where natural light hits at an angle. I have a wire botanical piece in my bedroom that gets afternoon sun and the shadow it throws is almost better than the sculpture itself.
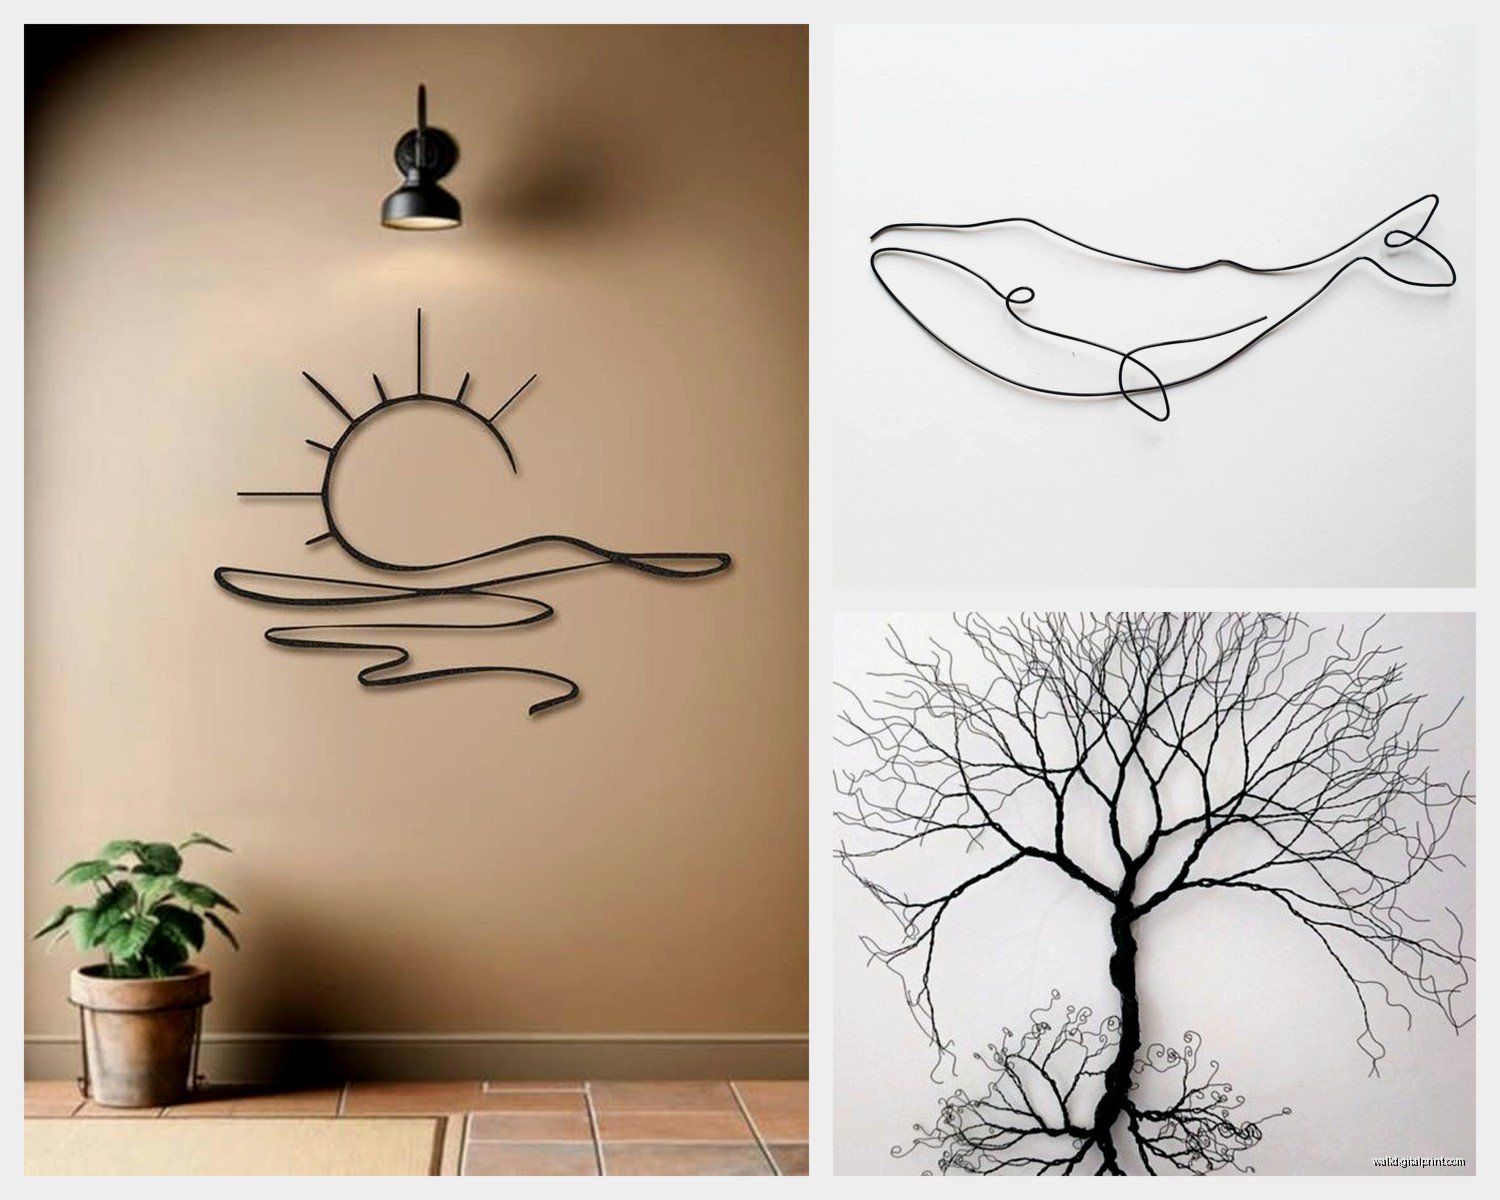
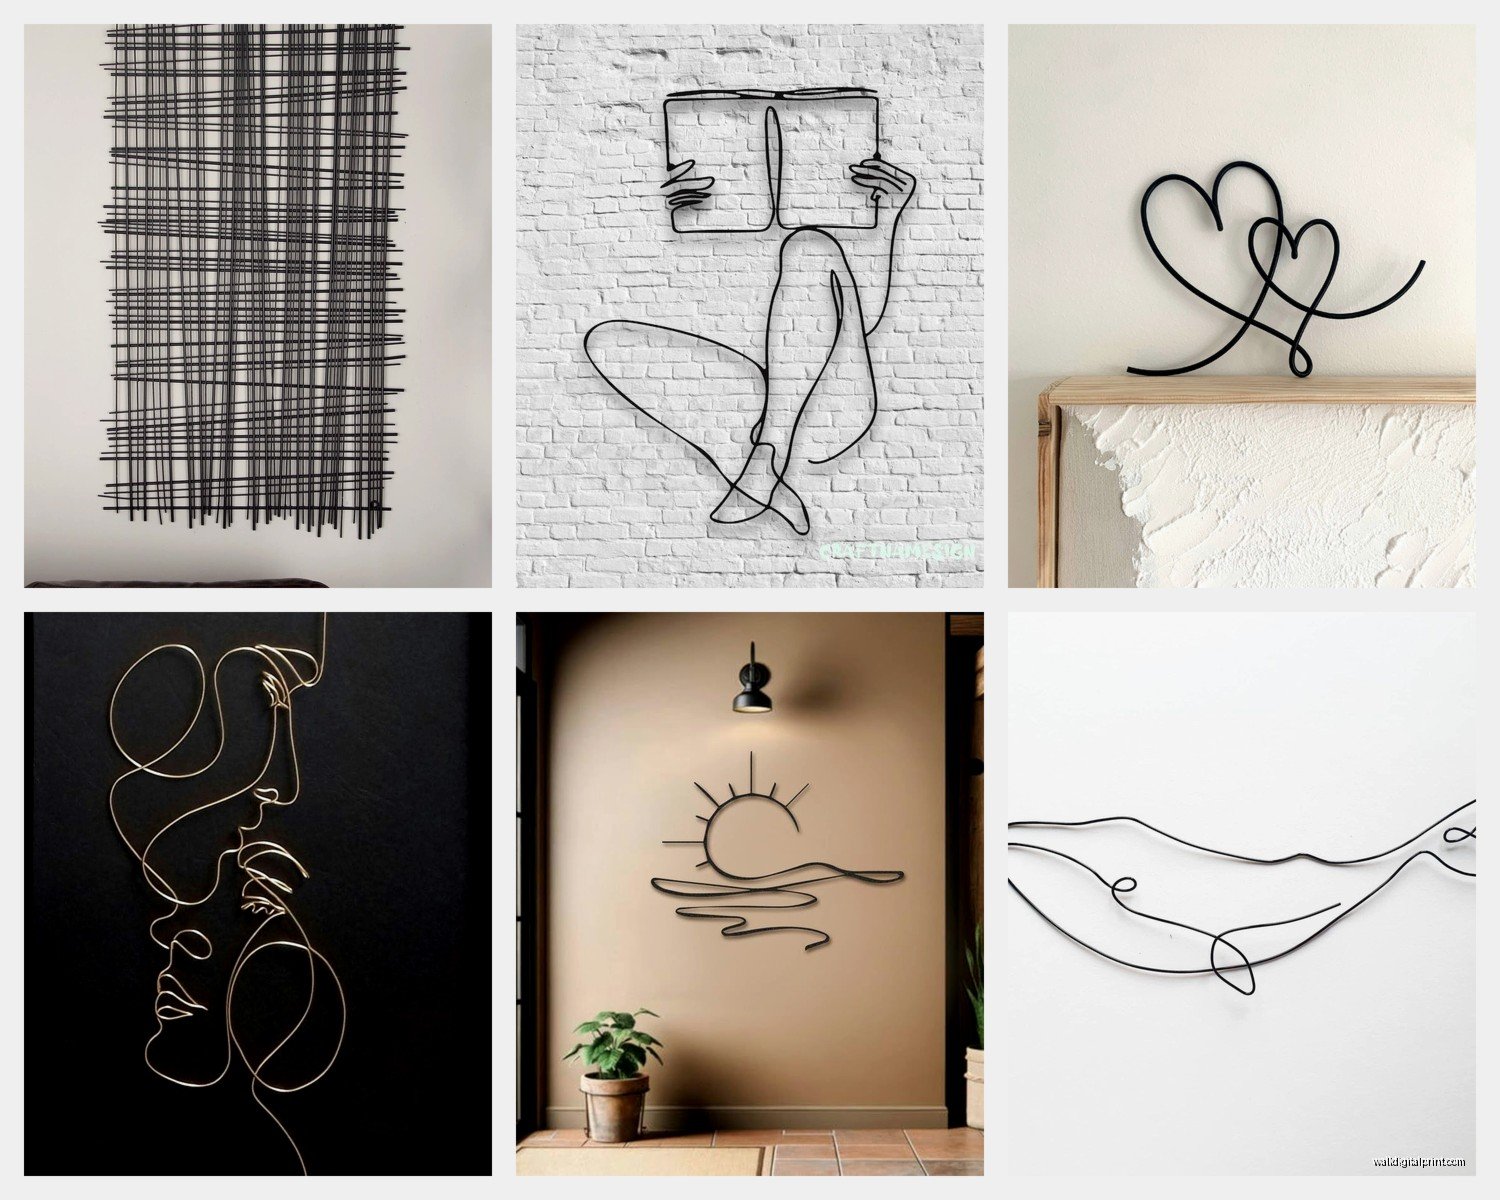
Popular Styles and What Works Where
Face profiles and figures – These are everywhere right now. They work great in bedrooms, home offices, or anywhere you want something contemplative. Just don’t put them in your bathroom because it feels like someone’s watching you. Trust me on this.
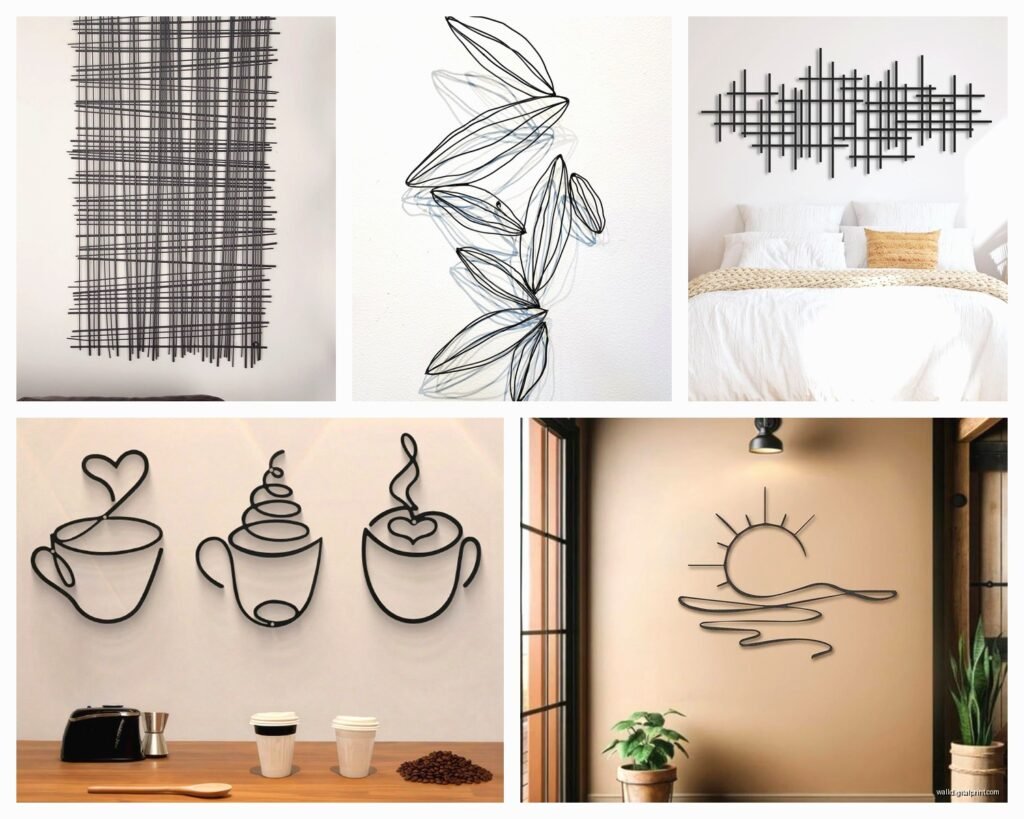
Botanical/organic shapes – Leaves, branches, abstract florals. Perfect for dining rooms, kitchens, sunrooms. They soften spaces without being too literal. I just hung a wire monstera leaf in a client’s kitchen and it’s become the whole vibe of the room.
Geometric/abstract – These are the most versatile honestly. They work in modern spaces, transitional spaces, even slightly traditional rooms if you style them right. I have a geometric wire piece in my living room that’s just intersecting circles and it goes with literally everything.
Words and quotes – Okay so these can go tacky fast. If you’re gonna do wire words, keep it to single words or very short phrases. “Breathe” in wire script above your bed? Sure. A full motivational quote? Probably skip it unless you’re going for that specific Instagram aesthetic.
Mixing Wire Art with Other Pieces
You can absolutely create a gallery wall that includes wire sculptures and framed art, but there’s a trick to it. The wire pieces need to be similar in visual weight to your framed pieces, which means either:
Going with very simple frames (thin black or natural wood) so everything feels minimal together, or making your wire art the focal point and surrounding it with smaller framed prints. I did this in my entryway – one large wire face profile in the center with four small 5×7 botanical prints around it. Works perfectly.
Don’t mix different wire finishes in the same grouping though. All black, all gold, all copper – pick one and stick with it. I violated this rule once mixing matte black and glossy black wire and it looked messy even though they were both “black.”
Maintenance and Care
This is gonna sound weird but wire art gets dusty in a way that’s really visible. The thin lines catch dust and spiderwebs (sorry) especially if they’re near a corner or ceiling.
Dust them monthly with a microfiber cloth or one of those extendable dusters. Don’t use anything wet unless you need to spot-clean, and even then just a barely damp cloth. The powder coating can handle it but painted wire might get weird.
If you live somewhere humid, check the mounting hardware every 6 months. I had a piece in my bathroom (before I moved it because of the creepy watching thing) and the D-rings started showing tiny rust spots after a year.
Budget Breakdown
Small pieces (under 18 inches) – $25-$60
Medium pieces (18-36 inches) – $60-$150
Large pieces (36+ inches) – $150-$400+
Custom work obviously costs more. I had a wire artist recreate my dog’s profile from a photo and it was $280 for a 24-inch piece, but it’s perfect and worth every penny.
Amazon has decent options in the $30-$80 range that are fine for trying out the trend. Etsy is where I find the more unique stuff – lots of small makers doing really interesting abstract work. Just read reviews carefully because shipping these things can get dicey.
West Elm and CB2 have beautiful options but you’re paying for the brand. Their quality IS good though, and they often go on sale.
Red Flags When Shopping
- No measurements listed (how is this still a thing?)
- Photos only show the piece on a white background with no scale reference
- Seller can’t tell you the wire gauge or finish type
- Shipping time is like 6-8 weeks for something that’s supposedly in stock
- All the reviews are 5 stars posted on the same day (fake reviews are real)
Okay so funny story – I ordered what I thought was a 36-inch piece based on the photos and it arrived as 12 inches. The listing said 36 but that was apparently the “design number” not the size. Always confirm dimensions before ordering, especially on Etsy where measurements can be listed in different formats.
Installation for Renters
If you can’t put holes in your walls, you’ve got options. Those Command picture hanging strips actually work really well for wire art since it’s so lightweight. Use the ones rated for more weight than you need – if your piece is 2 pounds, use 8-pound strips.
I’ve also had success with those ceiling track systems where you hang wire from the ceiling molding. Looks very gallery-like and works great for wire sculptures since they hang forward from the wall a bit anyway.
Lean larger pieces on mantels or shelves – wire art looks good displayed this way because you can see the dimensionality. Just make sure they’re stable and won’t slide off.
The other thing about wire art for renters is that if you DO put a small hole in the wall for a picture hook, it’s SO much easier to patch than the giant holes you’d need for heavy framed art. Like you can literally fill it with toothpaste in a pinch (not my official recommendation but I’ve seen it work).
Trending Designs Right Now
The face profile thing is still going strong but it’s evolving into more abstract interpretations. Less realistic, more suggestive line work. I’m seeing lots of pieces where it’s barely recognizable as a face until you step back.
Celestial wire art is having a moment – moons, stars, sun designs. These work surprisingly well in both kids’ rooms and adult spaces depending on how abstract they are.
Architecture and cityscape outlines are getting popular too. I hung a wire skyline piece in a client’s home office last month and it’s such a cool conversation starter without being too literal or cheesy.
Natural elements but make it weird – like a wire piece that’s sort of botanical but also sort of abstract geometric. These are my favorites because they work in basically any space and don’t feel too trendy.
Honestly the best wire art pieces are the ones where you’re not entirely sure what you’re looking at from far away but it resolves into something recognizable up close, or vice versa. That’s the sweet spot.
Anyway, that’s basically everything I wish someone had told me before I started collecting these things. Start with one piece in a low-pressure spot and see how you feel about it before committing to a whole gallery wall situation.