Wall Art Guide, Wall Art Tutoriels
Ceramic Wall Art: Pottery & Clay Sculptural Designs
Mar
So I’ve been working with ceramic wall art for like six years now and honestly it’s one of those things where I wish someone had just told me the actual practical stuff upfront instead of all the flowery descriptions you see everywhere.
Understanding What You’re Actually Buying
Okay so first thing – ceramic wall art isn’t all the same and this matters more than you’d think. You’ve got earthenware which is porous and needs to be glazed properly or it’ll absorb moisture over time. Then there’s stoneware which is what I use in most client spaces because it’s fired at higher temps and just holds up better. Porcelain is gorgeous but also the most expensive and kinda fragile for wall installations if you’re not careful with the mounting.
I learned this the hard way when I installed this beautiful earthenware piece in a client’s bathroom and after like eight months it started showing weird discoloration because the glaze had microscopic cracks. Had to replace the whole thing which was awkward.
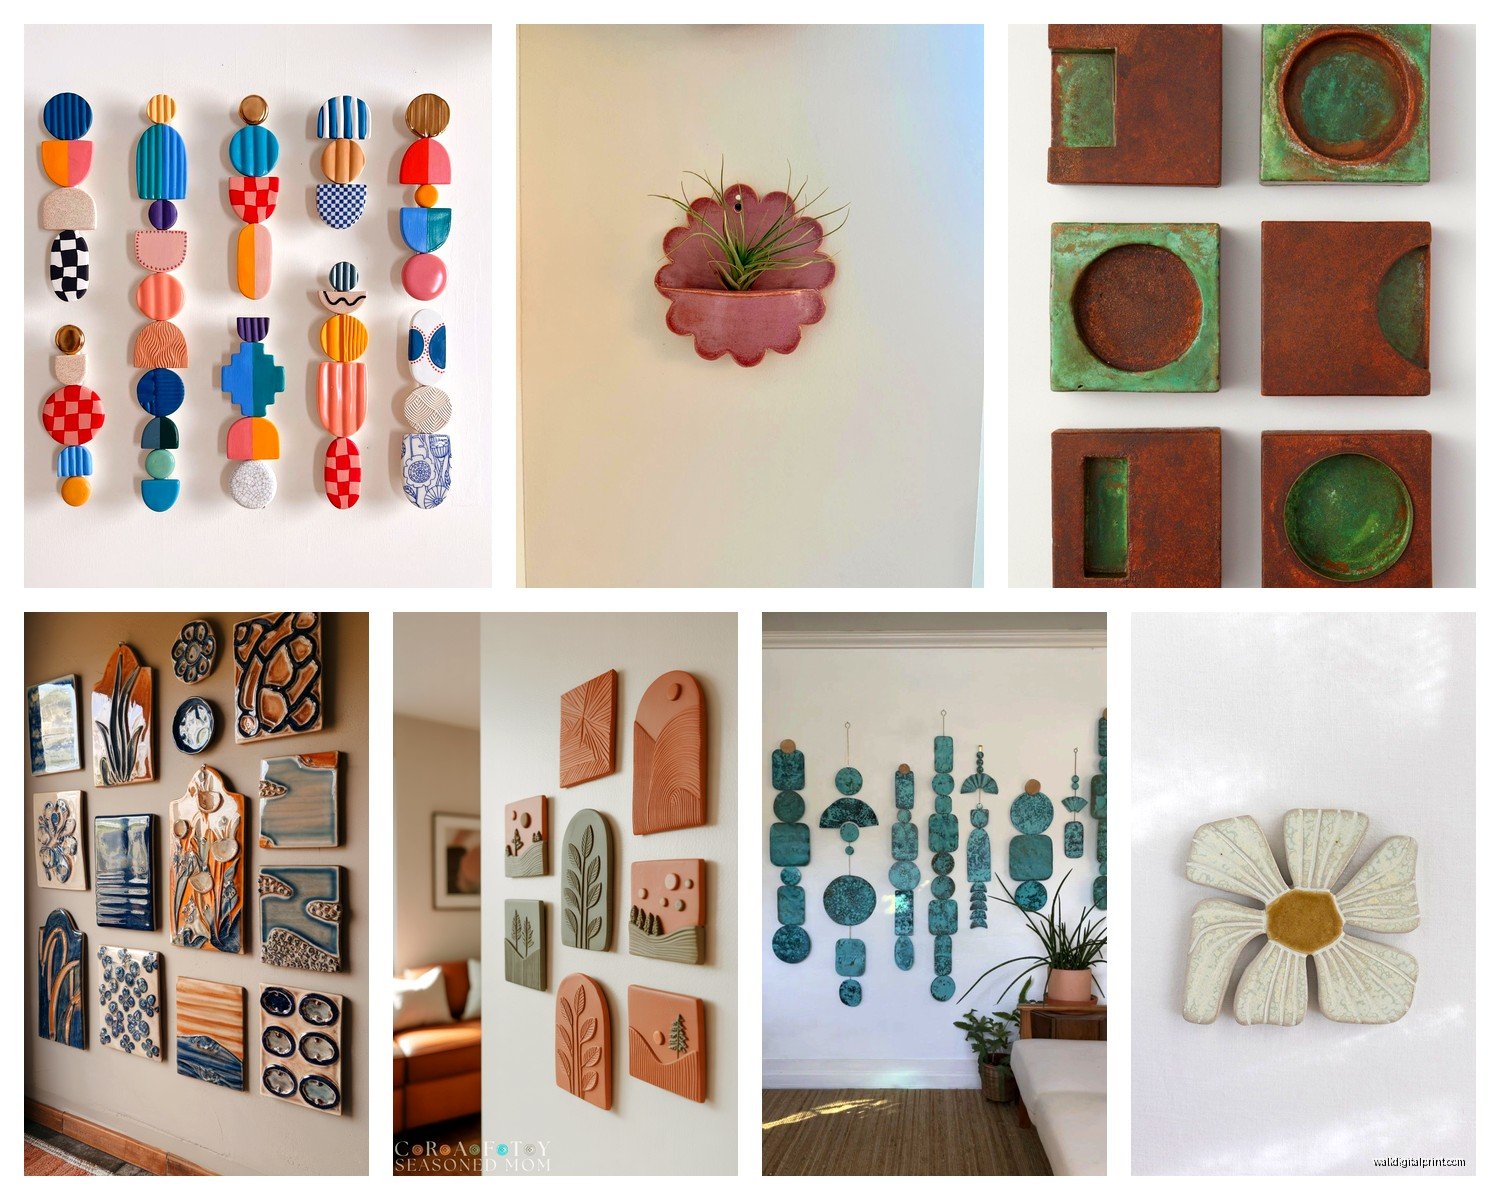
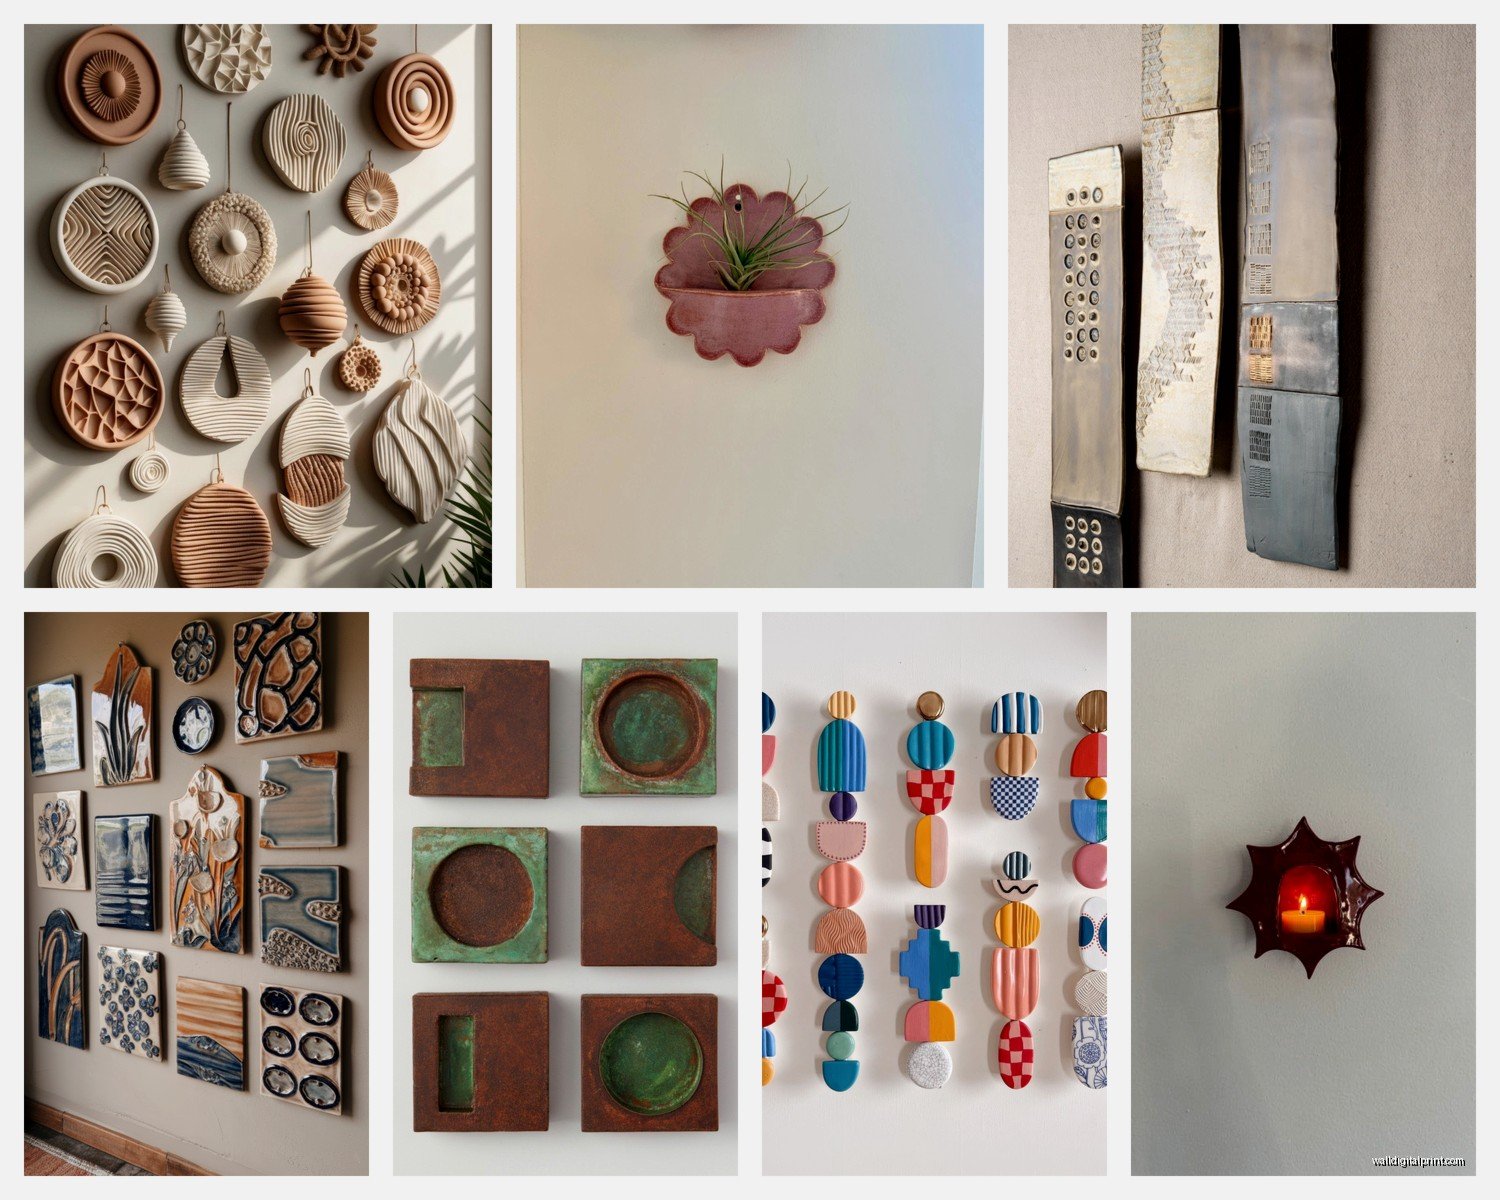
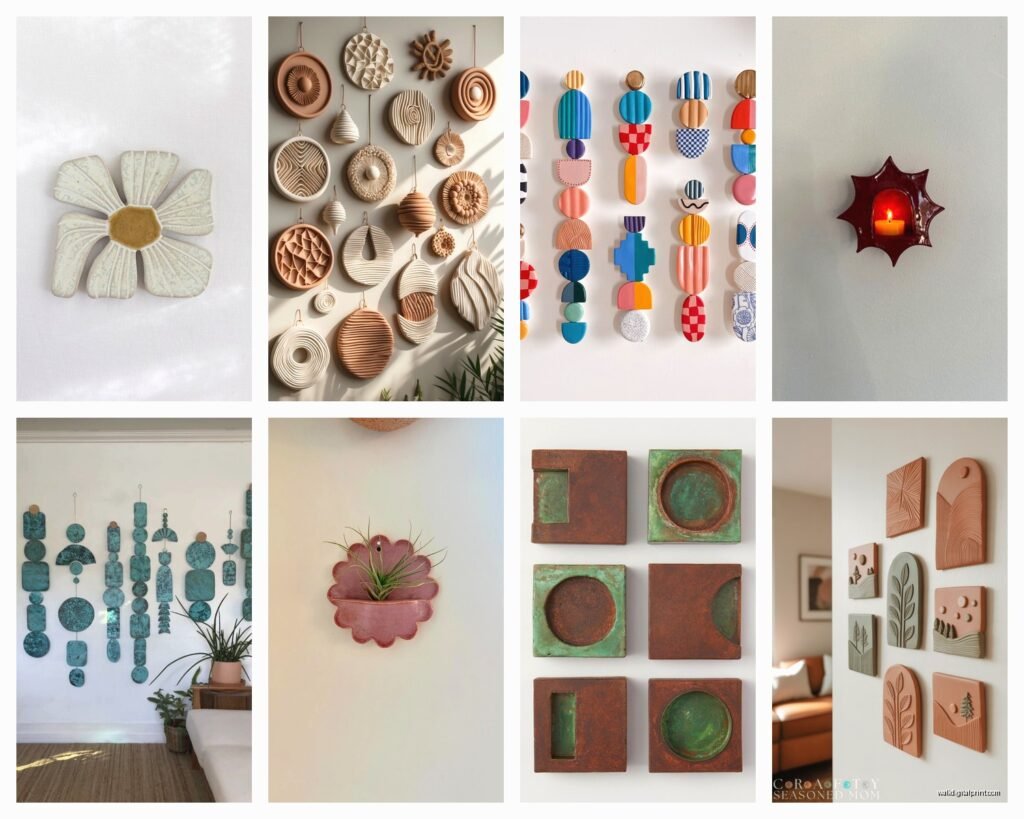
The sculptural designs you see – those raised patterns and 3D elements – they’re either hand-built or slip-cast. Hand-built stuff is gonna cost more but each piece is actually unique. Slip-casting uses molds so you get consistency but less character. Neither is “better” it just depends on what you want.
Mounting Systems That Actually Work
This is where everyone gets confused and I see so many people just slapping command strips on everything which… please don’t with ceramics over like 2 pounds.
For smaller pieces under 3 pounds I use those picture hanging strips but the heavy duty ones rated for at least double the weight. The trick is you gotta clean both surfaces with rubbing alcohol first and let it dry completely. Then press them together for like 30 seconds which feels longer than you think when you’re standing there holding it.
Medium pieces between 3-8 pounds need proper wall anchors. I use toggle bolts in drywall or if you can hit a stud that’s obviously ideal. Most ceramic wall art comes with a wire hanging system on the back or D-rings. The wire systems are easier for adjusting level but D-rings are more secure for heavier sculptural pieces.
Heavy sculptural installations over 8 pounds – you’re gonna want French cleats or Z-bars. I know they sound complicated but they’re actually pretty straightforward. One piece mounts to the wall, one mounts to the back of your ceramic piece, and they interlock. The weight distributes along the whole cleat instead of on two points. Game changer for those big statement pieces.
The Level Thing Nobody Talks About
Get a small torpedo level. Not even kidding, I have three of them scattered around my studio because I kept losing them. When you’re installing ceramic art that has irregular edges or organic shapes, you can’t always trust the edges to look level even when they are. I usually level based on the internal composition or where your eye naturally lands. Sometimes a piece that’s technically level looks crooked because of how the design elements flow.
Placement Decisions That Matter
Height is weirdly important with ceramic wall art. The standard “57 inches to center” rule that works for framed art doesn’t always apply. Sculptural ceramics have this physical presence that changes how you perceive them. I usually go 60-65 inches to center for pieces with significant depth or texture because the shadows they cast make them feel heavier visually.
In kitchens – keep ceramics at least 18 inches away from your cooktop. The heat won’t crack them immediately but over time the temperature fluctuations can cause issues especially with earthenware. Also grease splatter is real and cleaning textured ceramic surfaces is annoying.
Bathrooms are tricky. I only use fully vitrified pieces (stoneware or porcelain) and make sure they’re positioned away from direct shower spray. That moisture thing I mentioned earlier? It’s real.
Grouping Multiple Pieces
Oh and another thing – when you’re doing a gallery wall with ceramic elements mixed with other stuff, the ceramics need more space around them than flat art. They cast shadows and have this physical dimension that requires breathing room. I usually leave at least 4-6 inches between ceramic pieces and 3-4 inches between ceramic and flat art.
For all-ceramic installations I did this project last month where we mounted nine small clay discs in a grid pattern and the spacing was 8 inches center to center. Any closer and they started competing with each other visually, any farther and it lost cohesion. But that’s for pieces that were about 6 inches in diameter each – bigger pieces need more space obviously.
Wait I forgot to mention – test your layout on the floor first. Use painter’s tape on the wall to mark positions but arrange everything on the floor in the actual configuration. Take a photo from above. This saved me so many times from making weird spacing decisions.
Lighting Considerations You Gotta Think About
Ceramic wall art is like 50% about the shadows it creates. I’m not even exaggerating. A flat piece with carved or raised designs can look completely different depending on your light source.
Top-down lighting (like from ceiling fixtures) creates the most dramatic shadows but can sometimes make pieces look heavier than they are. Side lighting from wall sconces or nearby lamps gives you these subtle gradients across the surface texture. Front lighting basically flattens everything which is sometimes what you want if the glaze or color is the main feature.
Natural light changes throughout the day which is actually beautiful with ceramics but you need to consider sun exposure. Direct sunlight won’t fade ceramics like it does with prints but it can heat them up and if you’ve got any organic materials mixed in (some artists embed wood or fiber) those can deteriorate.
My dog just knocked over my coffee but anyway –
The Glare Problem
Glossy glazes look amazing but they can create glare spots depending on your lighting. If you’re buying online try to see photos of the piece in different lighting conditions. Matte and satin finishes are more forgiving but sometimes they don’t photograph as well so they look better in person than online.
Buying Tips From Someone Who’s Made Mistakes
Etsy and direct-from-artist purchases are where I find the best stuff but you gotta ask questions. I always ask about the clay body (earthenware/stoneware/porcelain), firing temperature, whether it’s food-safe glazed even though it’s wall art because that tells you about glaze quality, and what the weight is.
Weight matters for shipping and installation obviously. If a seller can’t tell you the approximate weight that’s a red flag they’re not familiar with their own products.
This is gonna sound weird but I also ask if they’ve had pieces break during shipping and what their packaging process is. Artists who’ve refined their packaging over time are way more reliable. I’ve had pieces arrive that were wrapped in like two sheets of newspaper and just hoped for the best. Not great.
For sculptural pieces with delicate elements – protruding parts, thin extensions, separate components – ask if they’re shipped attached or if you need to do final assembly. Some pieces ship with elements detached for safety and you glue them on with epoxy after. Not a dealbreaker but good to know upfront.
Style Categories That Actually Help When Searching
When you’re looking for ceramic wall art the descriptions can be all over the place so here’s how I mentally categorize things:
Relief tiles – these are flat-backed with raised or carved surface designs. Easy to mount, usually rectangular or square, good for creating patterns or grids.
Dimensional rounds – circular pieces with sculptural elements, either convex or concave. These catch light really beautifully but need careful placement because they create strong focal points.
Organic forms – irregular shapes inspired by nature, leaves, waves, geological formations. These are hardest to place because they don’t follow standard compositional rules but they’re my favorite honestly.
Geometric abstracts – angular pieces with clean lines and architectural vibes. These work well in modern spaces and are easier to group in multiples.
Vessel-based – actual pottery like plates, bowls, or vases mounted as wall art. You’re gonna need plate hangers or specific mounting hardware for these.
Color and Glaze Real Talk
Glaze colors can look wildly different in person versus photos. Blues and greens usually photograph pretty accurately but browns, taupes, and earth tones can look either way more boring or way richer than they actually are depending on the lighting in the photo.
If you’re trying to match existing colors in your space, message the seller with photos of your room. Most artists are happy to help you figure out if something will work. I do this all the time for clients and it’s prevented so many returns.
Reactive glazes – where the glaze does unpredictable things during firing creating unique patterns – are gorgeous but each piece is truly one of a kind. You can’t reorder the exact same thing if you break it. Just something to consider.
Crazing Is Normal Sometimes
Okay so funny story, I had a client freak out because her ceramic piece developed these fine cracks in the glaze after a few months. That’s called crazing and it’s actually not damage, it’s just the glaze and clay body expanding at different rates. It happens with certain glazes especially on earthenware. Some artists consider it a desirable feature, some prevent it with glaze formulation. If you hate the look, ask sellers if their pieces are prone to crazing before buying.
Maintenance Is Easier Than You Think
Most ceramic wall art just needs occasional dusting with a soft cloth. For textured pieces I use a soft brush – like a clean makeup brush works great for getting into crevices.
If something gets actually dirty you can use slightly damp cloth with mild soap but make sure the piece is fully glazed. Unglazed areas shouldn’t get wet because they’ll absorb moisture and can develop staining or mildew over time.
Don’t use glass cleaner or anything with ammonia on ceramics. It can dull certain glazes especially metallic finishes.
Installation Tools You Actually Need
Here’s my actual toolkit that lives in a canvas bag under my sink:
- Torpedo level
- Pencil for marking
- Painter’s tape
- Drill with bits for various wall types
- Toggle bolts in various sizes
- Picture hanging wire and D-rings
- Rubber bumpers for the bottom corners of pieces
- Stud finder even though mine is weirdly unreliable
- Measuring tape
Those rubber bumpers are clutch by the way – they keep the bottom of the piece slightly off the wall which prevents the ceramic from rubbing against the wall surface and also helps with air circulation behind the piece.
Sizing Guidelines That Help
For above furniture like a console or credenza, your ceramic piece or grouping should be about two-thirds to three-quarters the width of the furniture. But with sculptural ceramics that have significant depth, you can go slightly smaller because they have more visual weight than flat art.
In empty wall spaces I look at the wall dimensions and aim for pieces or groupings that fill about 60-70% of the visual space. Ceramics need more negative space around them than other art forms because of their dimensionality.
Small pieces under 8 inches work best in groupings unless you’re creating a specific vignette with other objects. Solo pieces should generally be at least 12 inches in one dimension to have enough presence on a wall.
Mixing Ceramics With Other Art
This works really well but you need some kind of connecting element – similar color palette, complementary styles, or consistent framing approach for the non-ceramic pieces. I usually let the ceramic be the textural anchor and keep other elements simpler.
Don’t put ceramics directly next to heavily textured fiber art or macrame. Too much competing texture makes everything feel busy. Flat photography or prints balance nicely with ceramic dimensionality.
Metal art and ceramics can work together but avoid shiny metals next to glossy glazes – it’s too much reflective surface. Matte metals with any glaze finish or matte ceramics with any metal finish is safer.
Seasonal and Trend Considerations
Ceramic wall art doesn’t really go out of style the way some decor does because it’s rooted in craft traditions that have been around forever. That said, certain aesthetics trend harder at different times. Right now organic irregular shapes and earth-tone glazes are everywhere. A few years ago it was all geometric and jewel tones.
Buy what you actually like because you’re gonna live with it for years. I have clients still loving pieces I installed five years ago while their other decor has changed three times.
The investment level varies wildly – you can find small pieces for $30-50 or large sculptural installations for thousands. For most residential spaces I budget $150-400 per significant piece which gets you quality handmade work from established artists.
Alright I think that covers most of the practical stuff I’ve learned through actually doing this. The main thing is just don’t overthink the installation part – proper anchors, good placement, and you’re golden.