Wall Art Guide, Wall Art Tutoriels
Crushed Glass Wall Art: Sparkling Mosaic Designs
Mar
So I’ve been working with crushed glass for wall art projects for like three years now and honestly it’s one of those materials that looks way more intimidating than it actually is. My first project was a total disaster because I bought the wrong adhesive but we’ll get to that.
Types of Crushed Glass You’ll Actually Want
Okay so there’s basically three main types and they’re NOT interchangeable even though Home Depot will tell you they are.
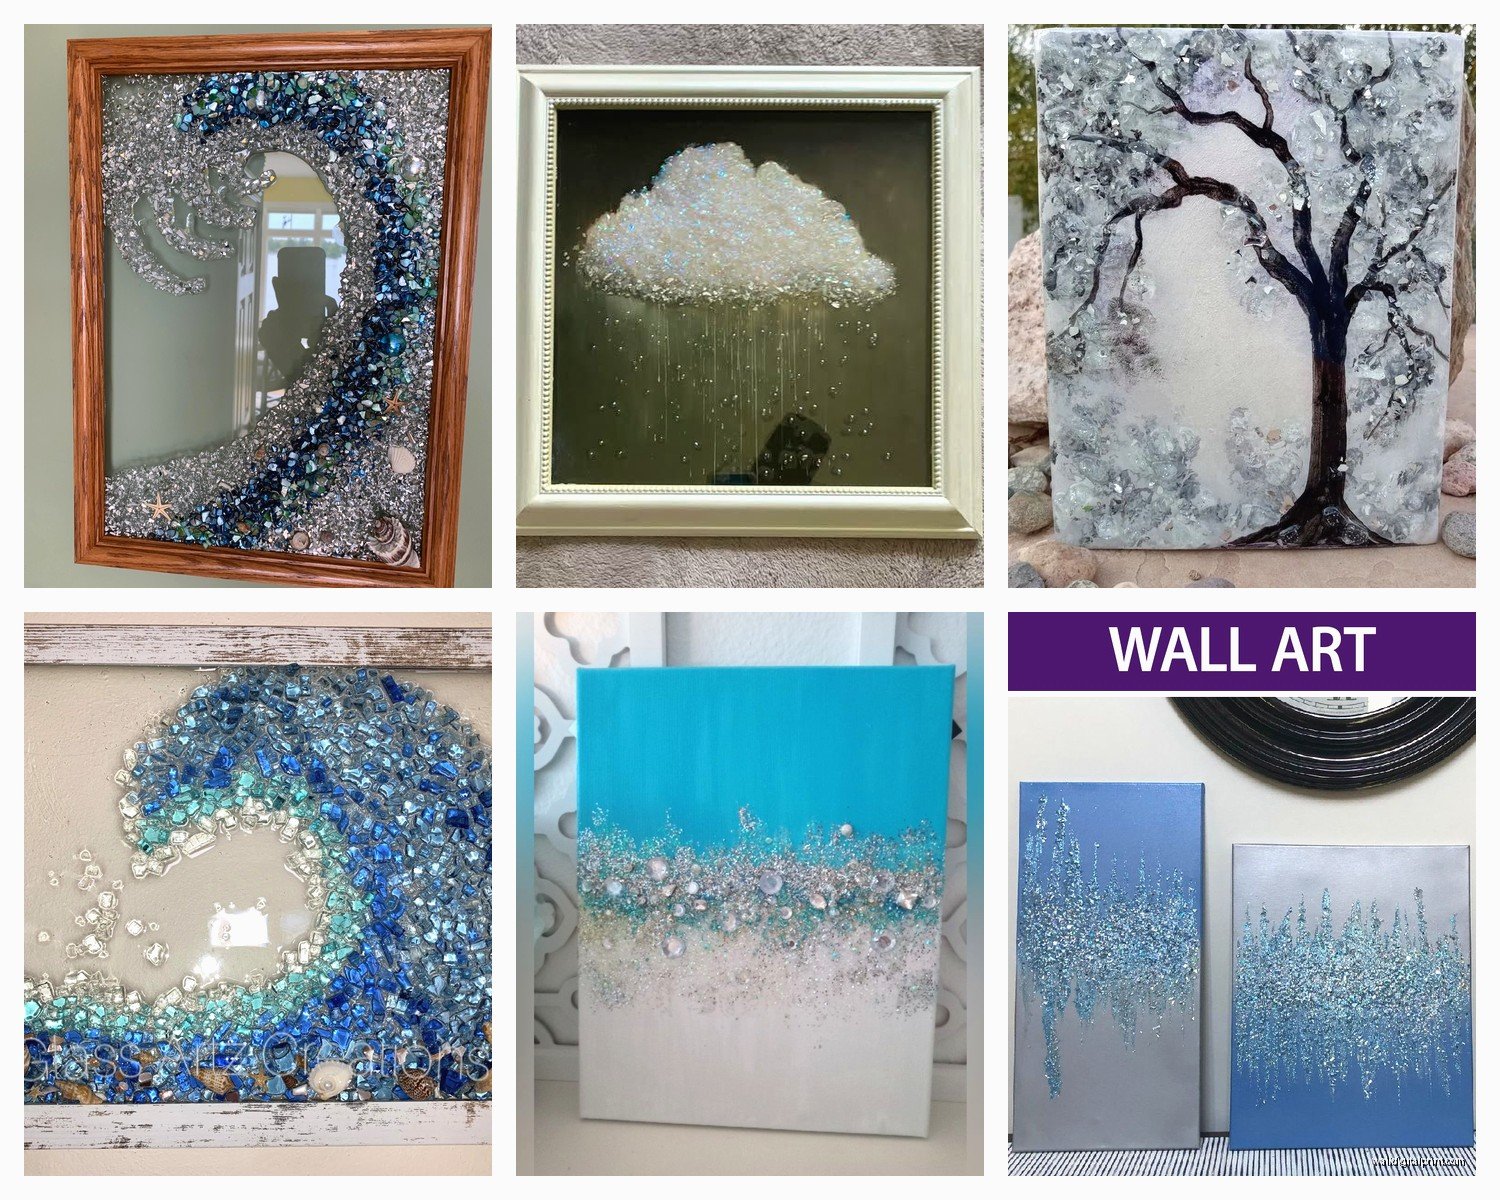
Tempered glass chips are what you want for most projects. They’re tumbled so the edges aren’t sharp, come in like a million colors, and you can get them from specialty craft stores or online. I usually order from Delphi Glass or Mosaic Mercantile because their color consistency is actually reliable. Nothing worse than ordering “cobalt blue” twice and getting two completely different shades.
Fire glass is technically for fire pits but honestly I use it all the time for wall art because it’s cheaper in bulk and the reflective quality is insane. The pieces are usually bigger though so if you want that fine mosaic look this might not work. Great for modern geometric designs where you want chunkier elements.
Beach glass or tumbled glass has that frosted look which is gorgeous for coastal themes but it doesn’t sparkle the same way. My client last month wanted a mermaid-themed piece for her daughter’s room and this was perfect, but for high-impact sparkle it’s not the move.
Sizes Matter More Than You Think
The mesh sizes are usually labeled like 1/4 inch, 1/2 inch, etc. For wall art I stick with 1/4 to 3/8 inch because anything bigger starts looking more like a rock garden than mosaic art. Mixed sizes actually create the most visual interest though so I usually get three containers of the same color in different sizes and combine them.
Backing Materials Because This Tripped Me Up
Your backing needs to be sturdy enough to hold the weight. Crushed glass is heavier than you’d expect and I learned this when a 2×3 foot piece literally fell off my studio wall at 2am and my cat freaked out so badly she didn’t come out from under the bed for like six hours.
Plywood or MDF board is my go-to. At least 1/2 inch thick for anything over 12×12 inches. I get mine cut at Home Depot because I don’t have a table saw and honestly their cuts are cleaner than mine would be anyway.
Canvas boards work for smaller pieces under 8×10 but you need to seal them first or the adhesive soaks through. Ask me how I know.
Cement board is overkill unless you’re doing an outdoor installation or something for a bathroom where moisture is an issue. It’s heavy as hell and harder to hang.
The Adhesive Situation Is Crucial
This is where I messed up initially so learn from my mistakes. Regular craft glue doesn’t cut it. The glass is too heavy and non-porous so it just slides around.
Weldbond is my absolute favorite. It’s technically a universal adhesive but it works perfectly for glass on wood. Dries clear, flexible enough that it won’t crack if there’s any wall movement, and strong enough that I’ve never had a piece fail. You can get it at most hardware stores or Amazon.
E6000 works but the fumes are no joke. I only use this for outdoor pieces or areas that’ll get wet because it’s completely waterproof. Work in a ventilated area or you’ll get a headache that lasts for days trust me.
Silicone adhesive is what some people recommend but I find it too thick and hard to work with for detailed designs. Maybe fine for random scatter patterns though.
Tile adhesive or thinset if you’re doing a really large installation or want that authentic mosaic look with grout lines between pieces. More labor intensive but the finished look is super professional.
Application Methods
You can either spread adhesive over sections and press glass into it, or apply adhesive to individual pieces. For scattered random designs I spread it. For specific patterns where color placement matters I do individual pieces even though it takes forever.
Oh and another thing, work in small sections like 4×4 inches at a time because the adhesive starts skinning over faster than you think especially in dry climates.
Design Approaches That Actually Work
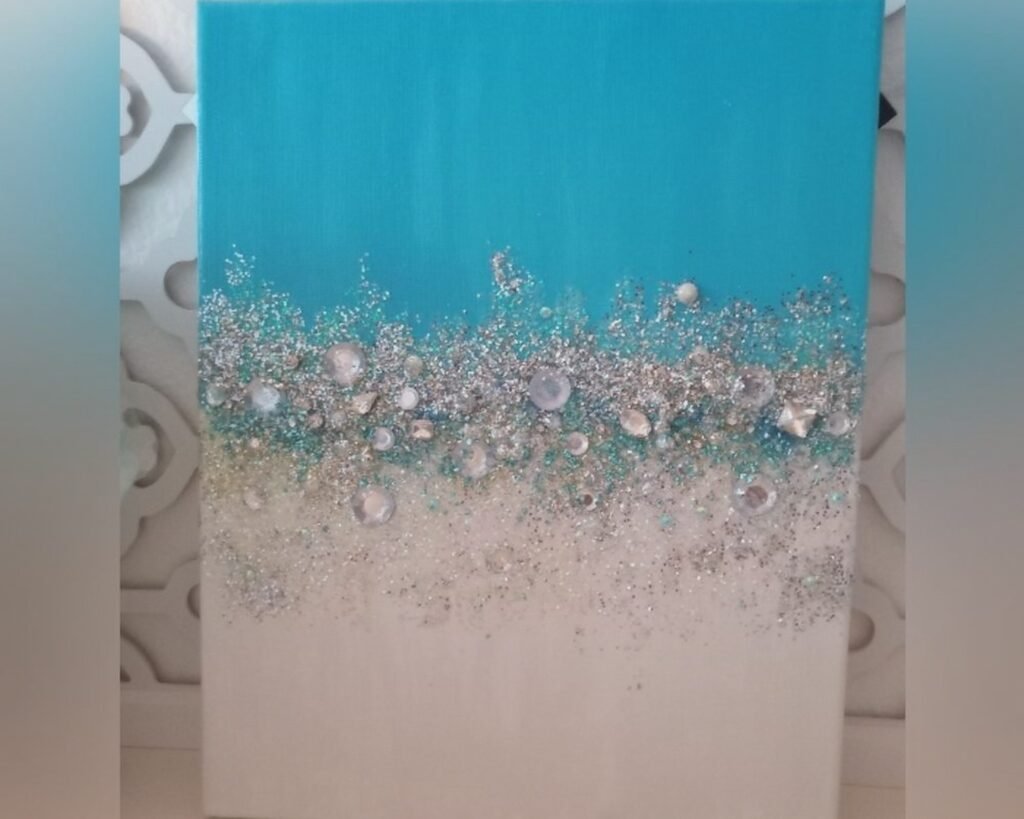
Ombre gradients are probably the easiest place to start. Pick like 5 shades of one color family from light to dark, sketch horizontal lines on your board, and fill each section. I did a turquoise to navy one for my bathroom and it took maybe three hours total.
Geometric patterns require painter’s tape to section off areas. I use the green Frog Tape because it doesn’t pull up the wood finish. Create your pattern with tape, fill sections with different colors, let dry completely before removing tape. The crisp lines look so professional that people always think I’m way more skilled than I actually am.
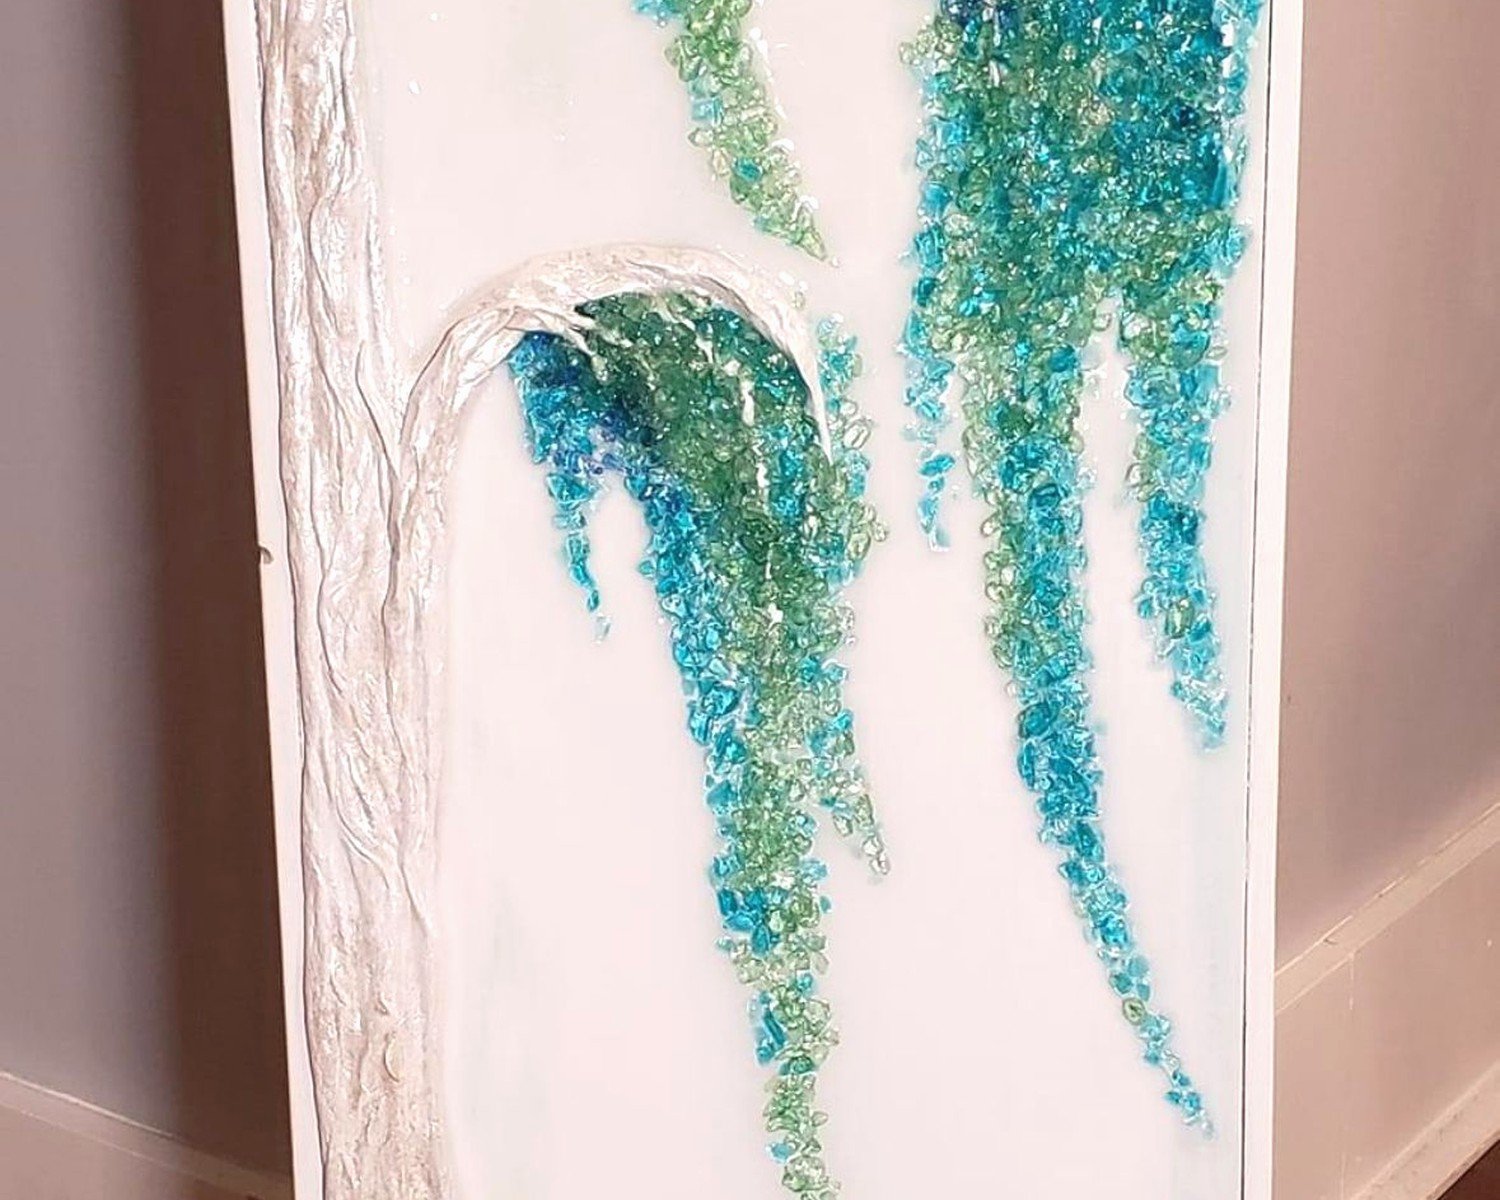
Silhouette designs where you print out a shape, trace it onto your board, and fill either the inside or outside with glass. I did a palm tree silhouette with clear iridescent glass around it and solid black glass for the tree itself. Really striking.
Random scatter is honestly the most forgiving for beginners. Mix multiple colors, spread adhesive over the whole surface, and just press glass in randomly. You can’t really mess this up.
Grout or No Grout
This is gonna sound weird but I actually prefer no grout for most wall art pieces. The glass-on-glass look with just tiny gaps is more modern and lets light reflect between pieces. But if you want that traditional mosaic look, grout definitely adds something.
Sanded grout for gaps wider than 1/8 inch. Comes in tons of colors but I usually stick with white, black, or gray.
Non-sanded grout for tighter spacing. Easier to work with for small projects.
The process is just like tile grouting, spread it over the surface with a rubber float, push it into gaps, wipe off excess with a damp sponge. Wait like 20 minutes and buff off the haze with a dry cloth. Seal it after it cures if you want but for wall art I usually skip this step.
Finishing and Hanging
Once everything’s dry which takes like 24-48 hours depending on adhesive and humidity, you gotta seal the edges. I use a small brush to paint Mod Podge around the perimeter where glass meets wood just to make sure nothing’s gonna pop off over time.
For hanging, the weight is real so use appropriate hardware. D-rings screwed into the back work for smaller pieces. For anything over 18 inches I use a french cleat system because it distributes weight better and sits flush against the wall.
Lighting Considerations
This is something I didn’t think about until I hung a piece in my hallway and it just looked… flat. Crushed glass needs light to sparkle. Natural light from a window is ideal but not always possible. I installed a small picture light above one piece in my living room and the difference is dramatic. Those battery-operated LED strips work too if you don’t want to deal with wiring.
Where to Source Materials Affordably
Craft stores are convenient but expensive. Michael’s has crushed glass but you’re paying premium prices. With a 40% coupon it’s not terrible though.
Dollar Tree actually carries vase filler glass in limited colors and it works fine for practice pieces. Not the best quality but for like experimenting with techniques it’s perfect.
Amazon has bulk options that bring the per-pound price way down. I got a 5-pound mixed color bag for like $25 which would cost probably $80 at a craft store.
Landscape supply stores sell fire glass in bulk if you need a ton of one color. Way cheaper than craft sources but you gotta buy like 10-20 pounds minimum usually.
Facebook Marketplace and Craigslist sometimes have people selling off supplies from abandoned projects. I got a huge score last year, someone was moving and sold me probably $200 worth of glass and mosaic supplies for $40.
Common Problems I’ve Dealt With
Glass sliding around before adhesive sets – work in smaller sections or use a thicker adhesive. E6000 has more grab than Weldbond if this is an issue.
Color looking muddy when mixed – yeah so complementary colors can cancel each other out. Blue and orange together just looks brownish. Stick to analogous colors or separate contrasting colors with clear glass as a buffer.
Uneven surface texture – happens when you press some pieces in more than others. I actually kinda like this dimensional look but if you want it flat you gotta be more careful about consistent pressure.
Adhesive showing through gaps – less is more honestly. You don’t need as much as you think. Skim coat the surface rather than globbing it on.
Pieces falling off after hanging – probably didn’t let it cure long enough or used inadequate adhesive. Give it a full 48 hours before hanging and make sure you’re using something rated for the weight.
Safety Stuff I Should Mention
Even tumbled glass can have sharp edges. I wear those cheap garden gloves from the dollar store when handling large quantities. Also work on a surface you don’t care about because tiny glass bits get everywhere and you’ll be finding them for weeks. I put down a cheap plastic tablecloth that I can just throw away when done.
If you’re cutting your own glass which I don’t really recommend for beginners but some people want that control, you need safety glasses and a proper glass cutter. The dust is bad for your lungs so a mask is smart.
Ideas I’ve Actually Made
Did a custom house number sign for my neighbor using navy and silver glass on a 10×14 board. Took maybe 4 hours including drying time and she was obsessed with it.
Made a series of four 8×8 inch pieces in different colors for my dining room. Each one is a single color ombre and they’re hung in a grid. Super simple but looks like I bought them from West Elm or something.
Client wanted a large piece for her entryway and we did a gold and white geometric pattern that’s like 3×4 feet. That one took me two full days and I charged accordingly because the material cost alone was over $100 but it’s honestly the most stunning piece I’ve ever done.
My sister wanted something for her meditation space so I made a mandala-inspired circular design on a round wood base. That was actually way harder than square designs because working in curves with square-ish glass pieces is tricky but it turned out beautiful.
Okay so funny story, I was watching The Great British Baking Show while working on a project last month and got so distracted that I mixed up my color containers and ended up with purple glass where I meant to put pink. Had to scrape it all off before it dried which was annoying but also like… maybe pay attention next time Sophia.
The thing about crushed glass art is it’s pretty forgiving for experimenting. If you hate how something looks before the adhesive fully cures you can usually scrape it off and start over. Once you get the hang of adhesive amount and working time, projects go pretty quickly and the results are always impressive. People see that sparkle and automatically think it’s more complicated than it actually is which honestly I’m not gonna correct them on.