Wall Art Guide, Wall Art Tutoriels
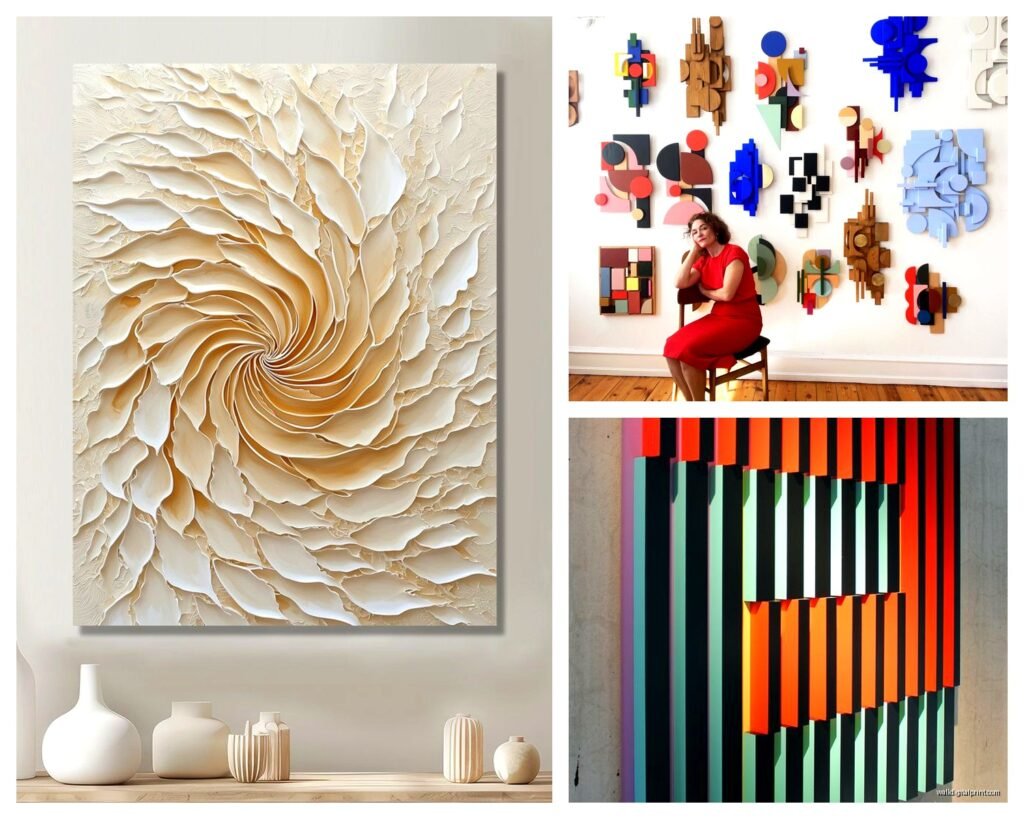
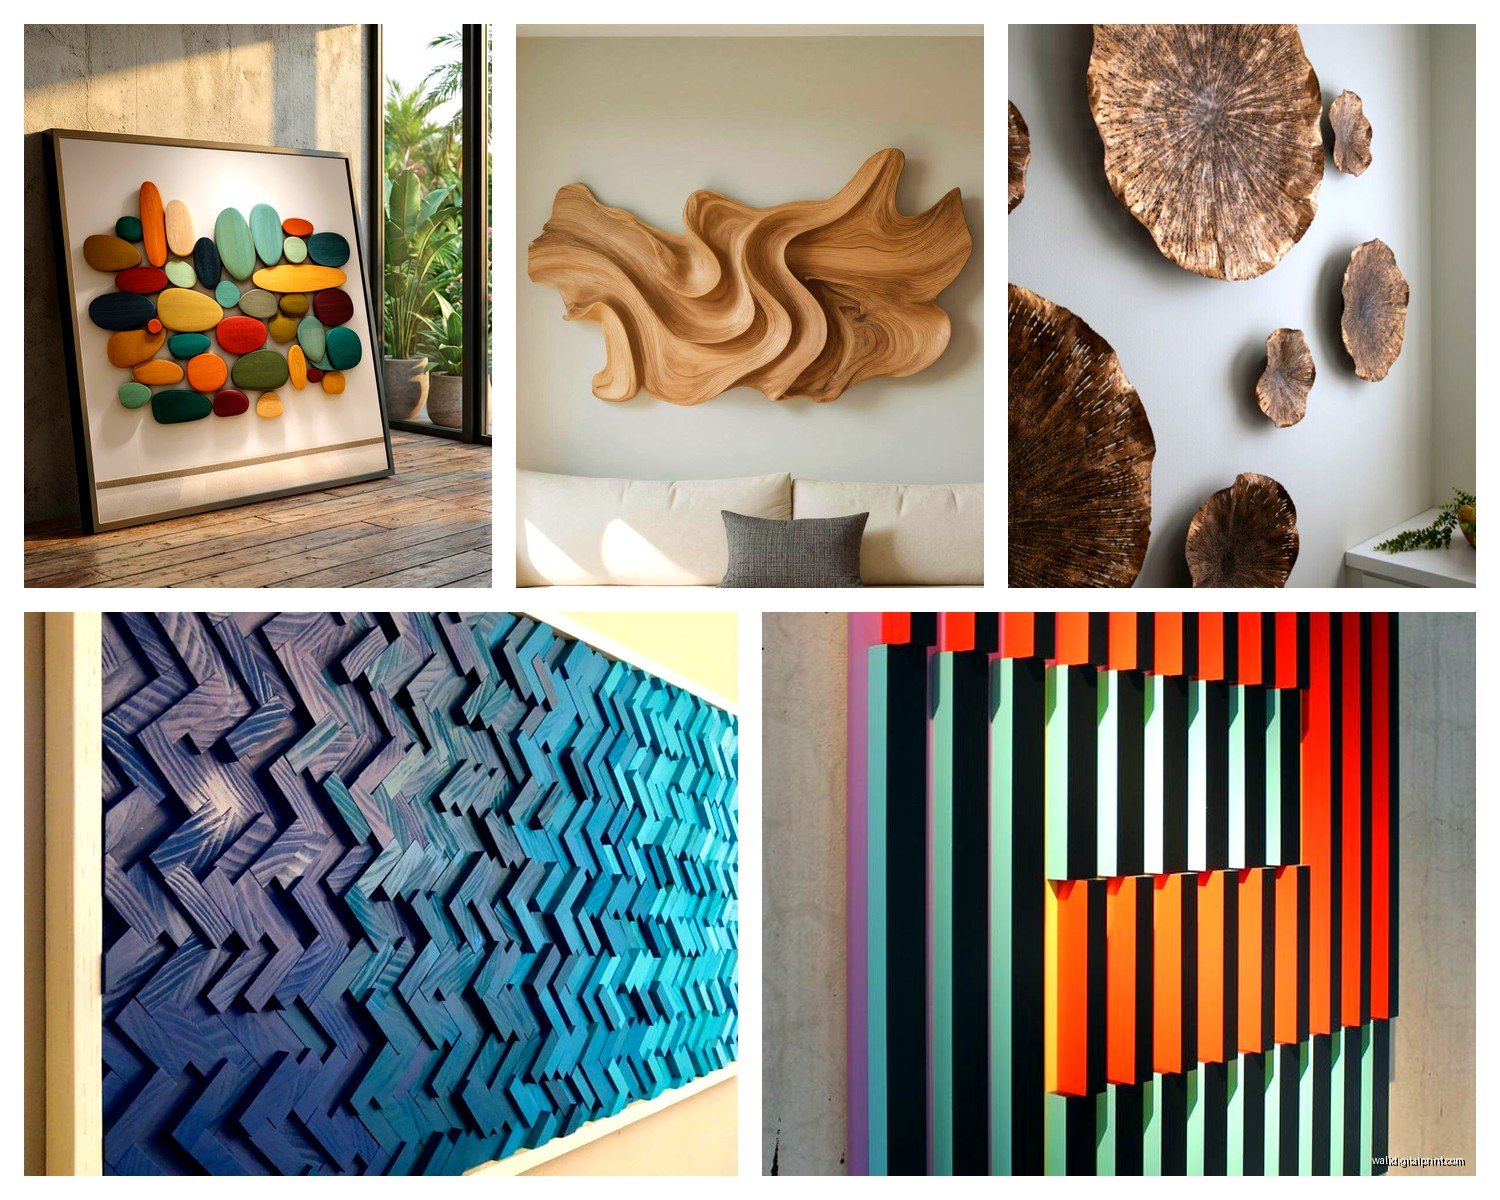
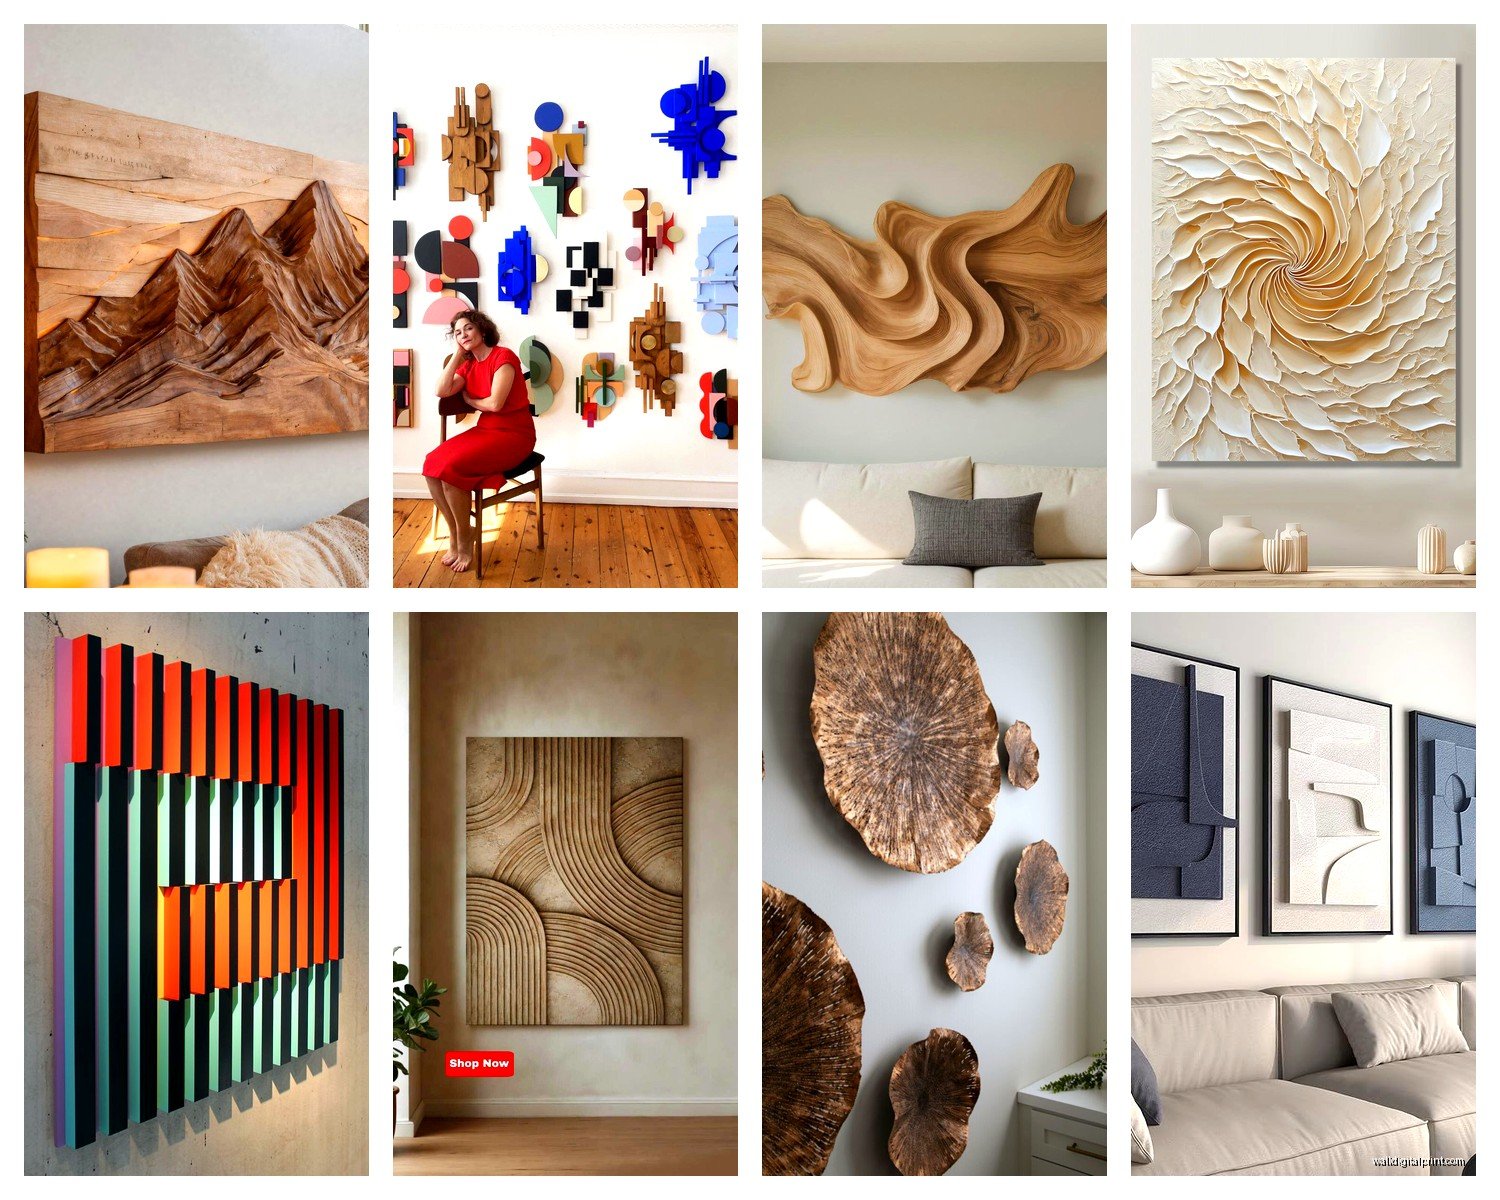
Dimensional Wall Art: 3D Relief & Layered Designs
Mar
So I’ve been totally obsessed with dimensional wall art lately and honestly it started because I was watching this renovation show while eating takeout and thought “wait I could actually make something like that” and here we are six months later with my entire guest room covered in test pieces.
The Materials You Actually Need
Okay so first thing, dimensional wall art basically means anything that’s not flat against your wall. Could be 3D relief sculptures, layered paper designs, wood cutouts stacked on top of each other, whatever. The materials you pick depend entirely on what look you’re going for but I’m gonna walk through what I’ve actually used and what worked versus what was a total disaster.
For wood relief pieces, you want basswood or birch plywood. I started with pine because it was cheaper and my cat knocked the first piece off my workbench before I even finished it, which was maybe a sign. Pine splits too easily when you’re carving details. Basswood is softer, easier to work with, and you can get sheets from craft stores for like $15-20. Birch plywood works great for layered designs where you’re stacking cut shapes because it has that beautiful edge grain.
The thickness matters more than I thought it would. For relief carving, you want at least 3/4 inch thick pieces. For layered designs, I usually do 1/4 inch layers and stack them with varying spacers between. Creates way more drama with the shadows.
Paper and Cardstock Options
This is gonna sound weird but paper dimensional art is actually more complicated than wood sometimes. You need the right weight or everything just flops over. I learned this the hard way when I made this gorgeous geometric design and it looked amazing for like three days, then the humidity hit and the whole thing warped.
Use cardstock that’s at least 80lb weight, preferably 110lb. Regular printer paper is useless for this. I get mine from online paper suppliers because craft stores charge insane markups. For colored pieces, Astrobrights has good colors that don’t fade quickly, but if you want really specific colors, you gotta go with something like French Paper Co.
Oh and another thing, textured cardstock adds SO much depth. I did this whole ocean wave piece using different textures of blue cardstock and the way light hits it throughout the day is completely different. Linen texture, felt texture, even that weird hammered metal texture cardstock they make now.
Cutting and Shaping Tools
You don’t need a whole workshop but you do need some specific tools. I started with just an X-Acto knife and quickly realized I was gonna lose my mind cutting intricate designs by hand.
A Cricut or Silhouette cutting machine changed everything for paper projects. Yeah they’re like $200-400 but if you’re serious about this, it’s worth it. I have the Cricut Maker and it cuts through 110lb cardstock like butter. You can do insanely detailed designs that would take hours by hand. The software is annoying though, not gonna lie, it took me like three weeks to figure out how to properly layer designs.
For wood, you need a scroll saw or a laser cutter. I don’t have space for a scroll saw in my apartment so I use a local makerspace that has a laser cutter. Costs like $20/hour but I can cut a whole project in 30 minutes usually. If you’re doing hand carving for relief work, get proper wood carving tools, not just random chisels from the hardware store. Flexcut makes a good starter set for around $60.
The Adhesive Situation
Okay so this is where everyone messes up including me for the first like dozen projects. Regular craft glue doesn’t cut it for dimensional work because you need things to stay EXACTLY where you place them and support actual weight.
For paper layering, I use foam mounting tape in different thicknesses. The 3M brand stuff comes in 1mm, 2mm, and 3mm heights. You can stack them for even more dimension. Double-sided tape works for really thin layers but anything with actual height needs the foam tape or it’ll eventually peel.
Wood pieces need wood glue (Titebond II is my go-to) plus sometimes small finishing nails if the piece is heavy. I also discovered these little metal spacers from the hardware store that you can hide between layers for consistent gaps. They come in different heights and you just paint them the same color as your background.
Creating Relief Designs
Relief art is basically when you carve or build up a design that projects from a flat background. Think like… fancy door carvings or old-timey wall medallions but modern.
I made my first relief piece using joint compound and a palette knife. You literally just slap joint compound onto a wood board or canvas and shape it while it’s wet. Takes forever to dry completely though, like 24-48 hours depending how thick you went. Then you sand it smooth(ish) and paint. The texture you can create is amazing and it’s super cheap, like $8 for a container that’ll do multiple projects.
Carving into wood is the traditional method and honestly it’s really satisfying once you get the hang of it. Start with simple geometric patterns before you try anything organic. I tried to carve a botanical design as my second project and it looked like a child’s drawing of plants. Stick with abstract patterns, triangles, waves, that kind of thing until you build up the skill.
Using Molds and Casting
Wait I forgot to mention you can also cast relief designs using plaster or resin. I got these silicone molds from Amazon, they have everything from geometric patterns to florals to abstract shapes. You just pour in your material and let it cure.
Plaster of Paris is the easiest and cheapest for beginners. Mix it with water, pour it in the mold, wait like 30 minutes. Pops right out. You can paint it, seal it, mount it on a backing board. The downside is it’s heavy and kinda fragile. Dropped one once and it shattered everywhere.
Resin is lighter and way more durable but also more expensive and you need proper ventilation because the fumes are no joke. I use Art Resin which is supposed to be less toxic but I still wear a respirator and open all my windows. You can mix in pigments or metallic powders to get really cool effects. Did this whole copper-toned geometric piece that everyone thinks I paid like $500 for.
Layered Paper Designs
This is probably the most accessible type of dimensional art because you don’t need power tools or ventilation systems. Just paper, cutting tools, and patience.
The technique is basically cutting the same design in multiple layers with each layer slightly smaller or offset from the one below it. Creates this shadow box effect that’s really dramatic. I usually do 3-5 layers for most pieces, more than that and it starts looking cluttered.
Color choice matters SO much here. You can go monochromatic with different shades of the same color, or do complementary colors, or even metallic layers mixed with matte. I did this whole series using black, white, and gold metallic cardstock and they sold immediately at a local art fair.
The Shadow Box Method
Okay so funny story, I was trying to figure out how to make my layered pieces look more professional and stumbled onto shadow box frames at the thrift store. Total game changer. They’re deeper than regular frames so your dimensional pieces actually fit inside without getting squished.
You can buy new shadow boxes but they’re expensive, like $40-100 depending on size. Thrift stores almost always have them for under $10. Just spray paint the frame if you don’t like the color. The backing board in shadow boxes is usually thick enough that you can pin or glue your layers directly to it.
I arrange my layers on the backing before gluing anything, take a photo so I remember where everything goes, then attach them one by one starting from the back layer. Use those foam mounting squares between each layer. The spacing between layers is what creates the shadow effect so don’t skimp on it.
Mixed Media Dimensional Art
This is where things get really fun because you’re combining different materials in one piece. Wood + paper, metal + fabric, whatever you want.
I did this piece recently with a wood base layer, then laser-cut acrylic shapes on top, then paper elements floating above that. The acrylic catches light completely differently than the other materials so you get this really dynamic look. Acrylic sheets are pretty affordable from plastics suppliers, like $15 for a 12×12 sheet, and they cut easily on a laser cutter.
Metal elements add a whole other dimension (literally). You can use thin aluminum sheets that you cut with metal shears, or copper sheets that you can emboss with tools. I found these pre-cut brass shapes at the craft store that I incorporated into a geometric piece and they added just enough shine without being overwhelming.
Fabric and Fiber Elements
Not gonna lie, I was skeptical about using fabric in wall art because it seemed like it would get dusty and gross but it actually works great if you seal it properly.
Felt is the easiest fabric to work with because the edges don’t fray. You can layer cut felt shapes just like paper. I made this whole botanical wall hanging using different shades of green felt for leaves and it has this soft, organic quality that paper doesn’t achieve.
For other fabrics, you gotta seal the edges with Fray Check or hem them which is annoying. But the texture variety you can get with different fabrics is worth it sometimes. Linen, burlap, silk, velvet, they all catch light differently and add tactile interest.
Mounting and Installation
So you made this beautiful dimensional piece and now you gotta get it on the wall without it falling and breaking. This part stressed me out for months.
For lighter pieces (under 5 pounds), Command strips actually work fine. I use the heavy duty ones rated for like 16 pounds even if my piece is lighter, just for peace of mind. The trick is using multiple strips distributed across the back of the piece, not just two in the corners.
Heavier pieces need actual wall anchors or screws into studs. I attach D-rings or sawtooth hangers to the back of the backing board. For really heavy relief sculptures, I use French cleats which are these interlocking pieces where one mounts to the wall and one mounts to the artwork. Super secure and you can easily remove the piece if needed.
Finishing and Sealing
Don’t skip the finishing step or your piece is gonna look DIY in a bad way. Sanding all the edges smooth, filling any gaps with wood filler or spackle, priming if you’re gonna paint.
For painted pieces, I usually do at least three coats of acrylic paint, sanding lightly between coats. Then seal everything with a matte or satin varnish. Glossy varnish can look cheap on dimensional work because it creates too much glare. The matte stuff from Mod Podge works fine for paper, but for wood I use Minwax Polycrylic.
Paper pieces need to be sealed or they’ll absorb moisture from the air and warp. I learned this the hard way in my bathroom when a piece literally curled up within a week. Even in normal rooms, seal your paper with at least two coats of sealer on all sides.
Design Tips That Actually Matter
The technical stuff is important but design choices make or break dimensional art. Too much dimension and it looks cluttered. Not enough and it just looks like weird flat art.
Stick with odd numbers of layers when possible. Three, five, seven. It creates better visual balance than even numbers. I don’t know why this works but it’s like a photography rule that applies here too.
Negative space is your friend. Don’t fill every inch of your piece with dimension. Let some areas be flat or empty so the dimensional parts stand out more. I made this geometric piece that was just lines and shapes but I left like 40% of it empty and it’s one of my favorites.
Play with scale by mixing really small detailed elements with larger bold shapes. Creates visual interest and gives the eye somewhere to rest.
Lighting is huge for dimensional work. These pieces look completely different depending on the light source. I always mount them where they’ll get indirect natural light during the day plus have a nearby lamp for evening. Direct harsh light can actually flatten the look which defeats the whole purpose.
My workspace is a mess right now with like four projects going at once but that’s kinda how dimensional art works, you get an idea and just gotta try it immediately before you forget the concept.