Wall Art Guide, Wall Art Tutoriels
Dried Flower Wall Art: Preserved Botanical Natural Designs
Mar
So I’ve been making dried flower wall art for like three years now and honestly it started because I killed my fiddle leaf fig and needed something that wouldn’t judge me for forgetting to water it. Now half my apartment looks like a Victorian herbarium and clients keep asking me to source pieces for them.
The Flowers You Actually Want to Use
Okay so not all flowers dry well and this is where everyone messes up. You can’t just grab whatever’s dying in your vase and expect it to look good pressed against glass. Some flowers turn brown and sad, others keep their color for literally years.
The ones that actually work:
- Strawflowers – these are like the MVP, they keep their color forever and look exactly the same dried as fresh
- Lavender – classic, smells amazing, doesn’t fade to that weird beige color
- Eucalyptus – stays silvery-green, super architectural
- Statice – comes in those papery purple and white clusters, holds color really well
- Celosia – the brain-looking ones or the feathery plumes, both work
- Baby’s breath – I know it’s basic but it fills space and doesn’t turn gross
- Roses – BUT only if you dry them properly, we’ll get to that
The flowers that will betray you: tulips turn to paper mush, most lilies go brown, anything too fleshy or watery is gonna be a problem. I learned this the hard way with some peonies that cost me $40 and turned into brown crinkled sadness.
Drying Methods That Don’t Suck
There’s like four ways to do this and I’ve tried them all because my dog ate a bunch of silica gel once and I had to get creative.
Air drying: Literally just hang them upside down in a dark, dry place. I use my closet. Bundle them with rubber bands because string loosens as they shrink. Takes 2-3 weeks. This works for lavender, strawflowers, eucalyptus, statice. The ones with less moisture content basically.
Book pressing: The traditional way but honestly it’s slow and you tie up your books. I use an actual flower press now which is just wood boards with screws and cardboard layers. Put flowers between parchment paper, tighten the screws every few days. Takes 3-4 weeks. Good for flat flowers and leaves.
Silica gel: This is the secret weapon for roses and anything three-dimensional. You bury the flowers in silica gel in an airtight container and it sucks out all the moisture in like 5-7 days. The flowers keep their shape AND color. You can reuse the silica gel by microwaving it. Just… don’t let your pets near it, learned that one.
Microwave method: Okay this sounds weird but you can press flowers between paper in the microwave for like 30-60 seconds and they’re done. I use this when I’m impatient. The colors aren’t quite as good but it’s SO fast.
The Timing Thing
Pick flowers right before they’re fully open. Fully bloomed flowers often drop petals when they dry. Also pick them after the morning dew dries but before it gets too hot. I usually do this around 10am when I’m supposed to be doing actual work.
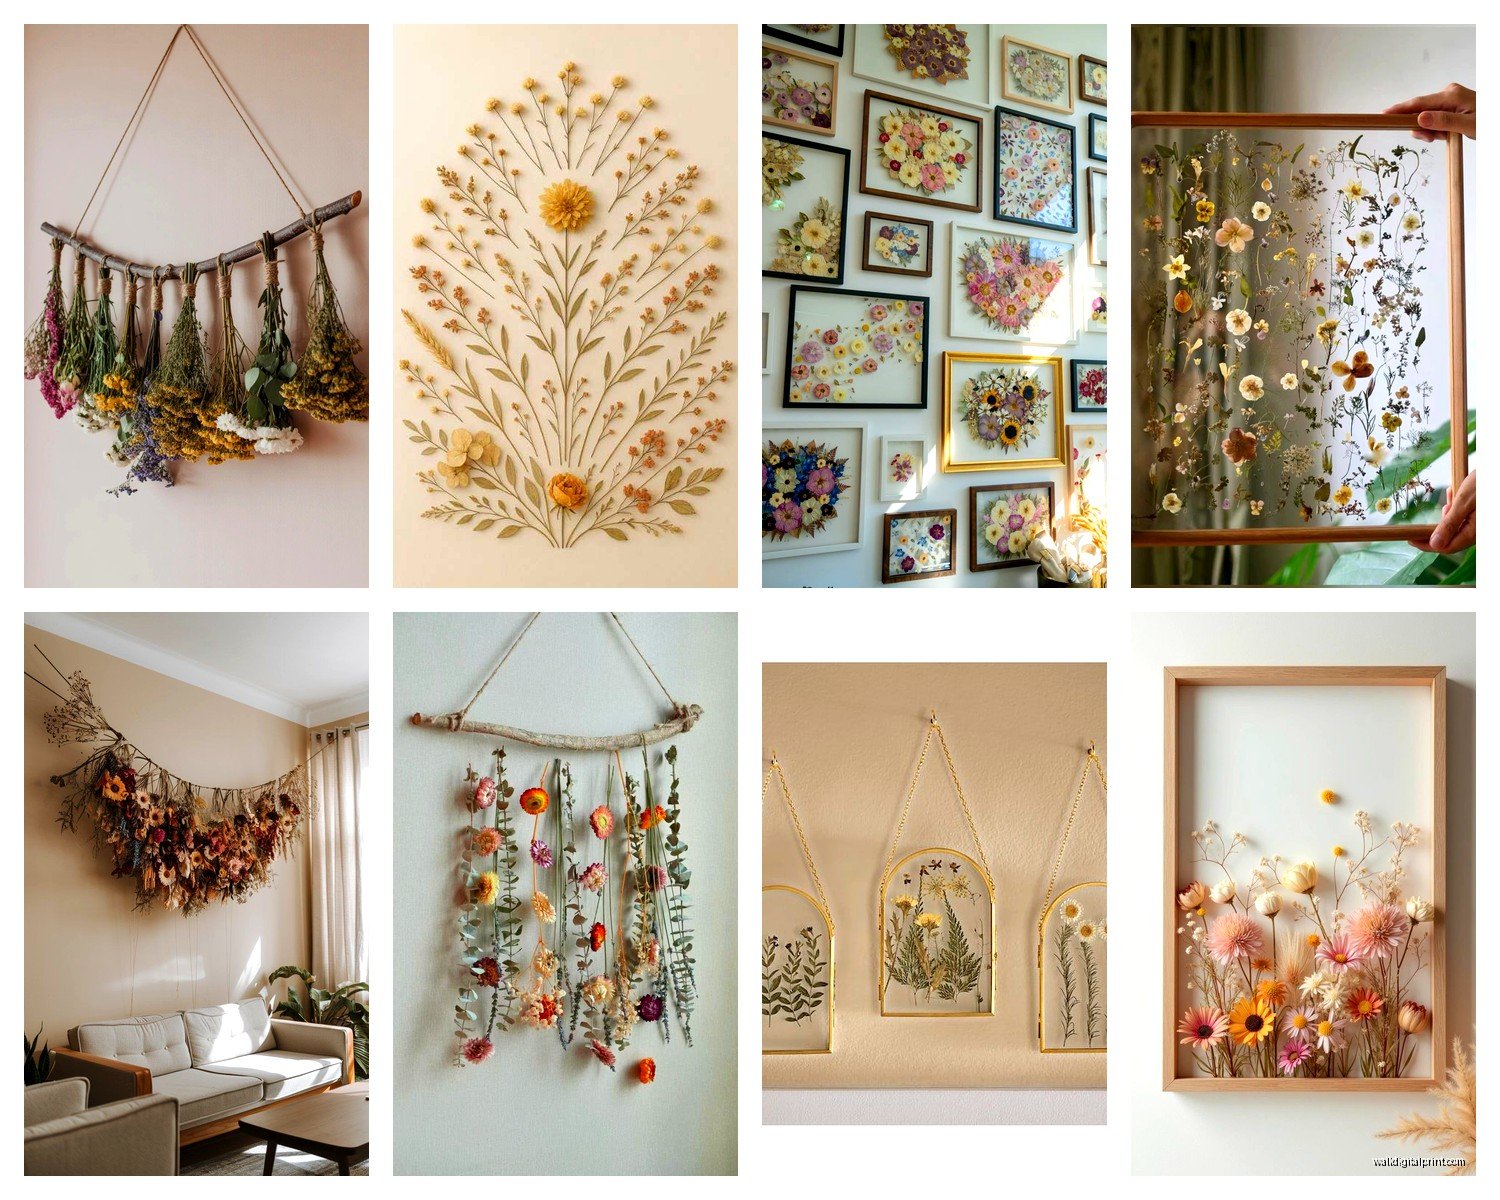
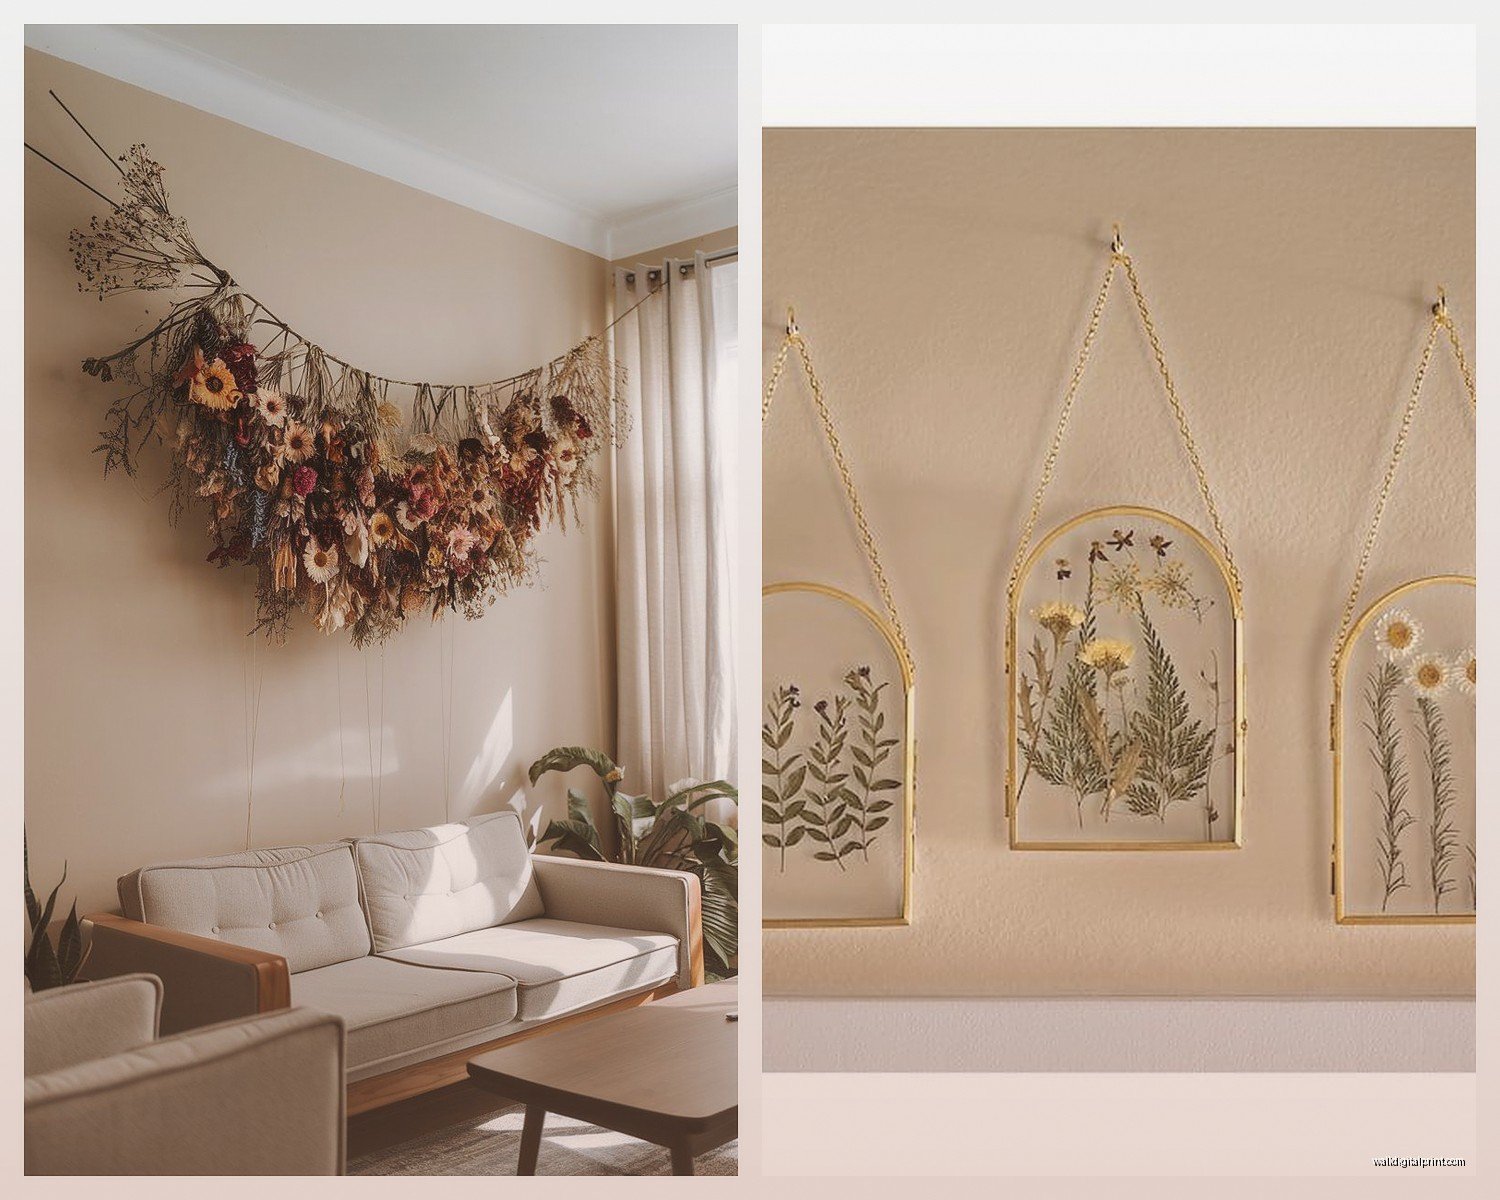
Frame Options Because This Matters More Than You Think
You need to think about depth. Regular picture frames are too shallow for most three-dimensional arrangements.
Shadow boxes: These are your friend. They come in different depths – I use 1-inch depth for pressed flowers, 2-3 inches for fuller arrangements with stems and seed pods. Michael’s has decent ones but Ikea’s RIBBA frames are actually really good for this and cheaper.
Floating frames: Two pieces of glass with the flowers sandwiched between, held together with clips. These look SO good with pressed flowers because you get that suspended botanical specimen vibe. You can DIY these with picture frame glass and corner clips.
Regular frames with spacers: If you’re doing flat pressed flowers, regular frames work but add a mat board spacer between the glass and backing so the flowers aren’t crushed. I use foam board strips.
The glass thing – you want UV-protective glass if you’re spending money on this. Regular glass lets UV light fade your flowers faster. Museum glass is expensive but worth it for pieces you really love.
Actually Arranging the Damn Things
This is where it gets fun or frustrating depending on your perfectionism level. I have a client who rearranged her piece seventeen times before gluing anything.
For pressed flowers:
Start with your background – watercolor paper, fabric, or just the backing board. I like cream or soft gray cardstock from the art store. Lay out your composition WITHOUT gluing first. Take a photo so you remember where everything goes.
Glue options: tiny dots of tacky glue, not too much or it shows through. Or use a glue stick for really flat leaves. Some people use white craft glue watered down. For delicate petals, I sometimes use clear-drying fabric glue.
Design-wise… odd numbers look better than even. Create a focal point with your biggest or most colorful element. Let some pieces overlap. Don’t center everything perfectly, it looks too rigid.
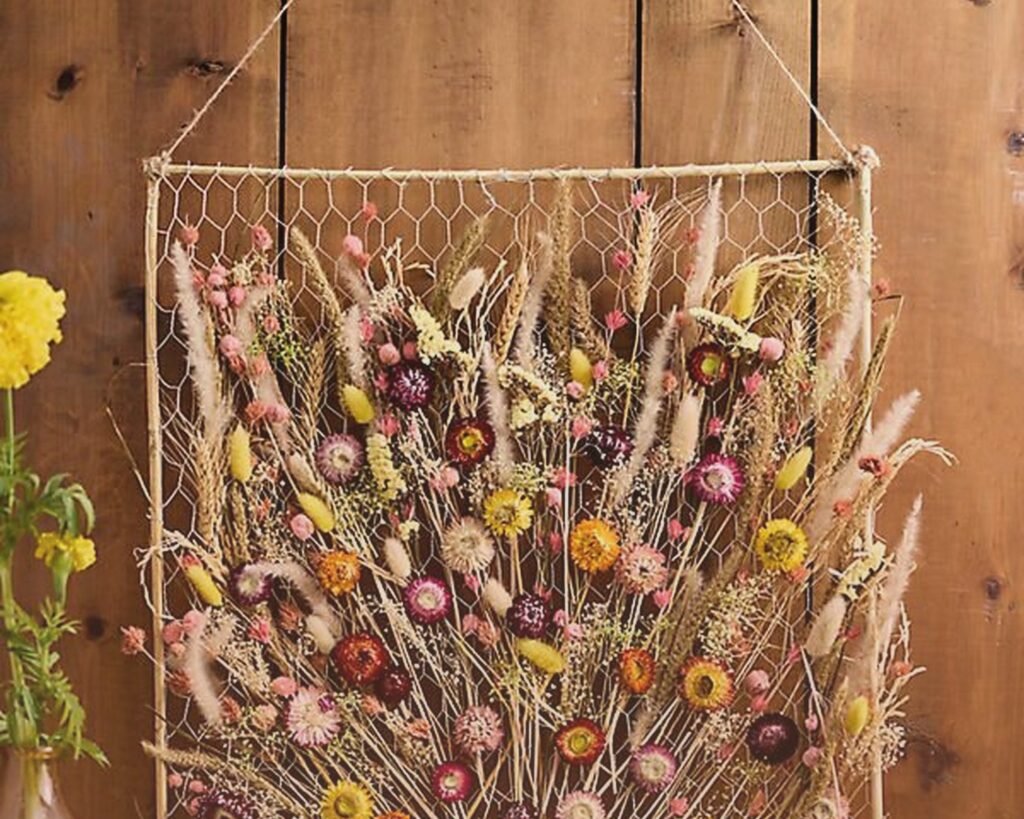
For dimensional arrangements:
You’re working in a shadow box here. Hot glue is your friend but BE CAREFUL because you can’t really undo it. I attach stems to the backing board first, then build forward. Think about layers – background elements, middle ground, foreground.
Wire works for hanging heavier stems. I poke holes in the backing, thread floral wire through, and secure stems that way. You can also use foam board as a base and just stick stems into it.
My Favorite Styles
Botanical specimen style: Single flower or leaf centered on light background, labeled with its Latin name in that old-timey handwriting font. Very apothecary, very cottagecore. I make these in sets of three or four.
Wreath composition: Arrange flowers in a circle or oval shape. Leave the center empty or put a monogram there. Works great with lavender and eucalyptus.
Wildflower meadow chaos: Just… organized chaos with lots of different flowers and grasses scattered across the frame. This is actually harder than it looks because you need to balance the visual weight.
Color gradient: Arrange flowers from light to dark or in rainbow order. Super satisfying if you have enough variety.
Preservation Tips So They Don’t Fall Apart
Even dried flowers aren’t immortal, much as we’d like them to be.
Keep them out of direct sunlight. I know, you want them where you can see them, but sun fades everything eventually. Indirect light or rooms that don’t get harsh afternoon sun.
Humidity is the enemy. Don’t hang these in bathrooms. I had a piece in my bathroom for three months and it got moldy which was disgusting.
Spray with hairspray or acrylic sealer if you want extra protection. I use a matte fixative spray from the art store, just a light coat. This helps prevent petals from dropping and adds a tiny bit of moisture protection.
Dust them occasionally with a soft brush or canned air. They will get dusty, it’s inevitable.
Where to Source Materials
Grow your own: Obviously the cheapest option. I have a tiny balcony garden that’s basically just strawflowers and statice at this point.
Farmer’s markets: End of day you can sometimes get flowers cheap because they’re gonna die anyway. Just ask.
Online dried flower shops: There’s a bunch on Etsy. More expensive but you get specific colors and varieties. I order pampas grass and bunny tails online because they don’t grow here.
Forage: Grasses, ferns, leaves, seed pods from walks. Free and you find cool stuff. Just don’t take from protected areas or private property obviously.
Craft stores: Pre-dried flowers exist but they’re often dyed weird colors and don’t look as natural. Sometimes useful for filler though.
Common Problems I’ve Dealt With
Flowers turning brown: Usually moisture or wrong drying method. Some flowers just do this no matter what – accept it or pick different flowers.
Petals falling off: Dried too quickly, or the flower was too old when you cut it, or you handled it too much. Delicate flowers like poppies are gonna do this no matter what you do.
Mold: They weren’t dry enough before you framed them. If you see ANY moisture, wait longer. I usually wait an extra week past when I think they’re ready.
Fading: UV light strikes again. Also just time – even preserved flowers fade eventually. That’s why UV glass matters.
The arrangement looks flat: Add different heights and textures. Mix feathery things with solid blooms. Include seed pods or grasses for variety.
Oh and another thing – if you’re selling these or giving them as gifts, write care instructions on the back. People will definitely put them in direct sun or humid rooms if you don’t tell them not to.
Wait I forgot to mention – you can also resin coat dried flowers for a totally different look. Pour clear resin over them in a mold or on a board. It’s permanent and waterproof but you lose that delicate botanical specimen vibe. I’ve done this with coasters and it’s pretty cool.
My current favorite piece is this huge frame with white and cream flowers – roses, baby’s breath, eucalyptus, some bleached ferns – all monochromatic. It’s above my couch and people always think it’s wallpaper until they get close. Took me probably six hours to arrange and I kept moving the roses around because I’m annoying like that.
The nice thing about this whole craft is you can start super simple with one pressed flower in a small frame and see if you even like it before investing in shadow boxes and silica gel and all that. I started with grocery store eucalyptus and a $5 Ikea frame and now I have supplies taking over my craft closet but that’s fine, totally fine, definitely not a problem.