Wall Art Guide, Wall Art Tutoriels
Geometric Metal Wall Art: Angular Sculptural Math Designs
Mar
So I’ve been completely obsessed with geometric metal wall art lately and honestly it started because this client wanted “something mathematical but not boring” for their home office and I went down this massive rabbit hole. Like I’m talking three weeks of researching materials, visiting metal fabricators, the whole thing.
Materials Matter Way More Than You’d Think
Okay so first thing – the metal type completely changes the vibe. I learned this the hard way after ordering what I thought was brushed steel and it showed up looking like something from a 1990s office building.
Stainless steel is gonna be your most durable option but it’s also the heaviest and most expensive. The 304 grade is what you want for indoor stuff – it’s got that nice polished look without being mirror-finish crazy. I used it for a massive hexagonal installation in someone’s entryway and three years later it still looks identical. No tarnishing, no weird spots. But mounting it was a nightmare because each piece weighed like 15 pounds.
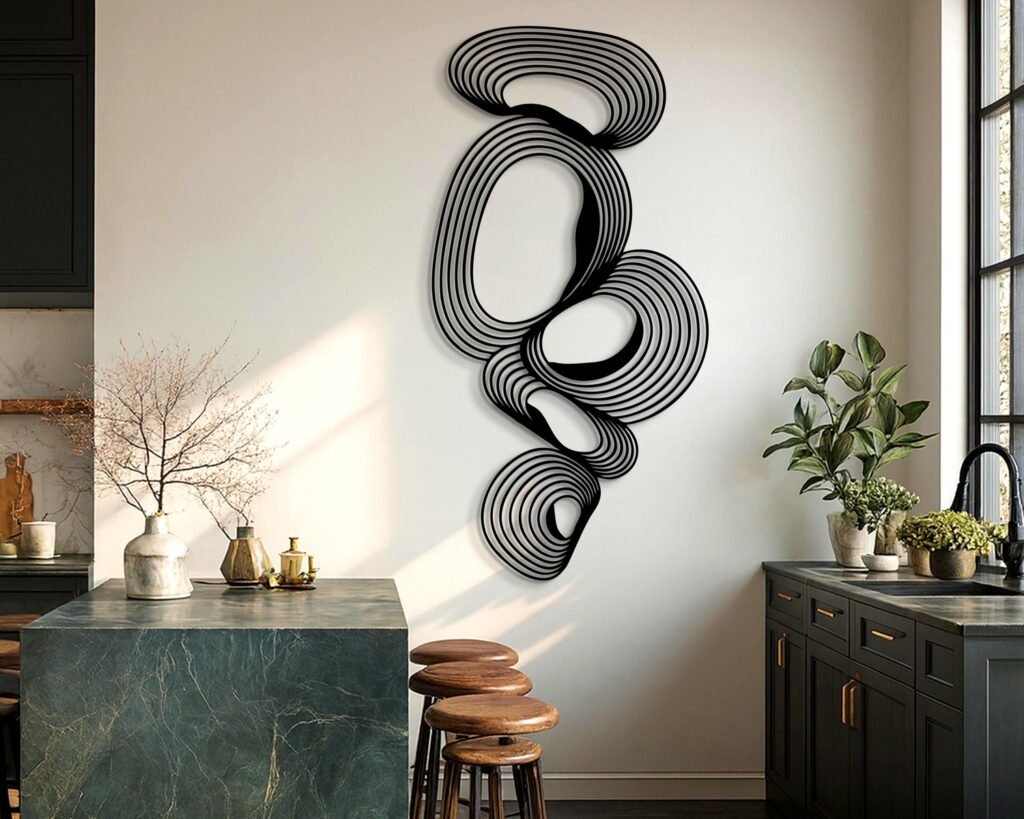
Aluminum is honestly my go-to now for most projects. It’s lightweight so you can do these really dramatic cantilever designs without worrying about ripping your drywall apart. The powder-coated finishes hold up really well too. I did this angular constellation piece – like 47 individual triangular pieces arranged in this mathematical pattern – and used matte black powder-coated aluminum. Been up for two years in a house with southern exposure and zero fading.
Mild steel with a clear coat is the budget option but here’s the thing nobody tells you – the clear coat eventually yellows. Not immediately, but maybe after 18 months you’ll notice it’s got this amber tinge. Which could be cool if that’s your aesthetic? I used it for a temporary gallery installation once and it was perfect for that.
Copper and brass if you want that whole patina situation. I’m obsessed with how copper oxidizes but you gotta commit to the maintenance or commit to letting it go full verdigris. There’s no in-between that looks good. Did a Fibonacci spiral piece in copper for someone’s meditation room and we sealed it at the exact patina stage they wanted – that was four years ago and we’ve resealed it twice.
Thickness Changes Everything
This is where I made my biggest mistake early on. Ordered these beautiful laser-cut designs in 16-gauge steel thinking thicker would be better and they looked… clunky. Too heavy visually.
For most geometric wall art you want 18-gauge or 20-gauge. It gives you that sculptural presence without looking like industrial equipment. The shadows cast are sharper too with thinner material.
But if you’re doing something really large – like over 4 feet in any direction – you might need to go thicker for structural integrity. I did this 6-foot angular sunburst thing in 14-gauge and it needed it because the cantilevered sections would’ve sagged otherwise.
Finish Options That Actually Last
Oh and another thing about finishes – I’ve tested basically everything at this point because my cat knocked over a whole sample board once and I had to redo all my client presentations.
- Powder coating: Best durability, comes in literally any color, slightly textured surface that hides fingerprints
- Brushed finish: Shows every fingerprint but looks incredibly high-end, works best on stainless
- Hammered texture: Great for hiding imperfections in the metal, adds dimension
- Raw/unsealed: Only if you want the patina effect and you’re using copper or brass
- Painted: Don’t. Just powder coat instead. Paint chips on metal wall art.
The Math Behind the Design
So geometric pieces work because they’re based on actual mathematical principles and your eye recognizes that even if you don’t consciously know what you’re looking at.
Sacred geometry stuff like the Flower of Life or Metatron’s Cube – these are having a huge moment right now but they can read really new-agey. I’ve used them successfully when they’re executed in industrial materials with clean lines. Like taking something spiritual and making it architectural.
Tessellation patterns are my favorite because you can do them in modular pieces. I created this whole system using equilateral triangles in three different sizes – clients can arrange them however they want and it always looks intentional because the geometry is sound. Sold probably 20 sets of these through my blog.
Fractals and recursive patterns – these are tricky because they can look too busy. The trick is to limit your iterations. Like a Sierpinski triangle is cool at 4 iterations but at 6 it just looks messy from any normal viewing distance.
Polyhedra projections – wait I forgot to mention this earlier but some of the coolest pieces I’ve seen are 2D representations of 3D geometric forms. Like taking an icosahedron and showing it as if it’s been unfolded. Creates this brain-bending effect where you’re trying to figure out how it folds up.
Mounting Methods Nobody Talks About
This is gonna sound weird but the mounting is like 60% of whether the piece looks good. I’ve seen gorgeous designs look amateur because of visible screws or weird spacing from the wall.
Standoffs are those little cylindrical spacers that hold the piece away from the wall. They create a shadow gap which makes the art look like it’s floating. For geometric pieces this is *chef’s kiss* because the shadows become part of the design. I use 1-inch standoffs for most applications – enough shadow to be dramatic but not so much that it looks disconnected from the wall.
French cleats for anything heavy. It’s basically a Z-shaped bracket where one part mounts to the wall and the other to the back of the art. Super secure, can hold crazy weight, and completely invisible. Used these for that 6-foot sunburst I mentioned.
Adhesive mounting – okay so there are these VHB (Very High Bond) tapes that are actually rated for permanent installation. I was skeptical too but I’ve used them on pieces up to about 8 pounds with perfect results. The trick is surface prep. You gotta clean both surfaces with isopropyl alcohol and let them dry completely. And once it’s stuck it’s STUCK.
Cable hanging systems work for lighter pieces and give you flexibility to adjust height. I use these in galleries all the time but they’re maybe too visible for most homes unless that industrial look is your thing.
Wall Considerations
Real talk – not all walls can handle metal art. Drywall alone maxes out around 50 pounds with proper anchors but honestly I get nervous above 30 pounds. Always find studs for anything heavy.
Brick and concrete walls are actually ideal because you can use tapcon screws or concrete anchors and those things aren’t going anywhere. Did a whole angular geometric installation on an exposed brick wall in a loft and used concrete anchors – that piece could probably survive an earthquake.
Plaster walls are the worst. They’re crumbly and unpredictable. If you’re dealing with plaster you basically need to find the lath behind it or use toggle bolts and pray.
Scale and Proportion Rules
I learned this from an art curator friend – your geometric wall art should relate mathematically to the wall space. Not just “that looks about right” but actual proportional relationships.
The golden ratio (1:1.618) shows up everywhere in nature and it works for wall art too. If your wall is 120 inches wide, a piece that’s about 74 inches wide hits that ratio. Your brain recognizes it as “right” even if you don’t know why.
For groupings of geometric pieces, odd numbers work better. Three pieces, five pieces, seven pieces. Something about symmetry and asymmetry balancing out. I usually do three-piece installations where the center piece is larger and relates to the side pieces using that golden ratio again.
Height-wise, the center of the piece should be at 57-60 inches from the floor. This is museum standard and it’s based on average eye height. Unless you’re putting it above furniture – then you want 6-8 inches above the furniture top.
Combining Different Geometric Elements
Okay so funny story – I was watching this documentary about Islamic architecture while working on a project and realized that mixing geometric forms is literally ancient design wisdom. You can combine circles, squares, and triangles in the same piece as long as they share proportional relationships.
Layering is where it gets really interesting. Multiple metal planes at different depths creates this crazy dimensional effect. I did a piece with three layers – circles in brass in back, triangles in copper in middle, straight lines in steel in front. Each layer was set 2 inches forward and the shadows created this whole other pattern.
Negative space is just as important as the metal itself. Some of my favorite pieces are mostly empty space with strategic metal elements that imply the larger geometric pattern. Your brain fills in the rest.
Finish Details That Level Up the Look
Okay I gotta mention edge finishing because nobody thinks about this until they see it done well. The edges of cut metal can be sharp and also they catch light differently than the face.
Deburred edges are the minimum – just smoothing off any sharp burrs from cutting. This is safety stuff but also the light catches smoother.
Beveled edges add this subtle detail that makes pieces look more expensive. It’s literally just cutting the edge at an angle but it creates this highlight line around every element.
Rolled edges for thicker pieces – actually bending the edge over creates this really finished look. More expensive to do but worth it for statement pieces.
Color Theory for Metal Geometrics
So metal finishes reflect light and that means color works differently than with painted art. I’ve been experimenting with this a lot lately.
Monochromatic schemes work really well – all silver tones or all warm metals. Mixing silver and gold metals usually looks dated unless you’re being really intentional about it. Like if the design itself is about that contrast.
Powder-coated colors should relate to your space but here’s my controversial opinion – geometric metal art looks best in neutrals. Black, white, grays, or raw metal tones. The geometry is the statement. Adding bright colors can make it look too much like office art.
Exception: copper and brass tones work with warm color schemes. That reddish-gold patina plays nice with terracotta, warm woods, rust colors.
Maintenance Real Talk
Most metal wall art is pretty low maintenance but here’s what actually works:
- Dust with a microfiber cloth monthly – dust buildup dulls the finish over time
- For brushed finishes, wipe in the direction of the grain always
- Fingerprints on polished metal: isopropyl alcohol on a soft cloth
- Powder-coated pieces: just dust them, seriously don’t use cleaners
- Raw copper/brass: if you want to maintain the patina, rewax annually with Renaissance wax
I’ve got this massive angular piece in my own entry and I literally just dust it when I remember which is like every 6 weeks maybe and it’s fine.
Where to Actually Buy This Stuff
Custom fabrication is expensive but it’s the only way to get exactly what you want. I work with a metal shop that does laser cutting and they charge by material cost plus machine time. Expect $200-800 for a medium-sized custom piece depending on complexity.
Etsy has gotten really good for geometric metal art. Search for “geometric metal wall art” obviously but also try “sacred geometry metal” or “mathematical wall sculpture.” Read reviews about packaging because shipping metal art is where things go wrong.
West Elm and CB2 have some options but they’re mass-produced and everyone has them. Good if you want something quick and relatively cheap but you’ll probably see the same piece in an Instagram post somewhere.
Local metal artists at craft shows – this is actually where I’ve found some of my favorite pieces. The quality is usually better than mass-produced stuff and you can often request custom sizes.
DIY Considerations
If you’re thinking about making your own, you need access to either a laser cutter, plasma cutter, or a really good angle grinder and a lot of patience. I tried doing a simple geometric piece with a jigsaw once and it was a disaster. Metal wants to be cut with heat or high-speed precision, not saws.
Some makerspaces have metal cutting equipment you can use. That’s actually how I made my first few test pieces before I found a fabricator I trusted.
The design is the easy part honestly – there are tons of geometric pattern generators online. Getting it cut cleanly is the challenge.
Anyway that’s basically everything I’ve learned about geometric metal wall art through way too many projects and experiments. The key is understanding that the material, the math, and the mounting all matter equally and you can’t phone in any of those elements if you want it to look good.