Wall Art Guide, Wall Art Tutoriels
Gold Leaf Wall Art: Gilded Luxe Metallic Designs
Mar
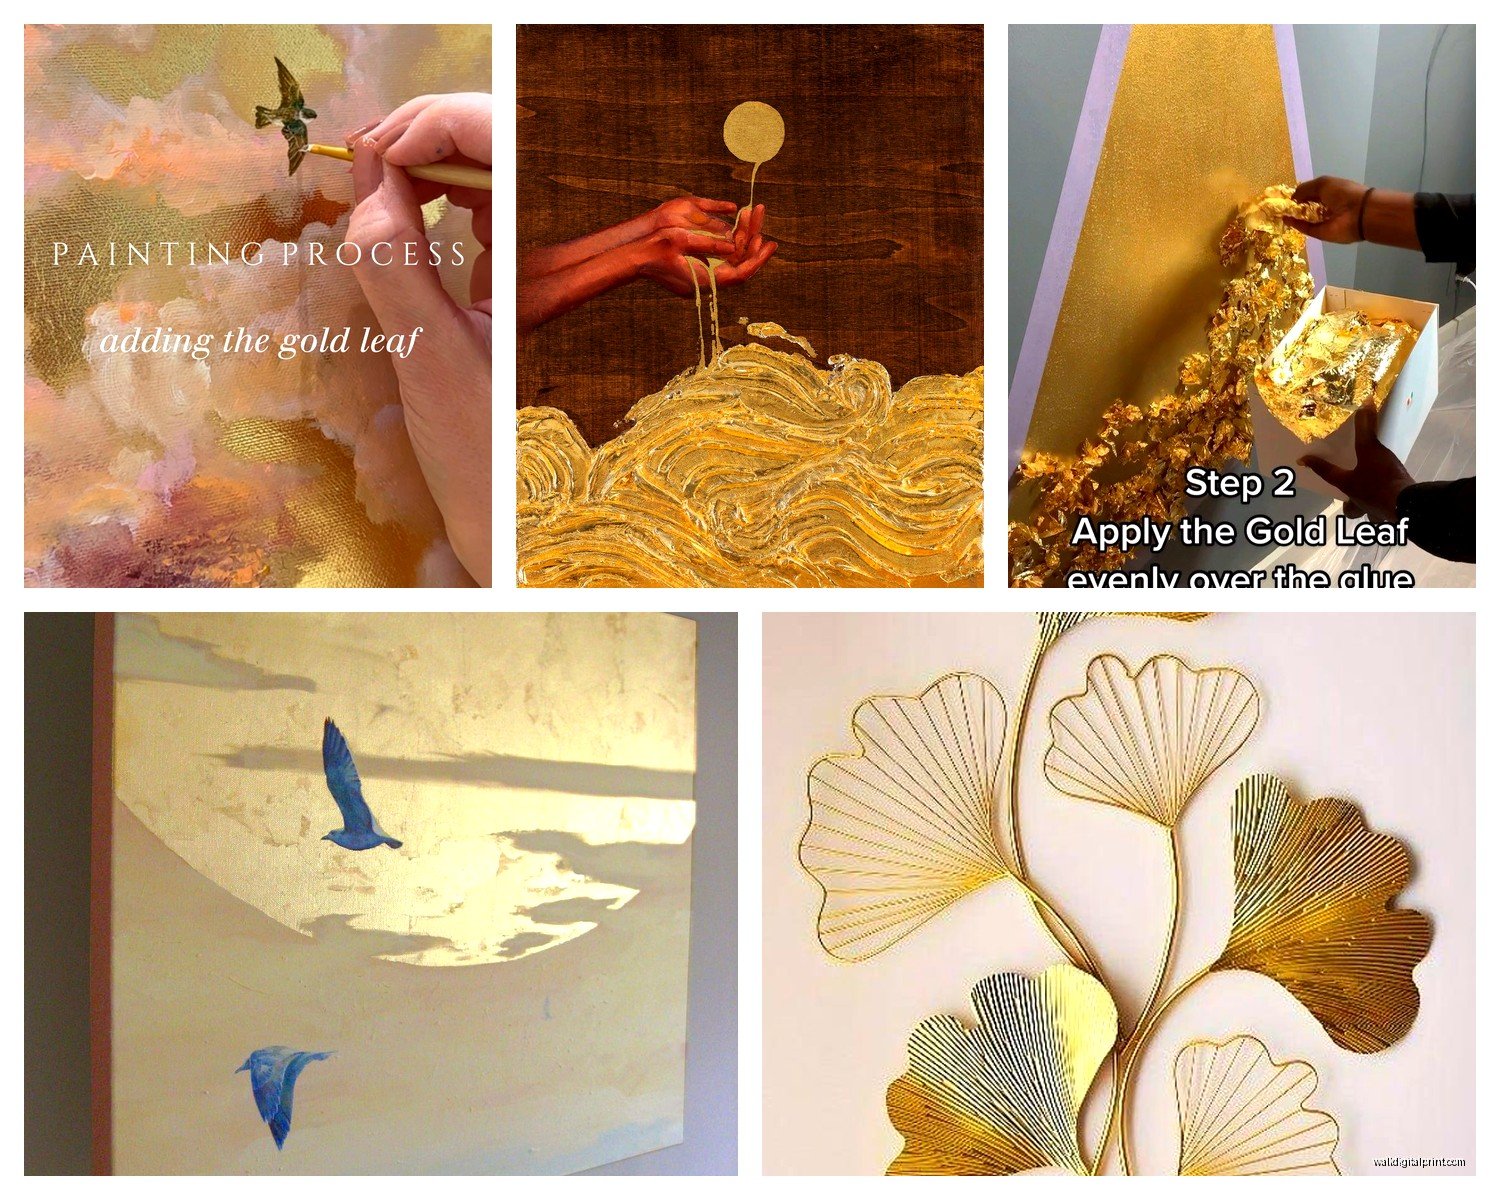
So I’ve been working with gold leaf for like three years now and honestly it’s one of those materials that looks way more intimidating than it actually is. Let me just dump everything I know because I literally just finished a project yesterday and I’m still finding tiny gold flakes on my sweater.
Types of Gold Leaf You Can Actually Buy
Okay so first thing, there’s real gold leaf and then there’s imitation gold leaf (also called composition leaf or Dutch metal). Real gold leaf is like $40-60 for 25 sheets and imitation is maybe $12 for the same amount. I use imitation for literally everything except when a client specifically asks for real gold and honestly? Most people can’t tell the difference once it’s sealed on the wall.
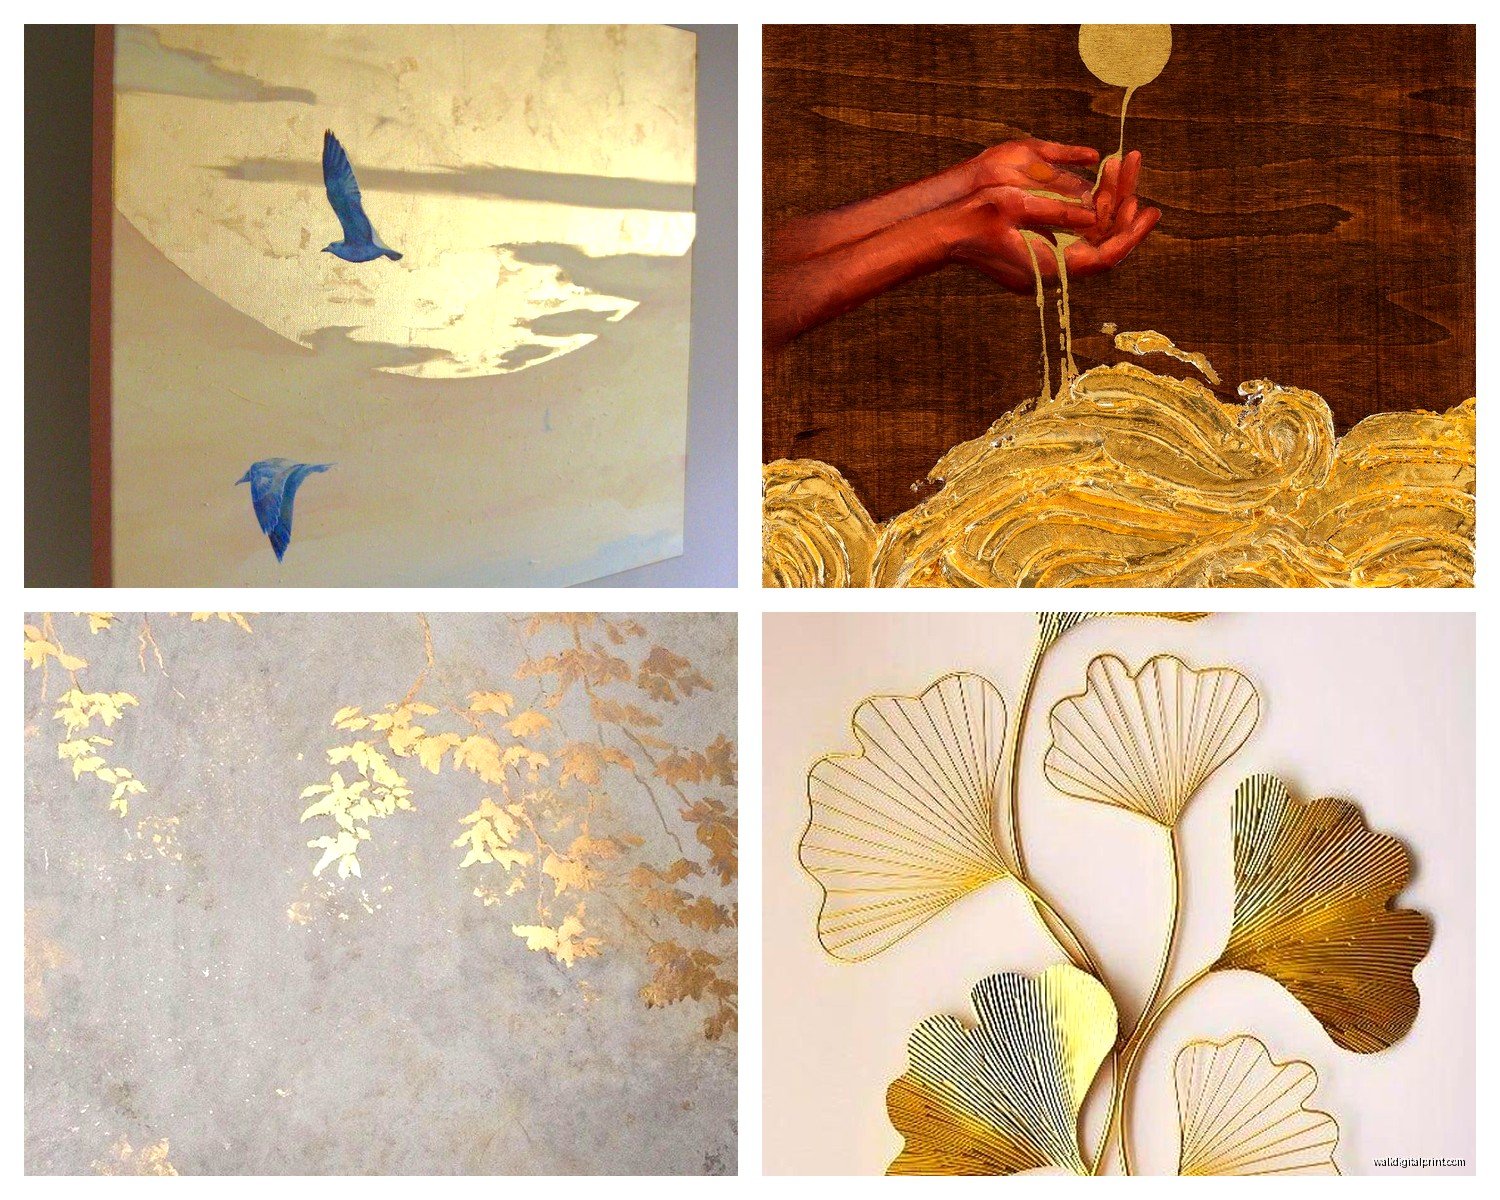
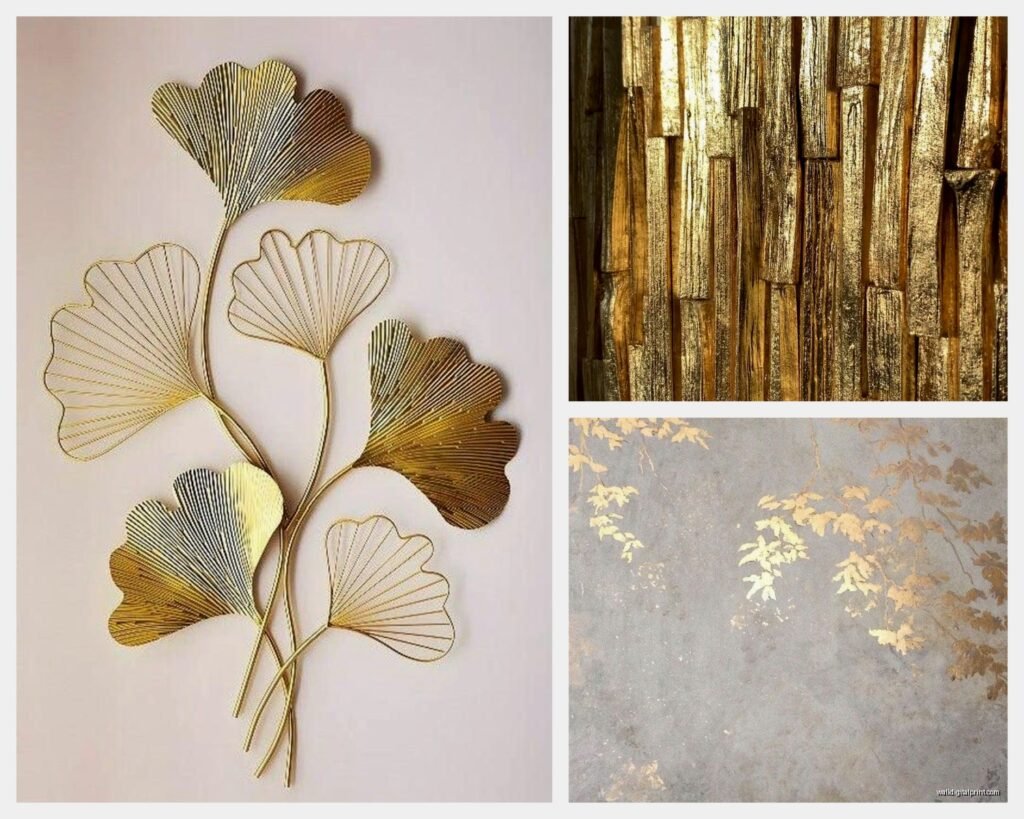
The imitation stuff comes in different shades too which is actually really helpful. There’s lemon gold which is super bright and yellow, classic gold which is what you’re probably picturing, and then champagne gold which has this softer peachy tone that I’m kinda obsessed with right now. I used champagne gold in my sister’s nursery last month and it doesn’t scream “LOOK AT ME” which was perfect.
Real gold leaf doesn’t tarnish which is its main advantage, but you gotta seal imitation leaf or it’ll oxidize and turn greenish over time. Not cute.
Leaf Thickness Matters More Than You’d Think
This is gonna sound weird but the thickness is measured in carats for real gold and just… thickness for imitation. For wall art you want something that’s not too thin because thin sheets are SO fragile. I learned this the hard way when I sneezed near my workspace and watched like six sheets just fly away. My cat thought it was the best day of her life.
Double-weight imitation leaf is what I stock now. Single-weight is cheaper but it tears if you look at it wrong.
What You Actually Need to Get Started
The supply list isn’t as crazy as those YouTube tutorials make it seem. Here’s what I actually use:
- Gold leaf sheets (obvs)
- Size or adhesive – water-based is easiest for beginners
- Soft brushes – I use cheap makeup brushes from the drugstore honestly
- Cotton gloves or just clean hands
- Sealer – I’ll get into this more in a sec
- Your base surface – canvas, wood panel, whatever
- Stencils if you want patterns
The “size” is basically the glue and there’s oil-based and water-based. Water-based is way more forgiving because you have like 15-20 minutes to apply the leaf after you brush it on. Oil-based you gotta wait like 12 hours for it to get tacky and the timing is really specific. I only use oil-based when I’m doing furniture restoration where I need that traditional technique.
Adhesive Sheets Are a Game Changer
Wait I forgot to mention – you can also buy adhesive sheets which are basically double-sided sticky sheets that you cut into shapes. These are PERFECT for geometric wall art designs. I used them for a hexagon pattern installation last fall and it was so much easier than trying to paint size in perfect shapes. You just peel and stick, then apply the leaf. They’re called composition gold adhesive sheets and they’re like $15 for a pack.
Surface Prep Because This Actually Matters
Your surface needs to be smooth and sealed. If you’re working on raw wood you gotta seal it first with like a clear acrylic sealer or even just mod podge. I’ve used mod podge as a base coat and it works fine, don’t let anyone tell you that you need fancy supplies.
Canvas is already pretty smooth but I usually give it a coat of gesso anyway. If you want a colored background under your gold, paint that first and let it dry completely – like overnight dry, not “feels dry to the touch” dry.
One time I didn’t wait long enough and the leaf just stuck to wet paint and created this muddy mess. Had to start completely over.
Actually Applying the Leaf
Okay so this is where it gets fun. Brush your size/adhesive onto wherever you want gold. You can do the whole surface, you can do abstract brush strokes, you can use stencils for patterns. I’ve done everything from full gilded canvases to just little geometric shapes.
For water-based size, wait until it goes from white to clear and gets tacky. This is usually like 15 minutes but depends on humidity and temperature. My apartment is super dry in winter so it happens faster.
Then you take a sheet of gold leaf – and this is important – you don’t really touch the leaf itself if you can help it. I either use the backing paper it comes with or just gently pick it up by the edges. Place it on the tacky size and use a soft brush to gently press it down. The leaf will stick to the sized areas and you can brush away the excess.
The Messy Reality
It’s gonna be messy. There’s gonna be flakes everywhere. I put down newspaper or a cheap plastic tablecloth because you’ll have excess leaf and it gets staticky and sticks to everything. Save your excess scraps in a jar though – you can use them for filling in gaps or for smaller projects.
Sometimes the leaf tears as you’re applying it and that’s totally fine. You can layer another piece over the gap or honestly sometimes the imperfection looks really cool and organic. I did a whole series of “broken gold” pieces where the gaps and tears were intentional and they sold really well at a local art market.
Sealing Your Work
If you used imitation leaf YOU HAVE TO SEAL IT. I cannot stress this enough. I use a spray sealer – either clear acrylic or shellac-based. Spray in light coats from like 12 inches away. If you spray too close or too heavy the leaf can discolor or get weird texture.
For real gold leaf you don’t technically need to seal it but I usually do anyway just for protection and to make the surface wipeable.
Some people use brush-on sealers but I find they can sometimes lift the leaf if you’re not careful with your brush strokes. Spray is just easier.
Design Ideas That Actually Work
Abstract geometric shapes are probably the easiest starting point. I’m talking triangles, circles, hexagons arranged in patterns. You can use painter’s tape to create clean edges – just make sure you apply the size inside the tape lines and remove the tape before the size dries completely.
Oh and another thing, ombre effects where you go from full gold coverage to scattered flecks look really expensive but they’re super easy. You just apply your size in gradually lighter layers or brush strokes.
Texture Techniques I Use All the Time
You can create texture before applying the leaf by using texture paste or even crumpled plastic wrap on wet paint. Once that dries and you apply the gold leaf, it catches on the high points and creates this dimensional effect. I did this for a client’s dining room piece and the way it catches light is just *chef’s kiss*.
Stenciling is your friend. I have like twenty different stencils – mandalas, florals, moroccan patterns. You just tape the stencil down, apply size through it, carefully remove the stencil, then apply leaf. Makes you look way more skilled than you actually are.
Common Problems I’ve Definitely Had
The leaf won’t stick – your size probably dried too much. Water-based size has a pretty forgiving window but if you waited like an hour it’s not gonna work. Just apply another thin layer of size.
The leaf is sticking everywhere including where you don’t want it – you got size outside your intended area or you touched the leaf with adhesive on your fingers. This is why I keep baby wipes at my workspace. Clean hands are crucial.
The gold looks dull or cloudy after sealing – you probably sprayed too heavy or the sealer wasn’t compatible. This happened to me with a shellac spray over water-based size once. Test your sealer on a scrap piece first.
Weird green or dark spots appearing weeks later – that’s tarnishing on imitation leaf that wasn’t sealed properly. Make sure you get full coverage with your sealer especially on the edges.
Working on Actual Walls
Okay so doing gold leaf directly on walls is totally doable but you gotta be more careful about prep. The wall needs to be clean, smooth, and primed. I usually paint the wall the base color I want first.
For large wall installations I sketch out my design with pencil first – really light so it doesn’t show through. Then I section off areas with painter’s tape if I’m doing geometric stuff.
The application process is the same but working vertically is more awkward. Gravity is not your friend when you’re trying to position a delicate sheet of gold. I use a step stool and work in sections, taking breaks because holding your arms up gets tiring real fast.
My client canceled last week so I spent an hour comparing different wall applications and honestly the adhesive sheets are clutch for walls. So much easier than trying to brush size on a vertical surface without drips.
Combining Gold Leaf with Other Materials
This is where it gets really interesting. Gold leaf plus resin creates this insane depth – you apply the leaf, seal it, then pour resin over it. The resin magnifies the metallic quality. I’ve done serving trays and small wall panels this way.
Mixing gold leaf with acrylic paint is my go-to for abstract pieces. I’ll do paint layers, then add gold leaf to certain sections, then maybe more paint on top in some areas. The interplay between matte paint and shiny metal is really dynamic.
You can also do gold leaf over photographs or printed images. Print on regular paper, mod podge it to canvas, then add gold leaf accents. I did a series of vintage botanical prints with gold leaf leaves and stems that turned out gorgeous.
Patina and Aging Techniques
If you want your gold to look more antique or weathered, you can add patina. For imitation leaf I use a mix of black and brown acrylic paint watered down and brush it into the crevices before sealing. Wipe off the excess so it only stays in the low spots.
Some people use liver of sulfur for chemical patina but that’s honestly more trouble than it’s worth for wall art in my opinion.
Caring for Gold Leaf Art
Once it’s sealed, gold leaf art is pretty durable. You can dust it with a soft cloth. Don’t use glass cleaner or anything with ammonia because it can damage the sealer over time.
Keep it out of direct sunlight if possible – not because the gold will fade but because the sealer can yellow or degrade. UV-protective sealers exist but they’re pricier.
If you’re hanging it, treat it like any other framed art. Just make sure your hanging hardware is secure because you didn’t spend all that time gilding something just to have it crash off the wall.
Cost Breakdown Reality Check
A basic starter project – let’s say an 11×14 canvas with partial gold leaf coverage – will cost you maybe $25-30 in materials if you buy imitation leaf. That includes the canvas, size, leaf, sealer, and brushes.
If you’re doing a large wall installation, costs scale up obviously. I did a 4×6 foot geometric wall design and materials were around $150 but that was using higher-end adhesive sheets and a lot of leaf.
The nice thing is gold leaf goes a long way. Those 25-sheet packs? Each sheet is like 5.5 inches square and you can cut them or tear them to size. I’ve gotten three small canvases out of one pack before.
Where to Actually Buy Supplies
I get most of my stuff from Amazon honestly – Speedball brand makes good imitation leaf, and Mona Lisa brand for size and sealer. Art supply stores like Blick have everything too but it’s usually more expensive.
For real gold leaf I order from Barnabas Blattgold or Gold Leaf Supplies online. They have good quality and you can buy in smaller quantities.
Don’t buy the super cheap leaf from random sellers – I tried once to save like three dollars and the sheets were so thin and patchy they were basically unusable.
Wait I should mention – some craft stores sell “gold leaf” that’s actually just gold-colored foil. It’s not the same thing. Real composition leaf or genuine gold leaf has this specific delicate quality. The foil stuff is thicker and doesn’t burnish the same way.
Troubleshooting Specific Looks
If you want that really smooth, mirror-like finish, you need to burnish the leaf after it’s applied but before sealing. Use a super soft brush or even a cotton ball and gently rub the surface. This smooths out any wrinkles and makes it more reflective.
For a more textured, organic look, just apply the leaf in pieces and let the gaps show. Don’t try to make it perfect. Some of my favorite pieces are the ones where I just crumbled the leaf and pressed it on randomly.
Metallic doesn’t have to mean shiny – if you seal with a matte sealer you get this soft gold glow instead of high shine. Really depends on your aesthetic and where it’s going.
I was watching The Great British Bake Off the other night while working on a piece and honestly the way they talk about texture in baking is kinda similar to working with gold leaf – you want variation, you want interest, perfection is boring.
Anyway that’s basically everything I wish someone had told me when I started. Just start with a small practice piece, don’t stress about making it perfect, and save your excess leaf scraps because you’ll want them later.