Wall Art Guide, Wall Art Tutoriels
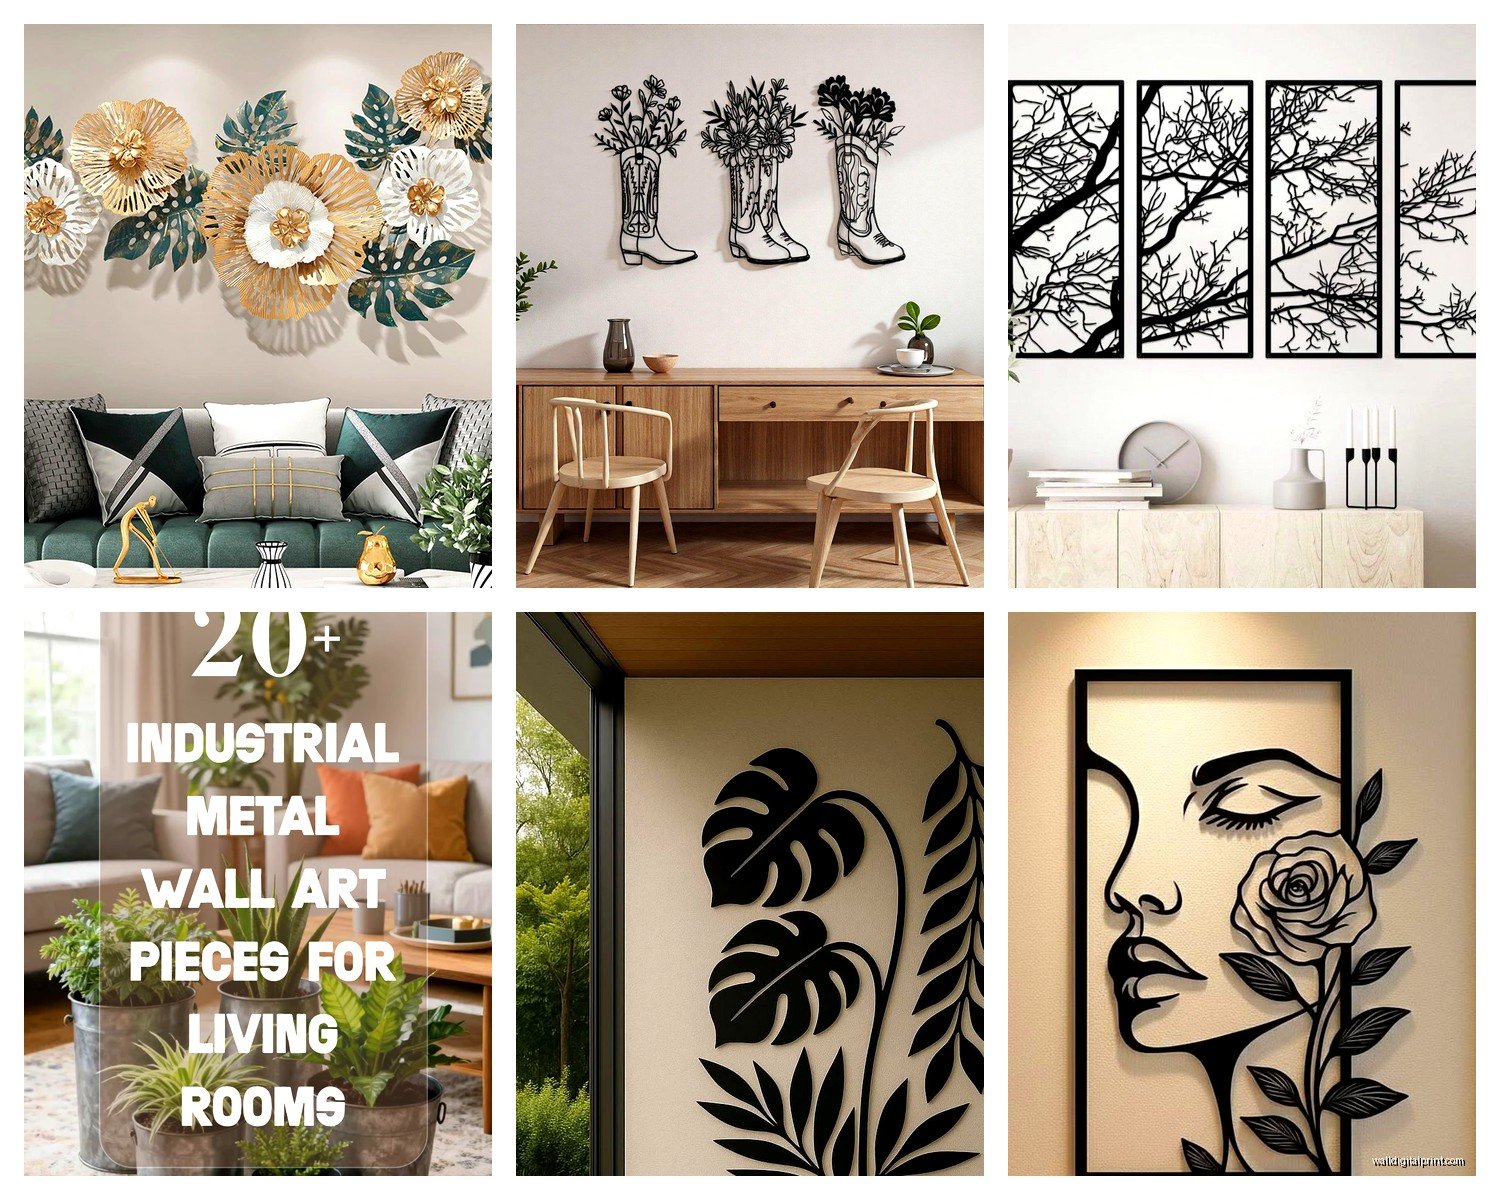
Metal Wall Art Decor: Sculpture & Laser Cut Designs
Mar
So I’ve been obsessing over metal wall art lately and honestly it’s way more complicated than just “hang a pretty thing on your wall” which is what I thought initially.
The biggest thing I learned after installing like fifteen different pieces in various spaces is that weight matters SO much more than you’d think. I mounted this gorgeous laser cut mandala design in my dining room last month and used the wrong anchors because I was being lazy and it literally fell off the wall at 2am and scared the crap out of my dog. So now I’m super paranoid about it.
Weight Categories and What They Actually Mean
Okay so metal wall art basically falls into three weight classes and this matters for installation. Light pieces are under 5 pounds, medium is 5-15 pounds, and heavy is anything over that. The sculptural stuff, especially if it’s layered or has multiple dimensions, tends to be heavier than laser cut pieces because laser cut is usually thinner gauge metal.
For lightweight pieces you can usually get away with regular picture hanging strips or basic wall hooks. But here’s the thing nobody tells you – even lightweight metal has sharp edges sometimes and it’ll cut right through those 3M strips if you’re not careful. I learned that the hard way with a geometric bird design that kept sliding down my hallway wall.
Medium weight stuff needs proper wall anchors. I use toggle bolts for drywall and they’ve never failed me. The ones that spring open behind the drywall? Those are your friends. Don’t cheap out on anchors because the $3 difference isn’t worth having your $200 sculpture on the floor.
Laser Cut vs Sculptural – The Actual Differences
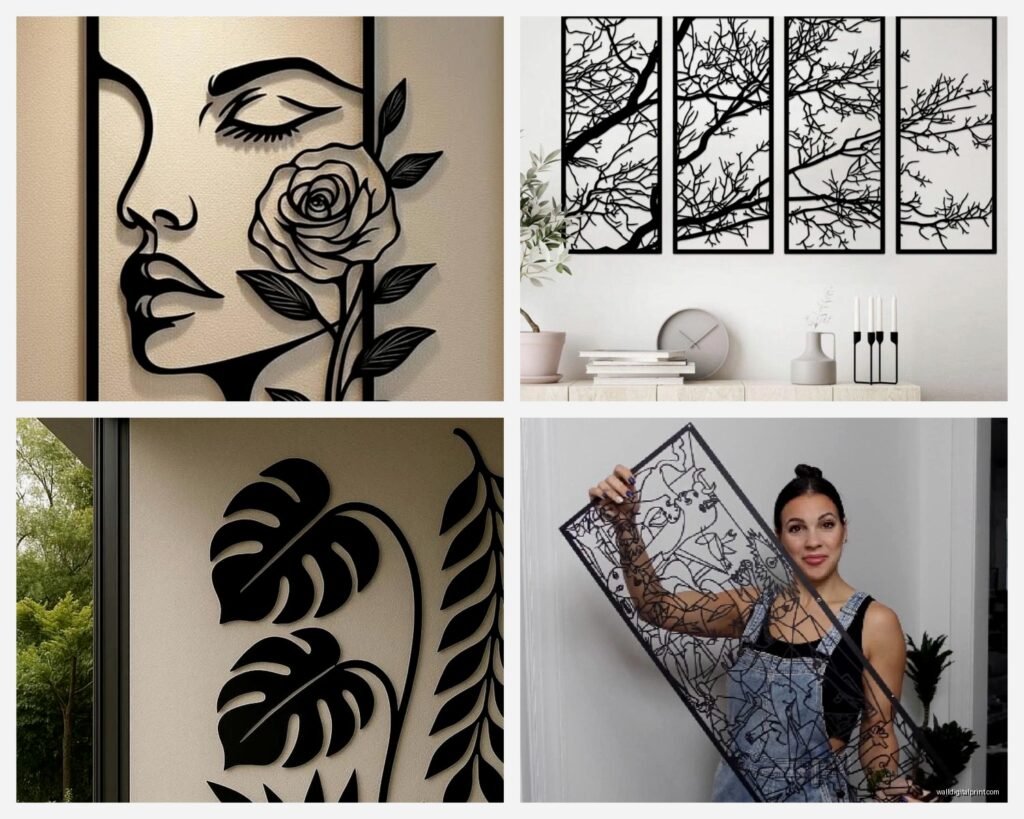
Laser cut designs are flat or mostly flat, cut from sheet metal using… well, lasers obviously. They’re super precise which means you get really intricate patterns. Tree of life designs, mandalas, geometric patterns, word art, all that stuff is usually laser cut. The edges are clean and the detail level is insane.
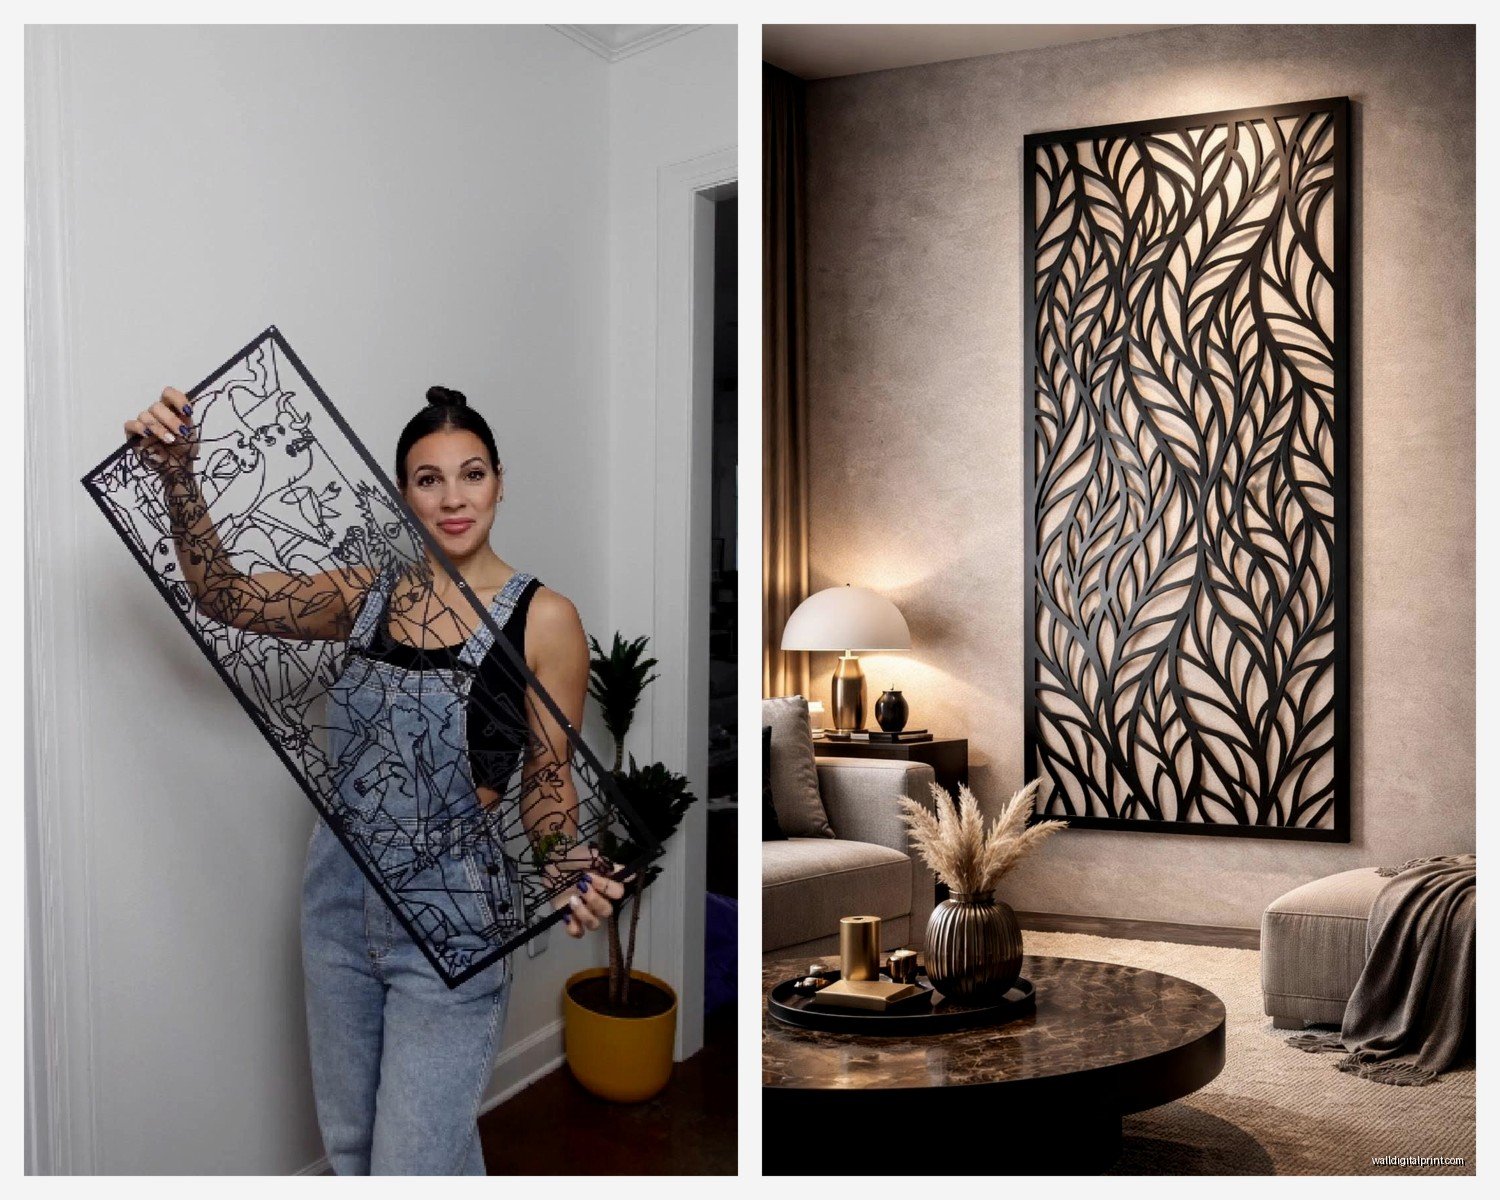
Sculptural pieces have dimension – they stick out from the wall, have curves, might be made from multiple pieces welded together. Think abstract faces, layered flowers, those cool wave designs that look 3D. They catch light differently throughout the day which is actually really cool if you position them right.
I’ve got both types in my house and honestly they serve different purposes. Laser cut stuff reads more as graphic design on your wall – it’s bold and clear from across the room. Sculptural pieces are more… experiential? You notice different things about them depending on where you’re standing and what time of day it is.
Material Types You’ll See
Most metal wall art is steel, aluminum, or copper. Steel is the heaviest and usually the cheapest. It can rust which might be a feature or a bug depending on what you want. Some pieces are designed to develop a rust patina and that’s actually the whole aesthetic – very industrial farmhouse vibes.
Aluminum is lighter and doesn’t rust. It’s easier to work with for laser cutting because it’s softer than steel, so you’ll see a lot of intricate aluminum pieces. The downside is it can look a bit… cheap? if the finish isn’t done well. But powder coated aluminum is great.
Copper and brass pieces are gorgeous but they patina over time – they turn green basically. If you want that Statue of Liberty look eventually, great. If not, you’ll need to seal them or polish them regularly which sounds like a pain to me honestly.
Finish Options and Why They Matter More Than You Think
Raw metal looks cool in photos but it shows fingerprints like crazy and will oxidize. I have a raw steel piece in my office and I’m constantly wiping it down.
Powder coated finishes are the most durable. They bake the coating onto the metal so it’s really tough. You can get them in matte or glossy and basically any color. Black powder coated steel is probably the most popular and it works with everything.
Painted finishes can chip if the piece gets bumped. Ask me how I know – I knocked a painted copper tree off the wall while moving furniture and now there’s a chip that drives me insane every time I look at it.
Brushed or polished metal has that shiny reflective quality. It’s very modern and contemporary but it also shows every little imperfection on your wall. If your wall isn’t perfectly smooth the reflection will highlight that.
Sizing Is Where Everyone Messes Up
Including me, multiple times. The general rule is your wall art should take up 60-75% of the wall space you’re trying to fill. But with metal art this gets weird because a lot of pieces have negative space built into the design.
Like I bought this laser cut tree that was technically 36 inches wide but because so much of it was cut away, it looked way smaller on the wall than I expected. The actual visual weight was more like a 24 inch piece. So now I always go bigger than I think I need with laser cut stuff.
Sculptural pieces have the opposite problem – they can overwhelm a space because they have physical depth. I put this layered flower sculpture in my bedroom that was only 30 inches but it stuck out from the wall about 6 inches and it felt massive. Ended up moving it to a bigger wall in the living room.
Height Placement
Center of the artwork should be at eye level which is usually 57-60 inches from the floor. But honestly I adjust this based on furniture. If it’s going above a sofa the bottom edge should be 6-8 inches above the sofa back. Above a console table or credenza, 4-6 inches of space looks right.
For really large pieces or gallery walls of multiple metal pieces, I tape out the arrangement on the wall with painter’s tape first. Sounds tedious but it’s way better than making multiple holes in your wall because you’re eyeballing it.
Installation Methods I Actually Use
Okay so this is gonna sound weird but I have a whole system now after installing so many of these things.
For pieces under 5 pounds with a sawtooth hanger on back, I use regular picture hooks rated for 10 pounds. Double the weight rating is my rule.
For medium weight pieces with D-rings or wire, I mark my spot, drill a pilot hole, install a toggle bolt or drywall anchor, then hang. If the piece has two D-rings I use two anchors for balance.
Heavy sculptural pieces or anything over 15 pounds gets mounted into studs if at all possible. I use a stud finder – not the cheap kind, a good magnetic one – and plan my placement around where the studs actually are. Yeah it’s less flexible but it’s also not gonna fall on anyone.
French cleats are amazing for really heavy pieces. You mount one piece of the cleat to the wall, one to the back of the artwork, and they interlock. Super secure and you can slide the piece along the cleat to adjust positioning which is clutch.
Style Categories and What Works Where
Industrial style metal art is usually raw or minimally finished steel, often with visible welds or rough edges. Think gears, blueprints of cities, vintage signs. This stuff looks great in lofts, modern farmhouse spaces, masculine offices.
Contemporary abstract pieces are all about clean lines and interesting shapes. Geometric patterns, flowing curves, minimalist designs. These work in modern spaces, Scandinavian interiors, anywhere you want a focal point without it being too busy.
Nature themed pieces – trees, flowers, animals, leaves – work in literally any style home if you pick the right finish. A black powder coated tree looks modern, a rusted steel tree looks farmhouse, a copper tree looks traditional.
Typography and word art in metal is having a moment. Home Sweet Home, family names, inspirational quotes… I’m not personally into the quote thing but people love them and they sell like crazy. The key is making sure the font style matches your decor style.
Layered and Multi-Panel Pieces
Some metal art comes in multiple pieces that you arrange yourself. These are cool because you can customize the layout but they’re also a pain to install because you need everything perfectly aligned.
I use a level and measure between each piece obsessively. Like measure three times, mark carefully, then measure again. My client canceled last week so I spent an hour comparing the spacing on a three-panel mountain scene until it was perfect and honestly it was therapeutic.
For layered pieces where metal panels overlap at different depths, make sure you’re installing the back layer first, then building forward. Sounds obvious but I’ve definitely started with the wrong layer before.
Outdoor vs Indoor Metal Art
If you’re putting metal art outside it needs to be specifically rated for outdoor use. Regular steel will rust – which again, might be what you want. Corten steel is designed to rust into a stable patina and then stop degrading, it’s pretty cool looking.
Aluminum and stainless steel are your best bets for outdoor pieces that won’t rust. Powder coating helps but it’s not foolproof – it can chip and then moisture gets under it.
I have a copper sun on my back patio and it’s turned this beautiful green color over two years. But I also have neighbors who hate the patina look and they’re constantly sealing their copper pieces which seems like so much work.
Maintenance Stuff Nobody Talks About
Dust accumulates on metal art just like anything else but it’s more visible because metal reflects light. I dust mine every couple weeks with a microfiber cloth.
For textured or dimensional pieces, compressed air works great to get dust out of crevices. I use the same can I use to clean my keyboard.
If you have powder coated pieces, you can clean them with mild soap and water. Don’t use abrasive cleaners or you’ll scratch the finish.
Raw metal pieces can be sealed with clear coat if you want to prevent oxidation. Renaissance wax is what museum people use and it works great but it’s kind of pricey.
Shopping Tips From Someone Who’s Bought Too Many
Etsy has amazing custom laser cut pieces and you can often get personalized stuff. But check the shop reviews carefully because quality varies wildly. Look for photos from previous buyers, not just the listing photos.
HomeGoods and TJ Maxx randomly have really good metal wall art for cheap. I’ve found $30 pieces there that look identical to $150 pieces I’ve seen online. It’s hit or miss though so you gotta check regularly.
Wayfair has a huge selection but the photos can be misleading about size. Always check the dimensions multiple times and read reviews about whether it looks bigger or smaller than expected.
Local metal artists at craft fairs and art shows often do custom work and their prices are sometimes better than you’d think. Plus you’re supporting actual people which feels good.
For really large statement pieces, I’ve had good luck with Houzz and even Amazon believe it or not. Amazon’s return policy makes it lower risk if the piece shows up and doesn’t work.
Price Ranges
Small laser cut pieces run $20-60 depending on complexity. Medium sized pieces are usually $60-150. Large or complex pieces can easily hit $200-400.
Sculptural art is generally more expensive because it’s more labor intensive. Small sculptures start around $50, medium ones $150-300, large statement pieces can be $500+.
Custom work obviously costs more but sometimes it’s worth it to get exactly what you want in the right size and finish.
Common Problems and Fixes
If your metal art is crooked, don’t just eyeball it. Use a level. I keep a small torpedo level in my art hanging kit for this exact reason.
If a piece feels unstable, add more anchors. Better to have extra support than to risk it falling.
If the color doesn’t work once it’s on the wall, some pieces can be spray painted. Just use paint meant for metal and do light coats. I’ve saved a few pieces this way that were the wrong finish for my space.
If sharp edges are catching on things or are dangerous, you can file them down or use metal edge tape. Safety first especially if you have kids.
Look, I should probably stop here because I could honestly talk about this forever. The main thing is just to measure carefully, install properly, and pick pieces that actually speak to you not just what looks good in someone’s Instagram post. Oh and don’t hang metal art above your bed unless it’s really securely mounted because that’s just asking for trouble.