Wall Art Guide, Wall Art Tutoriels
Mother of Pearl Wall Art: Iridescent Shell Inlay Luxe
Mar
So I’ve been completely obsessed with mother of pearl wall art lately and honestly it started because a client showed me this Instagram photo and was like “can we do this but make it look expensive” and I went down such a rabbit hole.
The thing about mother of pearl inlay is that it’s SO easy to get wrong. Like you think you’re getting this gorgeous iridescent piece and then it shows up looking like someone glued seashells from a craft store onto particle board. Been there, returned that.
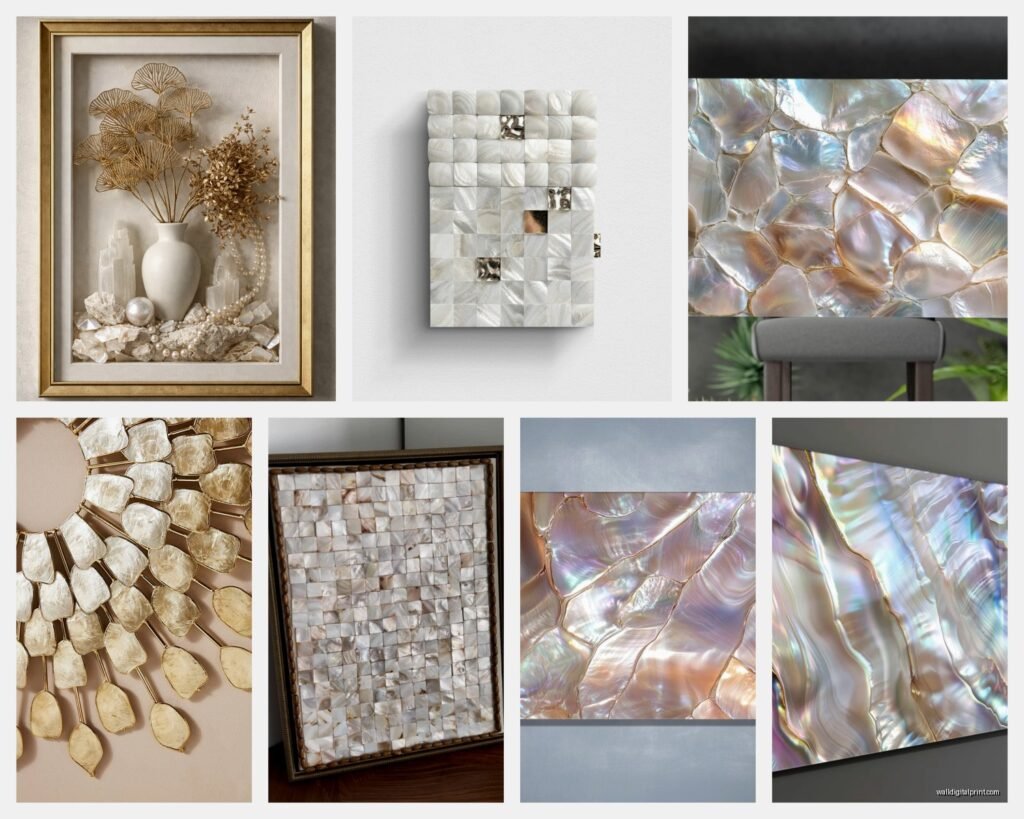
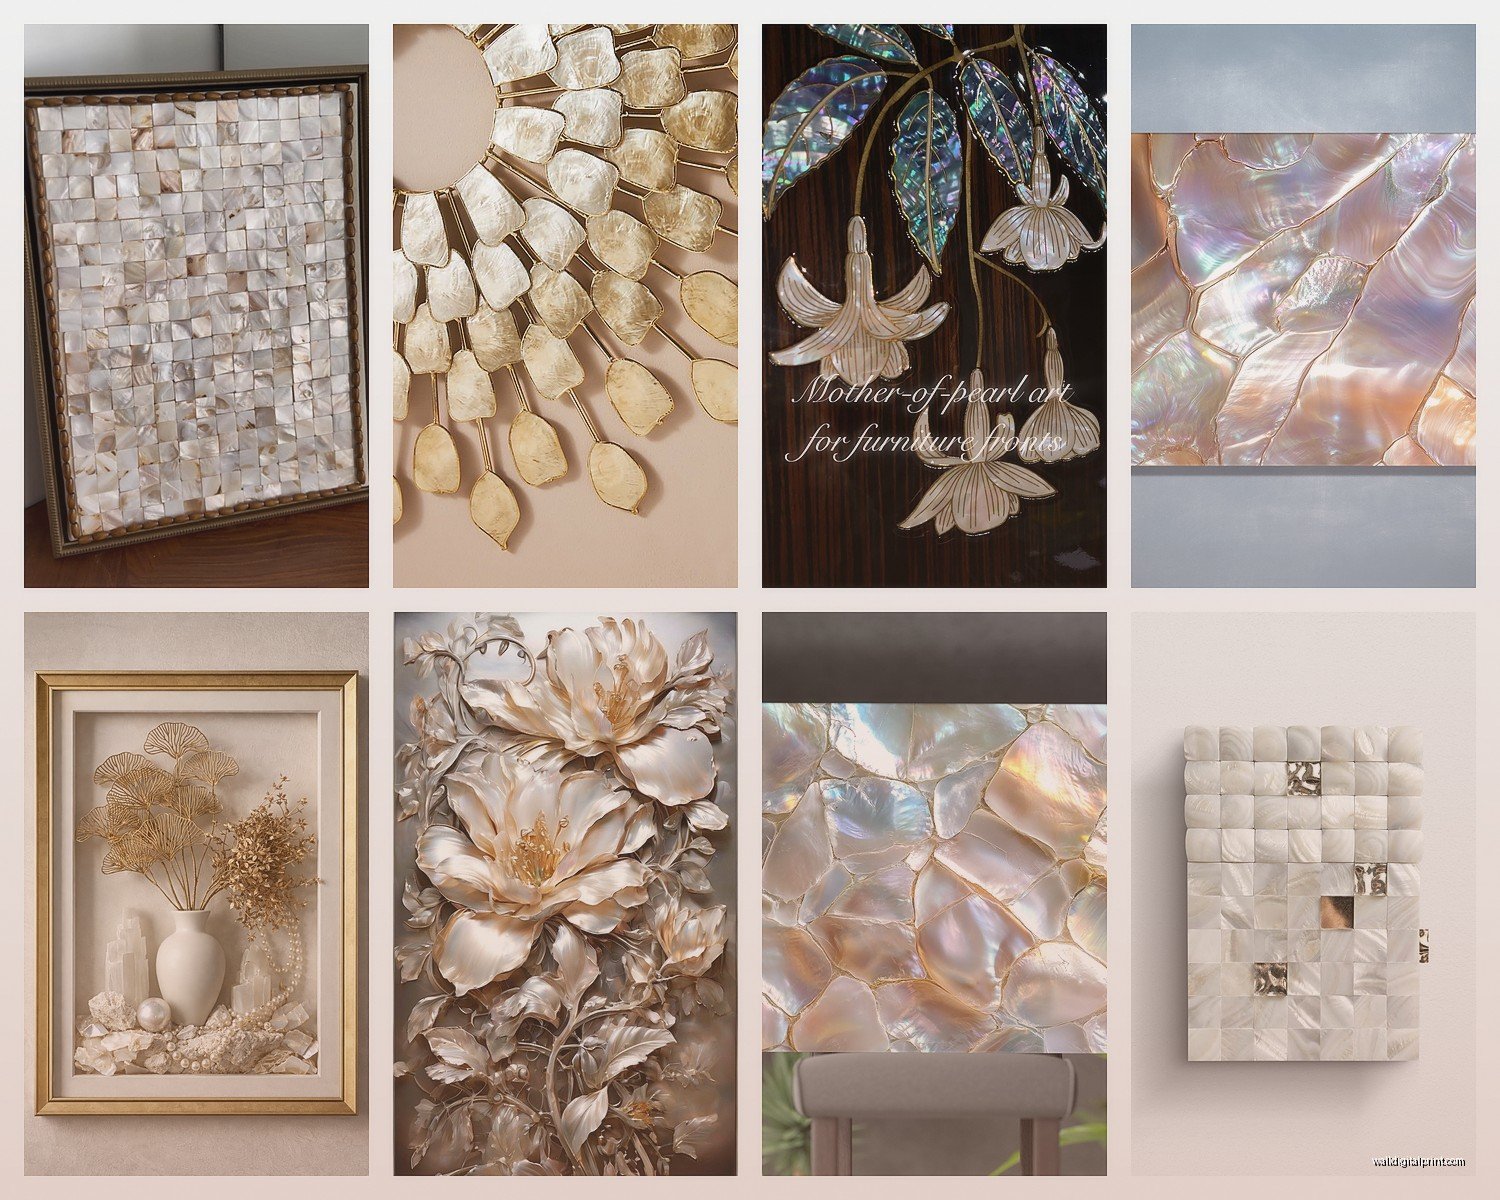
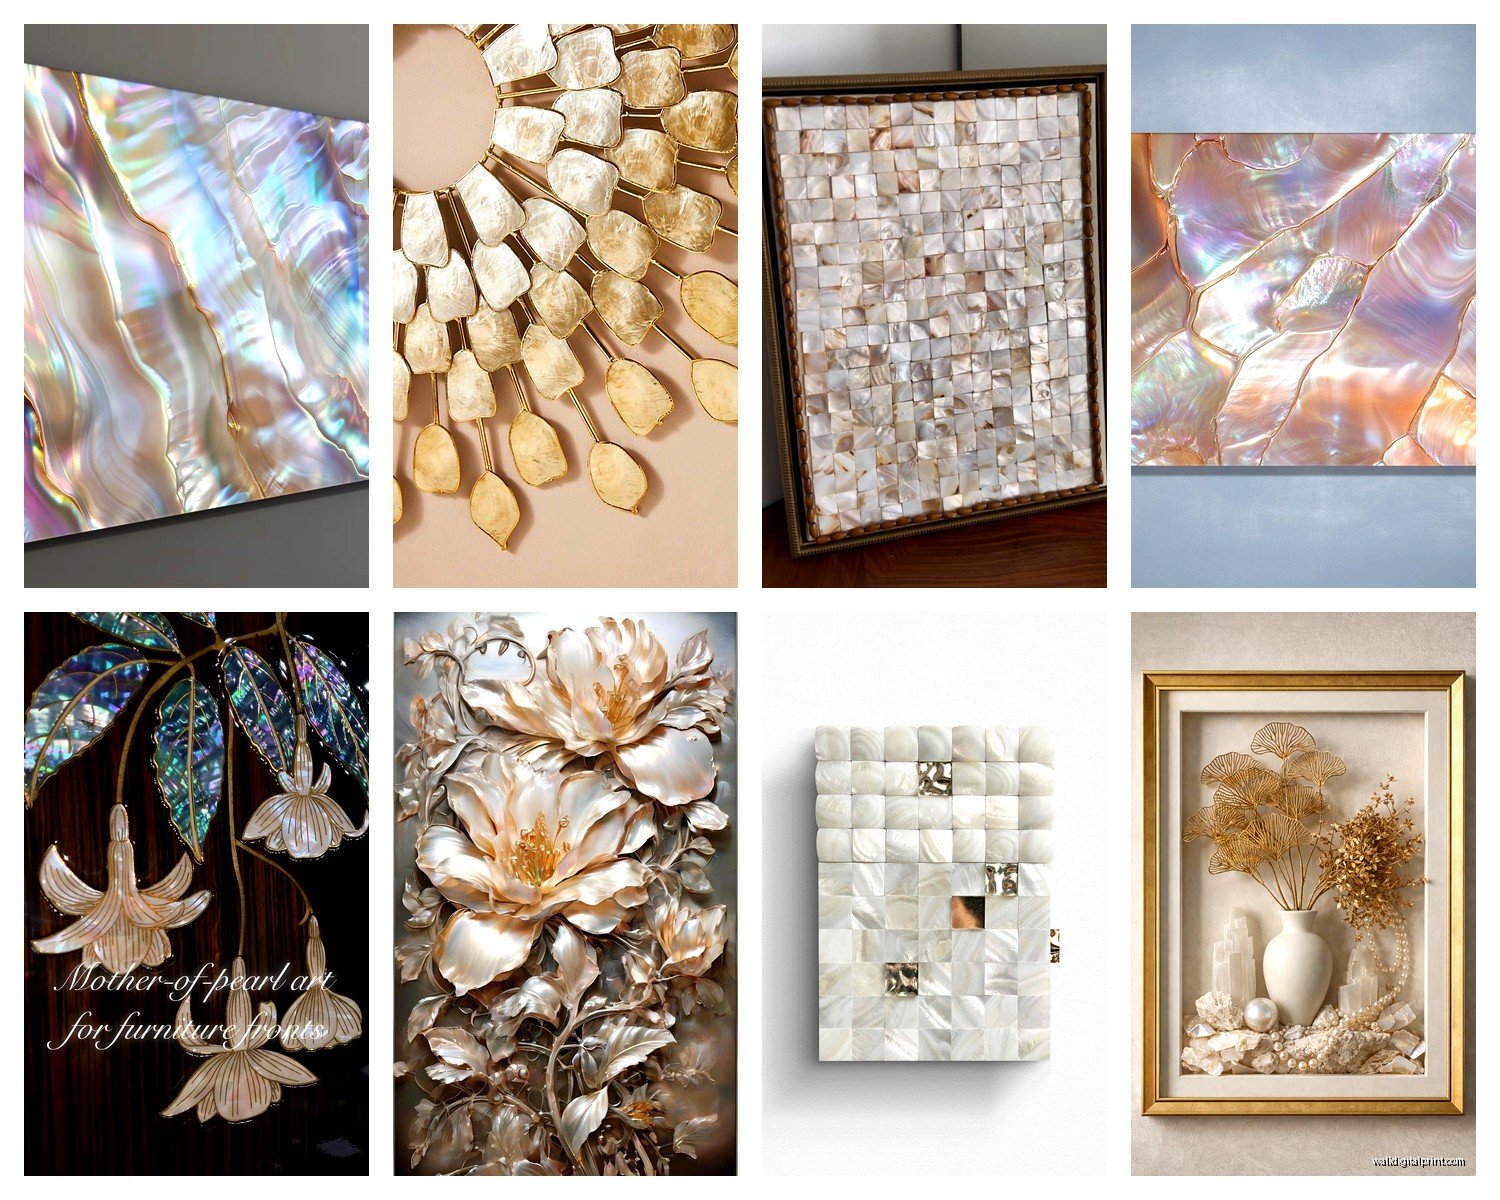
What You’re Actually Looking At
Real mother of pearl comes from the inner shell layer of mollusks—usually abalone, oysters, or mussels. The iridescence happens because of how light refracts through the layers of calcium carbonate. I know that sounds super technical but basically it means the color shifts depending on your viewing angle and lighting, which is what makes it look luxe instead of craft-fair.
You’ve got a few material grades to know about:
Premium grade is thick pieces with strong color variation—lots of blues, greens, pinks shifting around. This is what you want for statement pieces. It’s gonna cost you but the difference is really visible.
Standard grade is thinner, more uniform coloring. Still real mother of pearl but less dramatic. Good for larger installations where you need consistency.
Composite or reconstituted is crushed shell mixed with resin. Not inherently bad—I’ve used it for budget projects—but sellers should be upfront about it. The iridescence is way more subtle.
The Backing Material Actually Matters
Okay so this is where I made my biggest mistake initially. I ordered this gorgeous geometric piece without asking about the backing and it came mounted on like… the cheapest plywood. The inlay was beautiful but the base looked terrible and it warped within three months in my bathroom.
What to look for:
- Marine-grade plywood or MDF for humidity resistance—critical if you’re doing a bathroom installation
- Solid wood backing (teak, mahogany, walnut) for living spaces—adds weight and stability
- Metal backing for modern designs—I’ve seen copper and brass bases that look incredible with the shell
- Resin backing for contemporary pieces—totally waterproof and you can get interesting colors showing through
The backing should be at least 3/4 inch thick for anything over 24 inches. I learned this when a 36-inch panel I hung for a client started bowing in the middle. So embarrassing.
Inlay Techniques You’ll See
There’s basically three methods and they produce really different looks:
Flush inlay is where the shell pieces are set into carved channels so everything’s level. This is traditional and takes forever to do properly. The shells are literally glued into grooves that match their exact shape. Most expensive but most durable. The surface should feel completely smooth when you run your hand across it.
Surface applied means shells are glued onto the backing. Faster, cheaper, but the edges can lift over time especially in humid environments. You can feel the ridges of each shell piece. Not necessarily bad—some designers do this intentionally for texture—but know what you’re getting.
Mosaic style uses tiny shell pieces arranged like tiles. Can be either flush or surface applied. I love this for geometric patterns. The smaller pieces mean you get more color variation across the piece since you’re using shells from different sources.
Sizing and Scale Planning
This is gonna sound weird but I keep a folder on my phone of mother of pearl installations I’ve done with a banana for scale because photos are SO deceiving. A piece that looks massive online might be like 12×12 inches.
For living rooms, you want minimum 30×30 inches to make an impact. I usually go 40×50 for over a sofa. Anything smaller reads as decorative accent rather than art piece.
Dining rooms can handle dramatic vertical pieces—I did a 24×72 inch panel behind a console table that’s honestly one of my favorite installations ever.
Bathrooms are tricky because of humidity but also because the space is smaller. I stick to 18×24 or smaller, and I ALWAYS seal the back with marine varnish. Oh and another thing—the steam actually makes the iridescence more visible which is kind of magical.
The Lighting Situation
You can have the most expensive mother of pearl art in the world and if your lighting sucks it’ll look flat and dull. The whole point is the shimmer and color shift.
What works:
- Track lighting aimed at 45-degree angles—this is the magic angle for maximum iridescence
- Picture lights mounted above—but get the LED ones with adjustable color temperature
- Natural light from windows—honestly the best option if you have it, the color shifts throughout the day are gorgeous
- Accent lighting from below—super dramatic for entry halls
What doesn’t work is flat overhead lighting. It kills the dimensional effect completely.
I tested this extensively in my own place because my dog knocked over a lamp and I had to rethink the whole lighting setup and honestly it was a blessing because I figured out that two small spotlights work way better than one large one.
Installation Reality Check
These pieces are HEAVY. Like way heavier than you’d expect. A 30×30 inch piece with wood backing can easily be 20-25 pounds. You absolutely need proper wall anchors.
For drywall: use heavy-duty picture hanging hooks rated for at least 50 pounds, or better yet, find studs. I use a stud finder every single time now after one piece fell at 3am and scared me so badly.
For plaster walls: toggle bolts are your friend. Pre-drill carefully.
For brick or concrete: masonry anchors and a hammer drill. This isn’t a DIY situation unless you’re experienced—hire someone.
Most pieces come with D-rings or wire hanging systems. Here’s what I do:
- Measure the distance between hanging points
- Mark the wall with painter’s tape
- Level it like three times because once it’s up, moving it leaves holes
- Install anchors first, then hooks
- Get someone to help you lift it—seriously, don’t be a hero
Maintenance Is Easier Than You Think
People get so nervous about cleaning mother of pearl but it’s actually pretty straightforward. I clean mine maybe every two months.
Use a soft microfiber cloth slightly dampened with distilled water. Regular tap water can leave mineral deposits that dull the shine. Wipe gently in the direction of the shell grain—you’ll see natural lines in the material, follow those.
For stuck-on dust or grime, add one drop of pH-neutral dish soap to a cup of distilled water. That’s it. No vinegar, no ammonia, no commercial cleaners. Those can damage the calcium carbonate and you’ll lose the luster permanently.
Dry immediately with a separate clean microfiber cloth. Any standing water can seep into the inlay edges and cause lifting.
Dealing With Damage
Okay so funny story, my sister’s kid threw a toy truck at my favorite piece and chipped off a small section. I almost cried. But it’s actually repairable if you know what you’re doing.
Small chips: You can get mother of pearl powder mixed with clear epoxy resin. Mix it to match the surrounding area, fill the chip, let it cure for 24 hours, then sand smooth with 400-grit sandpaper. Seal with clear nail polish. Not invisible but way better than a missing chunk.
Lifted edges: This happens with surface-applied pieces in humid environments. Lift the shell piece carefully, scrape off old adhesive, apply new epoxy specifically made for shell (regular super glue doesn’t work well), clamp or weight it down while curing.
Dull or cloudy appearance: Sometimes this is just buildup. Try the distilled water cleaning first. If that doesn’t work, you can use a tiny amount of mineral oil on a cloth to restore some shine, but test in an inconspicuous spot first.
Where to Actually Buy Quality Pieces
I’ve ordered from probably 15 different sources at this point and the quality variation is wild. Some places I trust:
High-end galleries for one-of-a-kind pieces—you’re paying for artistry and provenance but it’s worth it for statement installations. Expect $500-$3000 depending on size.
Artisan marketplaces online—I’ve found amazing makers who do custom work. Communication is key here. Send them photos of your space, discuss the backing material, ask about their inlay technique. Good makers will answer everything in detail.
Home decor retailers for production pieces—these are hit or miss. Read reviews carefully and look at customer photos not just the professional shots. Return policy should be generous because colors can look totally different in person.
Antique shops for vintage pieces—I LOVE vintage mother of pearl art. The shells have aged to this incredible patina and the craftsmanship is often better than modern production pieces. Just check for loose inlay before buying.
Red Flags When Shopping
If the price seems too good to be true, it probably is. Real mother of pearl inlay with quality backing shouldn’t be $50 for a 24×24 piece. That’s composite at best, plastic at worst.
Photos that are super filtered or blurry—they’re hiding something. You should be able to see individual shell pieces and color variation clearly.
No information about backing material or inlay technique—means they’re using cheap materials and hoping you don’t ask.
Claims of “handmade” with identical pieces available—real handmade inlay has variation between pieces. If they have 20 identical items in stock, it’s manufactured.
Style Matching
This material works in more styles than you’d think but it needs the right context.
Modern minimalist: Go for geometric patterns with clean lines. White or grey backing. Simple frames or frameless. The contrast between sleek design and organic material is chef’s kiss.
Coastal/tropical: Obviously this works but don’t go too literal with like… seahorse shapes. I prefer abstract pieces or simple patterns that suggest water without being obvious about it.
Art deco/glam: THIS is where mother of pearl really shines. Pair it with brass accents, velvet furniture, jewel tones. Go big and dramatic. Sunburst patterns are incredible.
Bohemian: Mix it with other natural materials—rattan, wood, plants. Mosaic-style pieces work great here. Layer different sizes.
Traditional: Darker wood backing, classic patterns like florals or paisleys. These look gorgeous in formal dining rooms or studies.
Custom vs Ready-Made
I’ve done both and there’s definitely a place for each. Ready-made is obviously faster and usually cheaper. You can return it if it doesn’t work. But you’re limited to what’s available.
Custom lets you specify everything—size, pattern, backing material, shell type, even the colors you want emphasized. I did a custom piece for a client who wanted only the pink and green tones, no blue, and the maker sorted through shells to find the right ones. Took three months but the result was perfect for her space.
Custom costs probably 40-60% more than ready-made for similar size and quality. Worth it if you have specific requirements or unusual dimensions.
wait I forgot to mention—if you’re doing custom, ask for progress photos. Good makers will send you updates showing the shell selection and inlay process. This also protects you if something goes wrong because you have documentation.
Humidity and Environmental Stuff
Mother of pearl is actually pretty stable but it doesn’t love extreme conditions. Keep it away from direct heat sources like radiators or fireplaces. The heat can dry out the natural oils in the shell and cause cracking.
Humidity between 40-60% is ideal. Lower and you might see cracking, higher and you risk mold growing on the backing material or adhesive degradation.
I learned this the hard way with a bathroom installation that looked perfect for six months and then the shells started popping off because the room didn’t have proper ventilation. Added an exhaust fan and reinstalled with marine epoxy and it’s been fine for two years now.
Color Shift Throughout the Day
This is honestly my favorite thing about mother of pearl and something you can’t appreciate until you live with it. Morning light gives you more blue and green tones. Afternoon sun brings out pinks and purples. Evening artificial light makes it look more subtle and creamy.
I have a piece in my hallway that catches sunset light for about 20 minutes every day and it literally glows pink. My neighbor asked if I installed backlighting. Nope, just the shells doing their thing.
Position pieces where they’ll catch changing light if possible. Near windows but not in direct blazing sun all day—that’s too much and can fade the color over years.
The whole reason this material feels luxe is because it’s dynamic. Static art is… fine, but something that literally changes appearance based on your viewing angle and the time of day feels alive and special. That’s what you’re actually paying for.