Wall Art Guide, Wall Art Tutoriels
Preserved Moss Wall Art: Living Wall Installations
Mar
So I’ve been working with preserved moss walls for like three years now and honestly they’re so much easier than people think but also there are some things that will absolutely ruin your installation if you don’t know them upfront.
What You’re Actually Working With
First thing – preserved moss isn’t alive. I know that sounds obvious but I had a client water hers for six months before calling me in a panic. It’s been treated with glycerin and dyes to stay soft and colorful, which means it’s basically… paused? The moss was alive, got harvested, then preserved to stay in that state. No watering, no sunlight needed, which is why it works in spaces where real plants would just die.
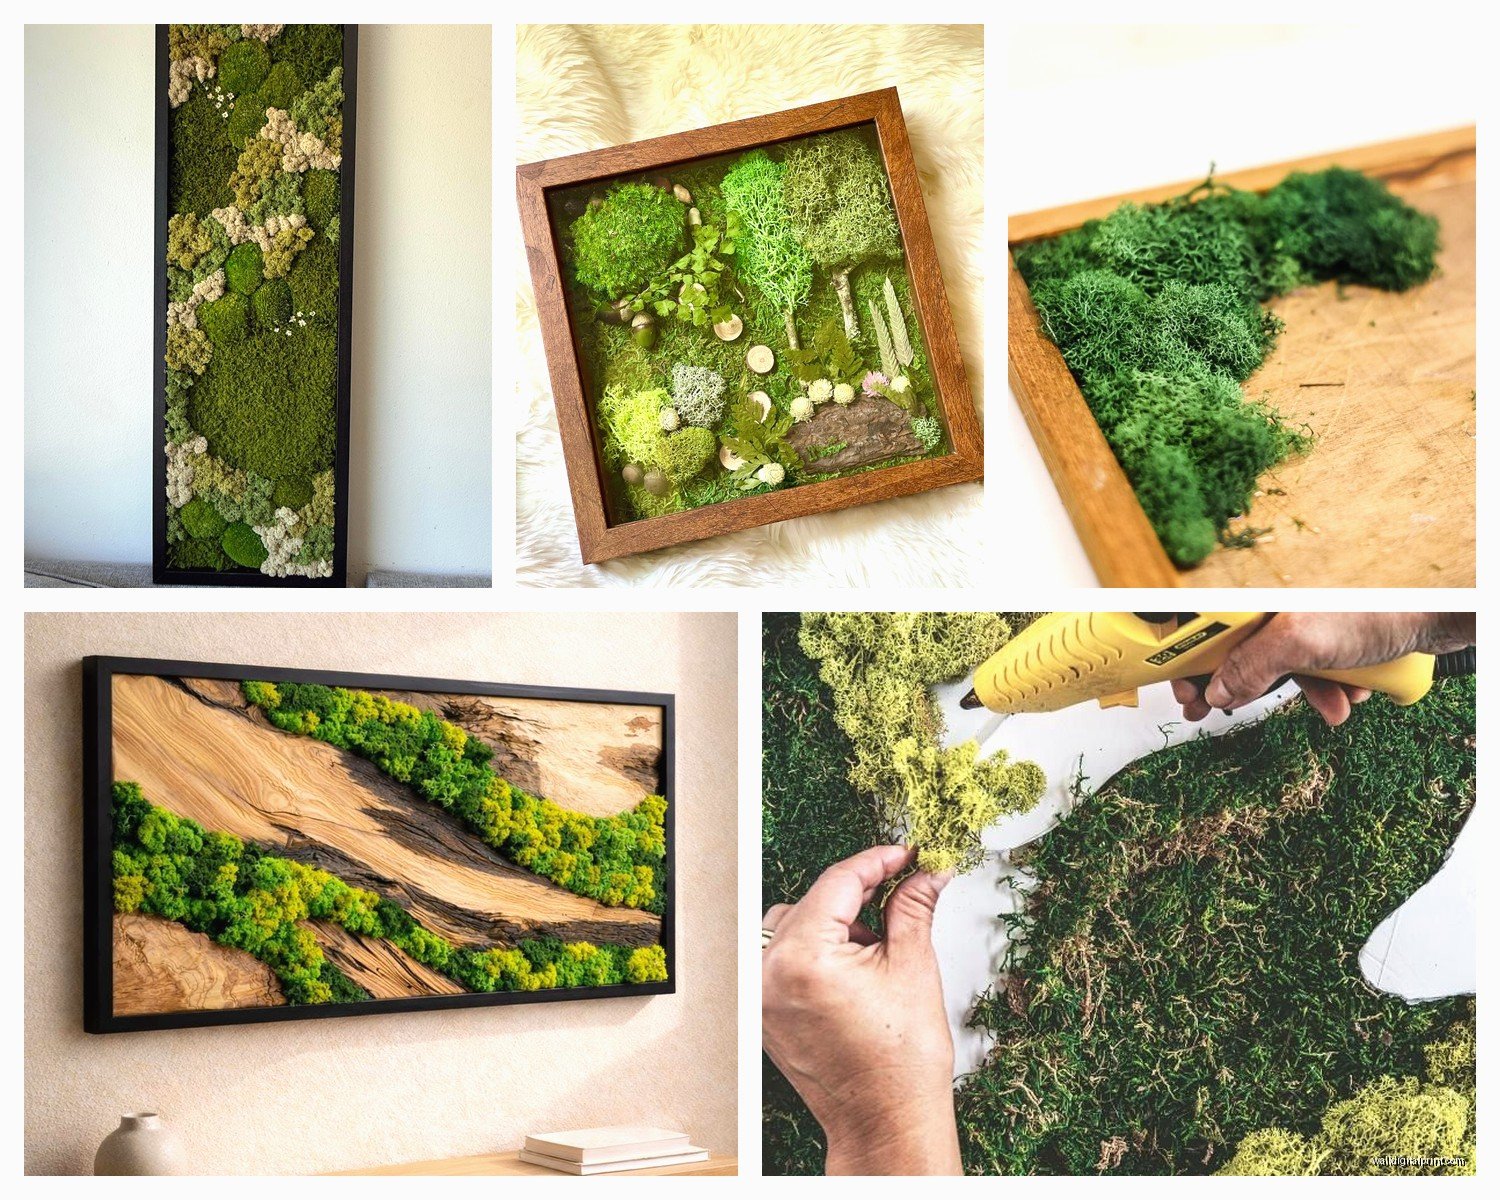
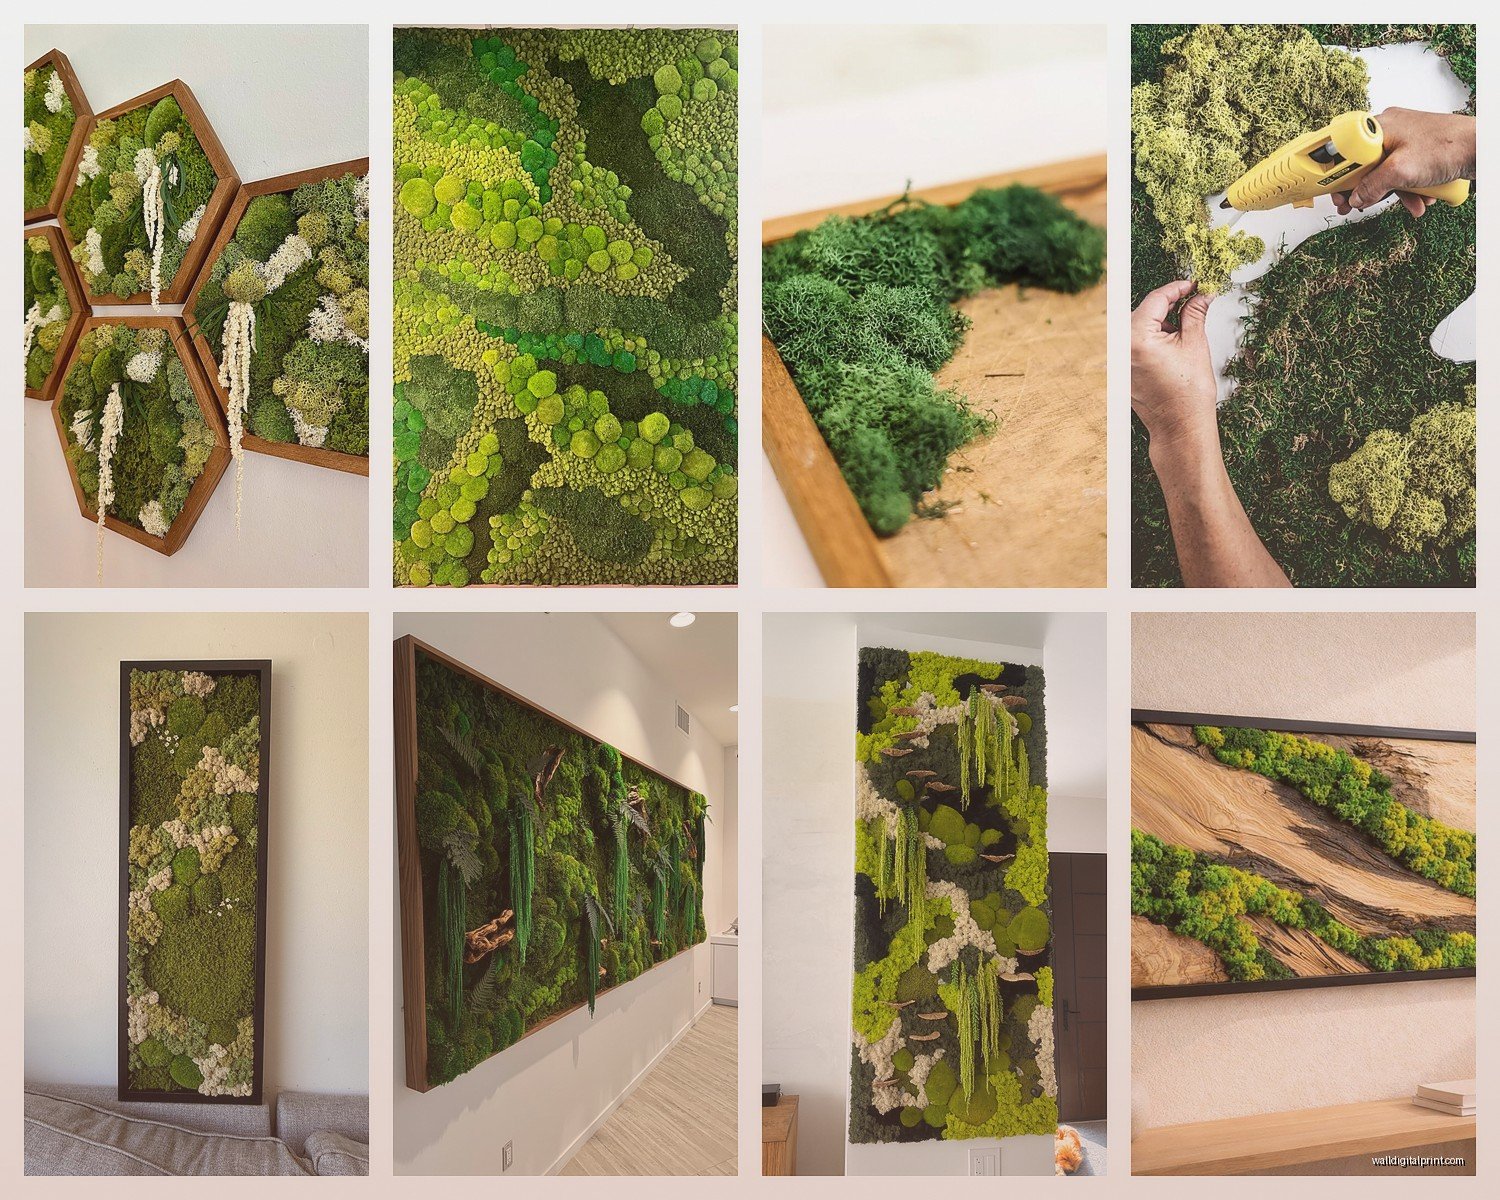
The main types you’ll see are reindeer moss (super fluffy, comes in crazy colors), sheet moss (flat, looks more natural), and mood moss (those gorgeous rounded clumps). I usually mix all three because using just one type looks kinda flat and fake.
Planning Your Wall Space
Okay so before you buy anything you gotta figure out your wall situation. Preserved moss HATES direct sunlight and humidity. Like, it’ll fade and get crunchy within months. I learned this the hard way with a bathroom installation that looked terrible after four months – my dog could probably have told me that was a bad idea.
Best locations are interior walls with indirect light, offices, bedrooms, living rooms away from windows. Humidity should stay between 40-60%. Too dry and it gets brittle, too humid and you risk mold even though it’s preserved.
Measure your space but also think about the layout. Are you doing a full wall, a panel, a logo, geometric shapes? I did this installation last month where we spelled out the company name in moss and honestly the planning took longer than the actual installation.
Size Considerations
Small panels (under 2×2 feet) you can do on your own pretty easily. Medium (up to 4×6 feet) gets tricky because you need to think about weight distribution. Anything bigger and you’re probably gonna want to work in sections or get help because holding a full sheet of moss backing while trying to secure it is… not fun.
Materials You Actually Need
Don’t overcomplicate this. Here’s what I keep in my studio:
- Backing board – I use 1/4 inch plywood or foam board depending on the installation
- Preserved moss in whatever varieties you want
- Hot glue gun and like a million glue sticks
- Spray adhesive as backup
- Picture hanging hardware or French cleats for larger pieces
- Exacto knife or scissors
- Painter’s tape
- Drop cloth because this gets messy
For the moss itself, I usually order from a couple different suppliers. The cheap stuff on Amazon can be hit or miss – sometimes it’s great, sometimes it arrives already crunchy. I’ve had good luck with Mountain Moss, Moss Acres, and there’s this seller on Etsy called SuperMoss that’s pretty consistent.
Budget like $8-15 per square foot for decent quality moss, more if you want premium or rare colors.
The Actual Installation Process
Alright so here’s where people mess up most often. They try to rush it.
Start by cutting your backing board to size. If you’re mounting directly to the wall you can skip the backing, but I don’t recommend it for your first project because you can’t fix mistakes as easily.
Lay everything out on the floor first. Seriously, don’t skip this step. I arrange the moss types how I want them, take a photo with my phone, then reference it while I’m gluing. Otherwise you forget where that perfect piece of mood moss was supposed to go.
Gluing Technique
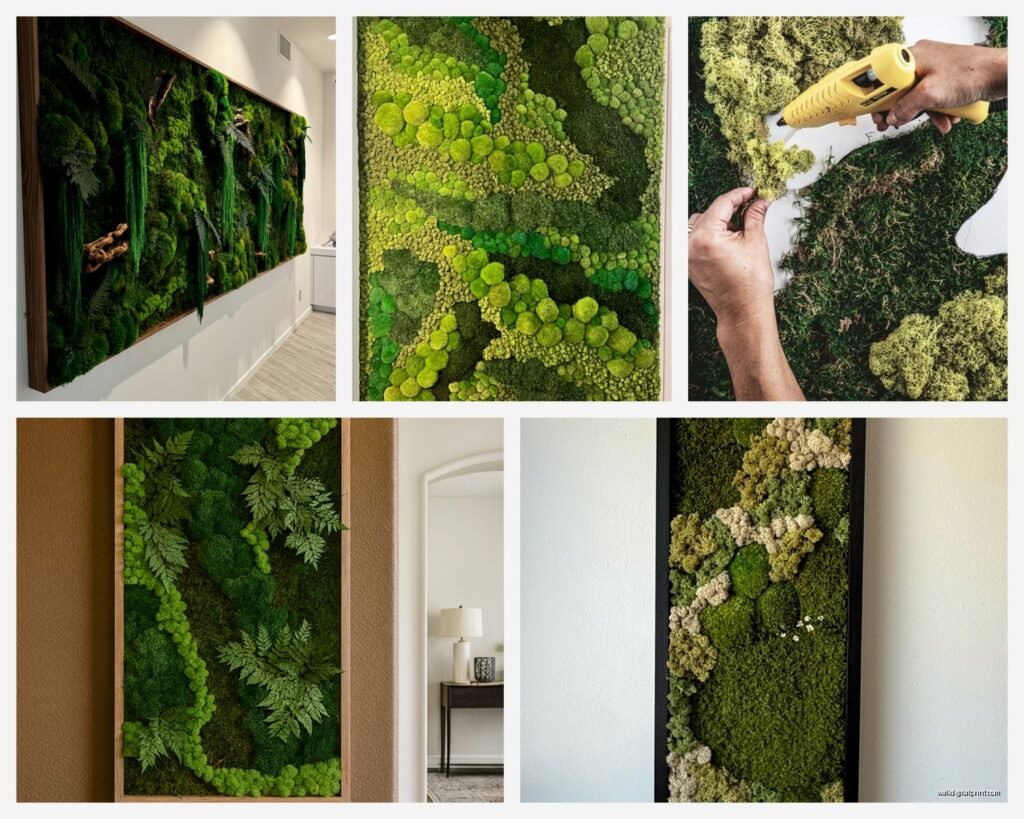
Hot glue is your friend but it’s also gonna burn you at least once so have ice nearby. I work in small sections, maybe 6×6 inches at a time. Apply glue to the backing board, not the moss – if you glue the moss directly it can show through and look weird.
Press the moss down firmly but don’t squish it flat. You want to maintain that natural texture. For reindeer moss especially, you’re just nestling it into place, not compressing it.
Oh and another thing – work from the edges toward the center. It’s easier to fill in gaps in the middle than to try to add moss around the perimeter later.
Sheet moss goes down first usually because it creates a good base layer. Then I add mood moss for dimension, then reindeer moss to fill gaps and add texture. But honestly there’s no one right way, I’ve seen people do it completely differently and it looks amazing.
Different Installation Methods
Panel Method
This is what I do most often. Create the moss art on a backing board, then hang it like a regular picture. For smaller pieces under 10 pounds, regular picture hangers work fine. Bigger pieces need French cleats or multiple anchor points.
The nice thing about panels is you can work on them in your garage or studio, really take your time, then just hang the finished piece. Also if you move or want to change things up, you can take it with you.
Direct Wall Application
Some people glue moss directly to the wall. I’ve done this for commercial installations where it’s gonna stay forever. You need really good wall prep – clean, dry, slightly textured is best. Smooth walls can be tricky because the moss doesn’t grip as well.
Use a combination of spray adhesive and hot glue. Spray adhesive for the base layer, hot glue for securing thicker pieces. This is permanent though, like you’re not getting it off without repainting.
Frame Method
Buy or build a shadow box frame, create your moss art, seal it in. This is the most finished-looking option and it’s great for smaller pieces. You can find shadow box frames at craft stores or online. Go at least 2 inches deep so the moss doesn’t get squished against the glass.
Wait I forgot to mention – don’t use glass directly against the moss. It needs airflow. If you’re framing it, use a deep frame or add spacers so there’s gap between the moss and any glass.
Design Ideas That Actually Work
Okay so funny story, I was watching this design show while working on a moss wall last week and they did this thing with ombre colors that I immediately stole for a client project. Going from dark green to light green to white reindeer moss looks SO good.
Patterns and Layouts
Geometric shapes – circles, hexagons, triangles mixed with moss. I use painted wood or metal for the geometric elements then fill sections with different moss types.
Gradient designs where you transition from one moss type or color to another. Takes planning but the effect is really striking.
Logo or text installations for offices. I charge extra for these because the detail work is tedious but they look professional.
Mixed media where you combine moss with driftwood, air plants (real ones in holders that you can remove for watering), or metal elements.
Common Problems and Fixes
Moss Getting Crunchy
If your space is too dry, the moss will dry out further and get brittle. You can lightly mist it with water (like barely any) every few months, but honestly if it’s in the right environment you shouldn’t need to. I’ve had pieces that haven’t been touched in two years and they’re still soft.
Color Fading
This is usually from sunlight. There’s not really a fix except moving the piece or accepting that it’ll fade to more natural tones. Some people actually prefer the faded look, it’s less artificial looking.
Moss Falling Off
You didn’t use enough glue or the wall wasn’t prepped properly. For direct wall applications, this is a bigger problem. You can try to re-glue pieces but it’s annoying. Better to just use more glue from the start.
Gaps Showing
Keep extra moss on hand for touchups. I literally have a box of moss scraps in every color I use regularly. When gaps appear (and they will, moss shifts a tiny bit as it settles), just glue in small pieces to fill.
Maintenance Real Talk
People always ask about maintenance and honestly there’s almost none if you install it correctly. No watering, no trimming, no fertilizing. Maybe dust it gently every six months with a soft brush or use compressed air from far away.
The big thing is just maintaining that humidity level. If you live somewhere super dry, a humidifier in the room helps. If you’re in a humid climate, make sure there’s decent ventilation.
I check my installations maybe twice a year. Look for any pieces coming loose, dust buildup, color changes that might indicate environmental issues. That’s it.
Cost Breakdown
Since you’re probably wondering what this actually costs:
Small panel (2×2 feet): $50-100 in materials, maybe 3-4 hours of work
Medium wall (4×6 feet): $300-500 in materials, 8-10 hours
Large installation (full wall): $1000+ in materials, multiple days
These are DIY costs. Professional installations cost way more because labor. I charge $75-150 per square foot installed depending on complexity, which is pretty standard.
Where to Source Materials
Moss suppliers I actually use:
Mountain Moss – great for bulk sheet moss, ships fast
Moss Acres – good variety, prices are decent
SuperMoss on Amazon/Etsy – consistent quality for reindeer moss
Artisan Moss – more expensive but amazing colors
Local craft stores sometimes have small amounts if you wanna test before committing to a big order.
For backing boards, just go to Home Depot or Lowe’s. They’ll cut plywood to size for you which saves time.
Pro Tips from Actual Experience
Buy 20% more moss than you think you need. You’ll waste some, use more in certain areas, want to fix things later.
Work in a well-ventilated area because hot glue fumes are real and you’ll be using a lot.
Take progress photos. I can’t tell you how many times I’ve looked back at photos and realized I should’ve added more texture in certain spots.
Don’t mix preserved moss with live plants in the same installation unless you have a way to water the live plants without getting the preserved moss wet. Trust me on this.
If you’re doing this professionally, get a heat-resistant mat for your glue gun. I’ve burned so many surfaces.
Test your moss colors in the actual lighting of the space before committing. Colors look totally different in natural vs artificial light.
The smell – preserved moss has a slight glycerin smell when it’s new. It fades within a few weeks but warn clients about it because some people are sensitive.
Advanced Techniques
Once you’ve done a few basic installations you can get creative. I’ve done moss walls with integrated LED backlighting which looks incredible at night. You just install LED strips behind sections of moss (not touching it directly) for this glowing effect.
3D installations where the moss comes off the wall in waves or peaks. This requires building a more complex frame structure but the depth is really cool.
Combining different textures by mixing in things like lichen, Spanish moss, or even artificial elements that complement the natural look.
Oh wait one more thing – if you’re doing a rental situation, use removable adhesive strips instead of permanent mounting. There are heavy-duty ones that can hold a surprising amount of weight and they come off without damaging walls.
Honestly the hardest part is just starting. Once you do your first panel and see how it comes together, you’ll probably want to put moss on everything. My apartment has like six moss pieces now and I’m running out of wall space but whatever, they make me happy and they’re so much easier than keeping actual plants alive.