Wall Art Guide, Wall Art Tutoriels
Pressed Botanical Wall Art: Dried Preserved Plant Art
Mar
So I’ve been making pressed botanical art for like three years now and honestly it started because I killed my fiddle leaf fig and needed something on that wall that wouldn’t judge me. Let me tell you what actually works versus what looks pretty on Pinterest but is basically garbage in real life.
The Flowers and Plants That Actually Press Well
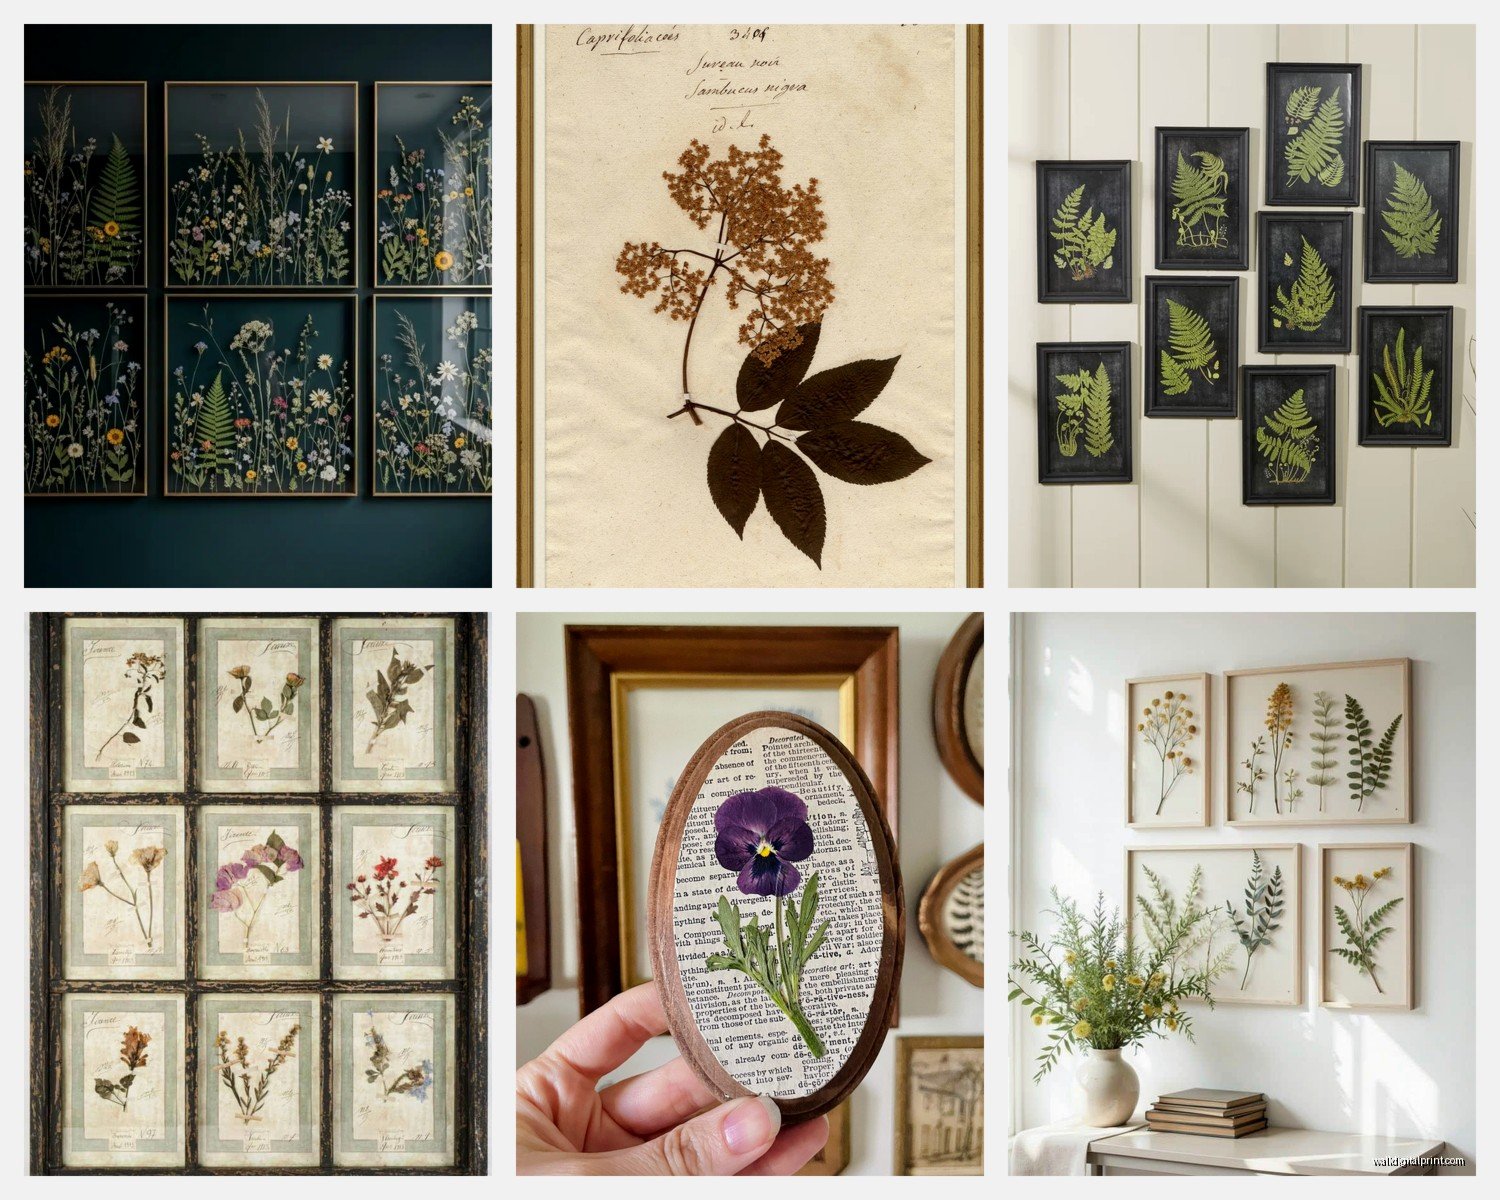
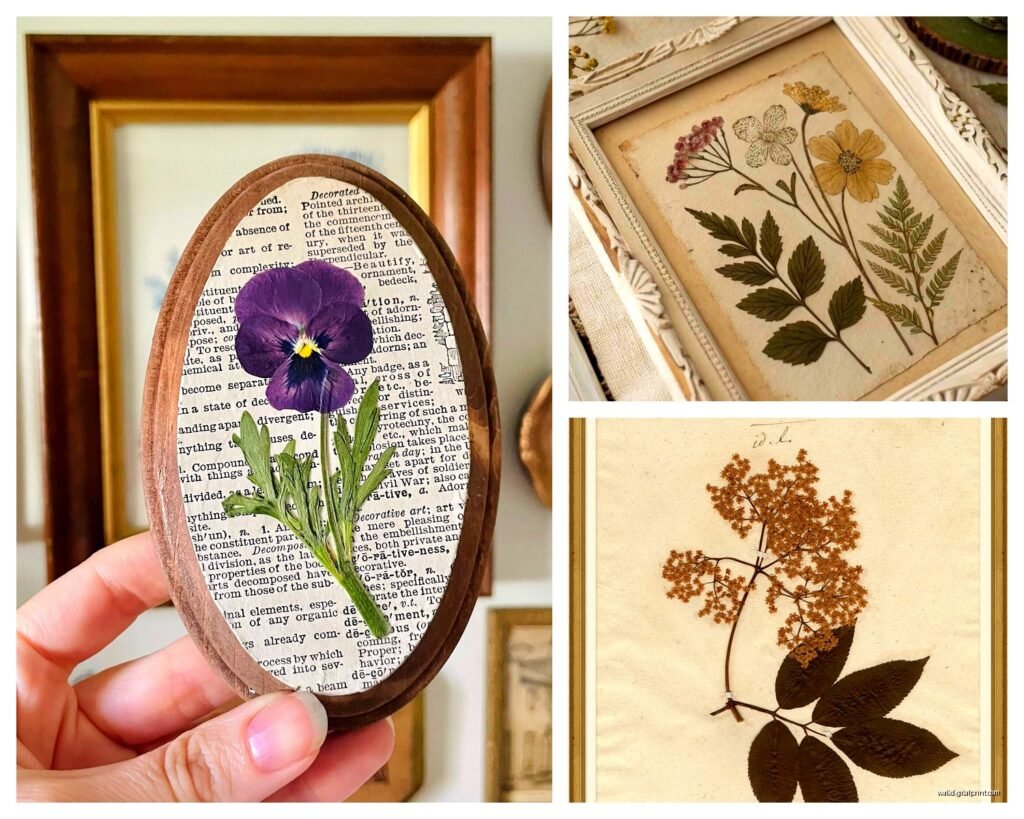
Okay so not everything presses nicely and this took me forever to figure out. Pansies are like the gateway drug of pressed flowers—they flatten perfectly, keep their color for months, and you can find them everywhere. Violets too. I grabbed some from my neighbor’s yard last spring (she said it was fine) and they’re still this gorgeous purple-blue color.
Ferns are stupid easy. Any fern. They dry flat, they look elegant, and if you mess up the arrangement you can just say it’s “organic” and people believe you. I use them as filler basically everywhere.
What DOESN’T work: anything thick or fleshy. I tried to press a succulent leaf once and it just turned into brown mush after two weeks. Roses are tricky because the petals are thick—you gotta press individual petals, not the whole flower. Learned that the hard way when I ruined like six roses trying to keep them intact.
Herbs are actually amazing for this. Lavender, rosemary, thyme—they smell good while pressing and they keep their shape. I did a whole kitchen piece with pressed herbs and my client literally cried. It was mounted on this cream linen background and yeah, that was a good day.
Wildflowers and Weeds
This is gonna sound weird but some of the best pieces I’ve made used “weeds.” Queen Anne’s lace is incredible when pressed—it creates this delicate lacy pattern. Clover flowers, dandelions (before they go to seed obviously), even those little purple deadnettle things that grow everywhere in spring.
My dog ate a pressed dandelion once before I could frame it. Just… grabbed it off my work table and I watched him do it. Anyway.
The Actual Pressing Process Nobody Tells You About
You need heavy books. Like really heavy. I use old art catalogs from museum exhibitions because they’re massive and I have like twenty of them. Phone books if you can find them anymore? Perfect.
Here’s what you do: put your flower or leaf between two pieces of parchment paper. Not wax paper—parchment paper or plain printer paper works. The wax can stick to your botanicals and it’s annoying to remove. Then stick that whole sandwich inside the book, pile more books on top, and forget about it for two to three weeks minimum.
I have a whole shelf in my studio that’s just books with plants inside and little sticky notes on the edges saying what’s in there and the date. It looks insane but it’s the only way I remember what I pressed and when.
The Microwave Method
Wait I forgot to mention—if you’re impatient there’s a microwave method. You need a microwave flower press (they’re like $25 on Amazon, the brand doesn’t really matter). You layer your flower between the pressing plates, microwave for like 30-second intervals, and boom, pressed flower in under 5 minutes.
BUT. And this is important. The colors don’t last as long. They fade faster than book-pressed flowers. So if you’re making something to sell or gift, use the book method. If you’re just testing arrangements or doing a temporary seasonal thing, microwave is fine.
Materials for Mounting and Framing
Okay so once your botanicals are pressed and dried, you gotta mount them. Here’s where people mess up constantly.
Backing Materials
- Watercolor paper in cream or white: This is my go-to. It’s thick enough that it doesn’t wrinkle, has a nice texture, and comes in different sizes. I buy the 140lb weight.
- Linen fabric stretched over foam board: More expensive but looks SO good. Very gallery-like. You can get pre-stretched linen boards or DIY it.
- Vintage book pages: For a more cottagecore aesthetic. Old botanical encyclopedias, music sheets, whatever. Make sure they’re not too yellowed unless that’s your vibe.
- Black cardstock: Creates serious drama. White flowers on black background? Chef’s kiss.
I tried burlap once because a client requested it and honestly it was a pain. The weave is too loose and the adhesive shows through. Would not recommend unless you’re gonna cover every inch with botanicals.
Adhesives That Won’t Ruin Everything
This is critical. You cannot use regular glue. It bleeds through the delicate petals and leaves, it discolors over time, and it just looks bad.
What works: PVA glue (archival quality), applied with a tiny brush or toothpick. You need like a microscopic amount. Just a dot on the back of the stem or leaf, press it down gently with tweezers, done.
Some people swear by double-sided tape but I think it’s too bulky for delicate flowers. Maybe for thicker leaves like eucalyptus it’s fine.
There’s also this stuff called pH neutral adhesive that museums use. It’s expensive but if you’re selling these pieces, it’s worth it because it won’t yellow or damage the botanicals over time. I use Lineco brand.
Arranging Your Botanicals
Don’t glue anything down until you’ve played with the arrangement for like twenty minutes. I’m serious. I use tweezers to move everything around, take photos from different angles, walk away, come back, change it again.
My client canceled yesterday so I spent an hour just rearranging the same five fern fronds and three pansies in different configurations. Sometimes you gotta live with it for a bit before you commit.
Composition Ideas That Actually Work
The Specimen Style: One large botanical centered on the page with its scientific name written below in nice handwriting or printed. Very minimal, very elegant. Works great in a series of three or five frames.
Scattered Chaos: This is what I call it when you just arrange a bunch of different botanicals in a loose, organic way. No symmetry, just vibes. Honestly this is the easiest because there’s no wrong way to do it.
Grid Layout: Multiple small flowers arranged in a grid pattern. Very modern, very clean. I did this with pressed pansies in different colors and it sold immediately.
Wreath or Circular: Arrange your botanicals in a circle. It’s harder than it looks because you gotta make sure the circle is actually circular and not like… egg-shaped. Use a pencil to lightly draw a guide circle first.
Framing Without Crushing Your Work
You need a frame with depth. Like a shadow box basically, or a frame with a mat that creates space between the glass and the botanicals. If the glass presses directly on your pressed flowers, they can stick to it over time or get crushed even more.
I buy most of my frames from IKEA honestly. The RIBBA frames work great because they have that little gap. For fancier pieces I use actual shadow boxes from craft stores or order custom frames online.
Glass vs Acrylic
Glass is heavier, more fragile, but looks better and doesn’t scratch as easily. Acrylic is lighter, won’t shatter if it falls, but scratches if you look at it wrong and can create static that attracts dust to your botanicals.
For anything I’m shipping, I use acrylic because glass breaking in transit is my nightmare. For local sales or personal pieces, glass all the way.
Oh and another thing—UV protective glass or acrylic is worth it if you’re using flowers that fade easily. It’s more expensive but your piece will last years longer without the colors washing out.
Preservation and Longevity
Even perfectly pressed and framed botanicals will fade eventually. That’s just nature. But you can slow it down.
Keep them out of direct sunlight. Seriously, even an hour of direct sun per day will fade colors noticeably within months. I learned this when I hung a piece in my kitchen and the side facing the window turned completely beige while the other side stayed vibrant.
Humidity is also the enemy. Bathrooms are a no. Basements can be iffy depending on your climate. Normal room humidity is fine.
Some people spray their pressed flowers with hairspray or acrylic sealer before mounting. I’ve tested this and… it’s not necessary? It can actually make colors look duller. The only time I seal is if I’m making an unframed piece that’ll be touched a lot, like a bookmark.
Where to Source Your Botanicals
Your yard, obviously. Parks if it’s legal in your area (check local regulations about picking wildflowers). Farmer’s markets often have vendors selling fresh flowers cheap at the end of the day.
I also buy from grocery stores when they mark down flowers that are starting to wilt. They press fine even if they’re not perfect fresh. Got a whole bunch of ranunculus for $3 once and they made beautiful art.
There are online shops that sell pre-pressed flowers but that feels like cheating to me? Plus it’s expensive. But if you live somewhere with harsh winters and can’t get fresh flowers, it’s an option.
Growing Your Own
I started growing specific flowers just for pressing. Statice is amazing—comes in tons of colors, dries perfectly, keeps its color forever basically. Strawflowers too. Bachelor buttons, cosmos, zinnias if you press individual petals.
It’s actually cheaper than buying flowers constantly and you can control the colors you want for specific projects.
Common Problems and Fixes
Flowers turned brown during pressing: Usually means moisture got trapped. Make sure flowers are completely dry before pressing, and change the paper halfway through the pressing period if you think there’s too much moisture.
Petals stuck to the paper: They were too moist or you used the wrong paper. Gently peel with tweezers. Some damage is inevitable. I keep the damaged ones for projects where I’m layering or using partial flowers.
Colors faded immediately after pressing: Some flowers just do this. Yellow flowers are notorious for turning cream-colored. Red roses often turn dark burgundy or brownish. You kinda gotta accept it or choose different flowers.
Everything looks flat and boring: Layer different elements. Put a fern behind a flower. Overlap leaves. Add small delicate flowers around larger ones. Depth comes from layering even though everything is technically flat.
Pricing If You’re Selling These
Okay so if you’re thinking of selling pressed botanical art… factor in your time. Like really factor it in. Between collecting flowers, pressing for weeks, arranging, mounting, framing—each piece takes hours spread over a month.
Small pieces (5×7) I price around $35-50. Medium (8×10) go for $65-85. Larger pieces or anything custom starts at $100. If I’m using an expensive frame or rare botanicals, I charge more.
Etsy is oversaturated with pressed flower art so you gotta have good photos and a unique style to stand out. Local art markets and home decor boutiques have been better for me honestly.
Just remember to account for materials—frames aren’t cheap, good paper adds up, and if you’re using archival materials those cost more but you can charge more too.
Anyway that’s pretty much everything I wish someone had told me when I started. It’s really not complicated once you get the hang of it, just takes patience with the drying time. Start with easy flowers like pansies and ferns, don’t overthink the arrangements, and invest in decent frames because a good frame makes even a simple piece look expensive.