Wall Art Guide, Wall Art Tutoriels
Resin Wall Art: 3D Epoxy Designs & DIY Tutorials
Mar
So I’ve been completely obsessed with resin wall art lately and honestly it started because a client asked if I could source something “like those wavy 3D pieces but not $800” and I went down this rabbit hole of making them myself. Now my studio looks like a mad scientist lab but whatever, the results are actually stunning.
What You Actually Need to Get Started
Okay so first things first, epoxy resin is not all the same and this matters more than you’d think. I wasted like three pieces before figuring this out. You want a two-part epoxy resin specifically designed for art, not the stuff for coating tables. I use ArtResin mostly because it doesn’t yellow and the fumes aren’t as brutal, but Stone Coat Countertops epoxy is cheaper and works fine if you’ve got good ventilation.
You’re gonna need:
- Two-part epoxy resin (get more than you think, I always run out)
- Silicone molds OR a canvas/wood panel with edges taped
- Resin pigments or alcohol inks
- Heat gun or torch (the torch works better honestly)
- Mixing cups and stir sticks
- Level surface and plastic sheeting because this gets messy
- Respirator mask, not just any mask
- Gloves, so many gloves
The respirator thing isn’t me being dramatic. I worked without one the first time and had a headache for two days. My dog kept leaving the room which should’ve been my first clue.
Understanding the 3D Effect Thing
The whole magic of those expensive gallery pieces is layers. That’s it. Multiple pours that cure between applications. I was expecting some complicated technique but it’s literally just patience, which I don’t have but you gotta wait anyway.
For a basic 3D wave or geode look, you’re building up dimensional areas with each pour. First layer is your base color, usually white or a light shade. Let that cure completely, like 24 hours minimum depending on your resin brand and how thick you poured. Then you add your feature layer with darker colors, metallic pigments, or that gorgeous cell effect.
The Cell Technique Everyone Asks About
Those organic cell patterns happen from adding alcohol or silicone oil to your resin. I use Resi-Blast which is specifically made for this, but honestly a few drops of silicone lubricant from the hardware store does the same thing for way less money. Don’t tell anyone I said that.
Mix your resin according to package directions, add your pigment, then add like 2-3 drops of silicone per ounce of resin. Pour it, then hit it with the torch. The cells just appear and it’s weirdly satisfying. I was watching The Crown when I did my first successful cell piece and missed an entire episode just staring at it.
Actual Step by Step for a Basic 3D Panel
Starting with a wood panel is easier than a canvas for your first attempt, trust me. Get a cradled wood panel from the art store, the ones with the raised edges.
Prep work: Sand it lightly, wipe it down. Seal it with a thin layer of resin first or the wood will create bubbles. This seal coat is annoying but necessary. Let it cure overnight.
First dimensional layer: Mix your resin, divide it into cups for different colors. I usually do three colors max because more than that gets muddy. Pour your lightest color as the base, covering maybe 70% of the panel. Then add your accent colors in specific areas where you want depth.
Use a stir stick or even a toothpick to swirl slightly, but don’t overmix. The beauty is in the separation. Hit it with the torch to pop bubbles, moving quickly in small circles. You’ll see the bubbles disappear, it’s like magic except sometimes you scorch it if you hold the torch too close, ask me how I know.
Building the dimension: This is where it gets fun. After that first layer cures, you can add raised elements. Mix a smaller batch of resin, make it thicker with pigment or mica powder, and literally drip or pour it in concentrated areas. I create wave crests by pouring along one edge and letting gravity pull it slightly.
Some people use a palette knife to push the resin into peaks before it sets. The working time is usually 30-45 minutes depending on temperature, so don’t mix a huge batch your first time.
Color Combinations That Actually Work
I’ve tried so many color combos and most look terrible in person even if they sound good in theory. Here’s what actually works:
- Ocean vibes: deep teal, white, tiny bit of gold mica
- Geode look: purple and white with gold or silver leaf edges
- Modern minimal: grays with white and black cells
- Warm abstract: burnt orange, cream, copper metallic
The metallic pigments are worth the extra money. I use Eye Candy pigments and they’re like $15 per color but a little goes so far. Regular acrylic paint works too but the colors aren’t as vibrant and can sometimes affect curing, especially if you add too much.
The Gold Leaf Hack
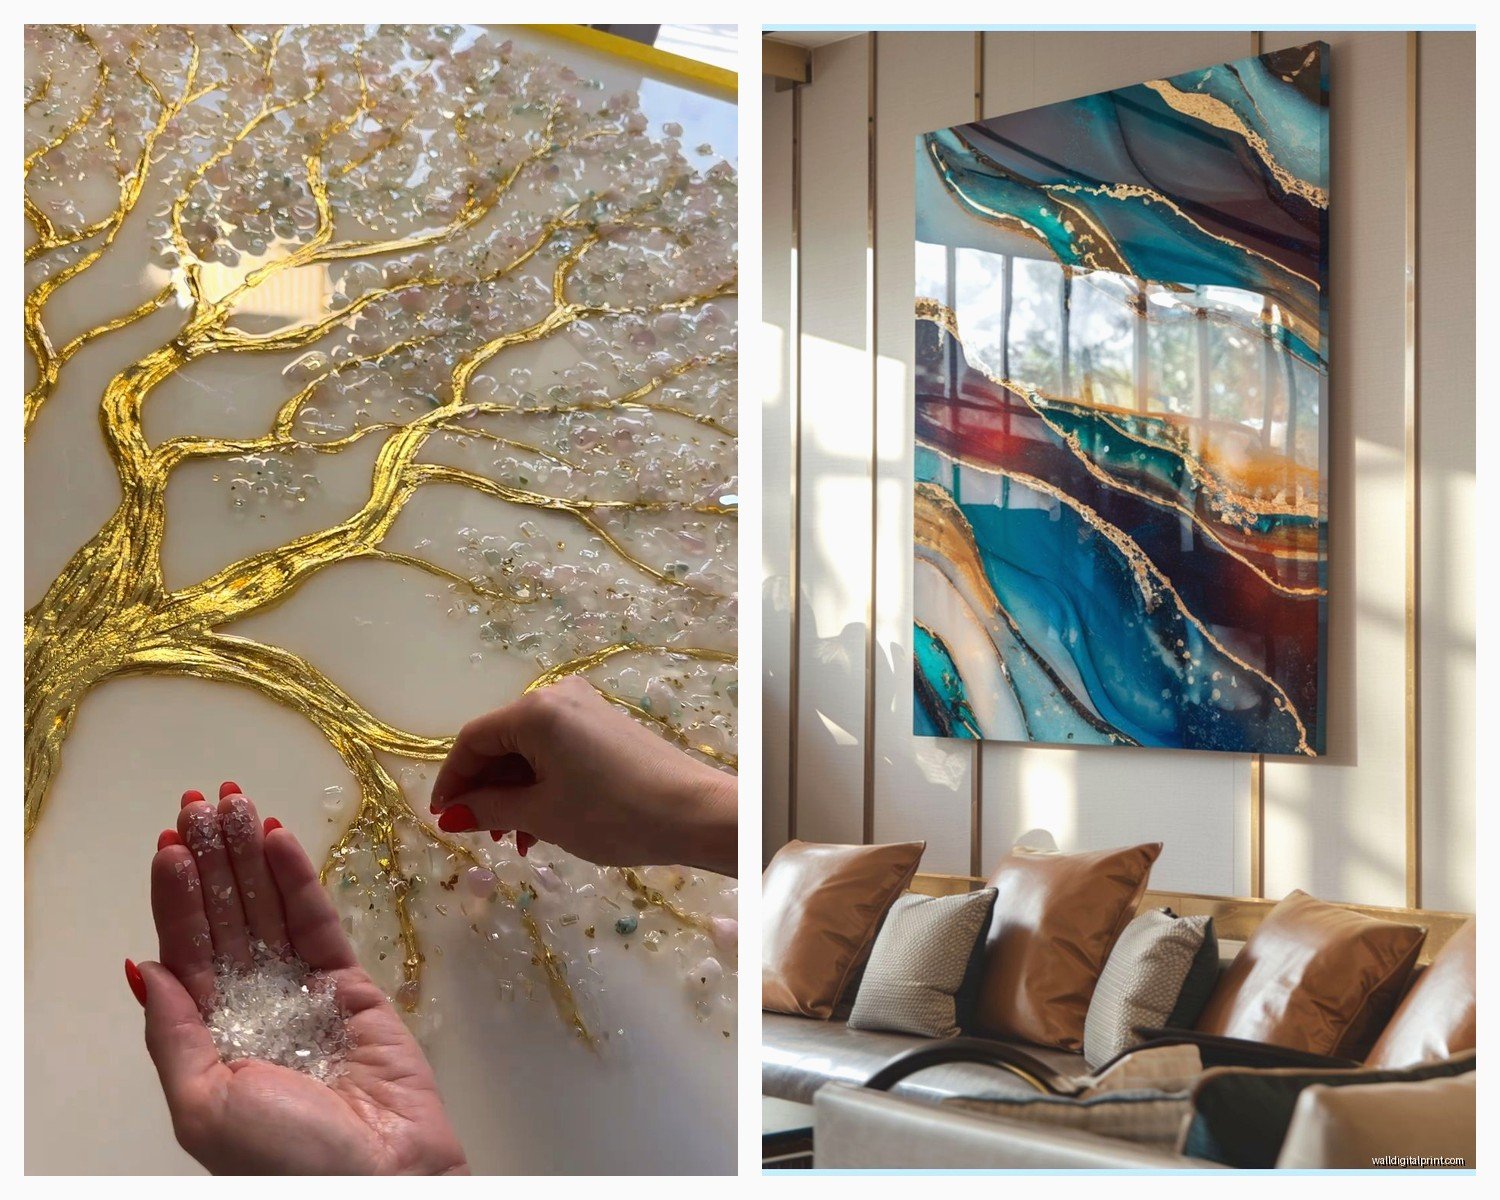
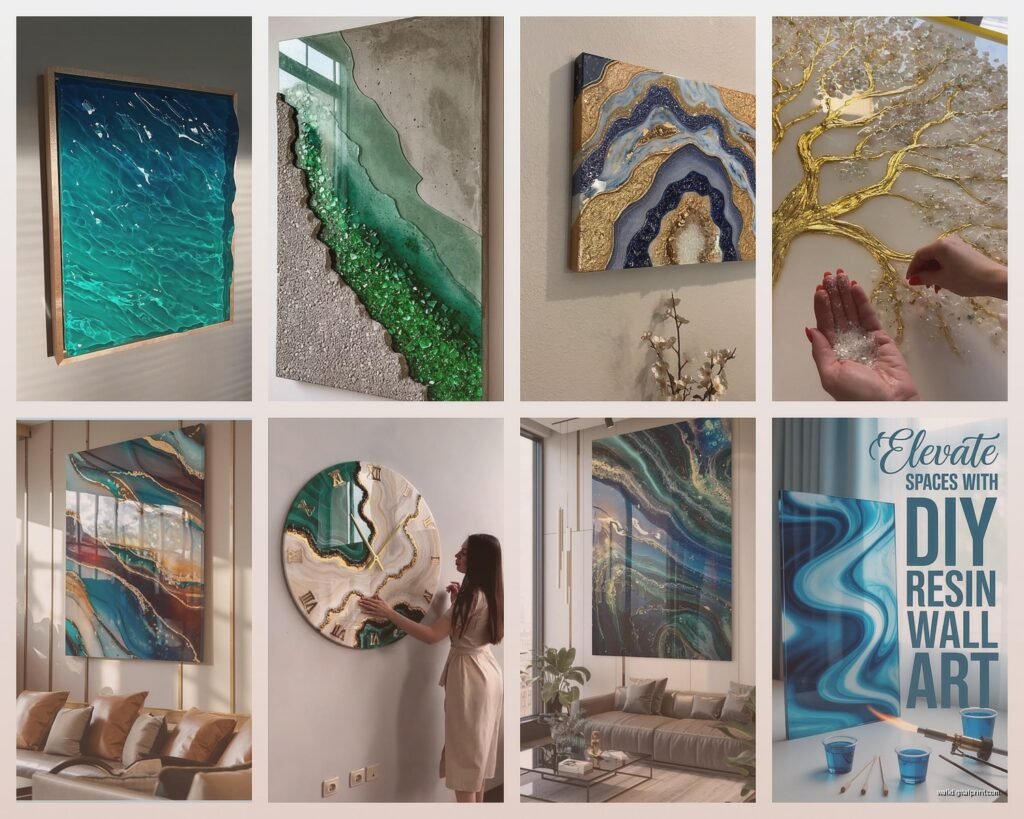
Oh and another thing, if you want that expensive gallery look, add gold or silver leaf between layers. Let your first layer get tacky, like honey consistency, then place torn pieces of leaf wherever you want. Pour the next layer over it. The leaf gets suspended and catches light and people will think you spent way more time than you did.
I buy the cheap imitation leaf from Amazon, the real stuff is unnecessarily expensive for this application.
Problem Solving the Annoying Issues
Bubbles: They’re gonna happen. Torch is your friend but also you can pop them with a pin for like 2 hours after pouring. I’ve literally sat there with a pin watching Netflix doing this. The heat gun doesn’t work as well, it moves the resin too much.
Uneven surface: Your work area must be level, I cannot stress this enough. I used a construction level app on my phone and adjusted my table with cardboard shims. Otherwise the resin flows to one side and you get a weird slanted piece.
Sticky surface after curing: This usually means you didn’t mix the two parts thoroughly enough or your ratio was off. You can pour another thin layer over it or sometimes sanding it lightly and applying a spray sealer works. Sometimes you just gotta start over though, I’ve thrown out three pieces.
Fisheyes or dimples: Usually from silicone contamination or working in a dusty area. Cover your piece while it cures. I use a big plastic storage container turned upside down.
Creating Specific 3D Effects
Wave walls: These are having a moment. You need to create height variation across the piece. Pour your base color, then add a thicker mixture of white or light color along one edge. Use a heat gun on low to push it into wave shapes, or tilt the panel to create movement. Add another layer after curing to enhance the peaks.
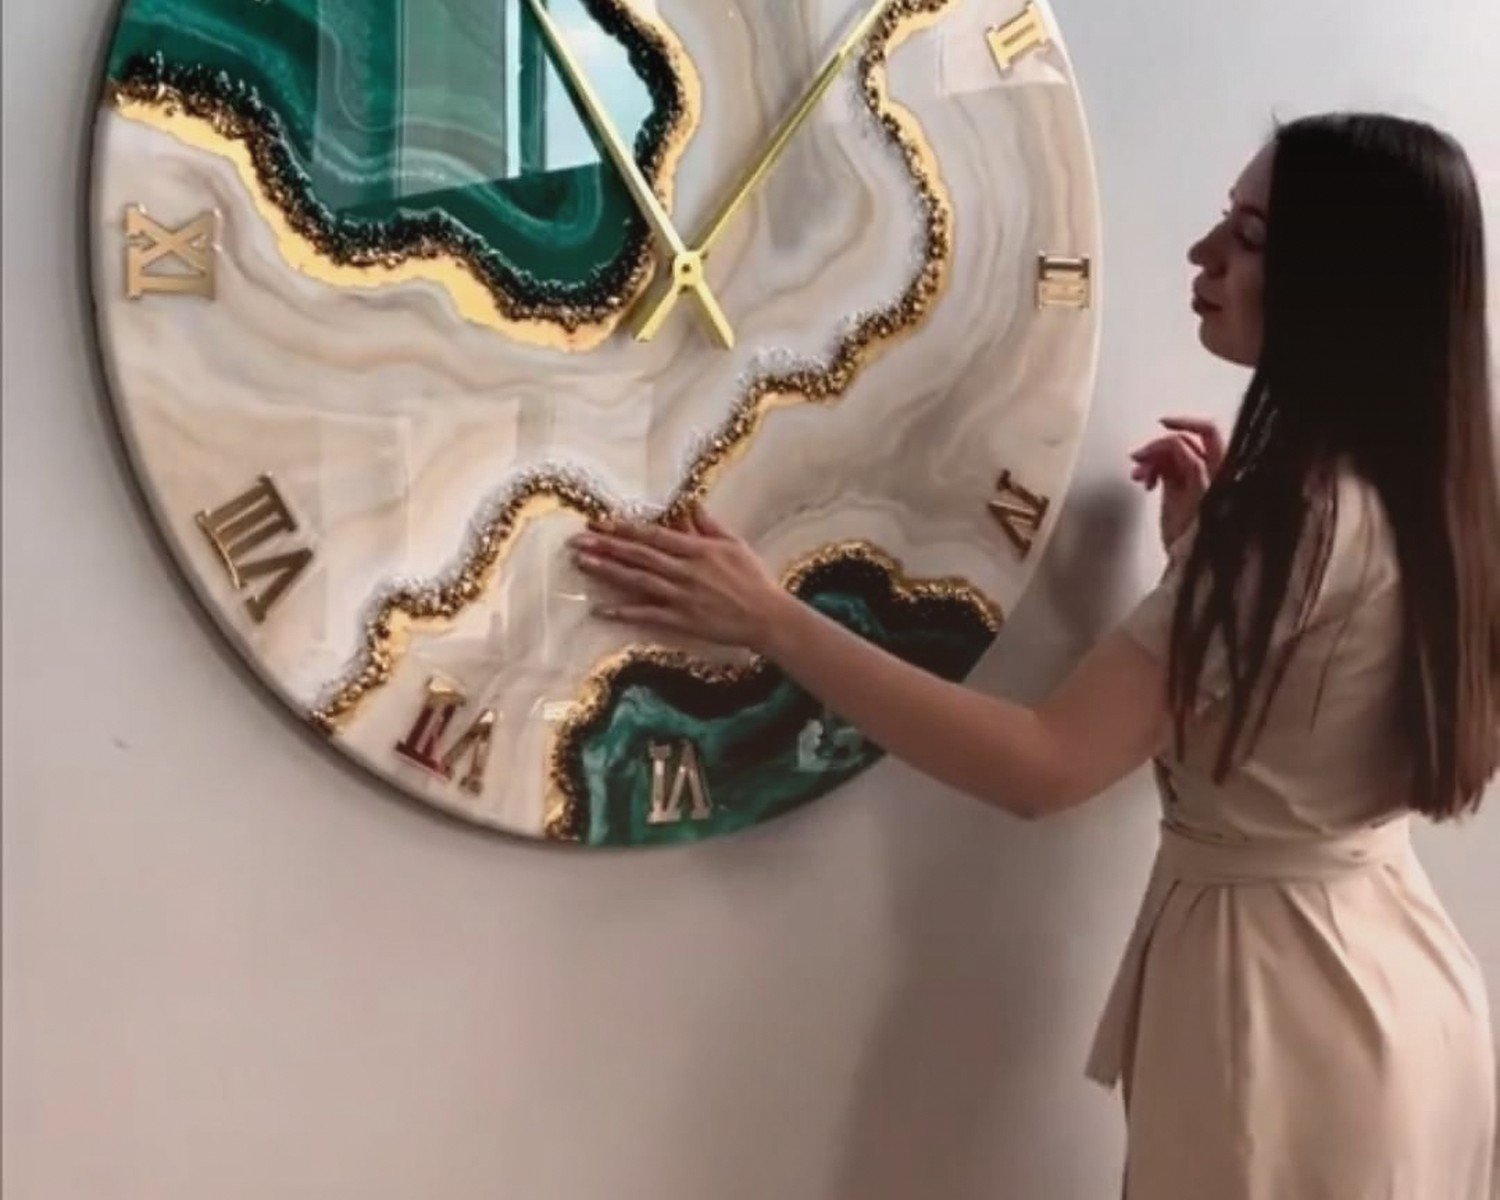
Geode slices: Start with a dark outer edge, pour in a circle. Add your crystal colors (purples, blues, teals) working toward the center. While it’s wet, sprinkle crushed glass or crystal glitter in the center. After it cures, edge the whole thing with gold leaf or metallic paint.
Abstract dimension: Honestly just experiment. Pour random puddles of color, let them interact naturally. Add cells with the silicone technique. Drip contrasting colors from a height to create interesting patterns. Some of my best pieces happened by accident when I was just playing around.
Finishing and Hanging
Once everything is fully cured, which takes 72 hours minimum for full hardness, you can sand the edges if needed. I use 220 grit sandpaper and work carefully because you can scratch the surface if you’re not paying attention.
For hanging, add picture hanging hardware to the back. The pieces are heavier than you’d think, so use appropriate wall anchors. I learned this when a piece crashed down at 2am and nearly gave me a heart attack.
You can leave the edges raw showing the layers, which I actually love, or paint them to match your main color. Black edges look super professional and gallery-like.
Cost Breakdown Because Everyone Asks
A basic setup costs around $150-200 initially, but that gives you enough supplies for multiple pieces. Each individual piece after that costs maybe $20-40 depending on size and how much metallic pigment you use. Compare that to buying similar art for $300-800 and yeah, it’s worth learning.
The resin is the expensive part. A gallon kit runs $75-100 but makes several large pieces. I buy in bulk now and store it in my closet, which my partner thinks is weird but whatever.
Advanced Techniques Worth Trying
Once you’re comfortable with basics, there’s so much more to explore. Embedding objects between layers creates cool effects, I’ve used dried flowers, photos, small shells. You can also create negative space by using molds or objects as barriers, then removing them after the first layer cures.
Resin petri dishes are another technique where you use alcohol inks and create those microscope-looking patterns. Mix resin with white pigment, add drops of alcohol ink, then add isopropyl alcohol to make them spread. The patterns are unpredictable and gorgeous.
wait I forgot to mention, temperature matters more than anyone tells you. Cold resin doesn’t flow well and gets bubbles. I learned to bring my resin bottles inside 24 hours before using them. If your studio is cold, use a space heater while working. Not too hot though, that makes it cure faster than you can work with it.
Scaling Up to Larger Pieces
Bigger isn’t always better but it is more impressive. For pieces over 24 inches, you need to think about weight and structural support. I use thicker wood panels or even mount to a frame. The resin weight adds up fast.
Also with large pours, you gotta work in sections sometimes or the resin gets too hot from the chemical reaction and can crack. Pour in layers no thicker than 1/4 inch, let each cure before adding more depth.
Safety Stuff That Sounds Boring But Matters
Work in a ventilated area, wear your respirator, wear gloves. Resin on your skin is not fun, I got it in my cuticles once and they hurt for days. Keep paper towels and rubbing alcohol nearby for cleanup. If you drip on something, alcohol removes uncured resin pretty well.
Don’t eat or drink in your work area, the fumes can settle on stuff. And honestly just be careful, this isn’t a craft you can do while distracted. I tried working on a piece while on a video call once and mixed the wrong ratio because I wasn’t paying attention, whole thing stayed sticky forever.
The finished pieces are safe once cured, totally non-toxic. I have them in my bedroom and clients’ kids’ rooms with no issues. But during the process, take it seriously.
Anyway that’s basically everything I’ve learned through trial and error and watching way too many YouTube videos at midnight. Start with a small piece, expect to mess up your first attempt, and don’t spend a ton of money on fancy supplies until you know you like the process. It’s weirdly addictive though, fair warning.