Wall Art Guide, Wall Art Tutoriels
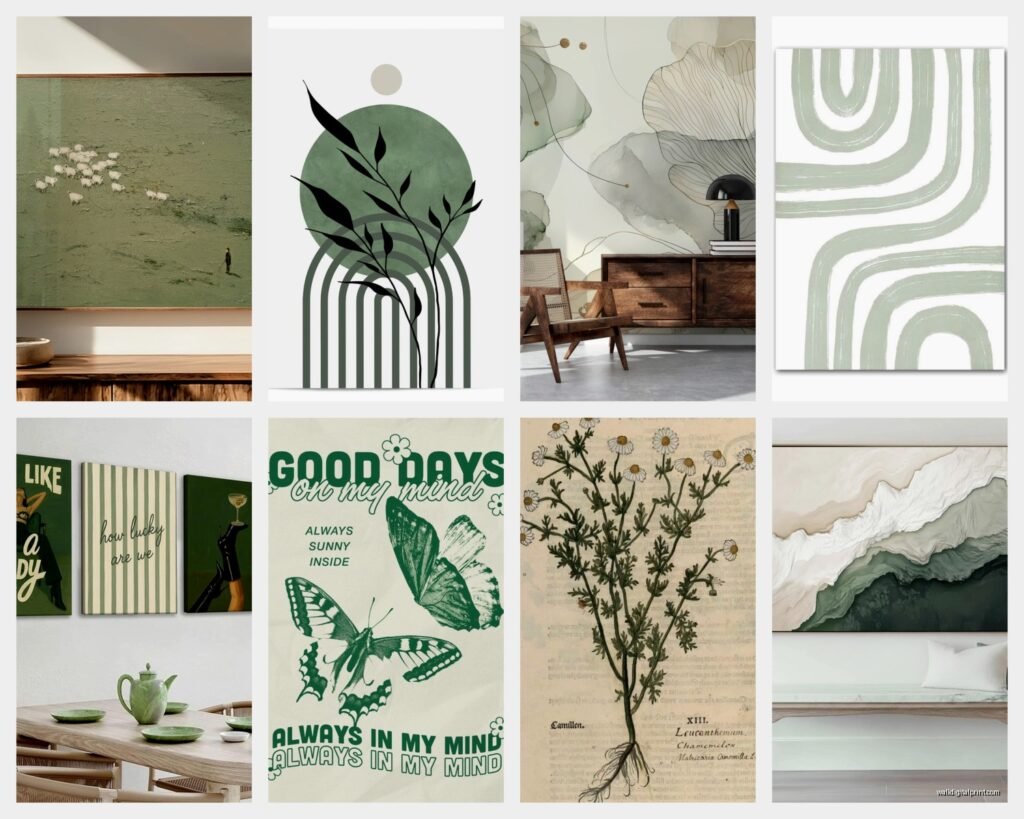
Sage Wall Art: Soft Green Herbal Nature Decor
Mar
So I’ve been working with sage green wall art for like the past three years and honestly it started because a client wanted to redo her reading nook and didn’t want the usual eucalyptus prints everyone was doing. We landed on sage botanical prints and now I literally can’t stop recommending this stuff.
Why Sage Green Actually Works When Other Greens Don’t
Okay so here’s the thing about sage – it’s got this gray undertone that makes it play nice with basically everything. I was working on this project last month where the client had beige walls (not my choice but whatever) and we threw up some sage herb prints and it just… worked? Like normally green against beige can look really builder-grade-2005 but the muted quality of sage keeps it sophisticated.
The gray undertone also means it doesn’t clash with wood tones the way brighter greens do. I tested this accidentally when I brought home like six different sage prints to photograph and scattered them around my living room which has both walnut and oak furniture. My dog knocked over three of them and I just left them leaning against different wood pieces for a week because I got busy with another project and honestly? They all looked good.
Types of Sage Wall Art That Actually Matter
Botanical Prints
The obvious choice but there’s levels to this. You’ve got your vintage botanical illustration style – those ones that look like they came from an old herbal medicine book. Then there’s the modern minimalist single-stem situation. And watercolor versions which can go either way depending on the artist.
I personally keep coming back to the vintage illustration style because they have staying power. I hung some in my office four years ago and I’m not sick of them yet which is saying something because I change my gallery wall every six months usually.
For sourcing these – Etsy is obvious but you gotta dig. Search for “vintage sage botanical” or “herbal illustration sage green” and filter by actual vintage or digital downloads. The digital downloads are clutch because you can print them at whatever size you need. I’ve used the same file printed at 8×10 for a small bathroom and 24×36 for a living room.
Abstract Sage Art
This is where it gets interesting and also where people mess up. Abstract sage pieces work best when they’re not trying too hard. Like you want organic shapes, watercolor bleeds, maybe some line work. What you don’t want is geometric patterns in sage green because then it just looks like you’re decorating a corporate office break room.
I found this one artist – wait I need to find her name – okay it’s gonna bug me but anyway, she does these organic blob shapes in different shades of sage with gold leaf accents and I’ve used her prints in probably five different client homes. The gold leaf is key because it warms up the cool gray-green and adds just enough visual interest.
Actual Pressed Herbs
Okay so funny story, I went through a phase where I was pressing actual sage and other herbs to frame them. Did it for my own place and posted it on my blog and suddenly I had three clients asking for custom pressed herb art. It’s way more labor intensive than just buying prints but the result is really special.
Here’s what I learned: you need actual herb sage (Salvia officinalis) not the decorative sage plants. Buy it fresh from the farmers market or grocery store. Press it between parchment paper in heavy books for like two weeks. I used old art history textbooks from college that I never got rid of.
The tricky part is mounting them. You can’t just glue them because they’re fragile and also that looks cheap. I use archival photo corners on acid-free backing paper, then frame with a mat. The mat is important because it creates depth and keeps the glass from crushing the herbs. I learned that the hard way when I pressed the glass directly against a pressed sage bundle and it just… pancaked. Looked terrible.
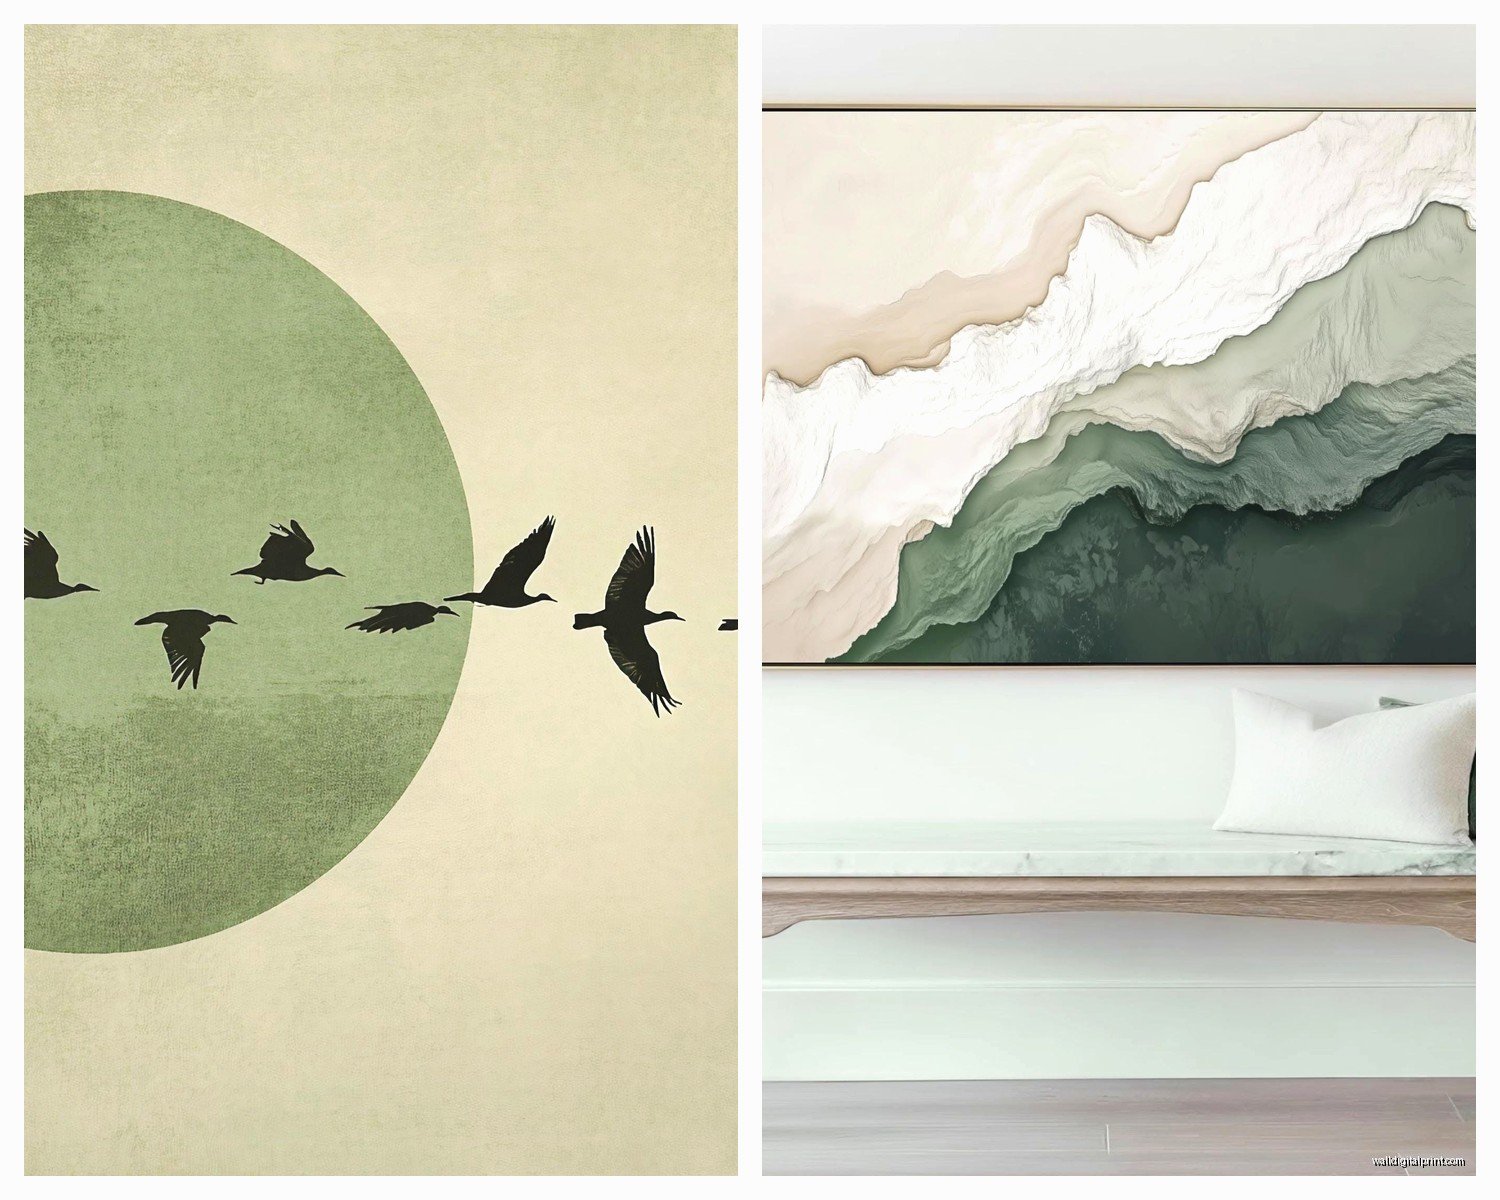
Photography Prints
Nature photography featuring sage plants or sage-colored landscapes. These work really well in spaces that already have a lot of pattern because they provide visual rest. I used a series of close-up sage leaf photos in a client’s bedroom that had a busy floral duvet and striped curtains – the sage photos calmed everything down.
When you’re shopping for these, look at the background color carefully. Some photographers shoot sage against white which is very clean and modern but can feel sterile. Others use natural backgrounds with browns and tans which feels warmer. Neither is wrong but you gotta know what vibe you’re going for.
Getting the Actual Green Right
This is gonna sound weird but not all sage green is created equal and I didn’t realize this until I ordered like ten different “sage green” prints from different sellers and they arrived and were all completely different colors. Some were more blue, some were more gray, some were actually just olive green which is NOT the same thing.
Real sage green should have: a gray base, slight green tint, sometimes a whisper of blue but not teal, overall muted and dusty appearance. If it’s bright or vivid, it’s not sage. If it looks like army green, not sage. If it’s got yellow undertones, that’s olive or herb green but not sage.
I actually started keeping paint chips of different sage green paint colors (my favorite is Healing Aloe by Benjamin Moore btw) to compare against prints before I buy them. Yeah I’m that person now. But it works because I can hold up my phone screen to the paint chip when I’m shopping online and at least get in the ballpark.
Framing Choices That Don’t Ruin Everything
Okay so you found the perfect sage art and then you stick it in the wrong frame and it’s just… off. Been there way too many times.
Frame Colors That Work
Natural wood frames are your safest bet. Light oak, maple, or pine complement sage without competing. I’ve also had good luck with white frames when the walls are white or light gray – creates a clean gallery look.
Black frames can work but they need the right context. If your space is very minimalist and modern with other black elements (light fixtures, furniture legs, window frames), then yes. If not, black frames make sage art look weirdly formal.
Gold or brass frames are excellent with sage because of that whole warm-cool contrast thing. But you gotta commit – like if you’re doing gold frames, you probably need gold elsewhere in the room. A gold frame floating alone with nothing to relate to looks confused.
What doesn’t work: silver frames make sage look sickly, dark walnut is too heavy unless the print is very large, ornate frames fight with the natural simplicity of sage botanicals.
Mat or No Mat
I almost always use mats with sage art and here’s why – the breathing room makes the art feel more intentional and less like you just stuck something in a frame. White or cream mats are standard and they work. I’ve been experimenting with sage green mats lately which sounds matchy-matchy but actually creates this cool tonal effect where the art almost floats.
The one time you might skip the mat is if you’re doing a large-scale piece (24×36 or bigger) or if you’re creating a salon wall where the variety of mat vs no mat creates visual interest.
Where to Actually Hang This Stuff
Living Rooms
Sage art works above sofas obviously but also consider less expected spots. I hung a large sage botanical above a console table behind a sofa and it created a nice layered look. Also great flanking a fireplace or in that weird narrow wall space next to windows that’s too small for furniture.
If you have a gray sofa (everyone has a gray sofa right now), sage art is like a cheat code. Adds color without being bold, brings in nature without being literal about it. I did a client’s living room last fall with a charcoal gray sectional and we hung three large sage botanical prints in a horizontal line above it – she sends me photos of that wall like every month because she’s so happy with it.
Bedrooms
This is where sage art really shines because of the calming effect. I’m not usually woo-woo about color psychology but green genuinely does promote rest and sage specifically doesn’t energize you the way brighter greens do.
Best placement is above the bed obviously. I like doing either one large piece or a grid of four smaller pieces. The grid thing works especially well with botanical prints – like four different herbs all in sage tones.
Also consider the wall opposite your bed because that’s what you see when you wake up. I have a pressed sage arrangement there in my own bedroom and it’s just nice to look at first thing in the morning instead of like, nothing.
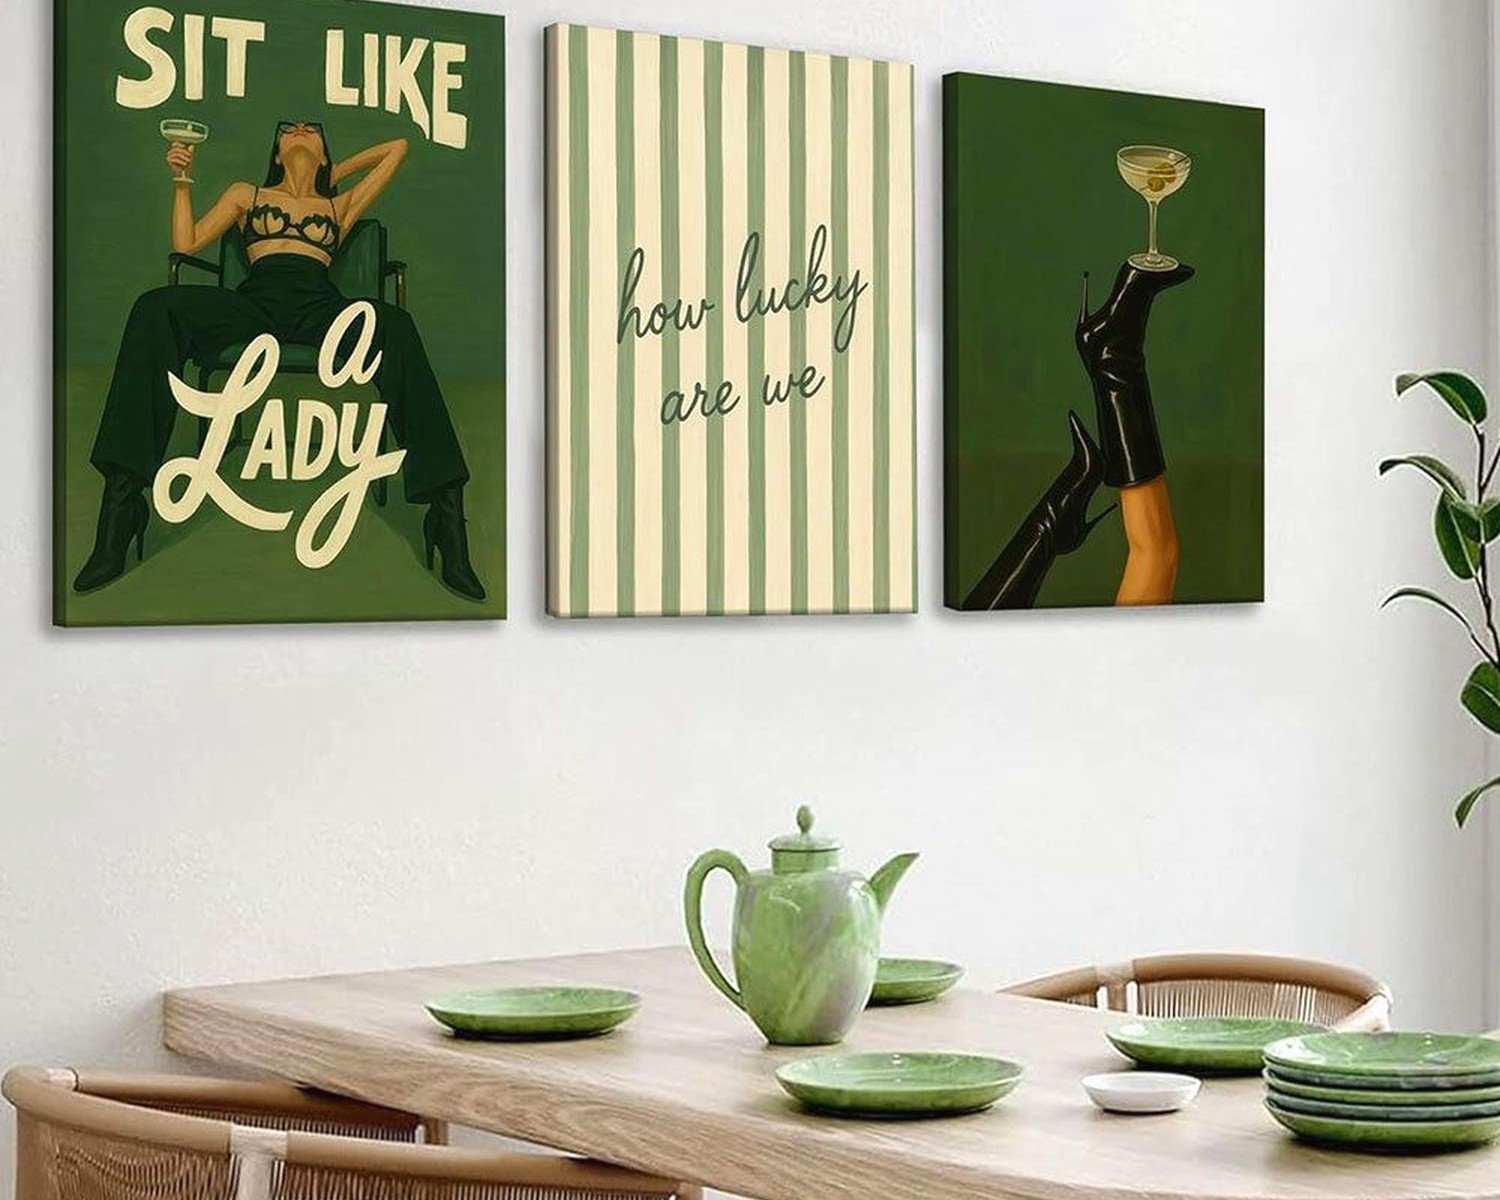
Kitchens and Dining Rooms
Herbal sage art makes obvious sense in kitchens since sage is a culinary herb. But don’t be too literal about it – you don’t need art that says “SAGE” in farmhouse font. Just nice botanical illustrations or pressed herbs work.
I did a client’s breakfast nook with four matching sage botanical prints in light wood frames and it created this casual but pulled-together look. Way better than the random rooster decor she had before (her words not mine).
Dining rooms can handle more formal sage art. This is where vintage botanical illustrations really work because they have that studied, collected-over-time vibe that suits dining spaces.
Bathrooms
Small spaces where you can make an impact with just one piece. I love sage art in bathrooms because it brings in that spa feeling without being cliché about it. Like you’re not doing zen stones and bamboo, you’re just bringing in a soft natural color.
Important note: if it’s a bathroom with a shower, make sure your prints are actually protected behind glass or acrylic. I learned this when I hung a canvas print in a client’s bathroom and the humidity made it warp. Had to replace it with a framed print.
Home Offices
Sage green is supposed to help with focus and concentration – again not usually my thing to quote color psychology but anecdotally I’ve had multiple clients tell me they feel more productive after we added sage elements to their offices.
For offices I tend to go more abstract or modern with sage art rather than botanical. Something about botanical prints in an office reads too casual? Like you’re trying to turn your work space into a garden which isn’t necessarily the vibe. Abstract sage pieces or sage photography feels more appropriate.
Creating a Sage Gallery Wall
Okay so I did one of these in my own home and documented the whole process for my blog and it was way more complicated than I expected but the result was worth it.
Mixing and Matching
You don’t want all the same style of sage art or it looks like a doctor’s office waiting room. Mix vintage botanicals with modern abstracts, throw in some pressed herbs, maybe one photograph. The sage green unifies everything even when the styles are different.
I also mix in some neutral pieces – black and white botanicals, cream abstract pieces, sepia photographs. Keeps it from being too much green even though it’s a soft green.
Frame Variety
This is controversial but I mix frame colors in my gallery walls and I think it looks better than matching frames. Like mostly natural wood but maybe one or two white frames, one gold frame. Makes it look collected rather than bought all at once from the same place.
What I keep consistent is the frame style – all simple and minimal, no ornate frames mixed with modern frames because that’s chaos.
Layout Strategy
I always plan gallery walls on the floor first. Like I clear a space and arrange everything, take a photo from above, adjust, take another photo. Once I’m happy with the layout, I measure the distances between frames and transfer those measurements to the wall.
For sage gallery walls specifically, I like to anchor with one larger piece and build around it. The large piece is usually the most prominent sage artwork and smaller pieces radiate out from there. Creates a focal point instead of just random stuff on a wall.
Wait I forgot to mention – leave like 2-3 inches between frames. Less than that looks cramped, more than that looks disconnected. I learned this by doing it wrong multiple times.
DIY Sage Wall Art Projects
Pressed Herb Method (Detailed)
Since I mentioned this earlier but didn’t give full details. You’re gonna need fresh sage – like a bunch from the grocery store is fine. Also grab some other complementary herbs if you want variety: rosemary, lavender, thyme.
Cut the stems to your desired length. I usually do 6-8 inches. Place them between parchment paper – not wax paper, parchment. The wax paper can leave residue. Then put the parchment paper inside a heavy book. Stack more books on top.
Leave it for two weeks minimum. I usually forget about mine for like three weeks which is fine. When you take them out they’ll be flat and dried and the color will have muted to this perfect dusty sage-brown situation.
For mounting: archival photo corners are like $5 on Amazon. Use acid-free cardstock as backing – craft stores sell this in sage green which is perfect. Position your dried herbs on the cardstock using the photo corners to hold them. Frame with a mat border between the herbs and glass.
I’ve also done these without photo corners by using tiny dots of archival glue on just the stem parts. Works fine but is more permanent.
Painted Canvas Method
If you’re comfortable with basic painting – and I mean very basic – you can make abstract sage canvas art that looks way more expensive than it is.
Get pre-stretched canvases from a craft store. I like working with 16×20 or 11×14 sizes. You’ll need acrylic paints in sage green but also get white, gray, and maybe a darker forest green for dimension.