Wall Art Guide, Wall Art Tutoriels
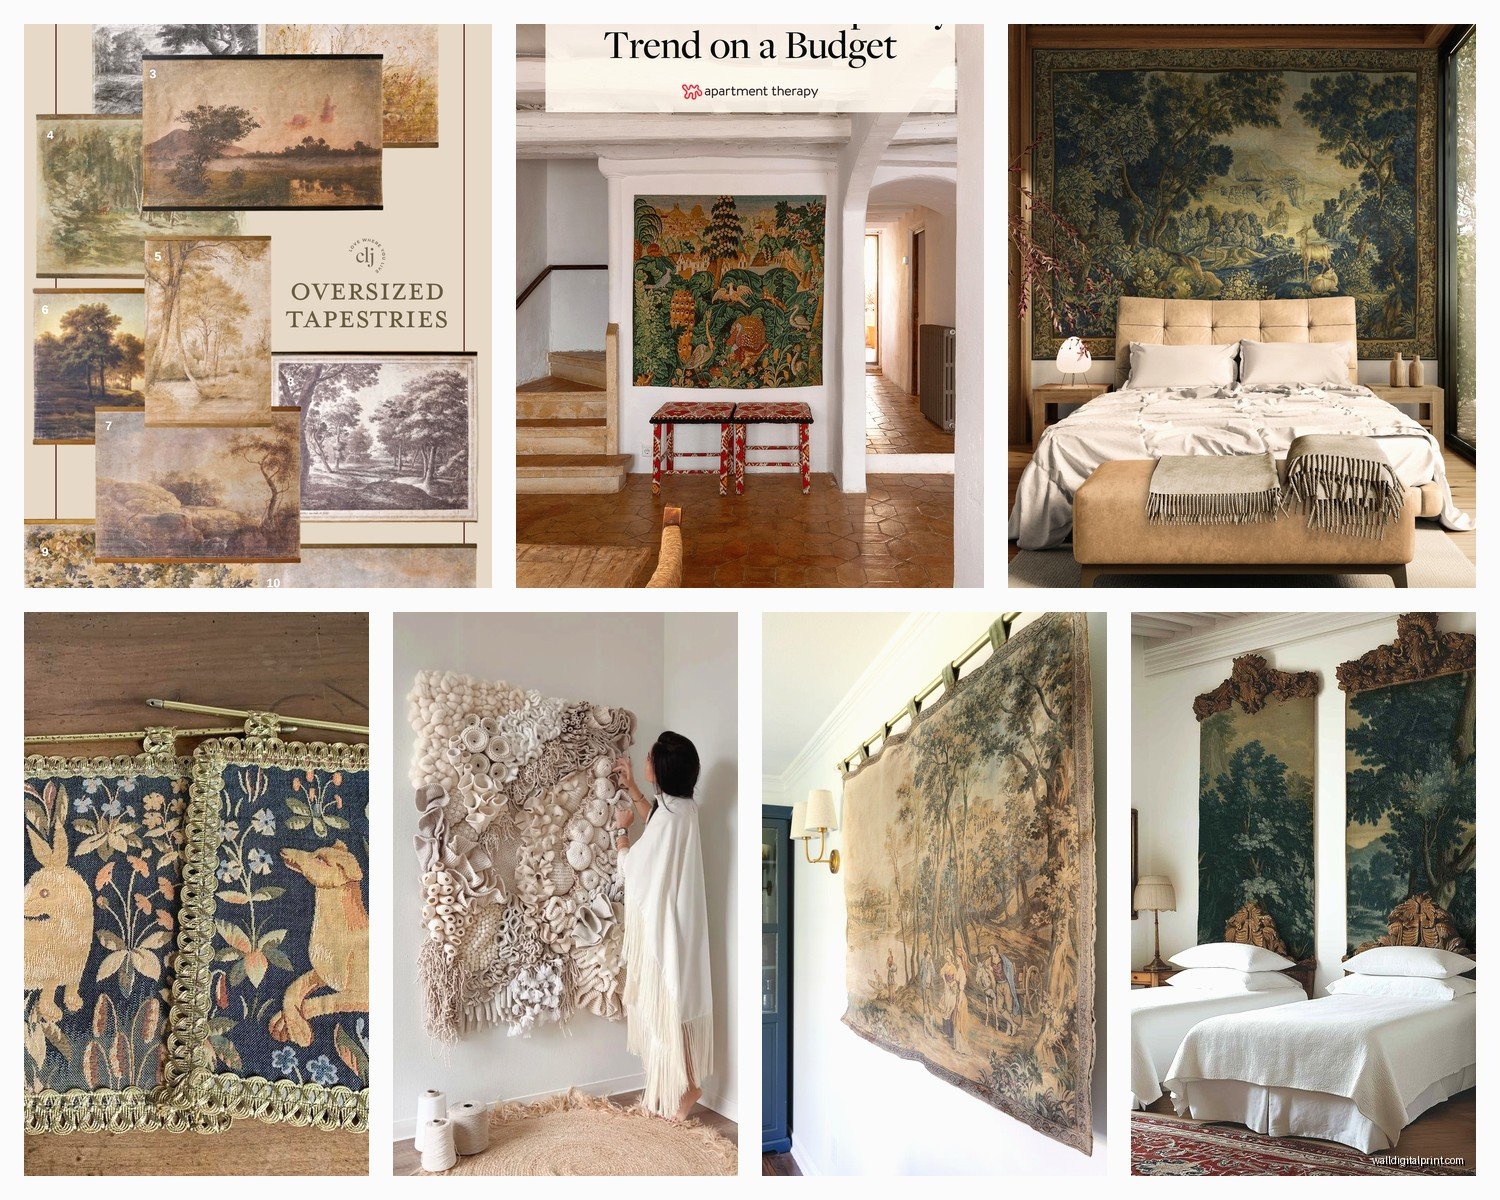
Tapestry Wall Art: Large Fabric Wall Hangings

Mar
So I’ve been obsessing over tapestry wall hangings lately and honestly it’s become a whole thing. Like my cat keeps trying to climb the ones with fringe and I’m just sitting here thinking about how much money I’ve spent testing different mounting methods but whatever, here’s what actually works.
Picking the Right Size Without Losing Your Mind
Okay so the sizing thing trips everyone up. You’re gonna want to measure your wall space first obviously, but here’s what nobody tells you – leave like 6-8 inches of breathing room on each side. I learned this the hard way when I ordered this massive 8-foot wide tapestry for a client’s living room and it looked like we were trying to wallpaper the entire house with one piece of fabric.
For over a sofa or bed, aim for something that’s about two-thirds the width of your furniture. So if you’ve got a 90-inch sofa, you’re looking at around 60 inches wide. But honestly I’ve broken this rule plenty of times and it still looked good, so don’t stress too much.
The height thing is trickier. Most large tapestries run between 60-90 inches tall. In a room with 8-foot ceilings, I usually hang them so there’s about 8-12 inches between the top of the tapestry and the ceiling. Any higher and it starts feeling like it’s floating awkwardly.
Material Matters More Than You Think
Cotton is your friend. It’s easy to work with, doesn’t wrinkle like crazy, and actually holds up when you’re stabbing it with mounting hardware. I’ve worked with cotton-poly blends that are fine too, maybe a bit more durable if you’re worried about fading.
Velvet tapestries are having a moment right now and they look incredible but oh my god the dust. Every single particle of dust in your house will migrate to that velvet surface. You’ll need to vacuum it with the upholstery attachment like once a week.
Wool tapestries are gorgeous and traditional but heavy. Like really heavy. Make sure your mounting system can handle the weight because I once had one pull out of the wall at 2am and it sounded like someone breaking in. My dog lost his mind.
Synthetic materials (polyester mainly) are actually pretty good for high-humidity areas or if you’ve got kids. They clean easier and don’t absorb smells as much. Not as fancy feeling but practical.
The Weave Density Thing
Tighter weave = more expensive usually, but also more detailed images and better durability. Loose weave tapestries have this boho vibe that I love but they can look cheap if the design is too complicated. Simple geometric patterns or solid colors work better with loose weaves.
Hanging Methods That Actually Work
Okay so this is where I’ve done way too much trial and error. Was literally watching The Great British Baking Show while testing like five different hanging methods last month.
The Rod Pocket Method
If your tapestry came with a rod pocket sewn into the top, you’re in luck. Just slide a curtain rod through and mount the rod brackets to your wall. Use drywall anchors if you’re not hitting studs – and you probably won’t be hitting studs exactly where you want them.
I like using decorative curtain rods for this because why not make it look intentional. The rod becomes part of the design. Just make sure the rod is sturdy enough to hold the weight without sagging in the middle.
Velcro Strips (My Secret Weapon)
Wait I forgot to mention this earlier but industrial-strength Velcro strips are amazing for lightweight to medium-weight tapestries. Get the kind that’s meant for hanging pictures, not the craft store stuff.
Cut strips and attach them along the top edge of your tapestry, then stick the corresponding strips to the wall. The tapestry hangs flat and smooth against the wall which looks really professional. Plus you can remove it easily for cleaning or when you get bored of it.
The downside is you gotta commit to the placement because those adhesive strips are STRONG. I’ve pulled paint off walls before trying to reposition them.
Clip Rings and Curtain Rods
For tapestries without rod pockets, clip rings work great. Space them every 6-8 inches along the top edge. This method works especially well for heavier tapestries because you’re distributing the weight across multiple points.
You can adjust the draping too, which is nice if your tapestry has a cool texture you want to show off. Creates a slightly more casual look though, so maybe not ideal if you’re going for super sleek and modern.
The Dowel and String Method
This is my go-to for lightweight tapestries with a boho vibe. Get a wooden dowel or even a decorative branch (if you’re into that look), attach it to the top of your tapestry with fabric glue or by sewing a sleeve, then hang the whole thing from leather cord or rope.
It’s cheap, it’s adjustable, and honestly it looks pretty cool. I used this method in my own bedroom and spent like $8 total on supplies.
Command Strips for Renters
Okay so if you’re renting and can’t put holes in walls, heavy-duty Command strips can work for smaller tapestries (under 5 pounds). Use way more than you think you need – like double what the package says. And press them firmly to the wall for a full 30 seconds.
I tested this in my last apartment and it held up for eight months before I moved. Just don’t use them in super hot or humid rooms because they’ll fail.
The Actual Hanging Process
Get a level. Seriously, eyeballing it never works no matter how confident you feel. I’ve hung probably 200 tapestries in my career and I still use a level every single time.
Mark your wall lightly with pencil where your mounting hardware goes. If you’re using a rod, mount the brackets first and make sure they’re level with each other before you hang anything.
For heavy tapestries, find the studs. Use a stud finder or knock on the wall until you hear a solid sound instead of hollow. Studs are usually 16 inches apart. If you can mount at least one bracket into a stud, your tapestry will be way more secure.
Oh and another thing – have someone help you with large tapestries. Trying to hold a 7-foot piece of fabric while marking the wall and keeping it level is basically impossible alone. I’ve done it but it’s frustrating and you’ll probably drop it twice.
Styling Around Your Tapestry
This is gonna sound weird but I usually design the whole room around the tapestry if it’s a statement piece. The colors in the fabric should pull from at least 2-3 other elements in the room – throw pillows, rugs, artwork, whatever.
Don’t put too much other stuff on the same wall. Maybe a plant in the corner or a small shelf, but the tapestry should be the focal point. I see people try to hang tapestries surrounded by gallery walls and it just looks cluttered.
Lighting is huge. If you can position a floor lamp or picture light to graze across the surface of the tapestry, it creates this amazing texture and depth. Especially with woven pieces or anything with dimensional elements.
Layering Textures
Tapestries work really well when you layer different textures in the room. Smooth leather furniture, nubby throw blankets, sleek metal accents – the contrast makes the tapestry stand out more. All soft textures together can look flat and boring.
Maintenance and Care
Vacuum your tapestry every few weeks with the brush attachment. Seriously this extends the life so much by preventing dust buildup in the fibers.
Most tapestries can’t go in the washing machine (despite what some sellers claim). Spot clean with gentle detergent and cold water when needed. Test any cleaning solution on a hidden corner first.
For deep cleaning, some dry cleaners handle tapestries but call ahead and make sure they have experience with textiles. I took a vintage tapestry to a regular dry cleaner once and they basically ruined the colors.
Sun fading is real. If your tapestry is in direct sunlight, rotate it every few months or use UV-filtering window film. I’ve seen gorgeous tapestries turn into washed-out shadows of themselves after a year in a sunny room.
Where to Actually Buy Them
Society6 has tons of artist-designed tapestries in every size. Quality is decent for the price, usually around $40-100 depending on size. The prints are vibrant and they ship fast.
Urban Outfitters is hit or miss but when they have good ones, they’re really good. More affordable options, very trendy designs. Just check reviews because some are super thin.
Etsy is where I find most of my vintage and handwoven pieces. You can get actual antique tapestries or support small makers creating contemporary designs. Prices vary wildly from $50 to thousands depending on what you’re looking for.
For high-end investment pieces, check out specialty textile galleries or auction houses. These are heirloom-quality tapestries that cost serious money but will last forever.
Common Mistakes to Avoid
Don’t hang tapestries with regular nails just pounded into drywall. They’ll pull out eventually, especially with heavier pieces. Use proper hanging hardware.
Don’t fold your tapestry for long-term storage. Roll it around a tube instead to prevent permanent creases. I learned this after storing a client’s tapestry folded for six months and those crease lines never fully came out.
Don’t ignore the back side. Some tapestries are reversible or the back has interesting texture worth showing. I’ve actually hung tapestries “backwards” when the reverse side looked cooler.
Working with Different Room Types
In bedrooms, tapestries behind the bed work as soft headboards. They absorb sound a bit too which is nice. Just make sure they’re hung high enough that you won’t bump them with your head when sitting up.
Living rooms can handle the biggest, boldest tapestries. This is where you can really go for it with color and pattern. Center it on your main wall and build the seating around it.
For dining rooms, I actually love tapestries because they make the space feel more intimate and absorb echo in rooms with hard floors. Pick something with colors that complement your dishes if you’ve got open shelving.
Bathrooms and kitchens are tricky because of moisture and cooking oils. If you really want a tapestry in these spaces, use synthetic materials and clean them frequently. Or just… don’t. Save yourself the hassle.
The whole process is really not that complicated once you’ve done it a few times. Just measure carefully, use proper hardware, and don’t be afraid to take it down and adjust if it’s not quite right the first time.