Wall Art Guide, Wall Art Tutoriels
Wall Art with LED Lights: Backlit Illuminated Designs
Apr
So I’ve been installing LED backlit wall art for like three years now and honestly it’s one of those things that seems way more complicated than it actually is. Last week I was helping my neighbor pick one out and she was so stressed about it, and I’m like… you’re overthinking this.
The Main Types You’ll Actually Encounter
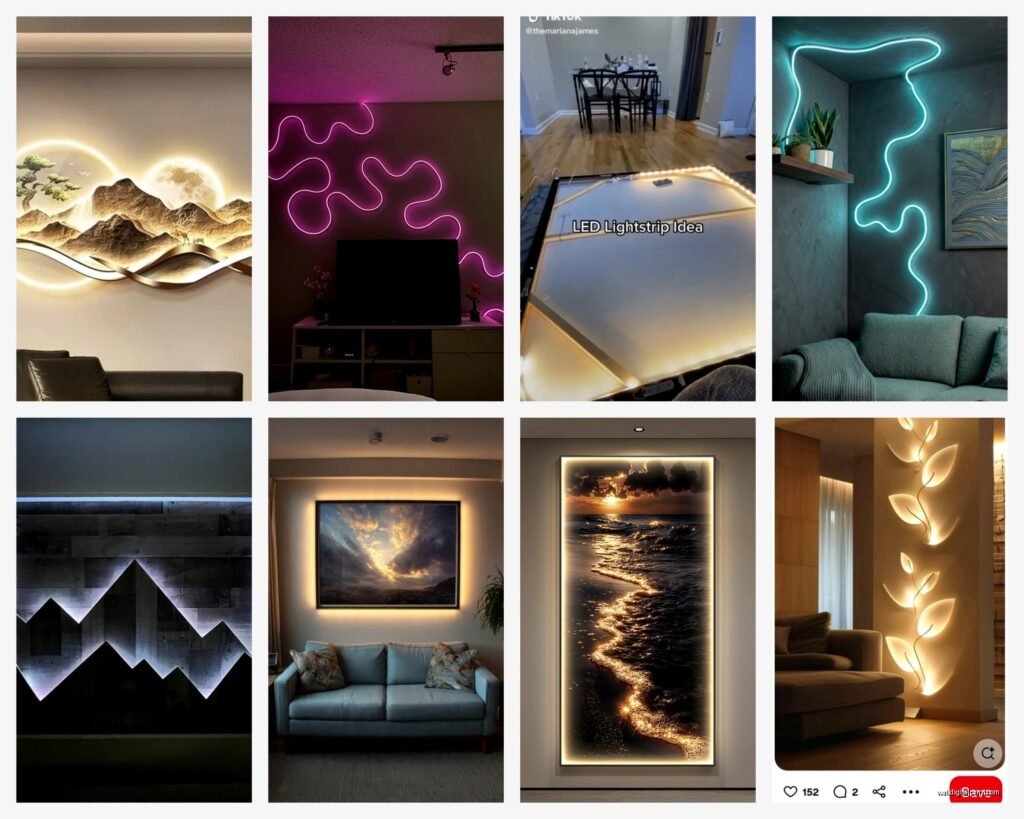
Okay so there’s basically three categories of LED wall art that you’re gonna see everywhere. There’s the acrylic panels with edge lighting, the canvas prints with backlighting, and then the metal/wood pieces with integrated LEDs. Each one has completely different vibes and installation headaches.
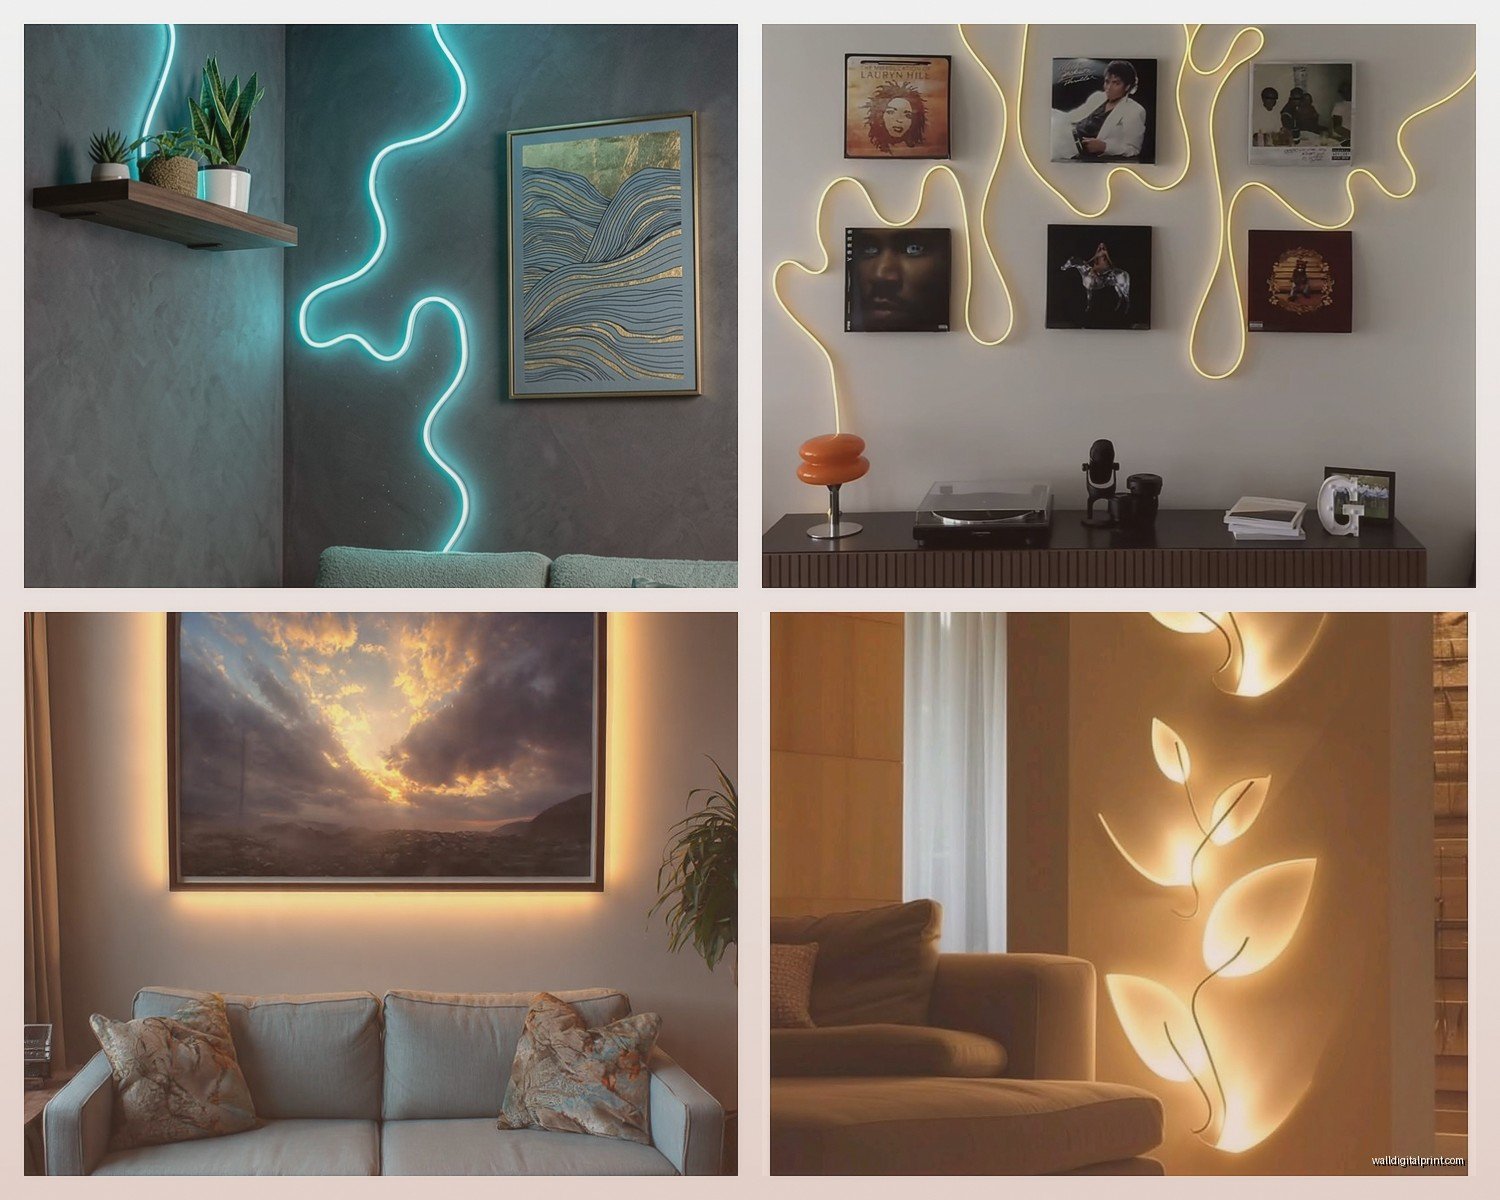
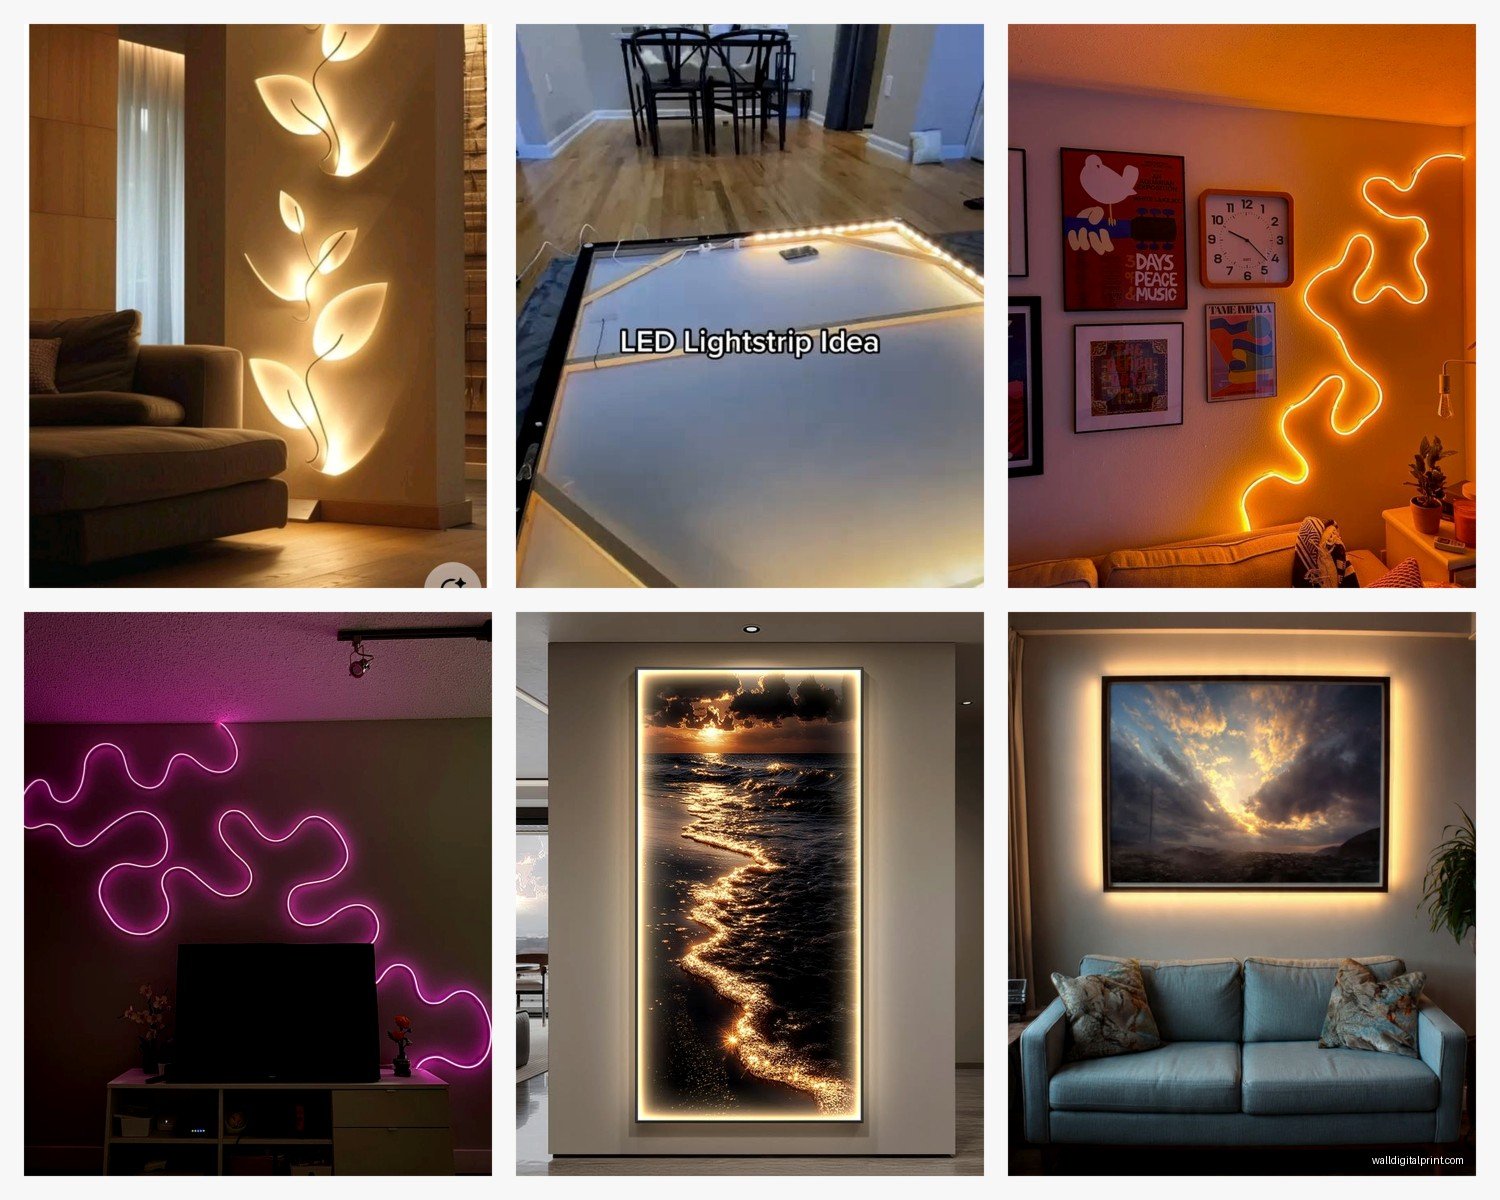
Acrylic edge-lit stuff is probably the most popular right now. It’s basically a clear or frosted acrylic sheet with LEDs running along the edges, and the light travels through the material. The designs are usually etched or printed on the acrylic. I have this geometric mountain scene one in my office and people always ask about it. The thing with acrylic is it’s super modern looking, almost futuristic? But it can look cheap if you go too thin. You want at least 5mm thickness, ideally 8mm. Anything less and it feels flimsy when you’re hanging it.
Canvas backlit pieces are more like traditional art but with LED strips mounted behind them. The canvas is usually printed with translucent inks in certain areas so the light shines through. My client last month got one with a city skyline and the windows literally glow. It’s pretty cool but here’s the thing nobody tells you – the effect only really works in dim or dark rooms. In full daylight it just looks like a regular canvas print with a weird shadow behind it.
Metal and Wood LED Art
Metal or wood pieces with LEDs are usually laser-cut designs with LED strips mounted in channels or behind cutouts. These tend to be pricier but they look insanely good. I’m talking like $200-$600 range versus $50-$150 for most acrylic stuff. The weight is also something to consider – a big metal piece might need serious wall anchors. I learned this the hard way when one fell off my client’s wall at 2am because we used the little plastic anchors that came with it. Use proper toggle bolts or find a stud.
Power Sources and Installation Reality Check
This is where people get confused. Most LED wall art comes in three power options: plug-in, battery, or hardwired. Plug-in is the most common and honestly the most practical unless you have a very specific situation.
Plug-in units usually have a small adapter box and a cord that runs down to your outlet. Some come with a remote control, some have touch sensors, and the fancy ones connect to your phone via Bluetooth. The cords are usually white or black and about 6-8 feet long. My advice? Plan where your outlet is BEFORE you buy. I see so many people buy these gorgeous pieces and then realize the cord doesn’t reach or it’s gonna be super visible. You can hide cords with cord covers from the hardware store or run them behind furniture, but just… think about it first.
Battery-powered seems convenient but it’s actually kinda annoying. You’re changing batteries every few weeks depending on usage, and the LED brightness is usually dimmer than plug-in versions. I only recommend battery if you’re doing a temporary display or you literally have no outlet access. Oh and another thing – some battery ones use those watch batteries which are stupidly expensive to replace in bulk.
Hardwired Installation
Hardwired is for when you’re serious about it. You’re basically connecting the LED art directly to your home’s electrical system. This requires an electrician unless you’re comfortable working with electrical (I’m not, so I hire it out). The benefit is no visible cords and no batteries, but you’re also committing to that spot on your wall pretty permanently. I did this for a client’s dining room with a custom piece and it looks incredible, but it cost an extra $300 for the electrician.
LED Color Options and What Actually Looks Good
Most pieces come in warm white, cool white, or RGB (color-changing). Here’s my honest take after seeing hundreds of these in real spaces:
Warm white (2700K-3000K) looks the most natural and works in basically any room. It’s that soft yellowish light that feels cozy without being too intense. This is what I use in bedrooms and living spaces. Cool white (5000K-6500K) is that bright bluish light that feels more modern and energetic. Good for offices, kitchens, or contemporary spaces. It can feel a bit harsh in a bedroom though.
RGB color-changing is fun but – and I’m gonna sound like a snob here – it often looks gimmicky unless you use it really intentionally. Like my nephew has a gaming setup with RGB everything and it works for that vibe. But in a sophisticated living room? Usually too much. That said, the RGB ones that let you set a static color and just leave it there are actually useful because you can match the light to your existing decor.
Brightness Levels Matter
Check if the piece has dimming capability. This is huge. Some cheaper ones are just on/off with no dimming, and if they’re too bright you’re stuck with it. Look for pieces that mention “dimmable” or “adjustable brightness” in the specs. The remote-controlled ones usually have dimming built in.
Materials and Quality Markers
Okay so when you’re shopping online (because let’s be real, that’s where most of us buy this stuff), here’s what to look for to avoid getting garbage:
For acrylic pieces: Check the thickness (5mm minimum), look for terms like “laser engraved” or “precision etched” rather than just “printed,” and see if they mention the LED type. SMD LEDs are better than the older 5mm bullet-style LEDs. Also peek at the backing – better pieces have a clean backing plate, usually black or white, that hides the LED strip. Cheap ones just have exposed LEDs and wiring that looks messy.
For canvas: Look for “museum-quality canvas” or “artist-grade canvas” descriptions. The frame should be actual wood, not MDF. Check if they mention how the LEDs are attached – better ones have the LED strips properly mounted in channels or frames, not just stuck on with adhesive tape. My cat knocked over a cheap canvas piece once and the LED strip literally peeled right off.
Metal pieces: Steel or aluminum are standard. Powder-coated finish is more durable than painted. Check the thickness of the metal – 14-gauge or thicker is solid. Also look at how the LEDs are integrated. Are they in routed channels? Mounted behind? The mounting hardware should be included and appropriate for the weight.
Installation Tips from Someone Who’s Messed It Up
First thing – use a level. I know it seems obvious but I’ve had to rehang so many pieces because they looked fine at first glance but were actually tilted. Get a small torpedo level, they’re like $8.
For lightweight acrylic pieces (under 5 lbs), Command strips work great and don’t damage walls. I use the picture hanging strips, usually 2-4 sets depending on size. For anything heavier or valuable, use proper wall anchors. If you can hit a stud, always do that.
Mount the piece first, THEN plug it in and arrange the cord. If you try to do it all at once you’ll drive yourself crazy. Also tape or clip the excess cord behind the piece or furniture so it’s not just dangling there.
Testing Before You Commit
This is gonna sound weird but before you permanently install an LED piece, tape it up temporarily with painters tape and live with it for a day or two. See how the lighting works at different times of day, whether it’s too bright at night, if the placement makes sense with your furniture. I started doing this after installing a gorgeous piece above a client’s couch only to realize the glare made watching TV impossible.
Where to Actually Buy These Things
Amazon has a massive selection but quality is all over the place. Read the reviews carefully and look at customer photos, not just the professional ones. Etsy is great for custom and handmade pieces – I’ve found some really unique stuff there from independent artists. The prices are higher but the quality usually is too.
Wayfair and Overstock have decent selections in the mid-range price point. Home Depot and Lowe’s are starting to carry some LED wall art now, mostly the simpler designs, but the advantage is easy returns if you don’t like it.
For high-end custom stuff, look for local metal fabricators or woodworkers who do LED integration. I have a guy here in town who makes incredible custom pieces and honestly his prices aren’t that much higher than the mass-produced stuff online once you factor in quality.
Common Problems and How to Fix Them
LEDs flickering usually means a loose connection or the power adapter is failing. Check all the connections first – unplug everything, plug it back in firmly. If that doesn’t work, the adapter might need replacing. Most pieces use standard 12V adapters that you can buy separately.
If sections of LEDs aren’t lighting up, the strip might be damaged. This is harder to fix unless you’re comfortable with soldering. Sometimes you can contact the manufacturer for replacement strips but honestly with cheaper pieces it’s often not worth the hassle.
The remote not working? Replace the battery in the remote first (obviously), but also check if there’s a clear line of sight to the receiver. Some pieces have the receiver hidden behind the backing plate and the remote signal can’t reach it properly. You might need to reposition the piece slightly.
Maintenance and Longevity
LED wall art is pretty low maintenance but dust accumulates on the surface and dims the light over time. Wipe acrylic pieces with a microfiber cloth and a tiny bit of water or acrylic cleaner. Don’t use Windex or anything with ammonia because it can cloud the acrylic over time. For canvas, use a soft dry brush or cloth to dust it gently.
The LEDs themselves should last like 25,000-50,000 hours which is years of normal use. The power adapter is usually what fails first. Most pieces use standard DC adapters so they’re replaceable, but keep the specs written down somewhere (voltage and amperage) so you can order the right replacement if needed.
Design Placement Ideas That Actually Work
Over the bed as a headboard alternative is super popular right now. Keep it centered and about 6-8 inches above the mattress. In living rooms, above the couch or fireplace mantel are the obvious spots but also consider empty walls that need something – like that weird wall at the end of a hallway.
Home offices look great with LED art behind your desk, especially if you’re on video calls. It creates a nice visual backdrop without being distracting. Just make sure the light isn’t too bright or it’ll blow out your camera exposure.
Dining rooms can handle bigger statement pieces since the walls are usually pretty empty anyway. I did a 48-inch wide geometric piece in my client’s dining room last year and it completely transformed the space.
Bathrooms are tricky because of moisture but if you have a large powder room or a bathroom with good ventilation, it can work. Just avoid anything directly above the shower or tub.
Size Guidelines
For above furniture, the art should be about 2/3 to 3/4 the width of the furniture piece. So if your couch is 84 inches wide, you’re looking at 56-63 inches of wall art. You can also do a gallery-style arrangement with multiple smaller LED pieces but that’s more complex to install and get balanced.
For empty walls, step back and visualize before you buy. Use painters tape to mark out the dimensions on the wall. A piece that looks huge online might look tiny on a big wall, and vice versa.
Oh wait I forgot to mention – consider the viewing distance too. If you’re gonna be looking at the piece from far away (like across a large room), you can go bigger and bolder. If it’s in a small space where you’ll be close to it, smaller and more detailed works better.
Budget Breakdown
Budget pieces ($30-$80) are fine for experimenting or temporary decor. Just don’t expect them to last forever or look super high-end. The acrylic will be thinner, the LEDs less bright, and the construction cheaper. But honestly for a kid’s room or rental apartment, they’re perfectly adequate.
Mid-range ($80-$200) is where you get decent quality that’ll last several years. Better materials, proper mounting hardware, usually dimmable with remote control. This is my sweet spot for most projects.
High-end ($200+) gets you custom designs, premium materials, better LED strips, and often smart home integration. Worth it if this is a permanent installation in a main living space.
Installation costs if you’re hiring someone – budget $50-$150 for basic hanging and setup, more if electrical work is involved. Some pieces are definitely DIY-friendly though, especially the lightweight acrylic ones.