Wall Art Guide, Wall Art Tutoriels
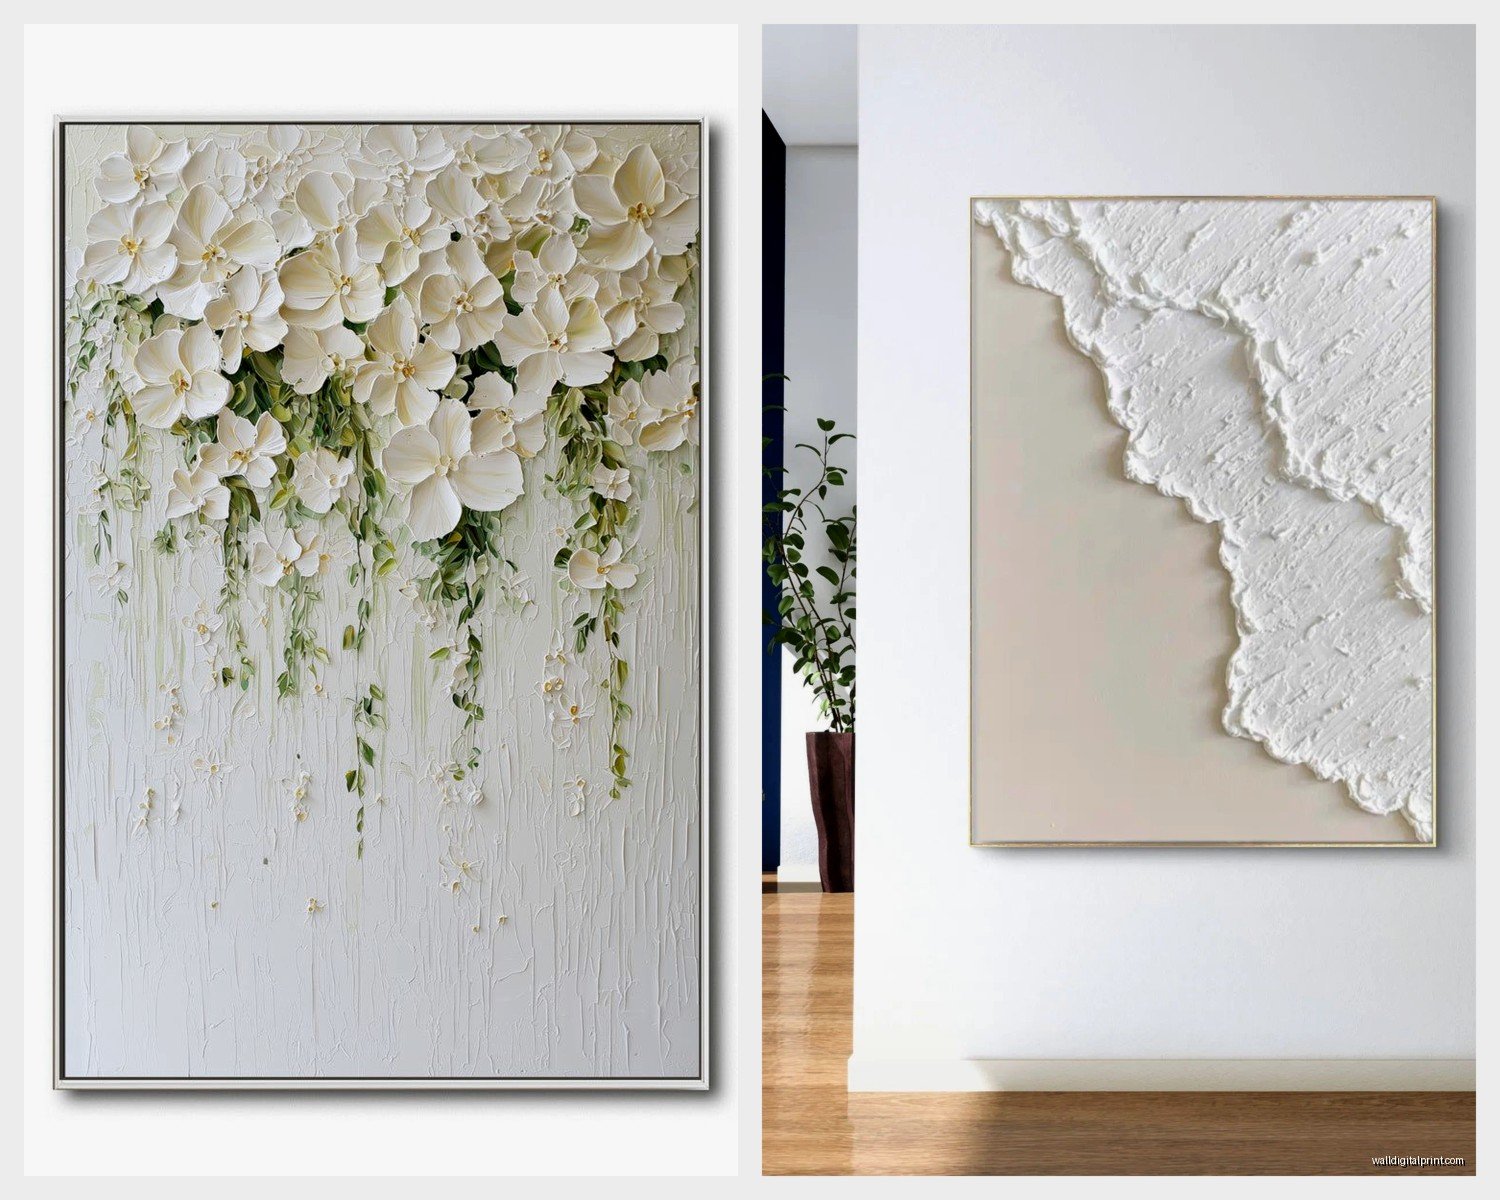
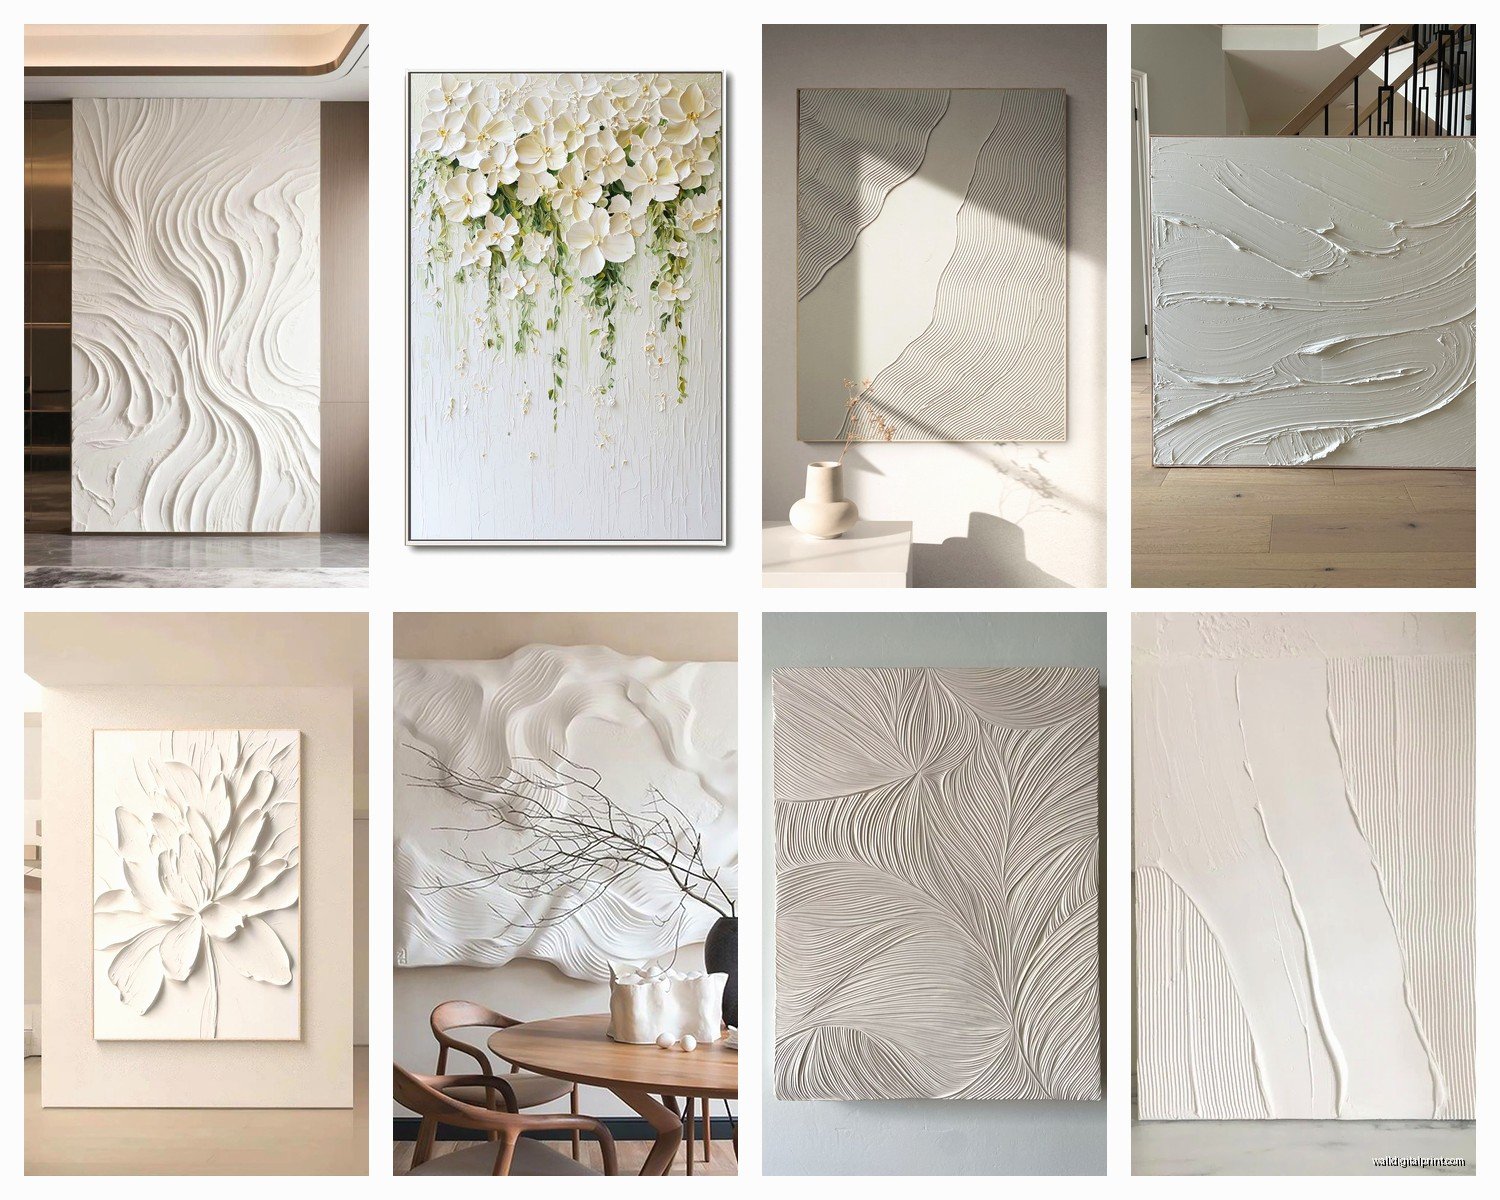
White Textured Wall Art: 3D Relief & Sculptural Designs
Mar
So I’ve been working with white textured wall art for like three years now and honestly it’s one of those things that seems simple until you’re actually standing in someone’s living room trying to figure out why that gorgeous 3D piece you ordered online looks completely flat in their space.
The Lighting Thing Nobody Tells You About
Okay so first thing – and I cannot stress this enough – textured white art is literally nothing without proper lighting. I learned this the hard way when I installed this beautiful sculptural wave piece in a client’s hallway and she texted me two days later saying it looked like “expensive white cardboard.” We added a picture light and suddenly you could see every ridge and shadow. The whole point of 3D relief is the shadow play, right? So you need either natural light hitting it at an angle or dedicated lighting.
I usually go with LED picture lights that mount above the piece, angled about 30 degrees down. The ones from House of Troy are pricey but they last forever. You want warm white LEDs, not cool white, because cool white makes the texture look harsh and kinda clinical. Think 2700K-3000K range.
Wall-Mounted vs Plug-In Lights
If you can hardwire a light, do it. It looks cleaner and you don’t have cords hanging around. But realistically most people are gonna use battery-operated or plug-in picture lights because hiring an electrician is expensive and annoying. I’ve used the Rite Lite wireless ones – they’re battery powered and you just stick them up with adhesive. They work fine for smaller pieces under 24 inches but anything bigger needs more light output.
Material Choices That Actually Matter
White textured art comes in so many materials and they all behave differently on the wall. Plaster and gypsum pieces are super popular right now – they have that raw, organic look. But here’s what nobody mentions: they’re HEAVY. Like really heavy. I installed a 36×36 inch plaster relief panel last month and we needed three heavy-duty wall anchors rated for 75 pounds each.
Resin pieces are lighter and more durable. They can mimic plaster or concrete textures pretty convincingly. The brand Uttermost makes some good resin sculptural pieces that look expensive but are way easier to hang. They’re also less likely to chip if you bump them while vacuuming or whatever.
Wood carved pieces painted white are gorgeous but you gotta watch for warping over time, especially in humid climates. I had a client in Charleston whose beautiful carved panel warped after six months because the humidity there is insane. If you’re going with wood, make sure it’s properly sealed on all sides, not just the front.
Papier-Mâché and Paper Pulp Art
There’s this whole category of textured art made from paper pulp or papier-mâché that’s having a moment. It’s lightweight, affordable, and you can find really interesting organic shapes. West Elm had some good ones last season. The downside is they’re fragile – not great for high-traffic areas or homes with kids who throw stuff. My sister’s kid hit one with a nerf dart and it dented, so… yeah.
Size and Scale Guidelines
This is where people mess up constantly. They order something online without really thinking about scale and then it arrives and it’s either comically small or overwhelming.
For a standard living room wall (let’s say 12 feet wide), you want your main piece or grouping to take up roughly 2/3 to 3/4 of the wall width. So like 8-9 feet of visual space. You can do this with one large piece or a grouping of smaller ones.
Single large pieces (48+ inches) work best on walls with minimal furniture below them or in dining rooms behind buffets. They need breathing room. I just finished a project where we hung a massive 60-inch circular textured piece above a console table and it’s stunning because there’s like 8 feet of empty wall on either side.
Gallery Wall Configurations
If you’re doing multiple textured pieces together – which btw looks amazing when done right – you need odd numbers. Three or five pieces usually. Keep spacing consistent, about 2-3 inches between pieces. I use painter’s tape to map everything out on the wall before hammering any nails because moving plaster art around creates a million holes.
One layout I use constantly: three square panels in a horizontal row, all the same size, evenly spaced. It’s clean and modern and hard to screw up. The panels should be at least 18×18 inches each for this to work, otherwise it looks dinky.
Installation Real Talk
Okay so hanging this stuff is not like hanging a regular framed print. Most sculptural pieces don’t have wire backs – they have D-rings, French cleats, or keyhole slots. You need the right hardware.
For anything over 20 pounds, I use wall anchors. Drywall anchors if you’re going into drywall (the toggle bolt kind, not those useless plastic ones), or you need to find studs. I bought a stud finder five years ago and it’s paid for itself a thousand times over. The Zircon one works fine, costs like $25.
French cleats are THE BEST for heavy sculptural pieces. It’s basically a mounting system where one piece attaches to the wall and one attaches to the art, and they interlock. Super secure and you can adjust the piece side to side to get it level. You can buy French cleat sets on Amazon or just make them from wood if you’re handy.
The Level Situation
Get a level. I don’t care if you think you have a good eye – you don’t. Nobody does. Even a small tilt makes textured art look wrong because the shadows fall weird. I use a 24-inch level for most installations and a laser level for gallery walls because my client canceled once and I spent like two hours doing a five-piece arrangement and I’m not doing that by eye anymore.
Style Mixing Because Rules Are Made Up
White textured art works with basically every style which is why it’s so popular. In modern spaces it reads as sculptural and architectural. In traditional rooms it adds unexpected texture without color clashing. In boho spaces it brings in that organic handmade quality.
I’ve mixed rustic wood textured pieces with super sleek modern furniture and it worked because the white ties everything together. I’ve put geometric relief panels in a farmhouse kitchen. The key is not overthinking it – white is neutral, texture is interesting, done.
One thing that’s kinda trendy right now is mixing different textures of white in one space. Like a smooth white ceramic vase next to chunky white knit throw next to dimensional wall art. It creates this layered, collected look without being too matchy-matchy.
Where to Actually Buy This Stuff
West Elm and CB2 have decent selections at mid-range prices. I’ve ordered from both and quality is hit or miss – sometimes you get something amazing, sometimes the “handcrafted” piece looks mass-produced. But their return policies are good so there’s that.
Etsy is great for truly unique pieces from actual artists. Search terms like “white plaster art,” “textured wall sculpture,” “dimensional wall art.” Prices vary wildly. I’ve found incredible handmade pieces for $200 and also seen people charging $800 for something that looks like it came from HomeGoods. Read reviews and check how many sales they’ve made.
For high-end stuff, Arteriors and Phillips Collection make beautiful sculptural pieces. We’re talking $500-2000 range but they’re statement pieces that’ll last forever. I used a Phillips Collection piece in a luxury condo lobby and it still looks perfect three years later.
HomeGoods and TJ Maxx sometimes have good finds if you’re patient. It’s totally random but I’ve scored some great textured panels there for like $60. You just gotta go regularly and hope.
DIY Options That Don’t Look DIY
If you’re crafty or broke or both, you can make textured wall art. I did this in my own apartment before I started making decent money. Joint compound (the stuff for drywall) on canvas, sculpted with palette knives and random tools, painted white. Let it dry for like 48 hours, seal it with matte varnish. Looks expensive if you’re patient with the sculpting part.
There are also those texture paste mediums from art stores – Golden makes a good one – that you can use to build up dimension on canvas or wood panels. Add things like sand or marble dust for extra texture. This is gonna sound weird but I watched my cat knock over a jar of modeling paste once and the splatter pattern it made actually looked cool, so sometimes accidents work.
Maintenance and Cleaning
White textured art gets dusty. All those crevices trap dust like crazy. You can’t just wipe it with a cloth because you’ll just push dust into the texture. I use a soft brush – like a clean makeup brush or a camera lens brush – to gently dust the surface every few weeks. For deeper cleaning, compressed air in a can works but do it gently because some materials are delicate.
If it’s sealed properly (resin, sealed plaster, painted wood), you can very carefully use a barely damp cloth. Emphasis on BARELY damp. Too much water and you risk damaging unsealed plaster or causing wood to swell.
Some pieces will yellow over time, especially if they’re in direct sunlight. UV-protective glass or acrylic can help if the piece is framed, but most sculptural pieces aren’t behind glass because that defeats the whole 3D effect. Just something to be aware of – position them away from windows if possible.
Common Mistakes I See Constantly
Hanging it too high. The center of the piece should be at eye level, which is usually 57-60 inches from the floor. I see so many installations where the art is floating near the ceiling and it looks weird.
Not considering the room’s existing texture. If you have heavily textured walls (like that knockdown ceiling texture or rough plaster), adding super textured art can be too much. Sometimes smooth walls need the contrast.
Buying something with sharp edges or protruding elements for a narrow hallway. I had a client who ordered this gorgeous piece with 3-inch sculptural elements sticking out and it was in a hallway where people were constantly brushing against it. Two months later half the elements were chipped or broken.
Forgetting about the thickness. These pieces often project 2-4 inches from the wall. Make sure there’s clearance if you’re hanging above furniture or near door swings.
Trending Styles Right Now
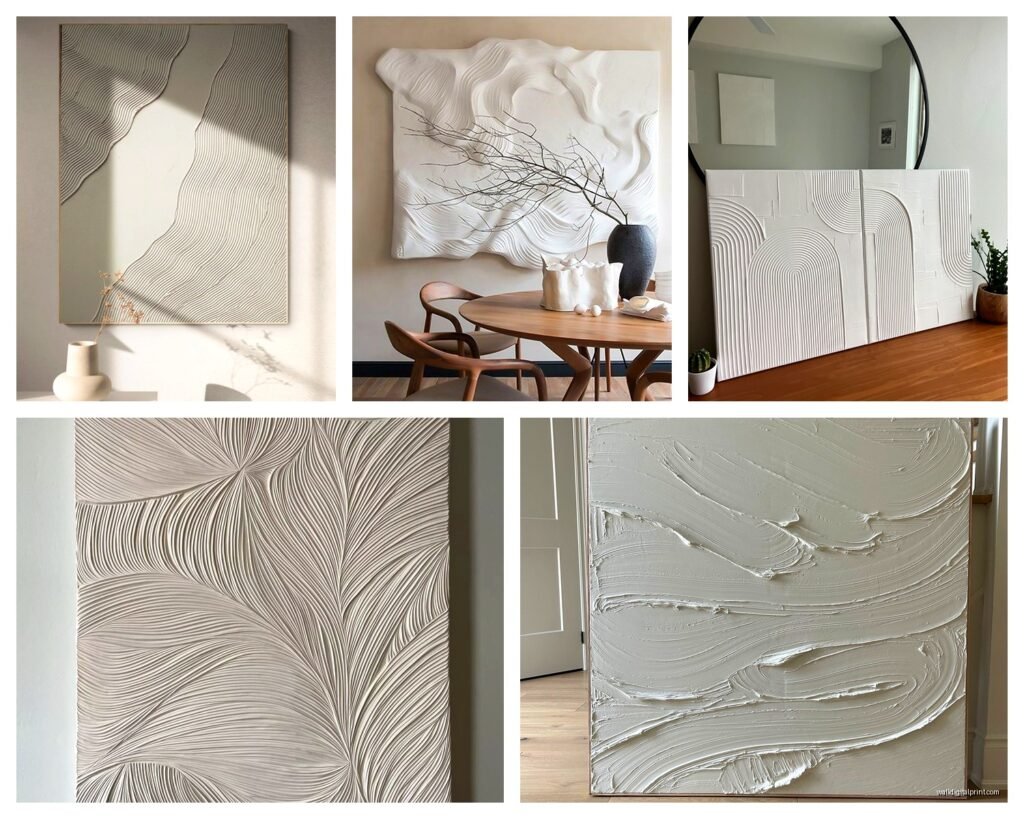
Organic shapes are huge – think flowing lines, wave patterns, abstract nature forms. That whole wabi-sabi aesthetic is driving demand for imperfect, handmade-looking pieces.
Geometric relief panels in grid patterns or with repeating architectural elements. Very modern, very clean.
Oversized single-statement pieces instead of gallery walls. People want fewer, larger, more impactful pieces.
Mixed media where texture is combined with metallic accents – like white plaster with gold leaf details. Not technically all-white but still in that neutral family.
Circle and arch shapes because we’re all obsessed with curves right now instead of harsh rectangles.
Oh and another thing – layered panels where multiple pieces are mounted at different depths to create even more dimension. It’s complicated to install but looks really cool when done right.
Anyway that’s basically everything I’ve learned from installing probably hundreds of these pieces. The main thing is just thinking about lighting first, making sure your wall can support the weight, and not being afraid to go bigger than you think you should. Textured art needs scale to make an impact otherwise it just looks like… white stuff on your wall.