Wall Art Guide, Wall Art Tutoriels
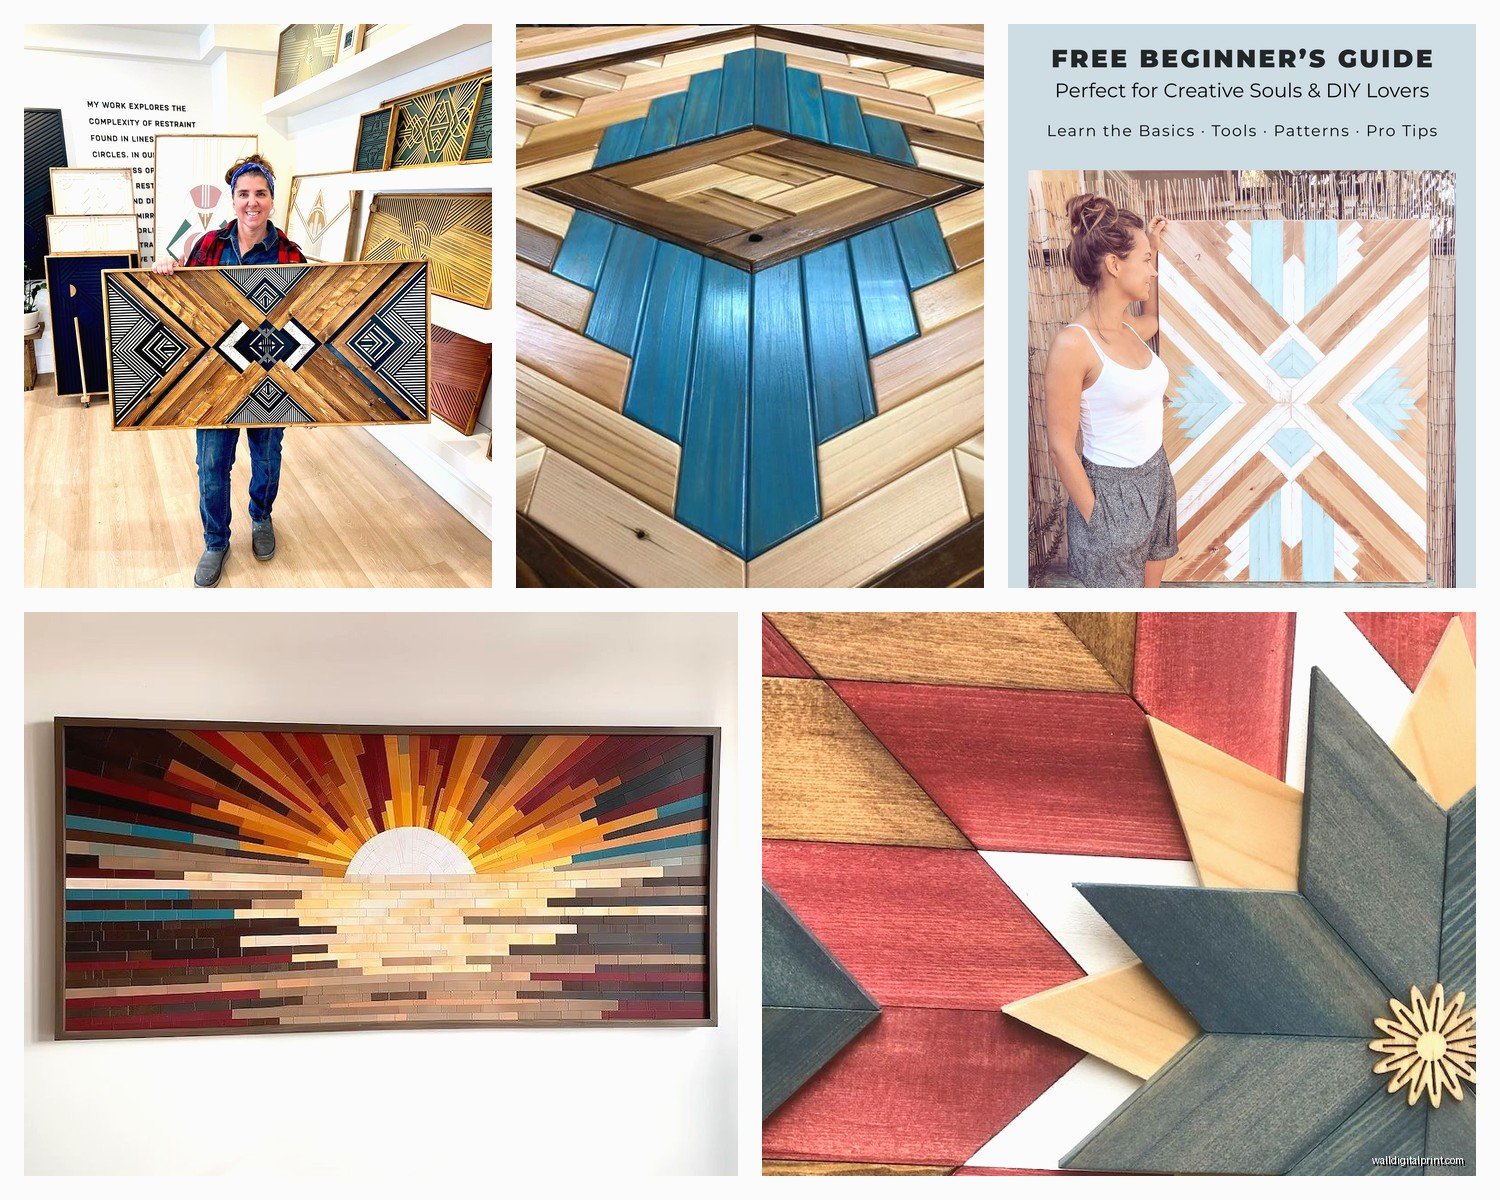
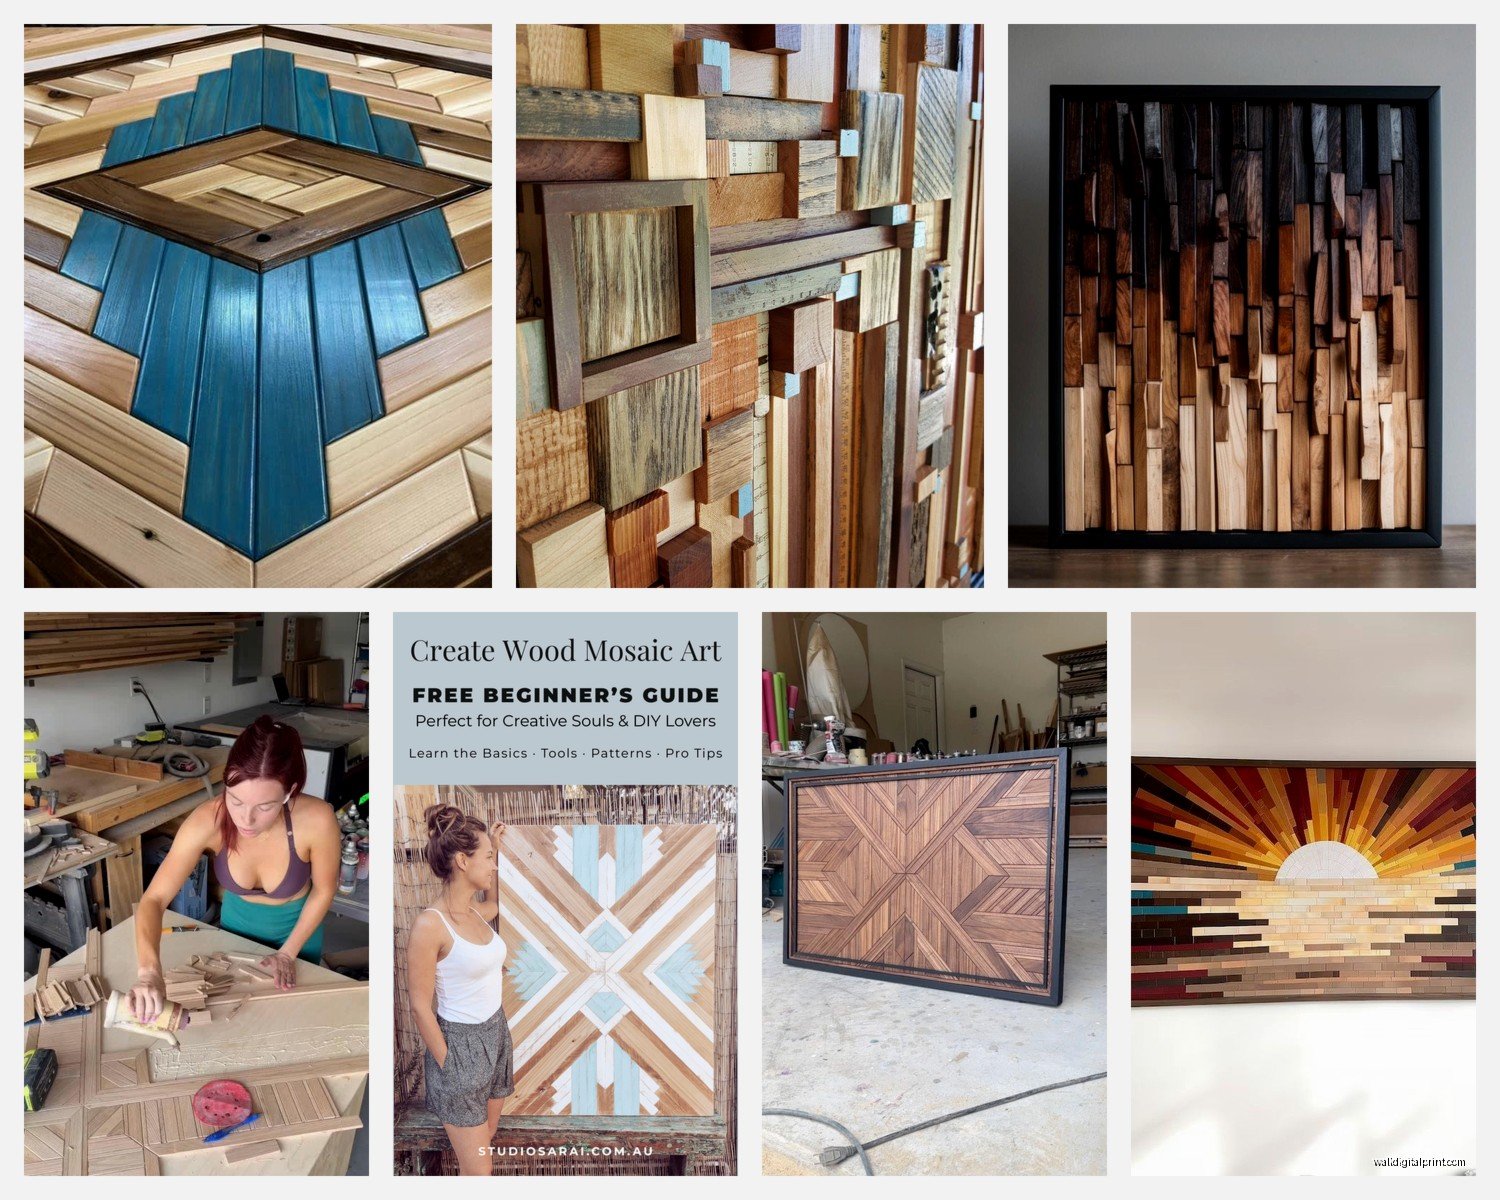
Wood Mosaic Wall Art: Tile Inlay Geometric Patterns
Mar
So I’ve been absolutely obsessed with wood mosaic wall art lately and honestly it’s one of those projects that looks way more intimidating than it actually is. Like, my cat knocked over my first attempt and I just… started over and it turned out better anyway.
The Wood Situation
Okay so first thing, you gotta decide what kind of wood you’re working with. I’ve tried a bunch and here’s what actually matters. Reclaimed wood is gorgeous but it’s inconsistent as hell. Sometimes you get this beautiful weathered barn wood, sometimes you get something that splinters if you look at it wrong. I usually hit up local salvage yards or that one guy on Facebook Marketplace who’s always tearing down old fences.
For something more predictable, go with:
- Oak – takes stain really well, pretty forgiving to cut
- Walnut – if you want that rich dark look without staining
- Maple – super light, great for contrast pieces
- Cedar – smells amazing while you’re cutting it, naturally resistant to warping
- Pine – cheap, easy to find, but kinda soft so your cuts need to be confident
I’m currently working with a mix of walnut and maple because the contrast is just *chef’s kiss* and you don’t even need to stain anything. My workspace smells like a fancy furniture store which is definitely better than when I tried working with treated lumber (don’t do that, the dust is nasty).
Cutting Your Tiles
This is where people get stressed but honestly once you have a system it’s pretty meditative. You need consistent shapes, right? I use a miter saw for most cuts because it’s fast and accurate. Set up a stop block and you can cut like 50 identical pieces without measuring each one.
The geometric patterns I do most:
Triangles – cut your wood into strips first, then cut at 60-degree angles. Stack them point-up, point-down, whatever. Very forgiving pattern.
Hexagons – okay these are fiddly but SO worth it. You need a 30-degree angle on your miter saw. Cut six identical trapezoid shapes and they fit together into hexagons. Took me like three tries to figure out the math but now I can crank them out.
Diamonds – just squares turned 45 degrees, makes everything look fancier than it is.
Chevrons – cut rectangles at 45 degrees, flip every other one. Classic.
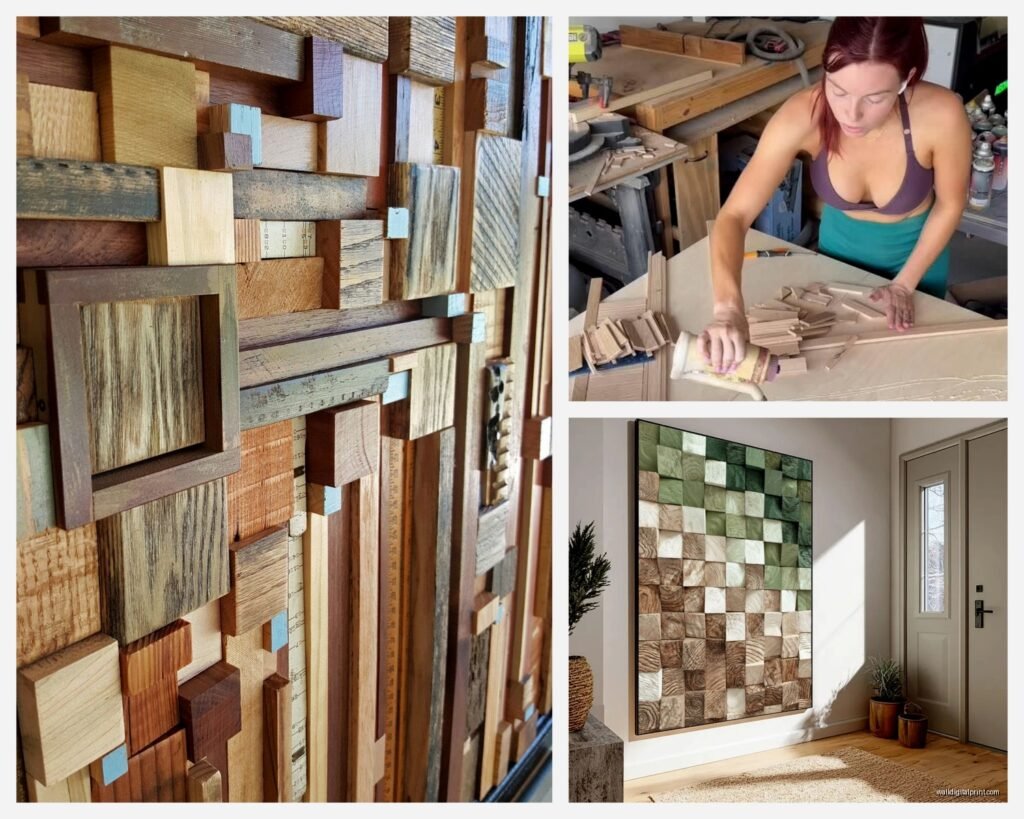
Oh and another thing, sand your pieces BEFORE assembly. Trust me on this. I learned the hard way that sanding after you glue everything down is a nightmare. Start with 80 grit if your wood is rough, finish with 220 grit. My palm sander died halfway through my last project so I had to hand sand like 200 pieces and my arm was sore for days.
The Base Panel Thing
You need something to attach all these little pieces to. I use quarter-inch plywood usually, sometimes half-inch if it’s gonna be a really big piece. The thinner stuff is easier to hang but can warp if you’re not careful with your glue application.
Cut your base to whatever size you want the final piece to be. I usually do 24×24 inches or 36×18 inches because those dimensions work well with the way I cut my strips. Sand the surface so glue adheres better.
Here’s something nobody tells you – paint or stain your base panel a color that complements your wood. If you’re using light woods, maybe a dark gray or black base. The little gaps between your mosaic pieces will show the base color and it adds this really nice depth. I saw someone on Instagram do an all-walnut mosaic on a gold-painted base and it was stunning.
Layout Strategy
Do NOT skip the dry layout phase. Just don’t. Lay out your entire pattern without glue first. Take a photo. I use painter’s tape to mark sections sometimes or I’ll draw directly on the base panel with pencil where certain pieces go.
For geometric patterns, start from the center and work outward. Or if you’re doing something directional like chevrons, start from one edge and maintain your pattern across. I usually put on a show I’ve seen before (currently rewatching The Office for the millionth time) and just zone out arranging pieces until it looks right.
You’ll probably need to cut some custom pieces to fill edges. This is normal. Measure twice, cut once, all that stuff.
Glue and Assembly
Wood glue is your friend. I use Titebond III because it’s waterproof and stronger than the wood itself once it cures. Some people use construction adhesive but I find it messier and harder to reposition if you mess up.
Apply glue to both the base panel and the back of each wood piece. Not too much or it’ll squeeze out everywhere (wipe excess immediately with a damp cloth). Not too little or pieces will pop off later.
Work in sections. Like, maybe do a 6×6 inch area at a time. This keeps the glue from drying before you get pieces down. Press each piece firmly, wiggle it slightly to spread the glue, then move to the next one.
Wait this is gonna sound weird but I use my body weight sometimes. For larger pieces or if I’m doing a whole section at once, I’ll put wax paper over the area and then stack heavy books on top while the glue dries. Clamps work too but I never have enough clamps.
Drying time is usually 30 minutes before you can move to the next section, but let the whole thing cure for 24 hours before hanging it.
Finishing Touches
Once everything’s glued and dry, go over it with 220 grit sandpaper lightly. This smooths any edges that stick up slightly and blends everything together.
For finish, I usually do:
- Polyurethane (water-based) – durable, doesn’t yellow, easy cleanup
- Danish oil – brings out wood grain beautifully, more natural look
- Paste wax – very subtle, good for pieces that won’t get touched much
- Nothing – sometimes the raw wood look is perfect as-is
Apply with a foam brush or lint-free cloth. Two coats minimum. Sand lightly with 320 grit between coats. The finish really makes the different wood tones pop and protects everything.
Staining Options
If you want to get fancy with color, stain before assembly. I’ll sometimes stain different pieces different colors to create gradient effects or more complex patterns. Minwax has like a million colors. My go-to combinations:
- Natural + Dark Walnut + Ebony for a monochrome gradient
- Golden Oak + Red Mahogany for warm tones
- Weathered Gray + Classic Gray + Ebony for modern neutrals
Test your stain on scrap pieces first because different woods absorb differently. Pine gets super blotchy unless you use pre-stain conditioner.
Pattern Ideas That Actually Work
Okay so in theory you can do any geometric pattern but some are way easier than others. Here’s what I’ve had success with:
Herringbone – classic, never goes out of style, relatively easy. Just rectangles at 90-degree angles to each other.
Basket weave – alternating horizontal and vertical rectangles. Looks complicated, isn’t.
Sunburst – trapezoid pieces radiating from a center point. This one’s tricky to get the angles right but looks amazing.
Random geometric – honestly sometimes I just cut a bunch of different shapes and fit them together like a puzzle. Very organic, very forgiving if you mess up.
Ombre effect – arrange same-shaped pieces from light to dark. Works with natural wood variation or stained pieces.
I saw this one piece where someone did concentric hexagons in graduating sizes and it looked like 3D optical illusion art. Still trying to figure out how to replicate that.
Tools You Actually Need
Gonna be real with you, you can do this with minimal tools but it’s way easier with the right stuff:
- Miter saw – essential for accurate angled cuts
- Table saw – helpful for ripping strips to consistent width
- Palm sander – saves your arms
- Tape measure and speed square – obvious
- Pencil – for marking
- Safety glasses and dust mask – seriously, wear these
- Clamps or heavy books – for glue-up
If you don’t have a table saw, buy pre-cut lumber at specific widths. Home Depot will cut boards for you too, though their accuracy is questionable.
Common Mistakes I’ve Made So You Don’t Have To
Not accounting for saw blade width (kerf) when calculating pattern repeats. Your pieces will be slightly smaller than you think.
Using too much glue. It’s messy and takes forever to clean up.
Not sealing the back of the base panel. It can warp from moisture differences between front and back.
Hanging it before the glue fully cures. Had one piece where two tiles fell off because I got impatient.
Forgetting to sand before assembly. Cannot stress this enough.
Hanging These Things
They’re heavier than they look. For anything over 12×12 inches, use proper wall anchors or hit a stud. I use D-ring hangers on the back, two of them for larger pieces so it hangs level.
French cleat system works great for really big pieces. You screw one part to the wall, one to the back of your art, and they lock together. Super secure.
Oh and measure from the floor up when hanging, not from the ceiling down. Ceilings aren’t always level and it’ll drive you crazy.
Where to Source Materials Cheap
This hobby can get expensive fast if you’re buying everything new. My favorite sources:
Construction sites – seriously, ask if you can take scrap. Most times they say yes.
Pallet wood – free, already cut into strips, just gotta denail and sand. Check behind furniture stores.
Estate sales – old furniture is basically pre-cut project wood.
Flooring stores – they have sample pieces and discontinued stock they’ll sell cheap or give away.
That Facebook Marketplace guy I mentioned earlier sells me 50 board feet of mixed hardwood for like $40. Relationship building pays off.
Sizing and Proportions
Your individual tile size affects the whole vibe. Smaller pieces (like 1-inch squares) create intricate detailed patterns but take forever. Larger pieces (3-4 inches) go faster but might look chunky depending on your pattern.
I usually work with pieces between 1.5 and 2.5 inches on their longest dimension. Good balance of detail and workability.
For wall size, go bigger than you think. A 12×12 piece looks tiny on an actual wall. I aim for at least 24×36 for a statement piece, 18×18 minimum for anything I want to actually have visual impact.
The wood thickness matters too. I use 3/4 inch stock usually, sometimes 1/2 inch. Thinner looks more delicate, thicker has more dimension and shadow play. Mix thicknesses in one piece for extra depth – it’s a cool effect.
Anyway, that’s basically everything I’ve learned from making like 20 of these things. Start small, maybe do a practice piece before you commit to a huge wall installation. And honestly the imperfections make it better, that’s the whole handmade thing, right?