Wall Art Guide, Wall Art Tutoriels
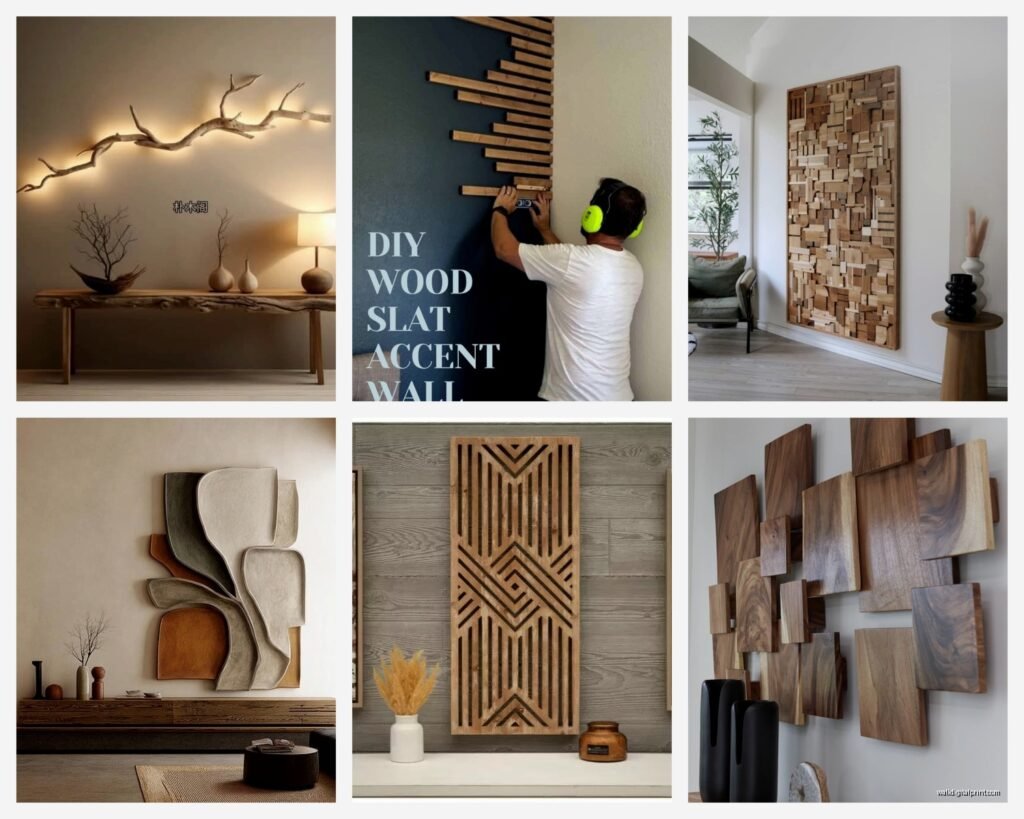
Wood Wall Art Decor: Carved & Reclaimed Wood Designs
Mar
So I’ve been working with wood wall art for like three years now and honestly it’s one of those things where you don’t realize how much bad advice is out there until you’ve actually hung a 40-pound carved piece that falls off at 2am because someone on Pinterest said command strips would work.
Choosing Between Carved vs Reclaimed Wood
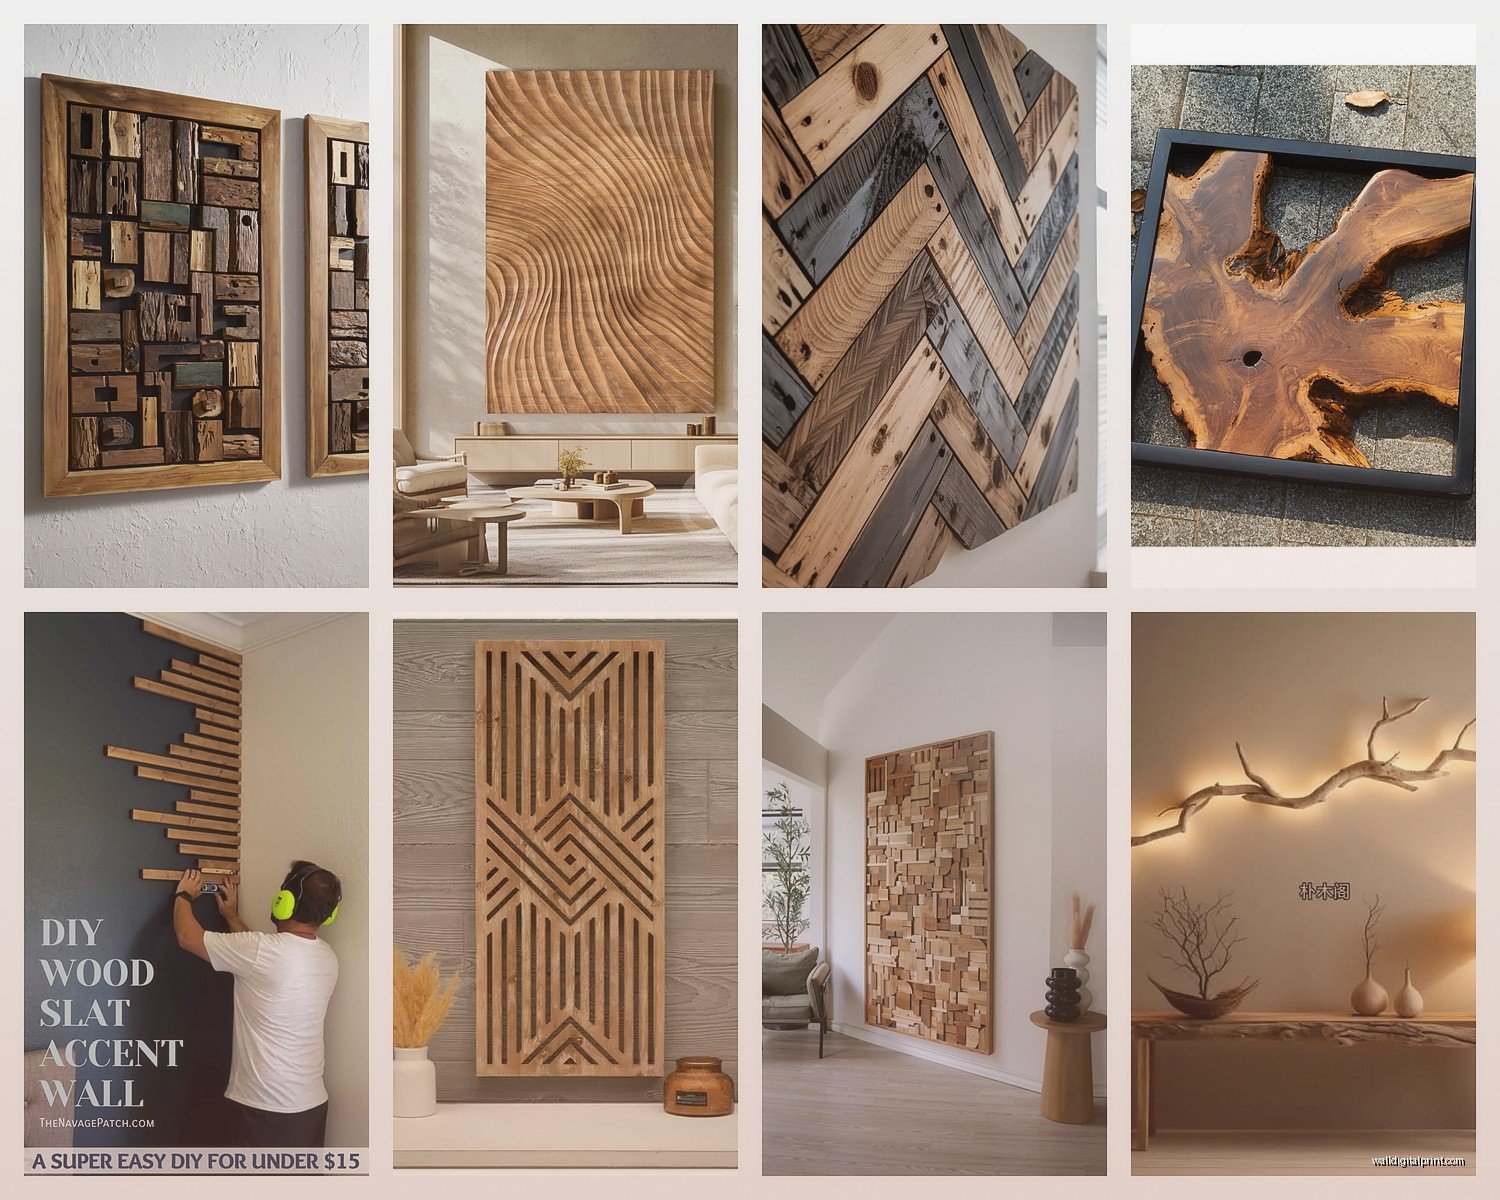
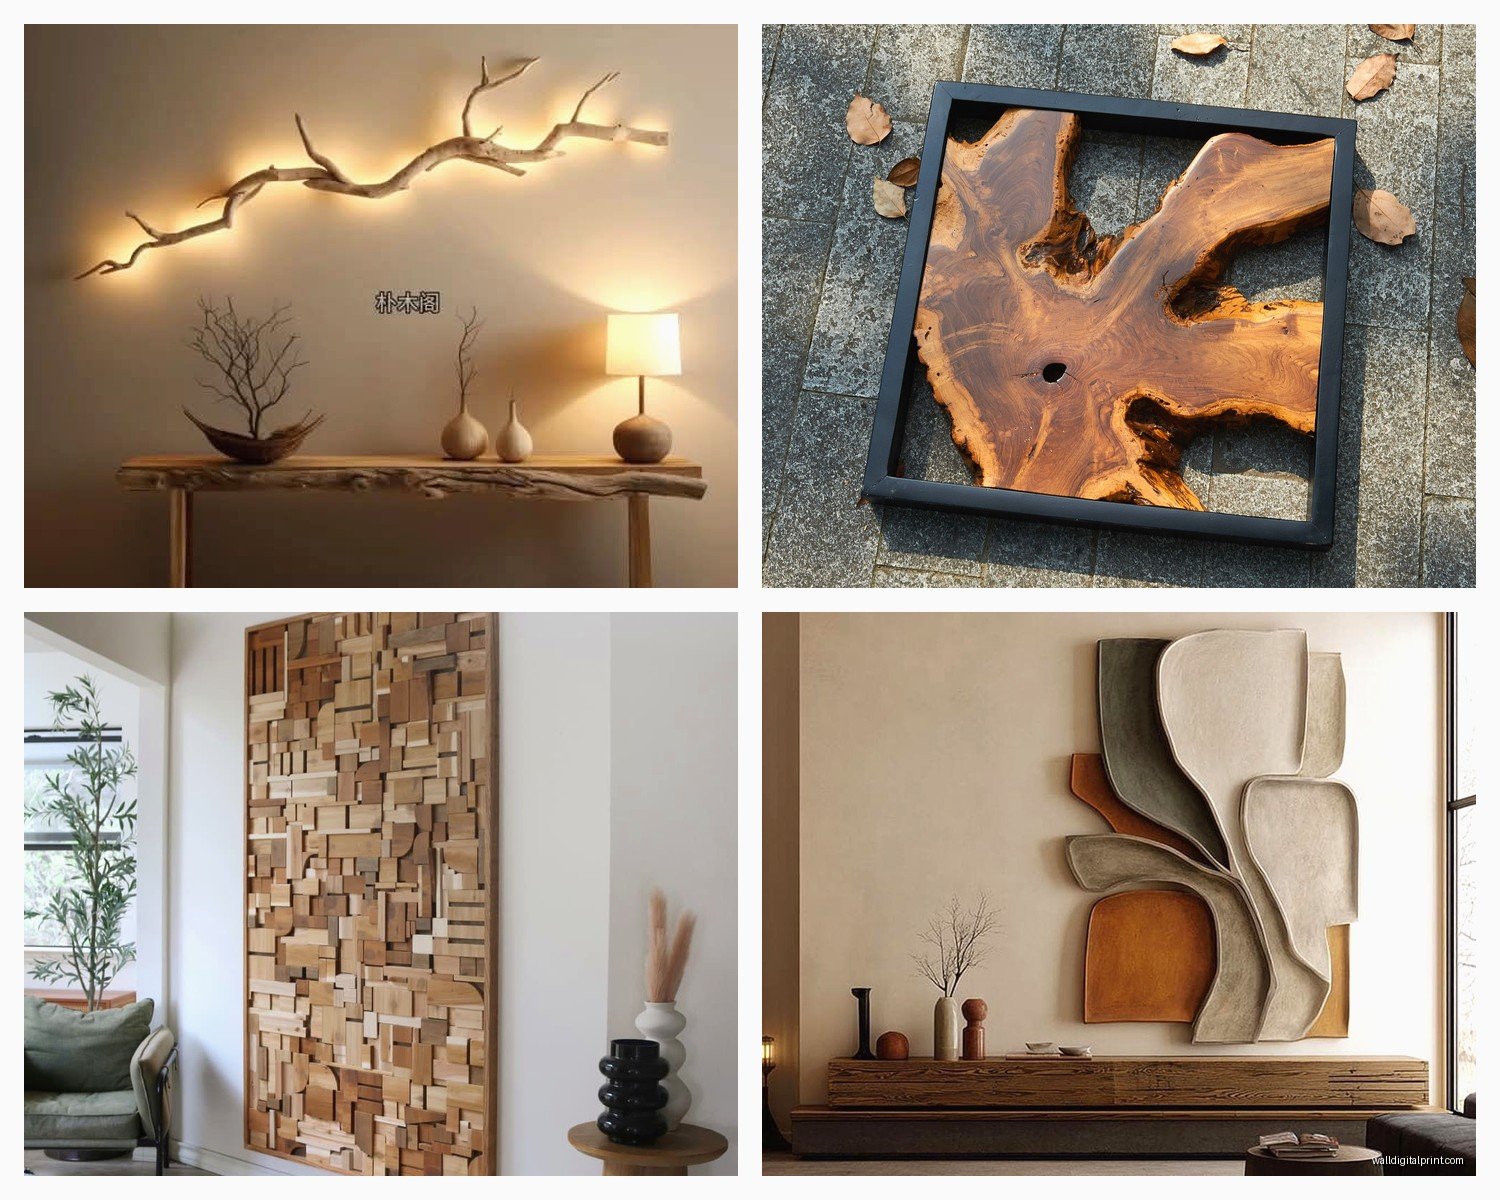
Okay so first thing, carved and reclaimed are totally different vibes and you gotta know what you’re actually getting into. Carved wood art is usually new wood that’s been CNC’d or hand-carved into patterns, mandala designs, geometric stuff, those trendy mountain ranges everyone’s doing right now. Reclaimed is old wood—barn wood, pallet wood, whatever—that’s been repurposed into wall hangings.
I messed this up with a client last year where she kept saying she wanted “rustic wood art” and showed me carved pieces but then got mad when I brought reclaimed options because she actually wanted the carved geometric stuff but just… in a farmhouse? Communication is hard.
Carved wood pros: clean lines, consistent finish, usually comes sealed and ready to hang, you know exactly what you’re getting. Cons: can look mass-produced if you go too cheap, heavier than you’d think, limited customization unless you’re commissioning.
Reclaimed wood pros: every piece is literally unique, lighter weight usually, amazing texture and color variation, tells a story if you’re into that. Cons: can shed or splinter if not properly finished, might have nail holes or imperfections (feature or bug depending on your perspective), harder to clean.
Size and Scale That Actually Works
This is gonna sound weird but I measure walls with my arms now because I’ve eyeballed it wrong so many times. Here’s what I’ve learned the hard way:
For above a couch or bed, you want the art to be roughly 2/3 to 3/4 the width of the furniture. I did a tiny 24-inch piece above a king bed once and it looked like a postage stamp. My dog literally tilted his head at it like “why though.”
- Small spaces (entryways, bathrooms): 18-30 inches works
- Medium walls (above console tables, smaller bedrooms): 30-48 inches
- Large statement walls (living rooms, master bedrooms): 48-72 inches or gallery wall situation
- Massive walls with high ceilings: honestly consider multiple pieces or go custom because standard sizes look lost
Height matters too. The center of your piece should be at eye level, which is roughly 57-60 inches from the floor. But like, whose eye level? I’m 5’4″ so I always hang stuff slightly lower than the “rule” says and it looks better in real homes where people aren’t all museum-height.
Weight Is a Real Problem Nobody Talks About
Oh and another thing—weight distribution will ruin your day if you ignore it. I had a gorgeous carved teak mandala that weighed 38 pounds and the hardware it came with was rated for 20. It lasted three weeks before it ripped out a chunk of drywall.
Always check the actual weight before you buy. Carved hardwood pieces (teak, mahogany, walnut) can be deceptively heavy. A 36-inch carved piece might be 25-40 pounds easy. Reclaimed wood is usually lighter because it’s often made from thinner boards, but if someone’s used thick barn beams you’re still looking at serious weight.
Hardware You Actually Need
Forget whatever hardware comes with cheaper pieces. Just forget it. Here’s my standard setup:
- Under 15 lbs: heavy-duty picture hangers with two nails, the ones rated for 30+ lbs to be safe
- 15-30 lbs: wall anchors (the screw-in kind, not those plastic garbage toggles) or find a stud
- 30+ lbs: you’re finding studs or using toggle bolts rated for 50+ lbs, non-negotiable
I keep a stud finder in my car now because I’ve had to hang things at clients’ houses who swear they know where the studs are and they never do. The $20 electronic ones work fine, don’t overthink it.
Finish and Maintenance Reality Check
So most carved pieces come pre-finished with some kind of lacquer or oil finish. Reclaimed pieces are… a gamble. Some sellers properly seal them, some just slap whatever together and call it rustic.
Ask sellers specifically: Is this sealed? What was used? Can I clean it with a damp cloth? If they can’t answer, pass. I got a “reclaimed” piece once that left wood dust on my white wall for weeks because it wasn’t sealed at all.
For carved wood, you basically don’t need to do anything except dust it. Maybe once a year hit it with some wood conditioner if it looks dry, but honestly most modern finishes hold up fine.
For reclaimed wood, it depends on the finish:
- Polyurethane sealed: wipe with damp cloth, you’re good
- Oil finished: might need re-oiling every 1-2 years depending on humidity
- Unfinished/raw: gonna collect dust like crazy, you’ll want to seal it yourself with paste wax or spray poly
Wait I forgot to mention—if you have a humid climate or you’re hanging this in a bathroom (why though), make sure it’s properly sealed or the wood will warp. Found that out with a client in Florida whose beautiful carved piece turned into a potato chip shape in six months.
Style Matching Without Looking Like a Pinterest Fail
Okay so funny story, I was watching this home reno show while researching wood art trends and they put a massive carved mandala in a mid-century modern living room and it actually… worked? Which broke my brain because I thought mandalas only worked in boho spaces.
Carved geometric patterns: modern, contemporary, minimalist, Scandinavian, even industrial if you do dark wood with metal accents
Carved organic/nature scenes (trees, mountains, forests): work everywhere honestly, they’re pretty neutral, good for transitional styles
Carved mandalas and intricate patterns: boho obviously, but also eclectic, maximalist, global-inspired spaces
Reclaimed wood in natural tones: farmhouse, rustic, cottage, industrial, some boho situations
Reclaimed wood painted or whitewashed: coastal, shabby chic, French country, modern farmhouse
The trick is matching your wood tone to other wood in the room. If you’ve got warm oak floors, a cool-toned grey reclaimed piece is gonna look weird. I learned this by doing it wrong in my own house and living with it for eight months before I finally admitted it looked bad.
Where to Actually Buy This Stuff
I’ve ordered from like a million places at this point and here’s the real talk:
Etsy: Best for unique reclaimed pieces and custom carved work. Read reviews obsessively. Check if they show the back of the piece with hanging hardware. Shipping can be wild expensive for large pieces. I found an amazing artist there who does custom mountain ranges and she’s done four pieces for my clients now.
West Elm, CB2, similar stores: Carved pieces are usually decent quality, proper finish, reliable hardware. You’re paying for the name but also for consistency. Their reclaimed stuff is hit or miss—sometimes it’s actual reclaimed wood, sometimes it’s new wood made to look old which like… okay.
Wayfair/Overstock: Wide range which means wide quality range. Under $150 pieces are usually composite or pine, not solid hardwood. Read the materials section carefully because “wood” might mean MDF with wood veneer. I’ve gotten good deals here but also received absolute garbage, so it’s a gamble.
Local artisans/craft fairs: You can see exactly what you’re getting, ask questions about the wood source and finish, sometimes negotiate custom sizes. More expensive usually but you know what you’re paying for.
Red Flags When Shopping
- No dimensions listed (how do they expect you to buy this)
- Only front-view photos, nothing showing depth or back
- Weight not mentioned for anything over 24 inches
- “Wood composite” without specifying what that means
- Reviews mentioning smell—formaldehyde in cheap finishes is real
- Shipping time over 6 weeks unless it’s custom (means it’s dropshipped from overseas usually)
Installation Tips That’ll Save Your Walls
My client canceled last week so I spent an hour comparing different hanging methods on my own wall and here’s what actually matters:
Use a level. I know everyone says this but I’ve eyeballed it exactly once and it was crooked and I was too lazy to fix it for three months. Just use the level.
For heavy pieces, use two hanging points minimum. Even if it comes with one D-ring in the center, add another. Weight distributed across two points = less stress on your drywall.
Mark your holes with painter’s tape first. Stick a small piece where you think the hole should go, step back, check if it looks right, adjust. Way easier than filling holes later.
If you’re hanging reclaimed wood that’s not perfectly flat (most isn’t), you might need spacers or felt pads on the back corners to keep it from sitting weird against the wall. Nothing worse than a gap on one side that creates shadows.
The Gallery Wall Situation
Oh and if you’re doing multiple wood pieces together, which can look amazing with mixed carved and reclaimed, lay them out on the floor first. Take a photo from above. This seems obvious but I’ve had clients just start hammering and then call me crying because it looks terrible.
Keep 2-4 inches between pieces for breathing room. Closer than 2 inches looks cramped, more than 4 inches looks disconnected unless you’re going for that specific vibe.
Start with the largest piece as your anchor, then build around it. I usually go center-out but some people like to start from one side, whatever works for your brain.
Customization and DIY Considerations
So you can definitely DIY reclaimed wood wall art if you’re even slightly handy. I’m not particularly handy and I’ve made three pieces that don’t look completely terrible. You need:
- Reclaimed wood (salvage yards, Craigslist, ReStore, old pallets if you’re careful about where they came from)
- Saw to cut pieces (miter saw makes it easier but hand saw works)
- Wood glue and/or nails
- Backing board (plywood works)
- Sandpaper because splinters
- Finish (poly, oil, wax, whatever you want)
- Hanging hardware
The process is basically: cut wood to desired lengths, arrange in pattern, attach to backing board, sand everything, apply finish, add hardware. It takes way longer than you think. My first piece took like 8 hours spread over a weekend and it’s only 24×36 inches.
For carved wood you’re not DIYing unless you have serious woodworking skills and tools. CNC machines exist but that’s a whole different investment level.
Trending Designs Right Now
This changes constantly but currently I’m seeing a lot of:
Layered geometric patterns with different wood tones creating depth. These are usually carved from multiple wood types or stained differently. Really pretty in person, photographs well which is why they’re everywhere on Instagram.
Minimalist line art carved into single wood pieces—like a simple mountain outline or abstract face profile. Good for people who want wood texture without the “rustic cabin” vibe.
Mixed media with wood and metal, especially brass or copper accents in carved pieces. I just installed one with thin brass inlay following the grain pattern and it’s stunning.
Oversized single pieces instead of gallery walls. The pendulum is swinging back to statement pieces after years of gallery wall overload.
Natural edge/live edge reclaimed wood keeping the bark or irregular edge. Very organic, works in modern spaces surprisingly well.
Common Mistakes I See Constantly
Hanging wood art too high. I don’t know why people do this but I walk into homes where beautiful pieces are floating near the ceiling like they’re trying to escape.
Putting carved wood in direct sunlight. Some finishes will fade or the wood itself will change color. It might look cool and aged or it might look sun-damaged, depends on your perspective, but know it’s gonna happen.
Mixing too many wood tones in one space. You can do it but it needs to be intentional. Random carved walnut piece + reclaimed pine + oak furniture + cherry floors = visual chaos.
Not considering the room’s acoustics. This sounds weird but large flat wood pieces can make rooms sound echo-y, especially in spaces with hard floors and minimal soft furnishings. It’s usually fine but in like a minimalist loft with concrete floors, you might notice.
Forgetting about doorways and furniture. Measure your doorways before ordering a massive piece. I’ve had delivery people try to get 60-inch pieces through 32-inch doorways and it’s not fun for anyone.
Price Expectations
You gotta know what’s reasonable so you don’t get ripped off:
- Small carved pieces (18-24 inches): $50-200 depending on complexity and wood type
- Medium carved pieces (30-40 inches): $150-500
- Large carved pieces (48+ inches): $300-1200+, custom can be way more
- Small reclaimed (under 24 inches): $40-150
- Medium reclaimed (30-40 inches): $100-300
- Large reclaimed (48+ inches): $200-600
Handmade and custom obviously costs more. Teak, mahogany, and walnut cost more than pine or composite. Intricate carving costs more than simple patterns. If something seems too cheap, it probably is—I’ve seen “$89 for huge carved mandala!” that turned out to be printed foam. Not even wood.
Anyway that’s basically everything I wish someone had told me before I started working with wood wall art. The main thing is just measure twice, check the weight rating, and don’t trust command strips with anything heavier than a picture frame no matter what the internet says.