Wall Art Guide, Wall Art Tutoriels
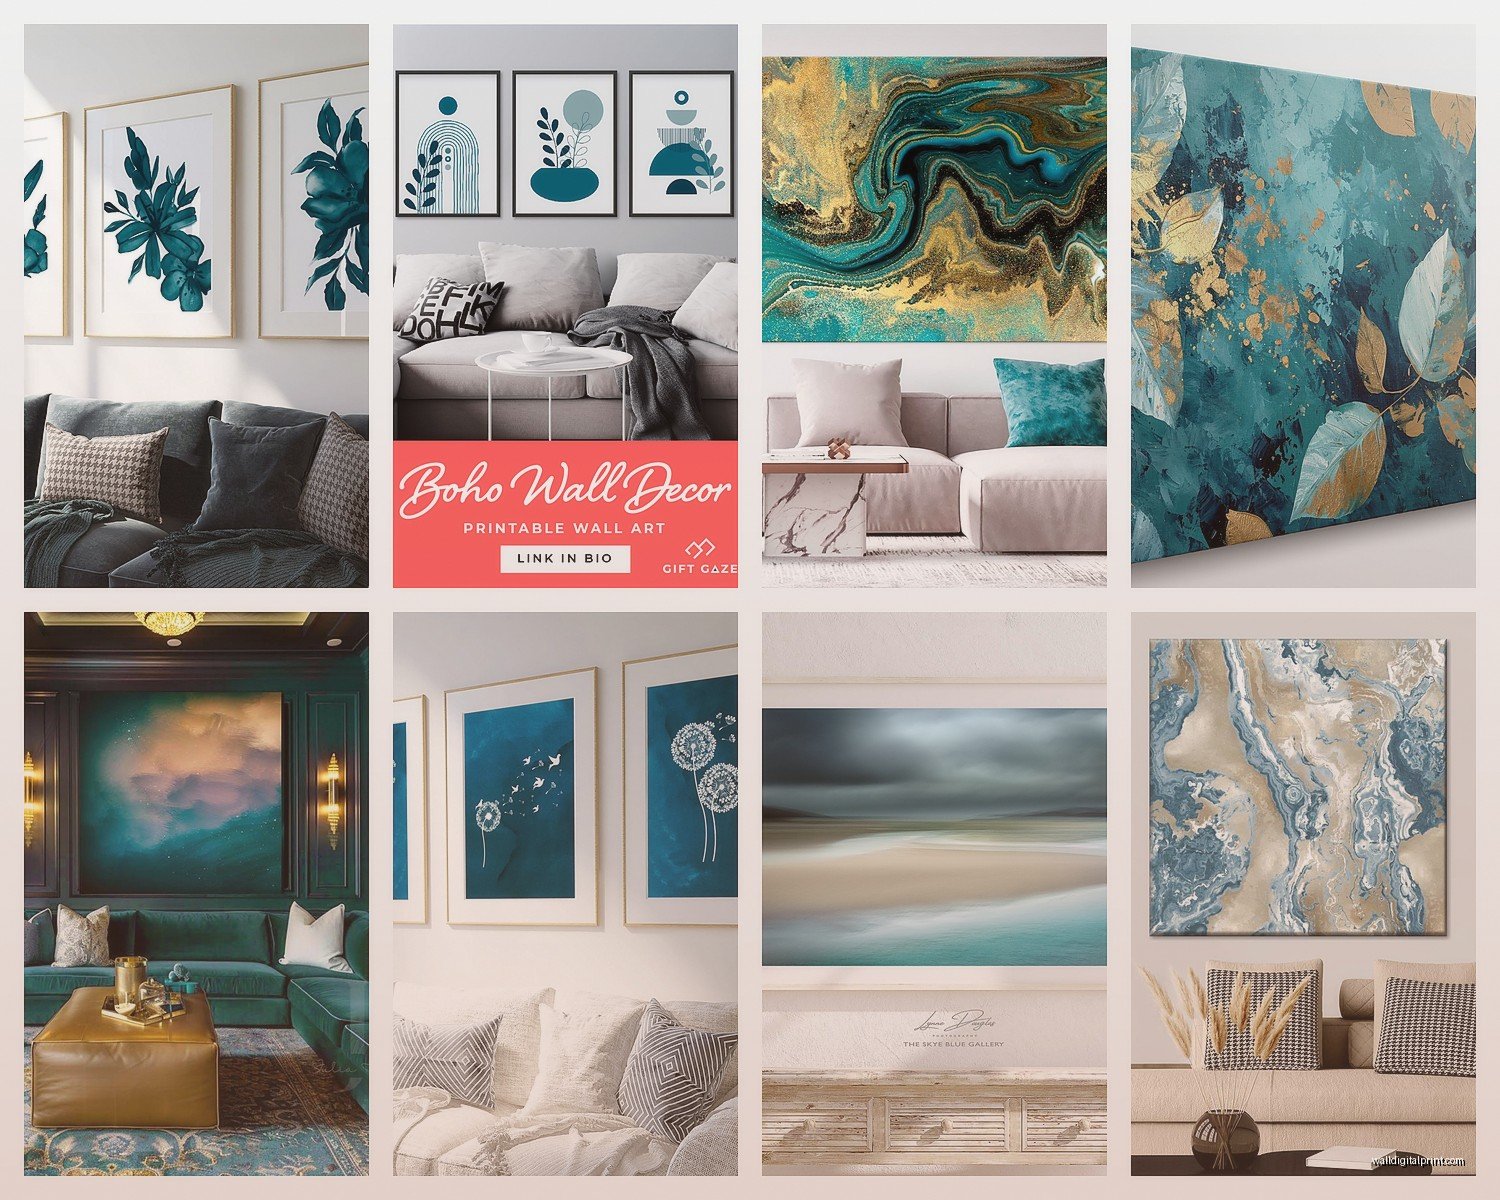
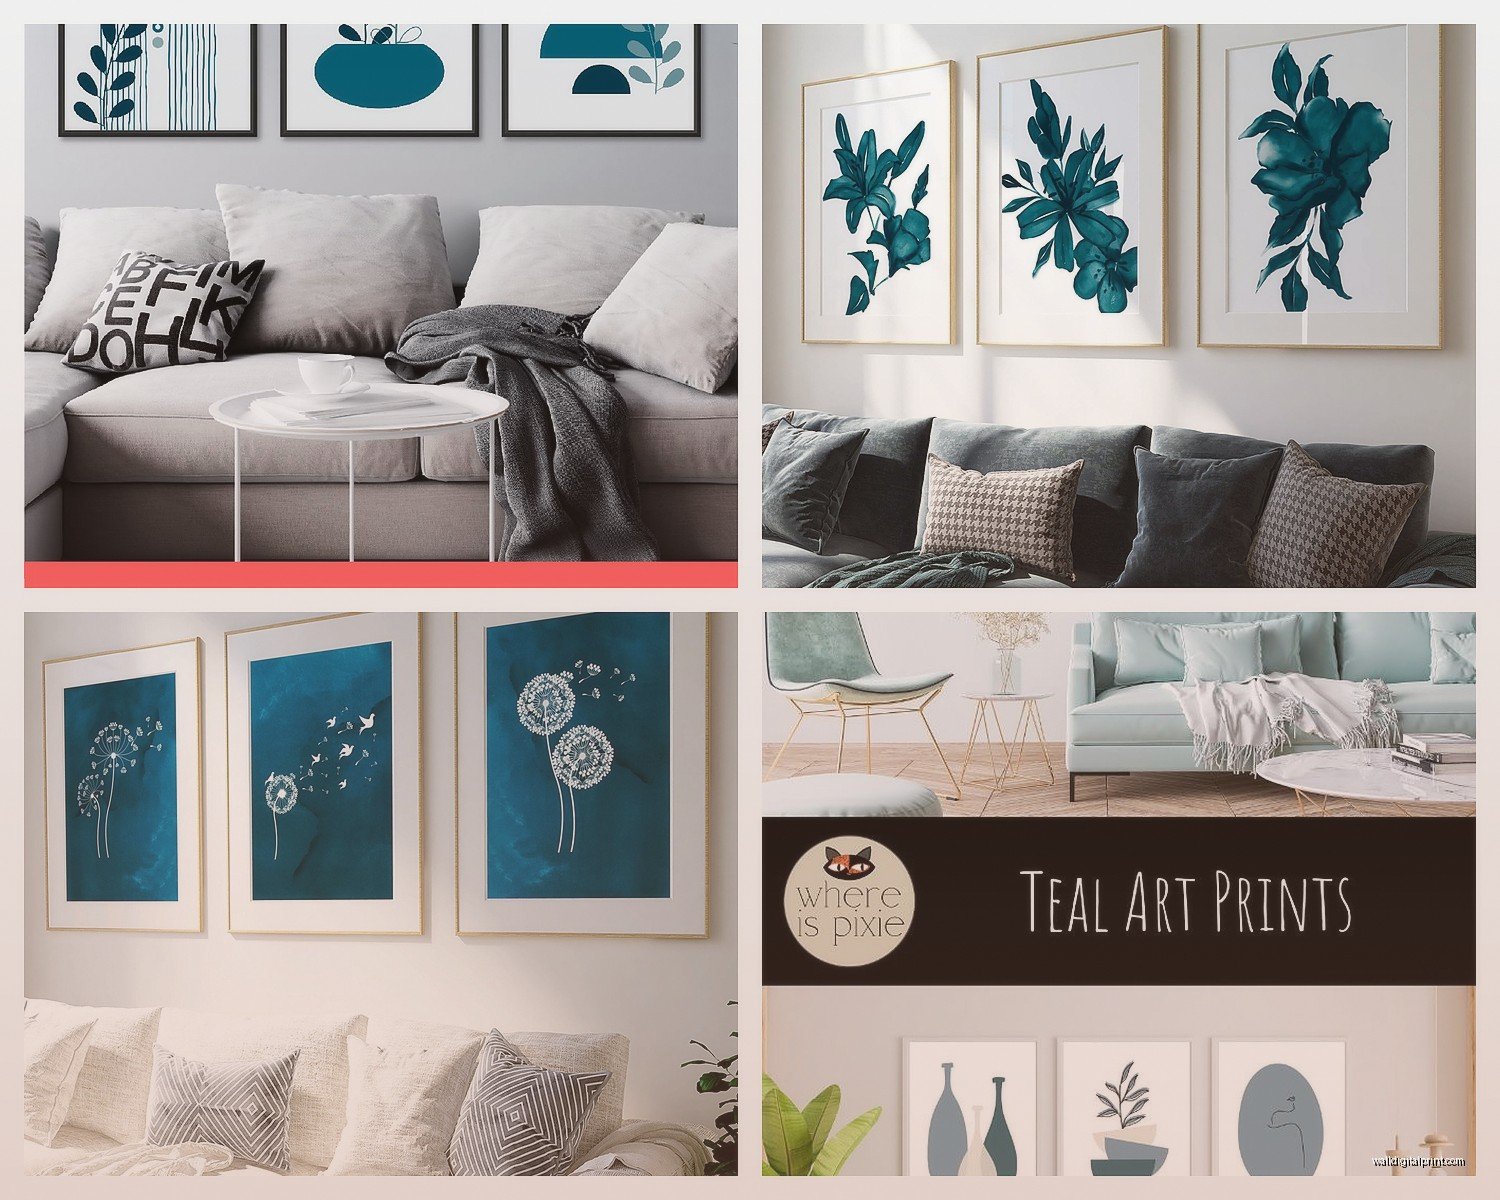
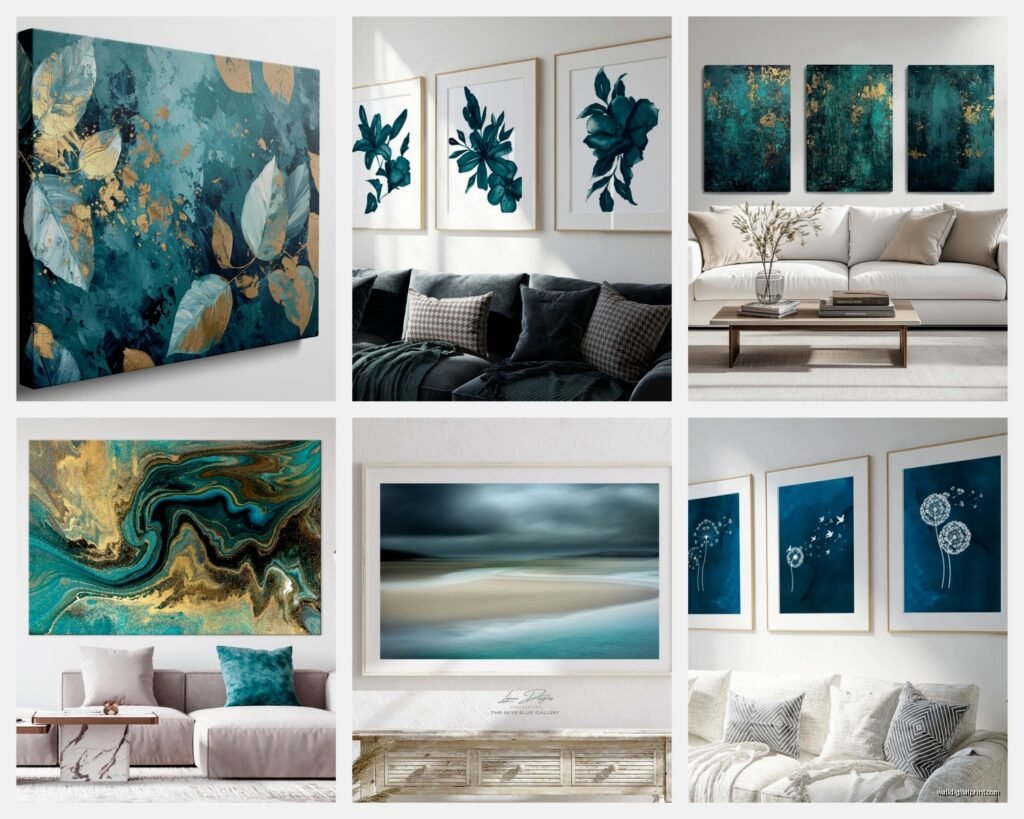
Teal Wall Art for Living Room: Ocean-Inspired Accent Pieces
Apr
So I’ve been obsessing over teal wall art lately because my sister called me last month completely panicking about her beige living room and honestly, once you start looking at ocean-inspired pieces, it’s like falling down this gorgeous blue-green rabbit hole.
The first thing you gotta know is that not all teal is created equal. I learned this the hard way when I ordered what looked like this perfect turquoise abstract piece online and it showed up looking more like…sad hospital scrubs green? The lighting in product photos is SO misleading. Now I always check if sellers include photos in different lighting conditions, and if they don’t, I literally message them and ask. Most good sellers will send you additional pics if you just ask.
Canvas vs Metal vs Acrylic Prints
Okay so canvas is obviously the most common and there’s a reason for that. I’ve tested probably 15 different canvas prints in the past year alone and the quality difference is wild. The cheap ones from those mass production sites? They fade SO fast if you have any natural light. Like my client had this beautiful teal wave canvas and within 6 months it looked washed out because it was across from a west-facing window.
What actually works: look for UV-resistant inks and at least 1.5 inch thick stretcher bars. The thin ones (like 0.75 inch) look cheap from the side and they warp easier. I usually go with gallery-wrapped edges so you don’t need a frame, which keeps costs down and honestly looks cleaner with ocean themes.
Metal prints though…okay this is gonna sound weird but they’re my secret weapon for teal art. The colors POP in a way canvas just can’t match. There’s this one company I keep going back to that does aluminum prints with this special coating and the teal tones have this luminous quality that actually shifts slightly depending on the angle you look at it. It mimics how water reflects light and it’s just *chef’s kiss*. They’re more expensive, usually starting around $150 for a decent size, but they last forever and you can clean them with just a damp cloth.
Acrylic is the fancy option. I have one acrylic teal abstract in my own living room and guests always think it cost way more than it did. The depth you get with the layered effect is unreal. But they’re HEAVY so make sure your wall can handle it and use proper anchors.
Size and Scale Mistakes Everyone Makes
I cannot tell you how many times I walk into someone’s house and they’ve got this tiny 16×20 piece on a massive wall looking lost and sad. Here’s my actual formula that I use: measure your wall space, then go at least 2/3 to 3/4 of that width. So if you have a 6-foot wide wall section above your couch, you want art that’s around 48-54 inches wide minimum.
You can do this with one large piece or a gallery wall. Actually wait I forgot to mention – gallery walls with ocean-inspired teal art are having a moment right now but they’re tricky to pull off. You need an odd number of pieces (3, 5, or 7 works best) and vary the sizes. I usually do one large anchor piece and then smaller complementary pieces around it.
My cat knocked over my coffee while I was arranging a gallery wall layout last week and honestly it was a blessing because I had to start over and the second attempt looked way better. Sometimes you just gotta play with it on the floor first before you start putting holes in your wall.
Material Combinations That Actually Work
So here’s something I discovered kind of by accident – mixing materials in your teal art creates this really dynamic look. Like pairing a smooth canvas abstract with a textured piece that has actual dimension. There are these amazing resin pieces now where artists pour layers of teal resin to create this 3D ocean effect and when you put that next to a flat print, it creates visual interest.
I found this artist on Etsy who does geode-style resin art in teal and gold and the way the resin catches light is insane. Fair warning though, real resin art is expensive (we’re talking $300-800 depending on size) and it’s heavy. But if you have the budget for one statement piece, that’s where I’d spend it.
Another combo I love: teal photography prints with natural wood frames. There’s something about pairing that cool blue-green with warm wood tones that just works. I usually go with lighter woods like oak or maple rather than dark walnut because it keeps things feeling coastal and airy.
The Texture Question
Okay so texture is where things get interesting. Flat prints are fine but they can feel kinda meh in person. I’ve been experimenting with different textured options and here’s what actually makes a difference:
Embellished canvas where they add gel medium or actual paint on top of the print – this gives you that hand-painted look without the hand-painted price. You can find these for around $80-200 and they look way more expensive than they are.
Woven wall hangings in teal are having this huge comeback. I was skeptical at first because they felt very 70s but the modern ones are gorgeous. Macrame with teal and cream creates this soft, organic vibe that works especially well if your living room has other natural elements.
Wood wall art – like those pieces where they cut thin strips of wood and paint them in different teal shades to create a gradient or wave effect. Super trendy right now and they add this architectural element that’s really cool. My only complaint is they collect dust like crazy so if you have allergies, maybe skip these.
Color Combinations You Need to Know
This is probably the most important part honestly. Teal can look amazing or terrible depending on what you pair it with. Colors that consistently work:
Coral and teal – this is the classic beach combo and there’s a reason it’s everywhere. The warm coral balances the cool teal perfectly. I usually do teal as the dominant color with coral accents.
Gold and teal – if you want something more sophisticated and less beachy, this is it. Brass or gold frames with teal art, or art that incorporates both colors, reads as really elegant. Works especially well in living rooms with modern or glam vibes.
Navy and teal – layering different blue-greens creates depth without being too matchy-matchy. I like to go darker navy on things like throw pillows and lighter teal on the wall art.
White and teal – the safest option if you’re nervous about color. Very crisp and coastal. Can’t really go wrong here but it might feel a bit safe depending on your style.
What doesn’t work as well: teal with red (too primary), teal with purple (gets muddy unless you really know what you’re doing), teal with too many competing colors (I see this all the time where someone has teal art but also yellow pillows and orange throws and pink curtains and it’s just chaos).
Where to Actually Buy This Stuff
Real talk about where I source teal wall art because this matters way more than people think:
Etsy is my go-to for unique pieces. You’re buying from actual artists and the quality is usually way better than mass-produced stuff. Plus you can often request custom sizes or colors. I’ve commissioned probably 10 pieces through Etsy and only had one bad experience. Just make sure to check reviews and look at how long the shop has been open.
Society6 and Minted are good for prints if you’re on a budget. They have tons of teal ocean designs and you can get the same image on different materials to see what you like. Quality is pretty consistent and they have good return policies.
Local art fairs and markets – okay this sounds obvious but I find the BEST pieces at local art shows. You can see the actual colors in person which is huge with teal, and you can talk to the artist about sizing or customization. Plus you’re supporting local artists which feels good.
HomeGoods/TJ Maxx – gonna be honest, this is hit or miss. I’ve found some incredible deals on teal wall art there (like $40 for something that looks way more expensive) but you have to go regularly because inventory changes constantly. I stop by every couple weeks when I’m running errands.
One place I’ve stopped shopping: those print-on-demand websites that advertise all over Instagram. I’ve ordered from three different ones and the quality was terrible every single time. The colors were off, the canvas was flimsy, just not worth it even though they’re cheap.
Installation Tips Nobody Tells You
So you bought the perfect teal ocean art and now you gotta hang it without making holes in the wrong place. Here’s my actual process:
Use paper templates first. Trace your art on paper (or use the packaging if it’s sturdy enough), tape it to the wall, and live with it for a day or two. I know this sounds excessive but I’ve saved myself from so many mistakes this way. The art that looks perfect in one spot in the morning might get weird shadows in the afternoon.
Height matters SO much. The center of your art should be at eye level, which is usually around 57-60 inches from the floor. But this changes if you have furniture underneath – then you want 6-8 inches between the furniture top and the bottom of the art.
For heavy pieces (anything over 20 pounds), you absolutely need wall anchors or studs. I use toggle bolts for drywall and they haven’t failed me yet. Don’t trust those little plastic anchors that come with frames, they’re useless for anything substantial.
Lighting can make or break teal art. If you have the budget, picture lights are amazing. They bring out all the color variations in the teal that you might miss otherwise. Even just repositioning a floor lamp to highlight the art makes a huge difference.
Styling Around Your Teal Art
The art is just the starting point, you gotta style around it to make it feel cohesive. What’s actually worked in real living rooms:
Pull one accent color from the art and repeat it in 2-3 other places. So if your teal art has hints of coral, add coral pillows and maybe a coral throw blanket. This creates visual flow.
Add natural elements – driftwood, shells, coral (faux please), sea glass. But don’t go overboard or it feels too themed. Like one bowl of shells on the coffee table, not shells everywhere.
Layer in different textures. If your teal art is smooth canvas, add a chunky knit throw, some linen pillows, maybe a jute rug. This keeps the ocean theme from feeling flat.
Keep the wall color neutral. I know it’s tempting to paint your walls teal too but it’s usually too much. White, cream, light gray, or even a soft beige lets the art be the statement.
Oh and another thing – don’t feel like everything has to match perfectly. I see people stressing about finding the EXACT same shade of teal in their pillows as their art and honestly, slight variations look more collected and intentional.
Budget Breakdown
Since everyone always asks about cost, here’s what I typically spend:
Budget option: $50-150 – You can get nice canvas prints or smaller pieces in this range. Stick with reputable sites and check reviews obsessively.
Mid-range: $150-400 – This is the sweet spot honestly. You can get larger canvases, metal prints, or original art from emerging artists. This is where I spend most of my money.
Investment pieces: $400+ – Original paintings, large-scale resin pieces, commissioned work. If you’re gonna splurge on one piece, make it the focal point of your living room.
You don’t need to spend a fortune to make it look good. I’ve mixed a $60 print from Society6 with a $300 original painting and they looked great together because I paid attention to color, scale, and framing.
The main thing is just starting somewhere. I spent like three months overthinking my sister’s living room art before finally just ordering something, and once that first piece went up, the rest fell into place way easier. Sometimes you gotta see it on the wall to know what works.