Wall Art Guide, Wall Art Tutoriels
Wooden Wall Art for Living Room: Natural Wood Decor
Apr
So I’ve been completely obsessed with wooden wall art lately and honestly it started because I hung this reclaimed barn wood piece in my own living room and now every client wants something similar. Let me just dump everything I know about picking and working with natural wood decor because I’ve made ALL the mistakes so you don’t have to.
Types of Wood You’ll Actually Find
Okay so first thing, not all wood wall art is created equal and the type of wood matters way more than I thought it would. Pine is everywhere and it’s cheap, which sounds great until you realize it dents if you look at it wrong. I learned this when my dog’s tail knocked a pine piece off the wall and it literally got a dent from hitting the carpet. Carpet!
Cedar though, cedar is interesting because it smells amazing and resists moisture naturally. I’ve used it in a few living rooms that get humid and it holds up. The grain is usually pretty subtle so if you want that dramatic wood look, cedar might read a bit flat.
Walnut and oak are where things get expensive but also really beautiful. Walnut has this rich dark color that doesn’t even need stain, and oak has those prominent grain lines that catch light in a really cool way. I splurged on a walnut geometric piece for a client’s midcentury living room and it was like $400 but honestly it made the whole room.
Reclaimed wood is its own category and I’m gonna be real with you, sometimes “reclaimed” just means “we made new wood look old” which like, fine, but know what you’re paying for. Real reclaimed barn wood or old fence wood has this weathered texture and color variation you can’t fake. It’s also usually harder to work with because the pieces are all different sizes.
Finishes and Treatments You Need to Know About
This is where I see people mess up constantly. You find a gorgeous piece of raw wood art and hang it and then six months later it’s cracked or warped or the color changed completely.
Natural/raw wood needs to be sealed unless you specifically want it to age and change. I use a matte polyurethane on most pieces, just a couple thin coats. Makes it way easier to dust too. Some people are all about tung oil or danish oil and yeah those look great but they need reapplication and honestly who’s gonna remember to do that.
Stained wood can go really wrong really fast. I watched someone on Instagram try to stain a piece they bought and it came out so blotchy because different wood species absorb stain differently. If you’re buying something pre-stained, make sure you see it in different lighting because what looks like a nice medium brown in their photos might be straight up orange in your living room lighting. Ask me how I know.
Painted wood art is having a moment and I’m here for it when it’s done well. White-washed or limewashed wood keeps that texture visible while brightening things up. Solid painted wood pieces can look amazing in a modern space but make sure the paint job is actually good quality because cheap paint on wood chips so easily.
Size and Scale Because Everyone Gets This Wrong
Okay so funny story, I once ordered a “large” wooden wall art piece for above a client’s sofa and it arrived and was maybe 20 inches wide. Their sofa was 8 feet long. It looked like a postage stamp on the wall. So here’s my actual sizing guide that I now follow religiously.
Above a sofa, your art should be roughly two-thirds to three-quarters the width of the sofa. So an 8-foot sofa needs something around 5-6 feet wide. You can do a gallery wall of smaller wooden pieces to achieve this width but each individual piece should still be substantial, like at least 24 inches.
For a blank wall, measure the wall space and don’t go smaller than one-third of the width. A 10-foot wall can handle a 40-inch piece comfortably. But also consider height because wood art tends to be heavy visually. A really tall narrow piece can work in spaces where you need to draw the eye up.
I’ve started telling people to make paper templates and tape them to the wall before ordering. Sounds ridiculous but I was watching this documentary about art heists while doing this for my own place and it saved me from buying something way too small.
Styles That Are Actually Available
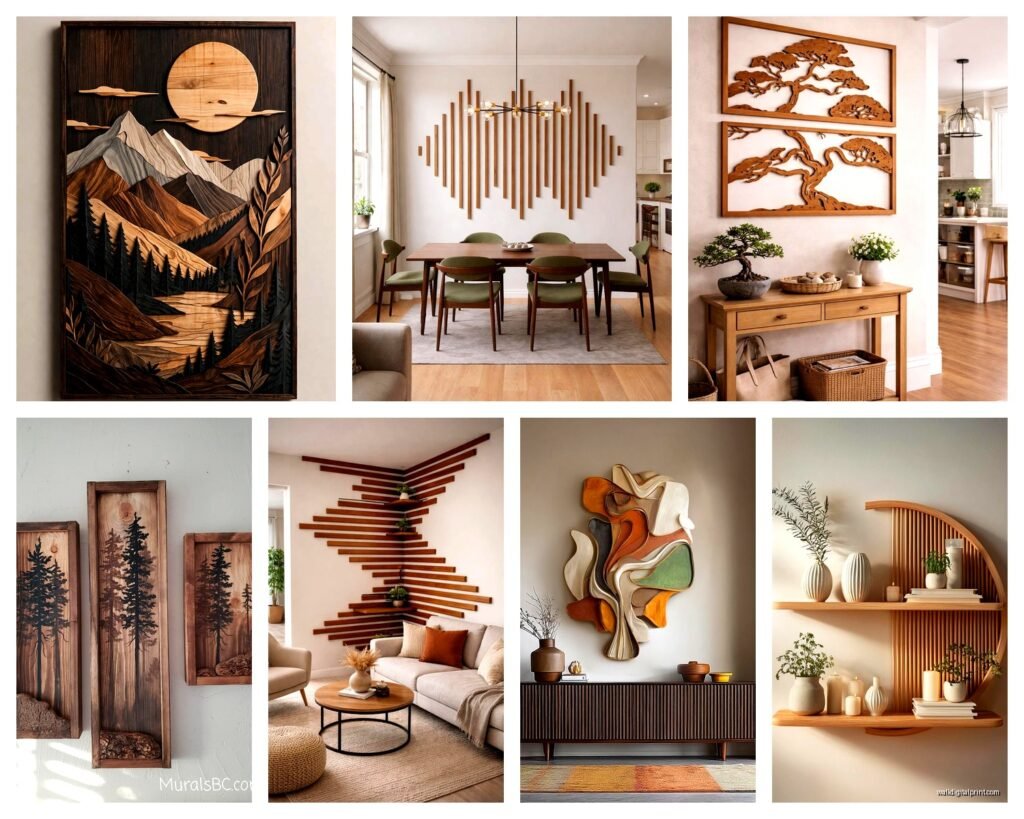
Wood slice art is probably the most common and it’s those circular cuts from tree trunks. They look really organic and natural but can read cottage-y if you’re not careful. I’ve seen them work best when they’re grouped in odd numbers and mixed with more modern elements.
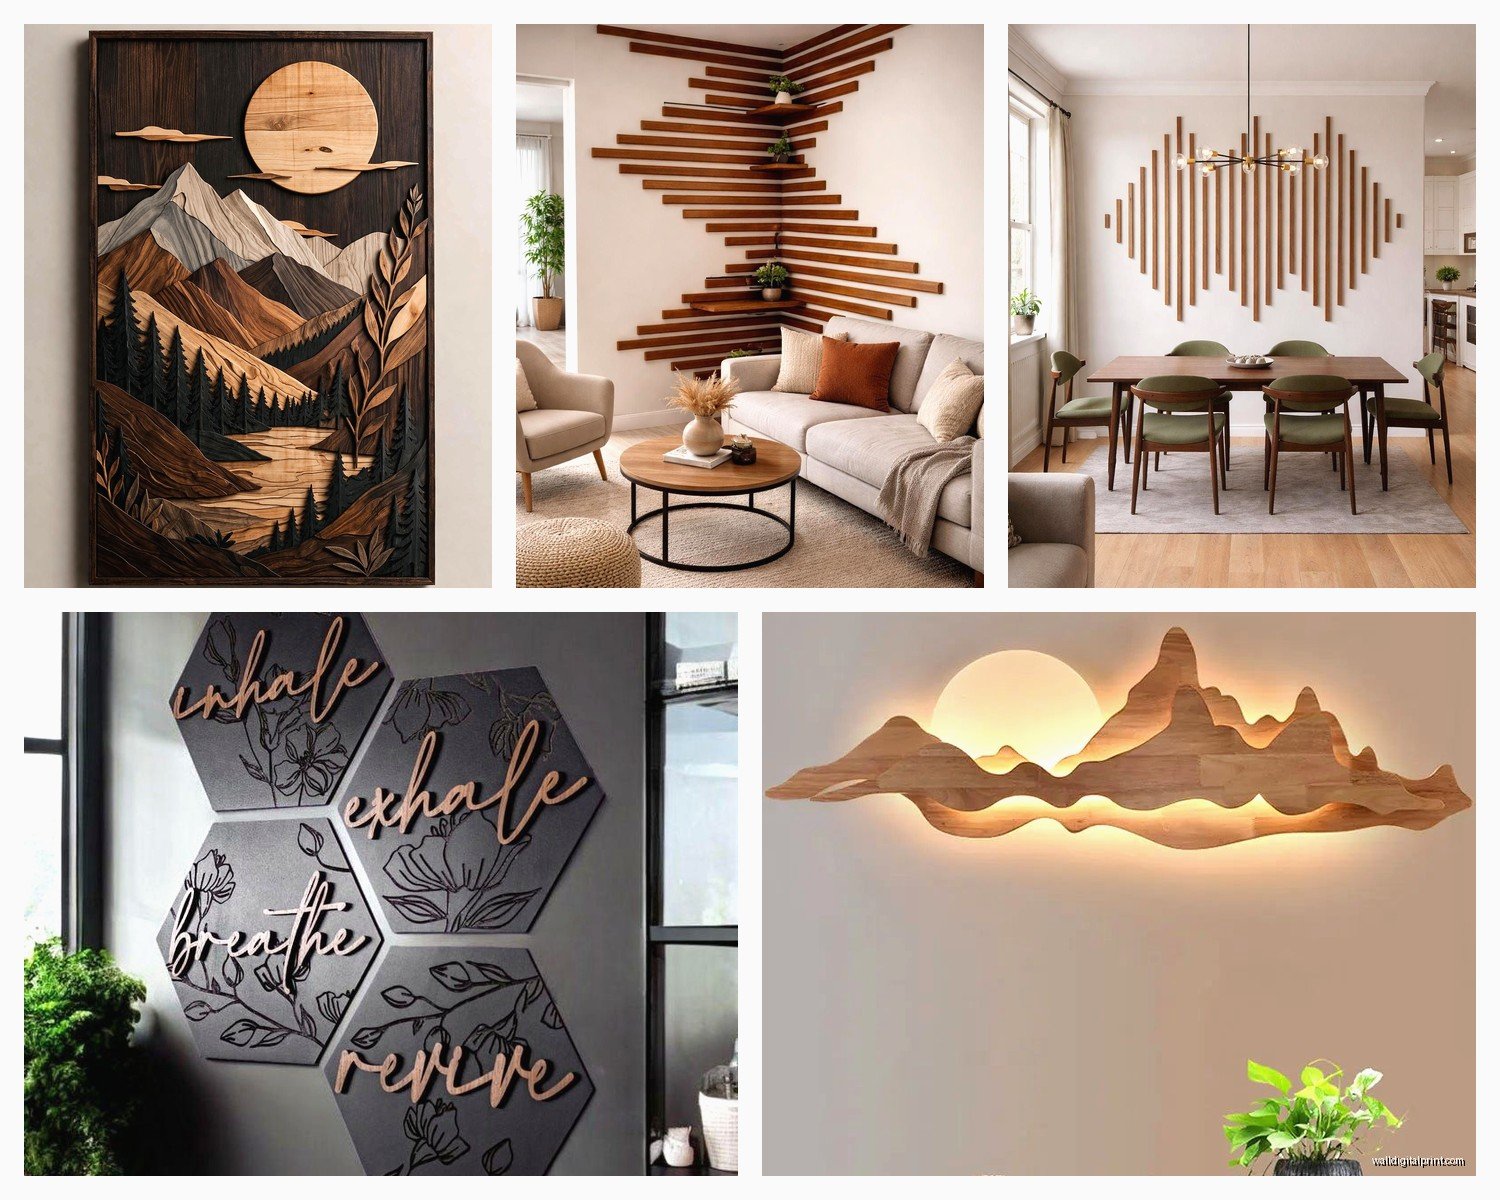
Geometric wooden art is my personal favorite right now. Think triangles, hexagons, chevron patterns made from different wood tones. These work in modern and transitional spaces really well. The dimensional ones where pieces stick out at different depths are especially cool because they create shadows that change throughout the day.
Carved wood panels are gorgeous but heavy, both literally and visually. I’m talking like mandala patterns or nature scenes carved into solid wood. These need a lot of wall space to breathe. Don’t put one in a small living room with tons of other stuff.
Wood wall sculptures are kind of abstract pieces that might be driftwood or branches or carved shapes. These are statement pieces and you either love them or hate them. I had a client who was obsessed with this massive driftwood installation and her husband thought it looked like firewood on the wall. They compromised with something smaller.
Reclaimed wood assemblages are those pieces made from different sized strips of old wood, usually in various weathered colors. Super popular for farmhouse and rustic industrial spaces. The good ones have real depth and texture, the cheap ones look like someone hot-glued some sticks to a board.
Where to Actually Buy This Stuff
Etsy is honestly my go-to for unique pieces. You’re buying directly from makers usually and can often get custom sizes. Just read reviews carefully because shipping wood art is tricky and some sellers don’t pack well. I’ve received pieces with corners broken off more than once.
West Elm and CB2 have solid options if you want something more standardized. Their quality is consistent and returns are easy. Prices are mid-range. Nothing super unique but won’t fall apart.
Local artisan markets or craft fairs are where I’ve found my favorite pieces. You can see the actual quality in person and usually talk to the person who made it. Plus you can check if it’s actually sealed properly.
Home Goods and TJ Maxx sometimes have wooden wall art and it’s hit or miss. I’ve found some great deals but also some absolute garbage that fell apart when I tried to hang it. If you go this route, inspect it really carefully in the store.
Installation Tips Nobody Tells You
Wood is heavy. Like really heavy. Don’t use those little picture hanging strips unless the piece is tiny and super thin. I’ve had pieces fall off walls at 3am and it’s terrifying.
For anything over 10 pounds, use proper wall anchors or hit a stud. I use these heavy duty picture hangers rated for like 50 pounds because I’d rather overkill it. Most wooden art has a sawtooth hanger or D-rings on the back. Sawtooth hangers are easier but D-rings with wire are more secure for heavier pieces.
Level it properly or it’ll drive you crazy. I use a laser level now because trying to eyeball it while holding a heavy wooden piece is how I ended up with holes all over my wall. Also if you’re hanging multiple pieces, map it out with painters tape first.
Some wooden pieces, especially reclaimed ones, shed. Like little bits of wood or bark fall off. Put it up and give it a good shake before you install it to get the loose bits off, otherwise you’ll have debris on your floor forever.
Styling Around Wooden Wall Art
Don’t do wood on wood on wood. I see this all the time where someone has wood floors, wood furniture, wood art, wood picture frames and it all just blends together. Your wooden wall art needs contrast to stand out. White or light colored walls work great. Even a bold paint color can make wood art pop.
Mix your textures. If you have smooth polished wood art, add some nubby textured pillows or a chunky knit throw. If your wood art is rough and rustic, balance it with some sleek metal or glass elements.
The wood tone should either match your other woods or be deliberately different. Having oak floors, walnut art, and pine furniture all in slightly different medium browns looks unintentional. Either match the tones or go with something dramatically lighter or darker.
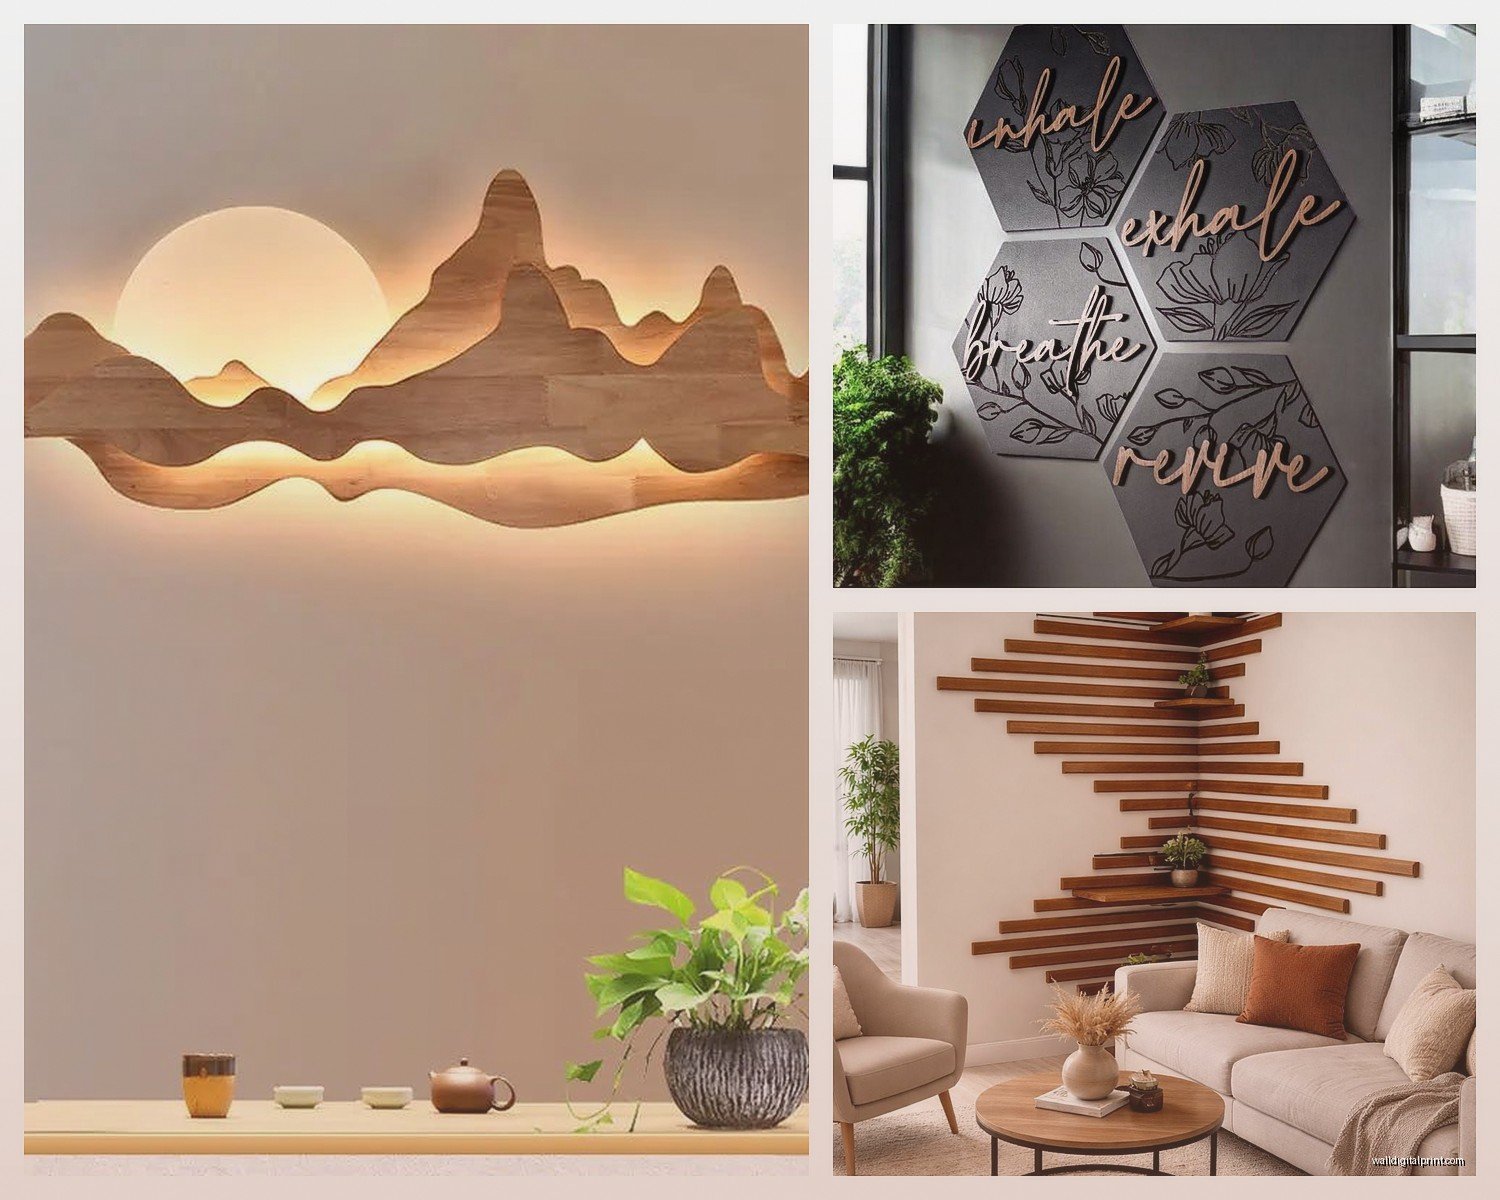
Living plants next to wood art is *chef’s kiss* honestly. The organic shapes complement each other and it reinforces that natural vibe without being too matchy.
Lighting Considerations
Direct sunlight will fade and damage wood over time. I learned this the hard way with a beautiful piece that got bleached out over one summer. If your art wall gets afternoon sun, consider UV protective glass if it’s in a frame, or just position it somewhere else.
Adding a picture light or uplighting makes dimensional wood art look incredible at night. Those shadows I mentioned earlier? Even better with intentional lighting. You don’t need anything fancy, even a small LED spotlight works.
Maintenance Real Talk
Dust your wood art regularly with a soft cloth. Sounds basic but dust buildup can get into crevices and is annoying to clean out later. I just hit mine with a microfiber cloth when I’m cleaning anyway.
If it’s sealed properly you can very lightly dampen your cloth for sticky spots but don’t soak it. Water and wood are not friends. Unsealed wood should only be dusted dry.
Check the hanging hardware every few months especially for heavy pieces. Screws can loosen over time and you don’t want to come home to your art on the floor.
Some pieces might need reconditioning every few years depending on the finish. Oil-finished pieces especially benefit from a fresh coat of oil to keep them looking rich. I usually do this when I’m deep cleaning anyway.
Common Mistakes to Avoid
Buying something just because it’s trendy. That arrow made of pallet wood was everywhere three years ago and now it’s dated. Choose pieces you actually connect with.
Hanging it too high. The center of your art should be at eye level, which is roughly 57-60 inches from the floor. Above furniture it should be 6-8 inches above the furniture top.
Not considering the room’s existing style. A super rustic wood piece in a minimalist modern room might look out of place unless that’s the intentional contrast you want.
Forgetting about scale in relation to ceiling height. Standard 8-foot ceilings need different proportions than 10-foot ceilings. Higher ceilings can handle taller or larger pieces.
Going too matchy with a whole set. Those sets of three identical pieces in graduated sizes can look really catalog. Mix it up a bit.
Oh and another thing, don’t assume expensive means better quality. I’ve seen $50 pieces from local makers that blow away $300 pieces from fancy stores. The maker’s skill and attention to detail matters way more than the price tag. Check how the piece is actually constructed, if edges are smooth, if the finish is even, if hardware is secure.
Wait I forgot to mention, if you have a very specific vision, commissioning a piece might cost less than you think. I’ve worked with several wood artists who charge like $200-300 for custom work and you get exactly what you want in the right size and colors for your space. Just make sure you see examples of their previous work first because artistic vision varies wildly.