Wall Art Guide, Wall Art Tutoriels
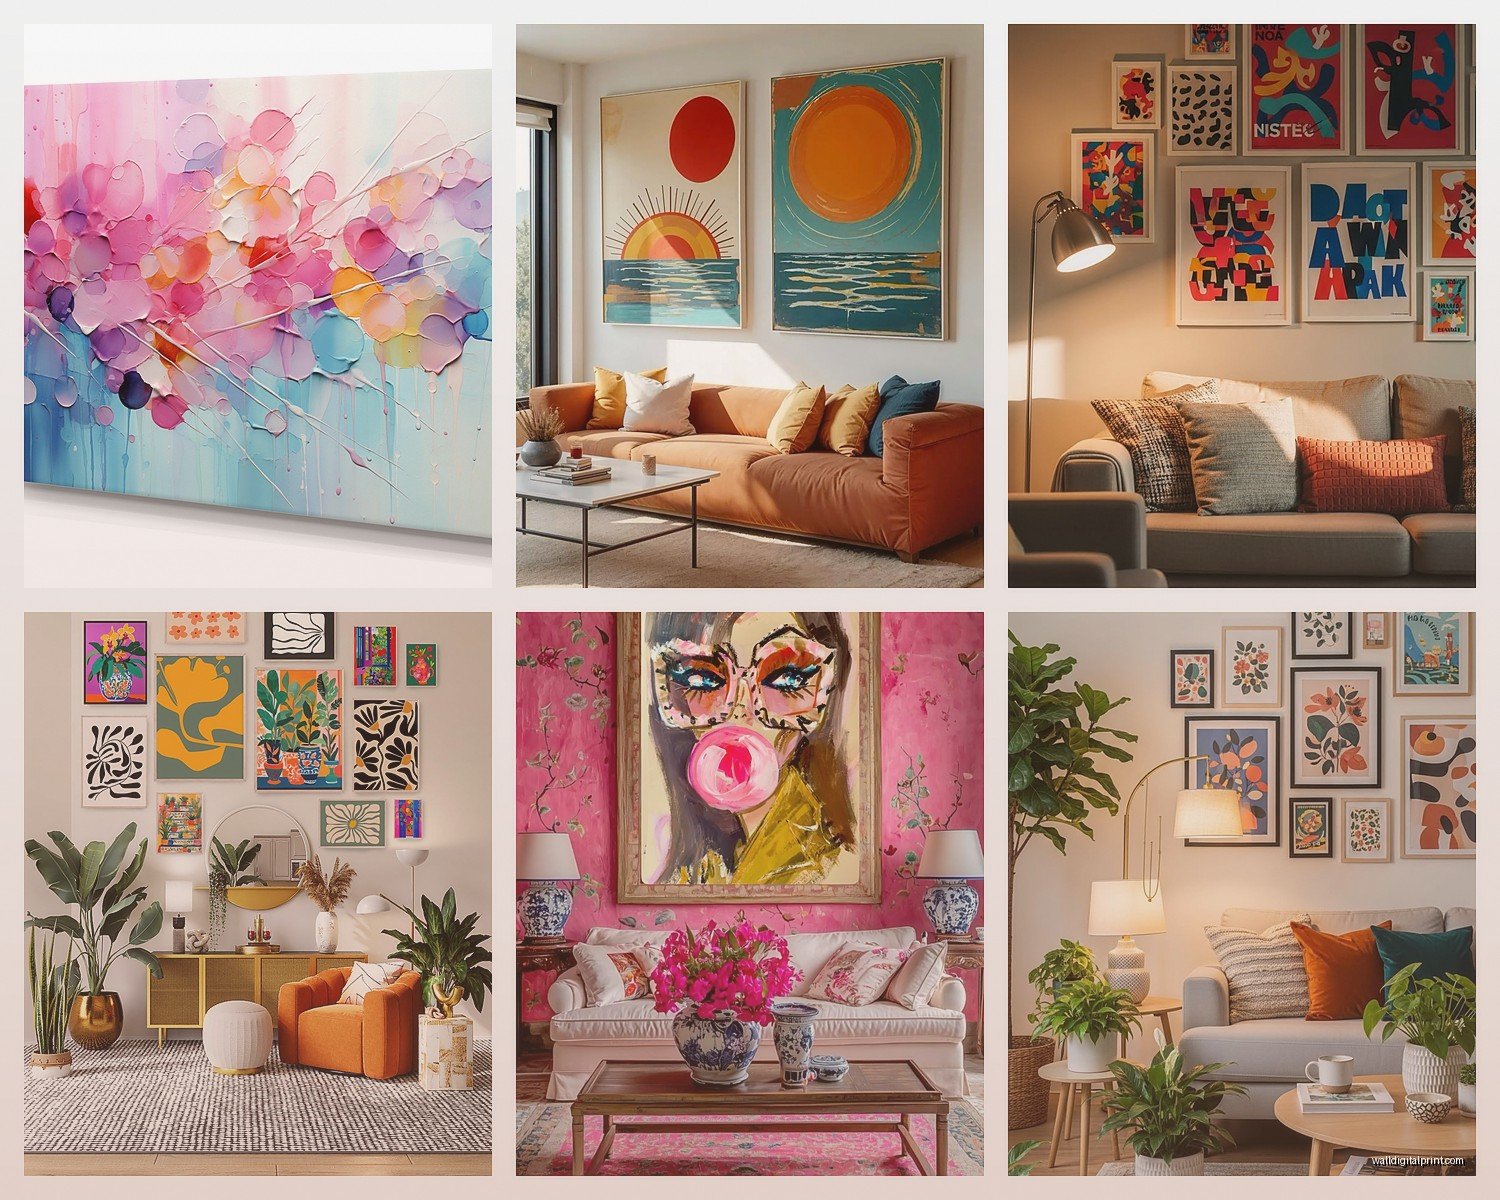
Colorful Wall Art Living Room: Bright Multi-Hue Main Space
Apr
So I’ve been working on this living room project for the past three weeks and honestly the whole colorful wall art thing is way more complicated than it looks on Pinterest. Like, you’d think you just throw up some bright pieces and call it a day but there’s actually a method to making it look intentional instead of like a college dorm exploded.
First thing – and I learned this the hard way after ordering five pieces that absolutely did NOT work together – you gotta pick your color story first. I know that sounds obvious but hear me out. When people say “colorful” they usually mean one of three things: rainbow gradient situation, analogous colors (like blues-greens-teals all playing together), or complementary pops (think orange and blue, or pink and green). You can’t just grab every bright thing you see because then it looks chaotic in a bad way.
I usually start with the biggest piece of furniture in the room. Like if you’ve got a navy sofa, that’s your anchor. Then I pull 3-4 colors from around the color wheel that either harmonize with it or deliberately contrast. My client last month had this gorgeous emerald velvet couch and we went with coral, mustard yellow, and deep purple for the art. Sounds insane written out but it worked because we kept repeating those exact shades.
Gallery Wall vs Statement Piece Strategy
Okay so here’s where people get stuck. Do you do one massive colorful piece or a whole gallery wall? I’ve done both about a million times and here’s what I tell everyone: if your living room is under 250 square feet, go with one large piece (like 40×60 inches minimum) or a diptych. Small rooms with tons of small art feels cluttered and honestly gives me anxiety.
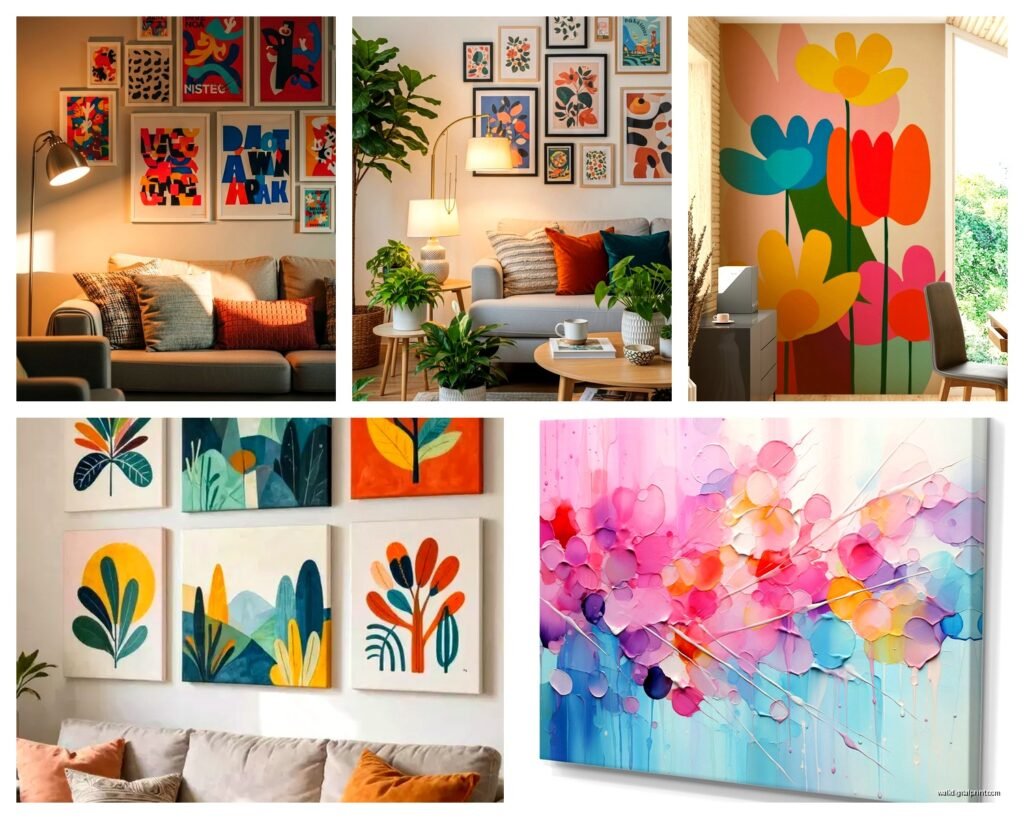
For bigger spaces – and I’m talking like 300+ square feet – a gallery wall actually helps fill the visual weight better. But you gotta have an odd number of pieces. I usually do 7 or 9 pieces for a standard wall. The layout matters SO much though. I spent probably two hours last Thursday laying out frames on my studio floor before hanging anything because once those nails are in the wall you’re kinda committed.
The trick with colorful gallery walls is varying the saturation levels. Not every piece should be screaming at maximum brightness. I do maybe 40% super vibrant, 40% medium saturation, and 20% almost neutral with just pops of color. Otherwise your eye doesn’t know where to land and it’s just exhausting to look at.
Actual Art Sources That Don’t Suck
Real talk – original art is expensive and most people don’t have $3000 to drop on one piece. I use a mix of sources depending on the client’s budget. Society6 and Minted are my go-to for affordable prints that actually look decent. The quality is consistent and you can get them framed which saves so much hassle.
Etsy is hit or miss but when you find a good artist it’s golden. I found this abstract artist last year who does custom color combinations and she’s done like four pieces for different clients now. Just search for “custom colorful abstract art” and filter by reviews over 1000.
Oh and another thing – don’t sleep on local art fairs and student shows. I got this incredible 36×48 acrylic piece from a college senior exhibition for $400 and it’s probably my favorite thing I’ve ever sourced. The colors were perfect – hot pink, turquoise, and this weird chartreuse that shouldn’t work but does.
If you’re really on a budget, you can do the DIY route but like… only if you’re actually gonna commit. I tried the “pour painting” thing during lockdown and it was a disaster until I watched probably ten hours of YouTube tutorials. Now I make them for staging sometimes. You need way more paint than you think though, that’s the thing nobody tells you.
The Framing Situation
This is gonna sound weird but frame choice matters more than the actual art sometimes. I’ve seen gorgeous prints look cheap because of bad framing and mediocre prints look expensive with the right frame.
For colorful art, I usually go three directions:
– Simple black frames (classic, lets the art pop, works with everything)
– Natural wood frames (warmer vibe, good for bohemian or mid-century spaces)
– White frames (clean and gallery-like but shows dust like crazy)
Mixed metallics can work if you’re doing a gallery wall but you gotta be careful. Like brass and black together? Yes. Brass and silver and black? That’s too many finishes and it gets messy.
The mat situation is personal preference but I’m team mat for anything under 24×36 inches. It gives the art breathing room. I usually do white mats for colorful pieces because colored mats can compete with the art itself. Although I did a coral mat with a predominantly blue abstract once and it was *chef’s kiss*.
Hanging Height Because Everyone Gets This Wrong
Center of the art should be at 57-60 inches from the floor. That’s museum standard and there’s a reason for it – it’s average eye level. I see so many living rooms where the art is hung way too high like it’s floating away.
For gallery walls though you treat the whole collection as one piece. Find the center point of your entire arrangement and THAT goes at 57 inches. I use painter’s tape to map everything out on the wall first. My cat kept attacking the tape strips last time I did this which was annoying but also hilarious.
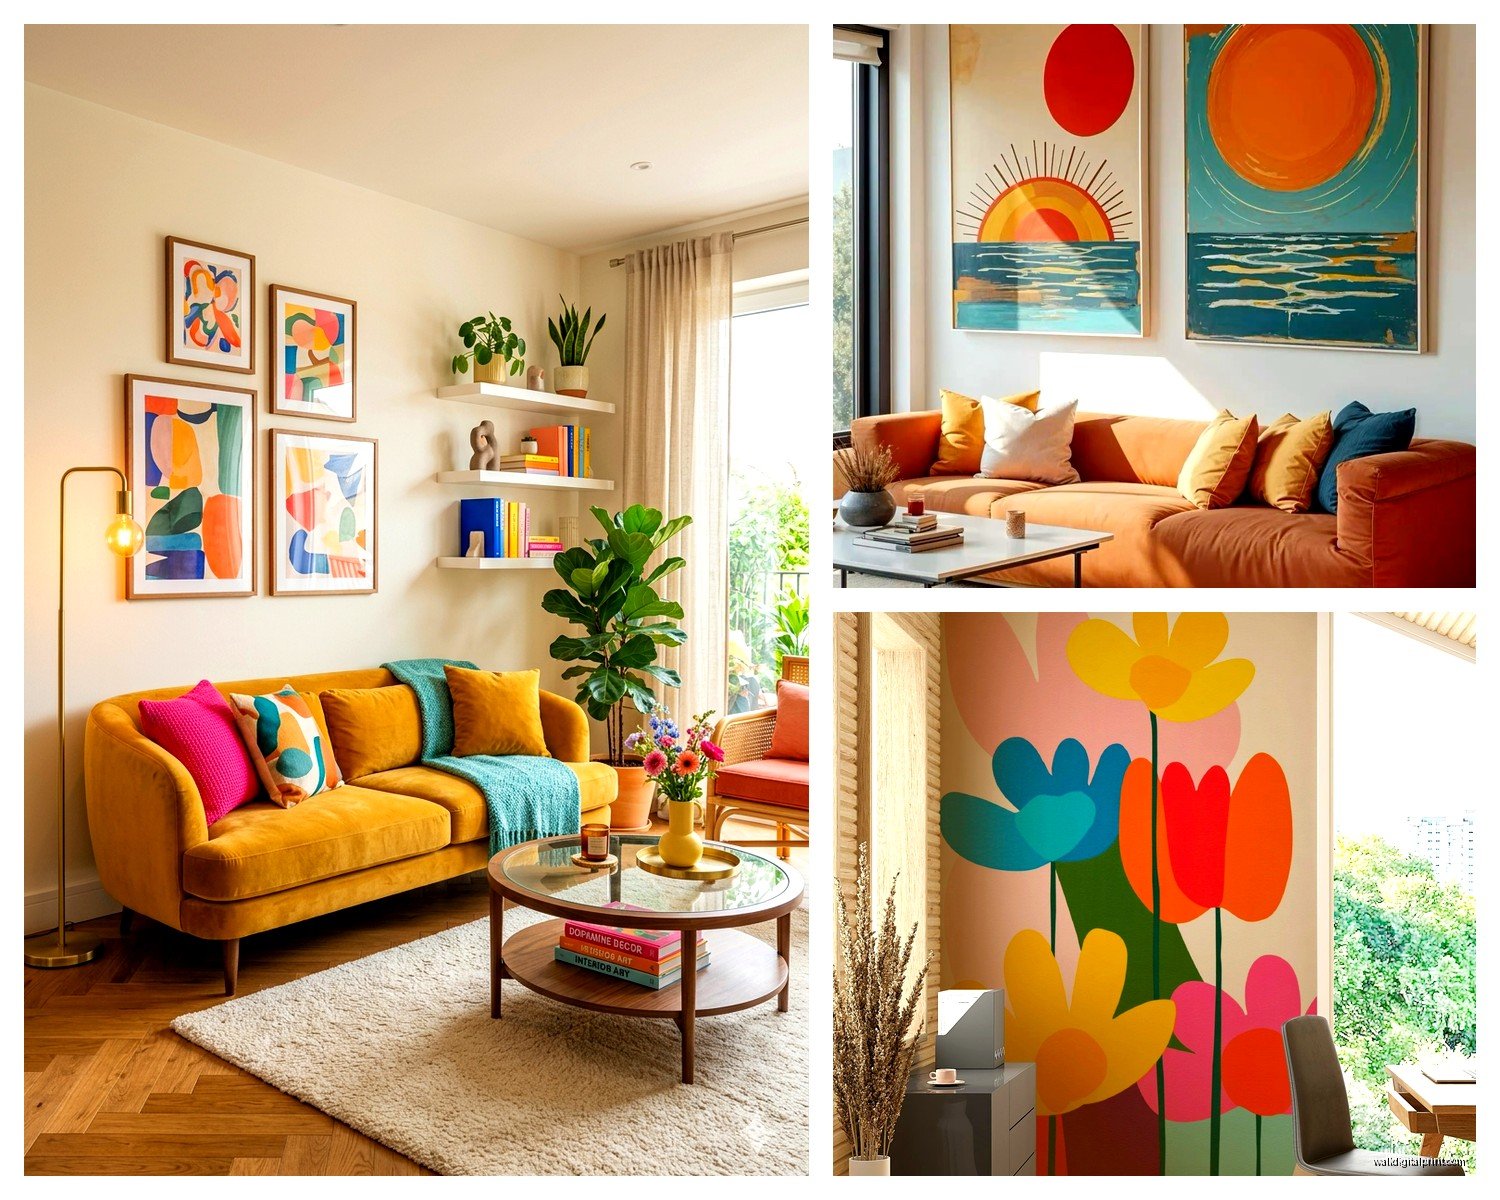
Color Distribution Across The Room
So here’s something I figured out kind of by accident – if all your color is on one wall it looks unbalanced. You gotta echo those colors throughout the space. Not like matchy-matchy, but enough that your eye travels around the room.
If your wall art has a lot of yellow, get some yellow throw pillows or a mustard blanket. There’s coral in the art? Maybe a coral vase or some books with coral spines on the coffee table. I know that sounds fussy but it’s what makes a room look designed instead of decorated.
I did this living room in Brooklyn last year where we had this massive abstract piece with like eight different colors. We pulled samples of each color and found ways to repeat them – turquoise lampshade, pink velvet chair, orange spine books, yellow flowers. It sounds like a lot but in person it was cohesive and actually pretty calming somehow.
Lighting Makes Or Breaks It
You can have the most incredible colorful art and if your lighting sucks nobody’s gonna see it properly. I always add picture lights or track lighting aimed at major pieces. It’s not that expensive – you can get decent picture lights for like $50-80 each.
Natural light is obviously ideal but here’s the thing about that… if you’ve got a wall that gets direct afternoon sun, be careful with prints. They’ll fade. I learned this the hard way in my own apartment – had this beautiful print that was basically bleached out after eight months. Now I use UV-protective glass for anything in direct sun zones.
The color temperature of your bulbs matters too. Warm white (2700-3000K) makes reds and oranges pop but can muddy blues. Cool white (3500-4100K) is better for blues and greens but can make warm colors look weird. I usually go with 3000K as a compromise or use adjustable bulbs if the client’s willing to spend a bit more.
Mixing Art Styles Without It Looking Chaotic
Wait I forgot to mention – you can totally mix abstract with figurative with geometric as long as the color palette is consistent. I’ve got a client right now with an abstract expressionist piece next to a geometric print next to a watercolor landscape and it works because they all share this teal-coral-cream palette.
The key is repetition. Pick 3-5 colors max and make sure each piece contains at least two of those colors. Not equal amounts necessarily, but they need to be present.
Also varying the scale of pattern helps. If you’ve got one piece with tiny detailed brushstrokes, pair it with something bold and graphic. The contrast actually makes both pieces look better.
The Actual Hanging Process
Okay practical stuff. You need a level, pencil, measuring tape, hammer, and picture hanging hooks rated for the right weight. I use the ones with two nails for anything over 10 pounds because I don’t trust those single nail situations.
For heavy pieces – like anything over 30 pounds – you gotta find studs or use wall anchors. I use the toggle bolt anchors for drywall and they’ve never failed me. There’s this stud finder app that uses your phone’s magnetometer and it’s actually pretty accurate, though I still have my regular stud finder because I’m paranoid.
The gallery wall hack I use: cut out paper templates of each frame, tape them to the wall in your arrangement, nail through the paper where the hooks go, then rip the paper down. Saves so much time and prevents the swiss cheese wall effect from multiple attempts.
Common Mistakes I See Constantly
Too much white space around the art. If you’ve got a big wall, fill it properly. I see these tiny 16×20 pieces floating on huge walls and it looks so sad.
Matching the art too perfectly to the room. A little tension is good. If everything coordinates exactly it looks like a hotel.
Hanging everything in a straight line. Unless you’re doing a formal horizontal gallery, stagger the heights a bit. It’s more dynamic.
Using wire hangers instead of sawtooth or D-rings. Wire hangers make leveling so annoying and the wire shows if you’re looking from the side.
Not considering the viewing distance. Art that looks perfect from ten feet away might be boring up close if there’s no detail or texture.
Budget Breakdown From My Last Project
Just so you have real numbers… I did a 350 square foot living room last month with colorful art as the main feature. Total art budget was $1800. We did one large original piece ($650), three medium prints from Minted ($180 each with framing), and two small Etsy prints with custom frames ($200 total). Plus $150 for picture lights and $85 for hanging hardware and miscellaneous stuff.
You could definitely do it cheaper. Like if you’re comfortable with just prints and DIY framing you could probably hit a similar look for $600-800. Or go wild and spend $5000 on originals if that’s your thing.
Seasonal Rotation Strategy
This is gonna sound extra but some of my clients rotate their art seasonally and honestly it keeps the room feeling fresh. You don’t need entirely new pieces – just swap like 30% of a gallery wall or switch out the statement piece. I store the off-season art in those flat boxes under beds or in closets.
Makes sense especially if you’ve got pieces with strong seasonal color associations. Like super warm oranges and reds feel fall-ish, while bright yellows and corals are summer vibes. Though honestly if you love a piece just keep it up year-round who cares.
The main thing with colorful wall art is committing to it. Half-hearted color never works – you gotta go bold enough that it feels intentional. Start with one wall, get that right, and then you can add more. My living room took me like four months to get where I wanted it and I do this professionally so don’t feel bad if it takes time to figure out your vision.