Wall Art Guide, Wall Art Tutoriels
Creative Wall Art: Artistic Innovative Imaginative Designs
Jun
So I’ve been obsessing over wall art lately because honestly, blank walls make a room feel like you just moved in even if you’ve been there for three years. And I’m gonna be real with you, the whole “gallery wall” thing everyone does? It’s trickier than it looks and I’ve definitely hammered way too many holes in the wrong spots.
Starting With What You Actually Have Space For
Okay so first thing, measure your wall. I know, I know, everyone says this but I literally hung this massive canvas in my dining room last month and it was like… six inches too close to the ceiling and looked ridiculous. You want about 6-8 inches of space above furniture if you’re hanging above a sofa or console table, and the center of your art should be at eye level which is roughly 57-60 inches from the floor. But honestly if you’re tall or short just adjust because it’s your house.
The Size Thing Nobody Talks About
Here’s what I learned the hard way: your art should take up about 2/3 to 3/4 of the wall space above furniture. So if you have a 6-foot sofa, you’re looking at art that’s around 48-54 inches wide. You can do one large piece or a grouping, but that ratio actually matters more than I thought it would. My client last week had these tiny 8×10 frames above this huge sectional and it just looked… lost?
Types of Wall Art That Actually Work
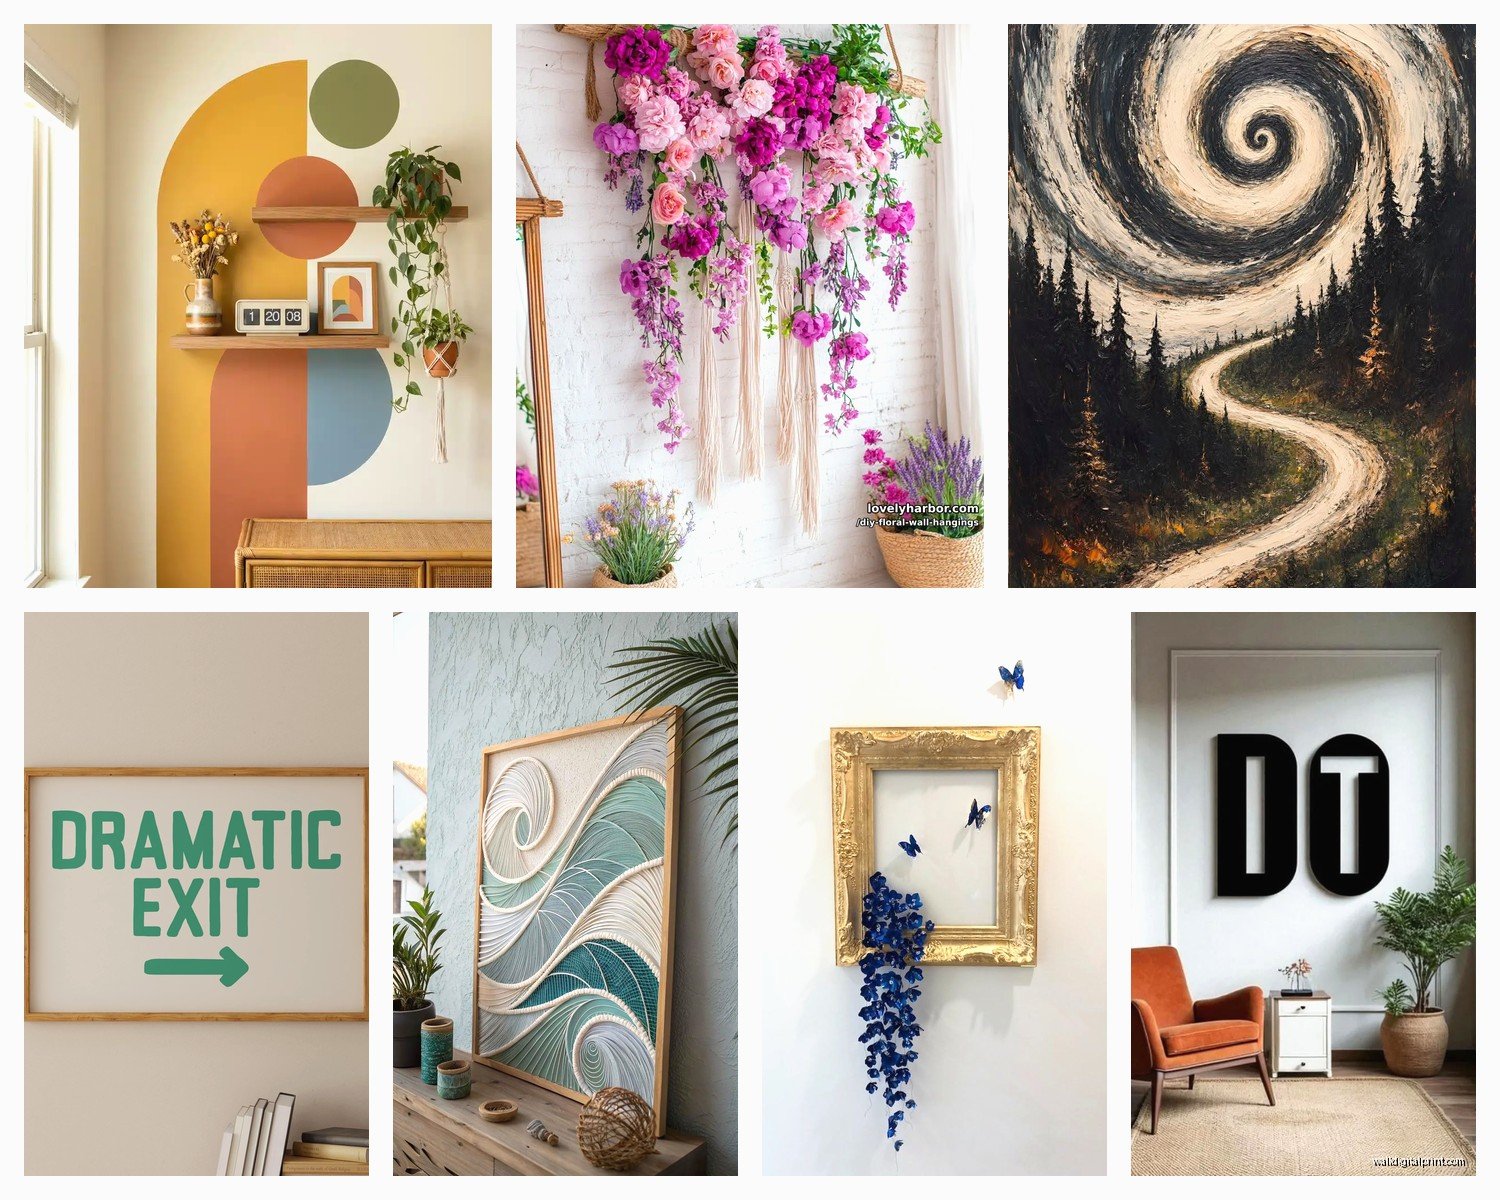
Large Scale Canvas Prints
These are probably the easiest if you’re not super confident about arranging multiple pieces. I got this 40×60 abstract piece from an online print shop, and it completely transformed my bedroom. The thing with canvas is it feels more expensive than it usually is, and you don’t need a frame which saves money and decision-making energy.
Look for pieces with colors that are already in your room but maybe in different proportions. Like if you have navy pillows, an art piece with some navy but not ALL navy creates this nice cohesive thing without being matchy-matchy which always feels dated.
Gallery Walls (But Make It Easy)
Okay so gallery walls are gorgeous but they can go wrong so fast. What finally worked for me was buying matching frames first, then finding art to fit them. I know that’s backwards but trust me. Get like 6-9 frames in the same color and style but different sizes, lay them out on the floor first, take a picture, then hang them in that exact arrangement.
Oh and another thing, use paper templates. Trace your frames on paper, tape them to the wall with painter’s tape, step back and look at it for a day or two. My cat kept trying to scratch the paper templates which was annoying but at least I didn’t have 47 holes in my wall from moving things around.
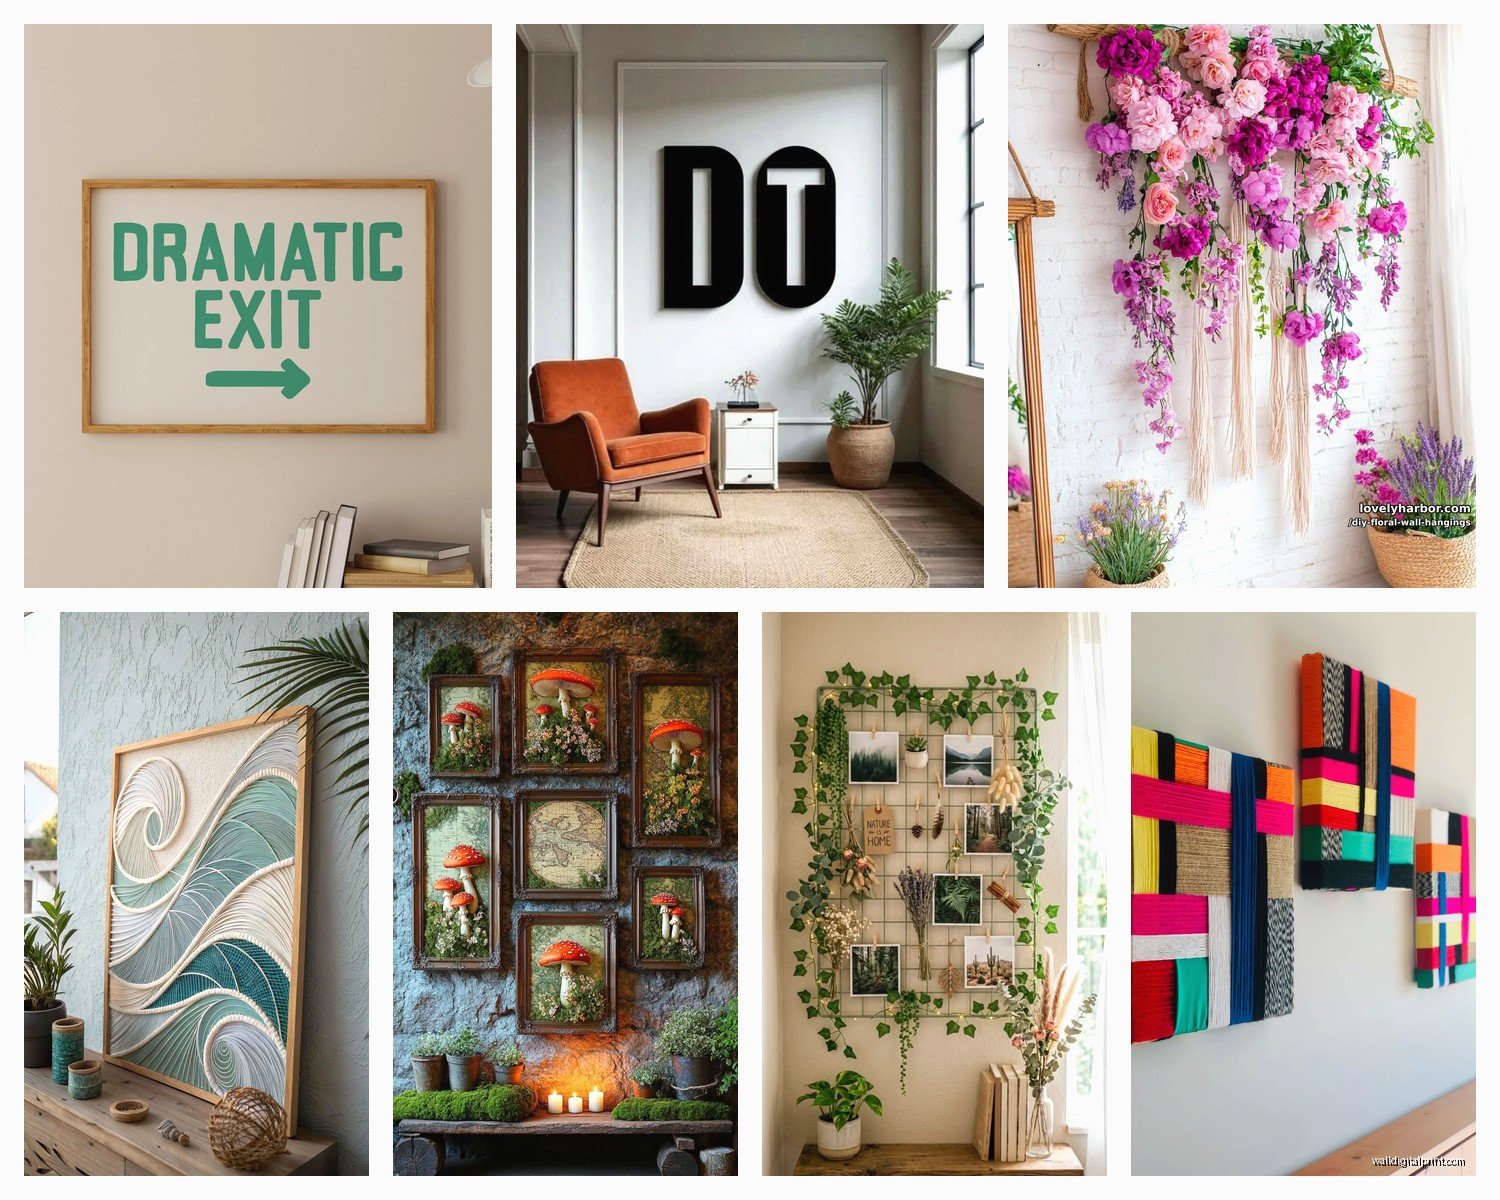
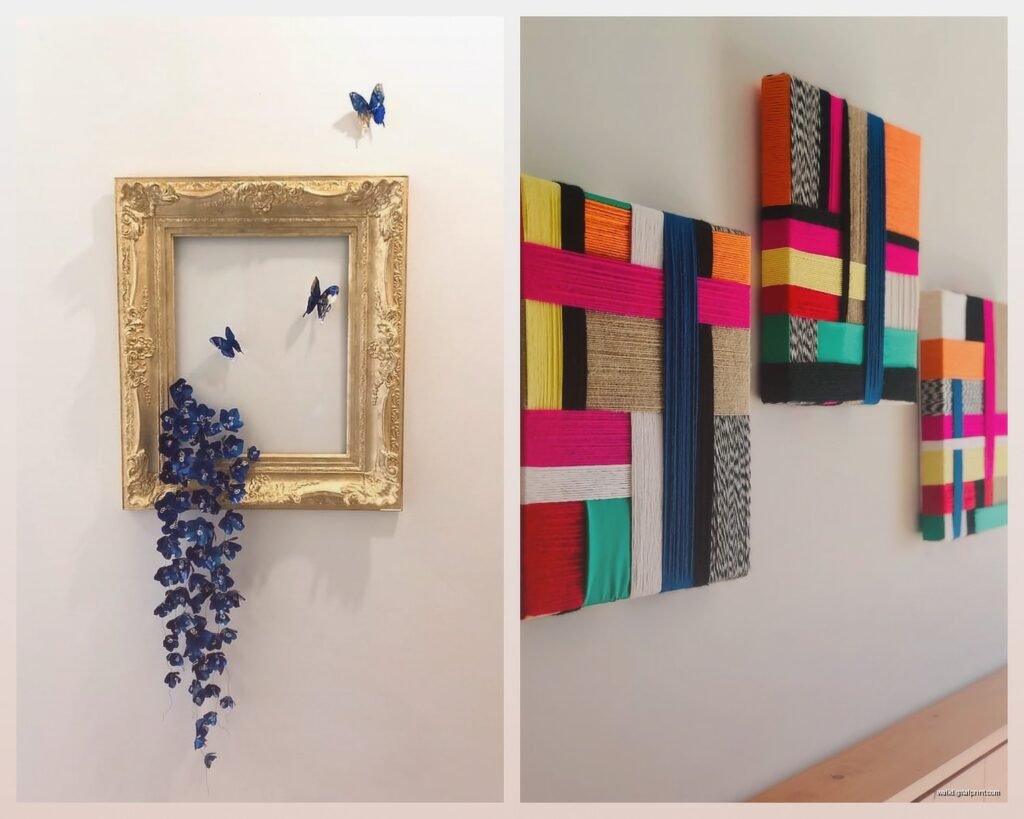
Textile Wall Hangings
This is gonna sound weird but woven wall hangings and tapestries are having a moment and they actually absorb sound which is clutch if you have echos in a room with hardwood floors. I hung this macrame piece above my bed and it’s way less predictable than another print would be.
You can find them on Etsy from actual artists, or honestly some of the ones from places like Urban Outfitters or World Market are pretty decent quality. Just avoid anything that feels too stiff or synthetic because it’ll look cheap.
The Innovative Stuff That’s Actually Cool
Removable Wallpaper as Art
Wait I forgot to mention this earlier but removable wallpaper in frames is genius. You can buy one roll of really beautiful wallpaper, frame sections of it in large frames, and you’ve got custom art that nobody else has. I did this in a powder room with this amazing emerald green palm leaf print and people always ask where I got the “art.” It cost like $35 for the wallpaper roll and $20 per frame from IKEA.
3D Wall Sculptures
Metal wall sculptures are everywhere right now and some of them are actually really interesting. I’m not talking about the generic metal flower thing from HomeGoods, but like geometric brass pieces or abstract metal work. They cast shadows which changes how they look throughout the day as the light moves, which is cool.
The trick is mounting them properly because they’re heavier than they look. Use actual wall anchors, not just nails. I learned this when a metal sunburst thing crashed down at 2am and scared me half to death.
Floating Shelves With Rotating Art
This is my favorite solution if you can’t commit or like changing things up. Install floating picture ledges and just prop art on them. You can swap pieces whenever you want, lean different sizes together, add small plants or objects. It feels more curated and less permanent.
The IKEA picture ledges are like $7 each and I have them in my hallway with a rotating collection of prints I’ve collected. Some are from artists on Instagram, some are vintage posters I found at estate sales, whatever. It feels way more personal than static framed art.
Sourcing Art That Doesn’t Break the Bank
Print Shops and Digital Downloads
Okay so Etsy has thousands of downloadable prints. You pay like $5-15, download a high-res file, and print it yourself at a local print shop or online service. I use a local printer because the quality is better than Staples or whatever, and a 24×36 print usually costs around $15-25.
Frame it yourself and you’ve got custom art for under $50 total. The selection is insane too, everything from vintage botanical prints to modern abstract stuff to photography.
Thrift Stores and Estate Sales
I find probably 40% of my art at thrift stores but you gotta go regularly because it’s hit or miss. I look for interesting frames even if the art inside is ugly, then I replace the art with something I actually like. Vintage frames have way more character than new ones.
Estate sales are goldmines if you get there early. I found this set of four original watercolors for $20 total last spring and they’re probably my favorite thing on my walls.
Support Local Artists
Check Instagram for local artists in your area. A lot of them sell prints way cheaper than you’d think, and sometimes you can commission custom pieces. I had an artist create a custom abstract piece in my exact color scheme for $200, which sounds like a lot but it’s a one-of-a-kind 30×40 canvas and cheaper than “real” art from a gallery.
Hanging Systems That Don’t Suck
Command Strips for Lightweight Stuff
Command strips are great for anything under like 5 pounds and if you’re renting. Follow the weight limits though, I got cocky once and a frame fell. The velcro ones are better than the sticky tabs in my experience.
Proper Hardware for Everything Else
For real walls (drywall), get wall anchors. For plaster walls, use plaster hooks. For brick, you need a masonry bit and anchors. I know this sounds basic but I’ve seen so many people just hammer a nail into drywall and wonder why their $300 frame fell.
The wire hanging kits with two hooks are more stable than single-point hanging, especially for larger pieces. Your art shouldn’t tilt forward at the top, which means the wire needs to be tight enough and the hooks spaced properly.
Picture Rail Systems
This is more of an investment but if you hang art frequently or can’t put holes in walls, picture rail systems are amazing. You install one rail near the ceiling and hang everything from cables. Super common in Europe and it’s catching on here. You can move art around without new holes and it looks really clean.
Creative Arrangements Beyond the Basics
Salon Style Walls
This is different from a gallery wall, it’s more organic and packed. You basically cover most of the wall with frames of all different sizes and styles, sometimes overlapping slightly. It works in entryways or dining rooms where you want drama.
The key is starting with your largest piece at eye level in the center, then building around it. Keep spacing between frames consistent, like 2-3 inches everywhere.
Leaning Art
Just lean large pieces against the wall on the floor or on a console table. It’s effortless and you don’t need to hang anything. Works best with really large pieces, like 30×40 or bigger. I have a huge abstract canvas leaning in my living room and it’s surprisingly stable, though I did put museum putty under the bottom corners so it doesn’t slide.
Unexpected Locations
Don’t forget about bathrooms, closets, stairway walls, above doorways. I hung a small print inside my coat closet and it makes me smile every time I open it. Stairway walls are perfect for vertical arrangements going up the stairs.
Color and Style Coordination
You don’t need everything to match perfectly but there should be some thread connecting your pieces. Maybe it’s all black and white photography, or maybe everything has touches of the same blue, or maybe it’s all abstract. Too much variety can feel chaotic unless you’re specifically going for that maximalist salon wall vibe.
I usually pick 3-4 colors that appear throughout my art collection and make sure those colors also show up in the room through pillows, rugs, whatever. It creates cohesion without being boring.
The Lighting Situation
Art looks completely different depending on lighting and this is something I didn’t think about until recently. If you have a piece you really love, consider adding a picture light above it or positioning it near a window where natural light hits it well.
I installed some adjustable track lighting in my living room pointing at my main art pieces and it legitimately made them look 10x better at night. You don’t need fancy gallery lighting, even a simple spotlight from IKEA works.
Mistakes I’ve Made So You Don’t Have To
Hanging things too high is the number one issue. Seriously, lower than you think.
Buying frames that are too matchy, like everything from the same Target collection. Mix it up with different styles even if the colors coordinate.
Not measuring before buying art online. That 16×20 might look huge in the product photo but tiny on your actual wall.
Forgetting about the space above doors and windows, which is perfect for smaller pieces or sculptural elements.
Using wire that’s too thin on heavy frames. The wire should be rated for at least double the frame’s weight.
Oh and putting art in direct sunlight if it’s an original or quality print, because it’ll fade. I ruined a print I actually liked this way and I’m still annoyed about it.
Anyway, the main thing is just to start somewhere and not overthink it. You can always move stuff around, and honestly those holes fill easily with spackle. I was watching this renovation show the other night and even the designers move things multiple times before they get it right, so don’t stress about making it perfect immediately.