Wall Art Guide, Wall Art Tutoriels
3D Mirror Wall Art: Reflective Dimensional Geometric Designs
Oct
So I’ve been obsessing over 3D mirror wall art lately and honestly it started because a client wanted something “dramatic but not too much” for her entryway and I went down this whole rabbit hole. Let me tell you what I’ve figured out because some of this stuff is actually tricky to get right.
The Actual Difference Between Types
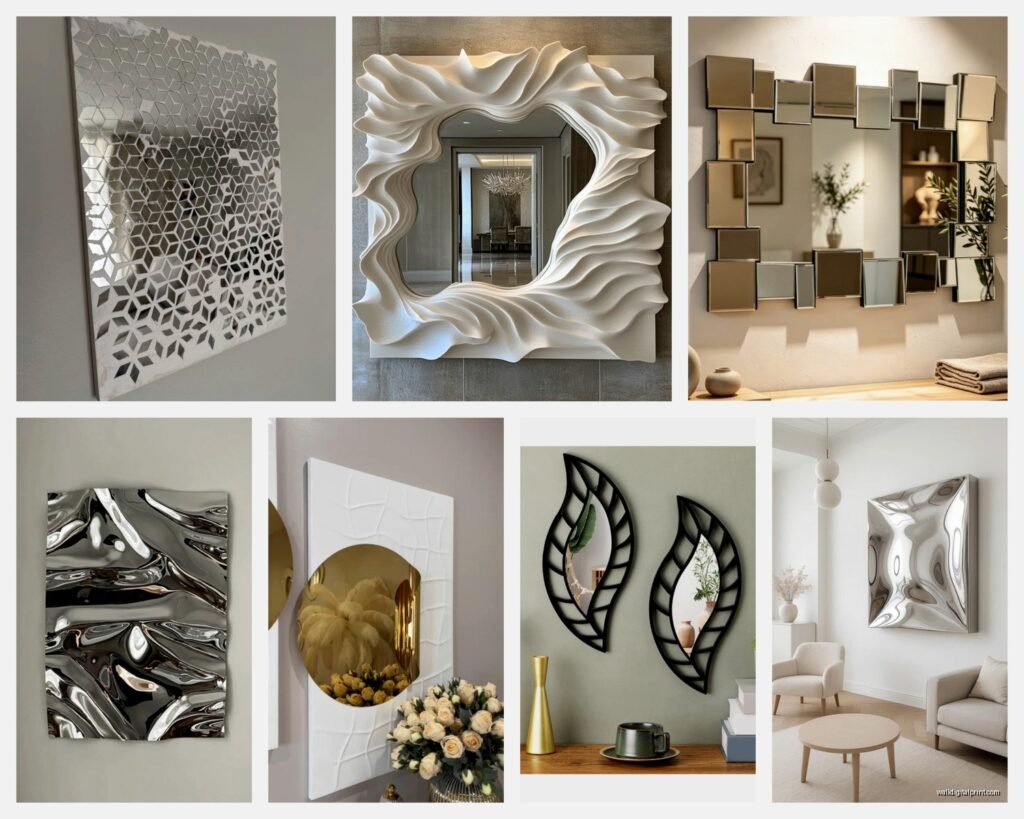
Okay so there are basically three kinds of 3D mirror pieces and nobody really explains this clearly. You’ve got your acrylic mirrors which are lightweight and honestly perfect if you’re renting or don’t want to drill a million holes. Then there’s actual glass mirror tiles that come in geometric patterns, way heavier but they reflect light better. And then there’s this newer stuff that’s like layered mirror panels that create actual depth, not just the illusion of it.
The acrylic ones are what I started with because I was terrified of mounting something heavy above my couch. They’re usually adhesive-backed which sounds sketchy but I’ve had mine up for like eight months and nothing’s fallen. The catch is they scratch easier than you’d think so if you have kids or a large dog who gets excited and jumps around, maybe reconsider.
Where to Actually Put These Things
Everyone puts them in the entryway or living room but wait I forgot to mention the best spot I’ve found is actually above a credenza or console table where you’ve got other decor. The reflection creates this whole layered look that photographs really well. I did this in my own place and suddenly my sad little bar cart looked intentional.
The worst place and I learned this the hard way is directly across from a window with harsh afternoon sun. You’ll basically blind yourself and your guests. My friend Sarah did this and we couldn’t even sit in her living room between 3pm and 5pm without sunglasses. She ended up moving the whole piece to a perpendicular wall.
Hallways are actually genius for these because they make narrow spaces feel wider. I used a series of hexagonal mirror pieces in my hallway and it legitimately looks twice as wide now. But measure your wall first because I definitely bought too many pieces initially and had to return them which was a whole thing.
The Measuring Thing Nobody Tells You
Use painters tape to map out the actual size before you buy anything. Like actually do this. I thought a 36-inch circular design would be perfect and when it arrived it was completely overwhelming for the space. Painters tape is your friend here, stick it up, live with it for a day or two, see if it feels right.
Installation Without Losing Your Mind
Okay so funny story, I tried to install one of those multi-piece geometric sets by myself while watching The Crown and it was a disaster. You absolutely need a second person for anything larger than maybe 24 inches. The pieces need to be level with each other and trying to eyeball it alone is gonna end badly.
Most kits come with a paper template which seems old-fashioned but actually works. You tape the template to the wall, nail or drill through it at the marked spots, then tear it away. The acrylic adhesive ones are easier, you just need to make sure your wall is clean. Like really clean. I use rubbing alcohol on a microfiber cloth because apparently wall dust is a thing that exists.
For the heavier glass pieces you’re looking at wall anchors minimum. If you can hit a stud, even better. I use a stud finder that I bought three years ago from Home Depot for like fifteen dollars and it’s honestly one of my most-used tools. The magnetic ones work fine, don’t overthink it.
The Level Situation
Get a small level, not one of those giant construction ones. A torpedo level is perfect. And here’s the thing, most walls aren’t actually straight so sometimes level looks wrong to your eye. Trust the level anyway. I’ve redone installations because I went with what “looked right” and then every photo of that wall showed how crooked it actually was.
Oh and another thing, start from the center piece if you’re doing a multi-element design. Work your way out. I started from the corner once like an idiot and everything ended up shifted to one side.
Which Styles Actually Work
The super trendy ones right now are those exploding star designs with like a hundred little mirror pieces radiating out. They’re beautiful but they’re also a commitment. Each piece needs to be placed individually and if one falls off your cat will definitely find it at 3am and scare you half to death. Not that this happened to me.
Hexagon tiles are more forgiving and you can create custom patterns. I’ve done honeycomb layouts, scattered random placements that look organic, even a gradient effect going from small to large hexagons. They’re modular so if you mess up or want to change it later you can.
The geometric sculptural ones that are like one solid piece with angular cuts are probably the easiest. You mount them like you would a regular mirror or artwork. They’re my go-to recommendation for people who want the look without the installation headache.
Size and Scale Reality Check
Bigger is not always better and this is coming from someone who loves drama. In a small room, a large 3D mirror piece can feel aggressive. I’ve found the sweet spot is usually taking up about one-third to one-half of your wall space. If you’re working with a wall that’s like 8 feet wide, aim for something in the 3 to 4 feet range.
Multiple smaller pieces can actually create more impact than one large one. I did a cluster of circular mirrors in different sizes with varying depths and it’s way more interesting than the single large piece I had before.
The Light Reflection Thing
This is where these pieces either look incredible or just weird. You want them to reflect something interesting, not just your blank wall across the room. I position mine to catch light from lamps or to reflect artwork or plants. The dimensional aspect means you’re getting multiple angles of reflection which is cool but also means you need to think about what’s in the room.
Table lamps with warm bulbs look amazing reflected in these. Overhead fluorescent lighting makes them look like an office. If you have the ability to control your lighting, put these mirrors where they’ll catch ambient light rather than direct overhead light.
Natural light is beautiful but indirect is better. A mirror piece near a window but not directly in the sunbeam creates this soft glow effect that’s really pretty. Direct sunlight just creates glare and those weird rainbow prisms that seem cool initially but get annoying.
Cleaning and Maintenance Reality
Nobody talks about this but 3D mirror art is a dust magnet. All those angles and surfaces collect dust like it’s their job. I use a microfiber duster every week or so, just a quick pass. For actual cleaning, glass cleaner works but you gotta be careful with the edges where pieces connect.
The acrylic ones can get staticky and attract even more dust. I learned that a little bit of anti-static spray on your cleaning cloth helps. Don’t spray it directly on the mirror because it can seep behind the pieces and create weird cloudy spots.
If you’ve got individual tiles with gaps between them, dust will settle in those gaps and it’s kinda tedious to clean. A soft paintbrush actually works better than a cloth for getting in there.
What to Actually Buy
I’ve tried probably a dozen different brands and styles at this point. For acrylic, the Umbra and Stratton Home pieces are solid and affordable. They’re in the forty to eighty dollar range usually and look way more expensive than they are. I have the Umbra prisma mirrors in my office and people always ask where I got them.
For real glass, the Abbyson pieces are heavier and pricier but they’re actual quality. The reflection is clearer and they just feel more substantial. You’re looking at a hundred fifty dollars and up but they last forever.
The individual tile options from places like Home Depot or even Amazon can be great if you want to customize. I bought a pack of hexagon mirror tiles for like thirty dollars and created my own pattern. It took longer but I could make it exactly the size and shape I wanted.
Budget Options That Don’t Look Cheap
Target actually has some decent 3D mirror pieces in their threshold line. I’ve used them in client homes where we needed to save money elsewhere. They’re not gonna be heirloom quality but they look good and they’re like thirty to fifty bucks.
Dollar store mirrors can work if you’re crafty. I’ve bought a bunch of small square mirrors and mounted them with varying depths using foam mounting tape. Created my own 3D effect for under twenty dollars. It’s more DIY but if you’ve got the patience it’s totally doable.
Common Mistakes I’ve Made So You Don’t Have To
Mounting them too high is probably the most common issue. You want the center of the piece to be at eye level, roughly 57 to 60 inches from the floor. I’ve hung them at like 70 inches thinking it would look more dramatic and it just looked weird and disconnected from the furniture.
Not considering the viewing angle is another one. These pieces look different from different spots in the room because of the dimensional aspect. Walk around the room and think about where you’ll actually see it from. I’ve placed pieces that looked great from the doorway but terrible from the couch where I actually spend my time.
Using the wrong adhesive for your wall type. Smooth walls are fine with most adhesives but textured walls need something stronger. I’ve had pieces fall off textured walls because I didn’t account for the reduced surface contact.
Combining Them With Other Decor
These work really well with minimal decor around them. They’re statement pieces so you don’t need much else. I usually pair them with maybe one plant and a simple console table or shelf. Too much other stuff and it starts to feel cluttered.
They look amazing with metallic accents. Brass or gold lighting fixtures, copper planters, that kind of thing. The mirrors pick up those warm tones and it creates this cohesive look.
Mixing them with regular flat mirrors can actually be cool. I’ve done a gallery wall with both 3D mirror pieces and regular framed mirrors and the contrast in depth is interesting. Just keep the frames simple so it doesn’t get too busy.
This is gonna sound weird but they also work with darker wall colors better than you’d think. I was nervous about putting a mirror piece on a navy wall but the contrast is actually really striking. The dimensional aspects cast shadows that show up better against darker backgrounds.
The DIY Route
If you wanna make your own, it’s totally possible. You need mirror tiles, foam mounting squares in different thicknesses, and patience. I made one using circular mirrors in graduated sizes, mounting them at different depths to create a spiral effect. Cost me maybe forty dollars in materials and an afternoon.
The key is planning your design first. Draw it out, figure out which pieces need to be at which depth. The foam mounting squares come in different thicknesses so you can create varying levels. I use a combination of single-layer and double-layer foam to get three different depth levels.
Construction adhesive works better than regular mounting tape for heavier pieces. It’s messier but it’s not going anywhere once it’s set.
Anyway, that’s basically everything I’ve figured out through trial and error and probably too many late-night online shopping sessions. The main thing is just to measure twice, think about the light in your room, and don’t be afraid to rearrange if something doesn’t look right. These pieces are way more forgiving than they seem and they really do make a space feel more intentional and pulled together.