Wall Art Guide, Wall Art Tutoriels
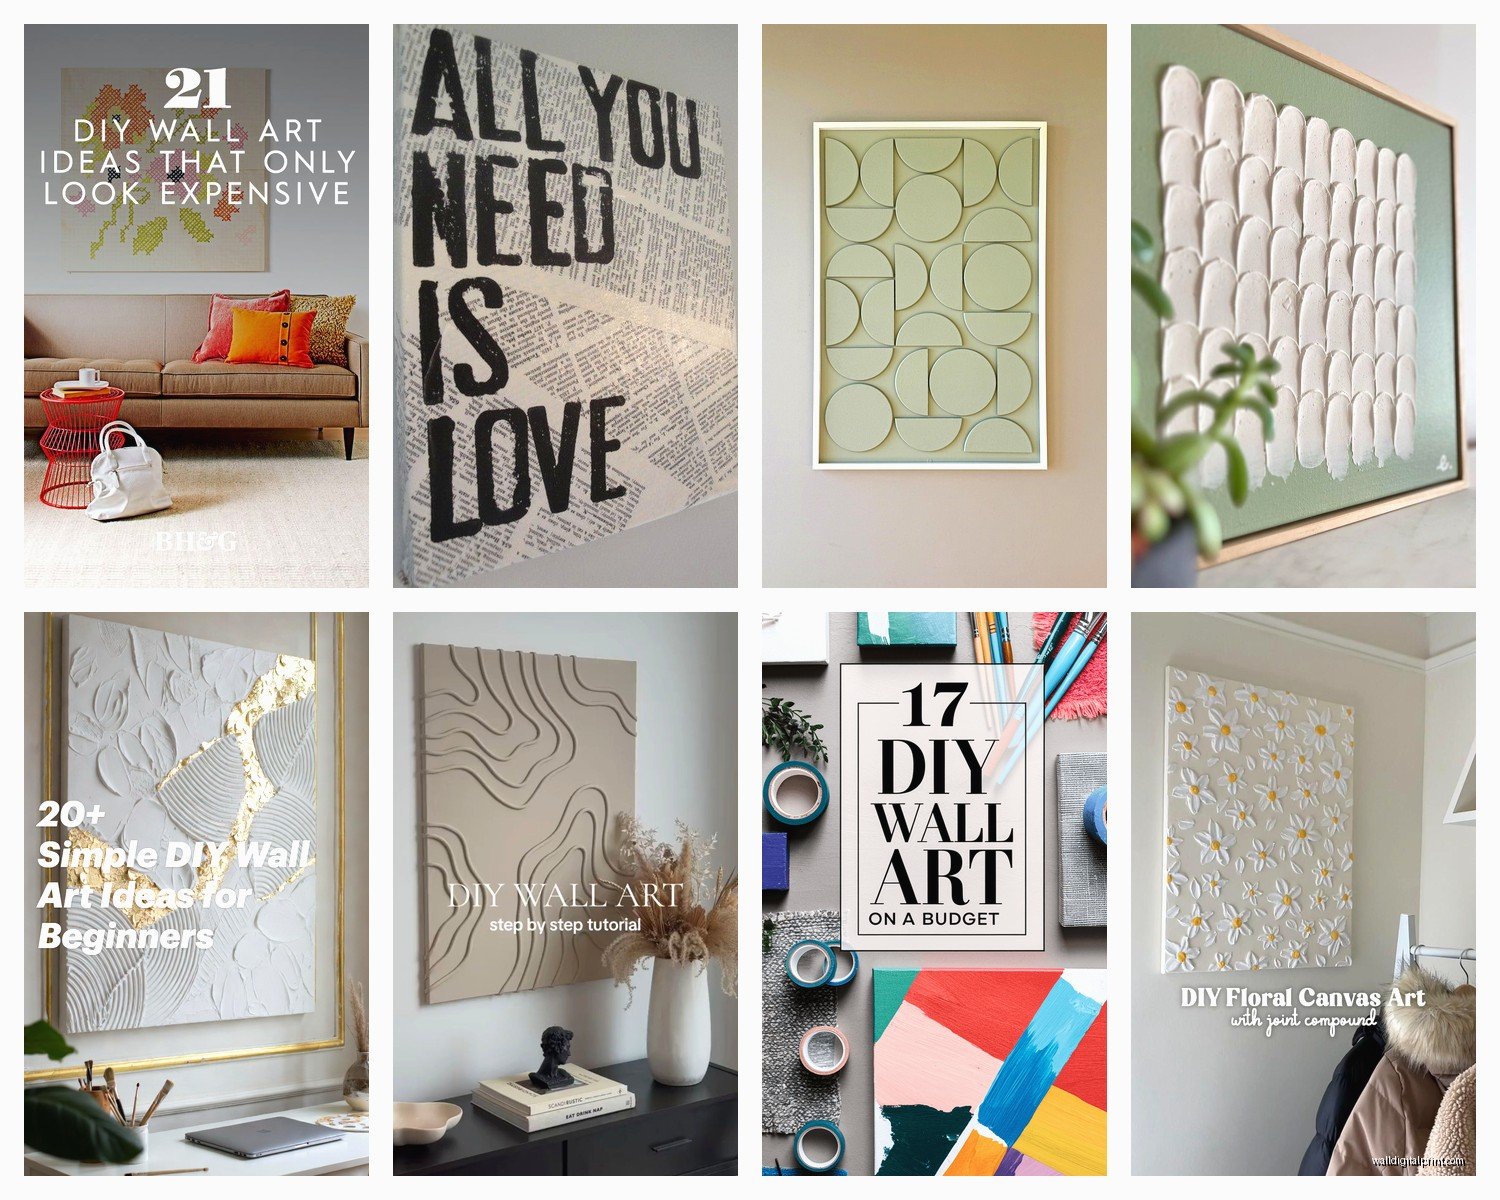
Easy Wall Art DIY: Simple Handmade Projects & Tutorials

Mar
So I’ve been making wall art for like 6 years now and honestly the color part is where everyone gets stuck, right? Like you can follow a tutorial perfectly but if the colors are wrong it just looks… off.
The Basic Color Thing Nobody Tells You
Okay so here’s what I wish someone told me when I started – pick three colors max for your first project. I know Pinterest makes those rainbow abstract pieces look amazing but they’re actually harder to pull off than a simple three-color scheme. My go-to formula is: one neutral (this is your safety net), one bold color, and one softer version of that bold color. Like navy + light blue + cream. Or forest green + sage + beige.
The neutral does SO much heavy lifting. It’s basically there to calm everything down so your bold color can actually shine instead of fighting with other colors. I learned this the hard way after making this terrible piece with like seven different colors for a client’s nursery and it just looked chaotic.
Paint Colors That Actually Work for DIY
Acrylic craft paint is gonna be your best friend here. Don’t overthink it with expensive artist paints when you’re starting out. The Apple Barrel and Folk Art brands at craft stores are like $1-2 per bottle and honestly they work great for wall art.
Here are the colors I always keep stocked:
- Titanium white – you’ll use this to lighten literally everything
- Mars black – but use it sparingly, it’s intense
- Burnt sienna – this brown is warmer and way more forgiving than straight black
- Ultramarine blue – mixes well with everything
- Raw umber – for when you need to tone things down
The thing about craft paint is you can mix custom colors super easily. I probably spend more time mixing than actually painting because getting the exact right shade makes such a difference.
Testing Colors Before You Commit
This is gonna sound obvious but test your colors on the actual surface first. Paint looks COMPLETELY different on canvas vs wood vs paper. I keep a stack of small canvas boards just for color testing and my studio is basically covered in these little sample pieces at this point.
Also natural light vs artificial light – huge difference. What looks perfect under my studio lights sometimes looks completely washed out in the client’s living room. Now I always take my color samples to the window before I commit to a full piece.
Easy Project One: Abstract Color Block Canvas
This is literally the easiest thing and looks expensive if you nail the colors. You need a canvas (any size, I usually do 16×20), painter’s tape, and your three colors.
Pick a warm neutral like cream or tan for your base. Paint the whole canvas and let it dry completely – this takes like 2 hours with acrylic, maybe less if you’re impatient and use a hairdryer which I definitely do.
Then use painter’s tape to section off geometric shapes. Rectangles are easiest but you can do triangles if you’re feeling fancy. Here’s where color matters: your bold color should be the smallest section, maybe 20% of the canvas. The medium tone takes up like 40%, and your neutral is the rest.
I made one last month with: cream base, then added sections of terracotta (the bold) and dusty rose (the medium tone). The terracotta was just two small rectangles in opposite corners and it looked SO much more intentional than if I’d done half and half.
The Tape Trick
Oh and another thing – seal the tape edges with your base color first before you paint your bold colors. Paint the cream along the tape line, let it dry, THEN add your terracotta or whatever. This prevents bleeding under the tape and you get those crisp lines that make it look professional.
Project Two: Watercolor Resist with Strategic Colors
Okay so this one’s fun because watercolors naturally blend in pretty ways and you can’t really mess it up. You need watercolor paper (get the thick stuff, at least 140lb), white crayon or oil pastels, and watercolors.
Draw your design with the white crayon – abstract shapes, botanical outlines, geometric patterns, whatever. The crayon resists the watercolor so those areas stay white.
Color strategy here: use analogous colors, which is just a fancy way of saying colors that sit next to each other on the color wheel. Like blues and greens. Or reds, oranges, and yellows. They blend together naturally and you can’t really make them look bad together.
I usually start with the lightest color and work darker. So if I’m doing a blue-green piece, I wet the whole paper first (this is important, the water helps colors blend), then drop in pale yellow-green at the top, then regular green in the middle, then deep teal at the bottom. The colors just flow into each other and it looks intentional even though it’s basically controlled chaos.
My cat knocked over my water jar during one of these and honestly it made the piece more interesting because the colors spread in this organic way… sometimes accidents work out.
Understanding Warm vs Cool (It Actually Matters)
So every color has a temperature and this affects how your piece feels. Warm colors (reds, oranges, yellows, warm browns) make things feel cozy and energetic. Cool colors (blues, greens, purples) feel calm and spacious.
But here’s the thing – you can have warm blues and cool reds. A blue with red undertones is warmer than a blue with green undertones. This is why some “matching” colors look off together – they’re fighting temperature-wise.
When I’m picking colors for a project, I make sure they’re all warm-leaning or all cool-leaning. Like if I’m doing a pink piece, I pick a warm pink (peachy undertones) and pair it with warm neutrals like cream or tan. A cool pink (lavender undertones) needs cool neutrals like gray or white.
Quick Temperature Test
Can’t tell if a color is warm or cool? Put it next to pure white and pure black. Warm colors look better with cream/ivory, cool colors look better with bright white. This saved me so many times when I’m standing in the craft store completely overwhelmed.
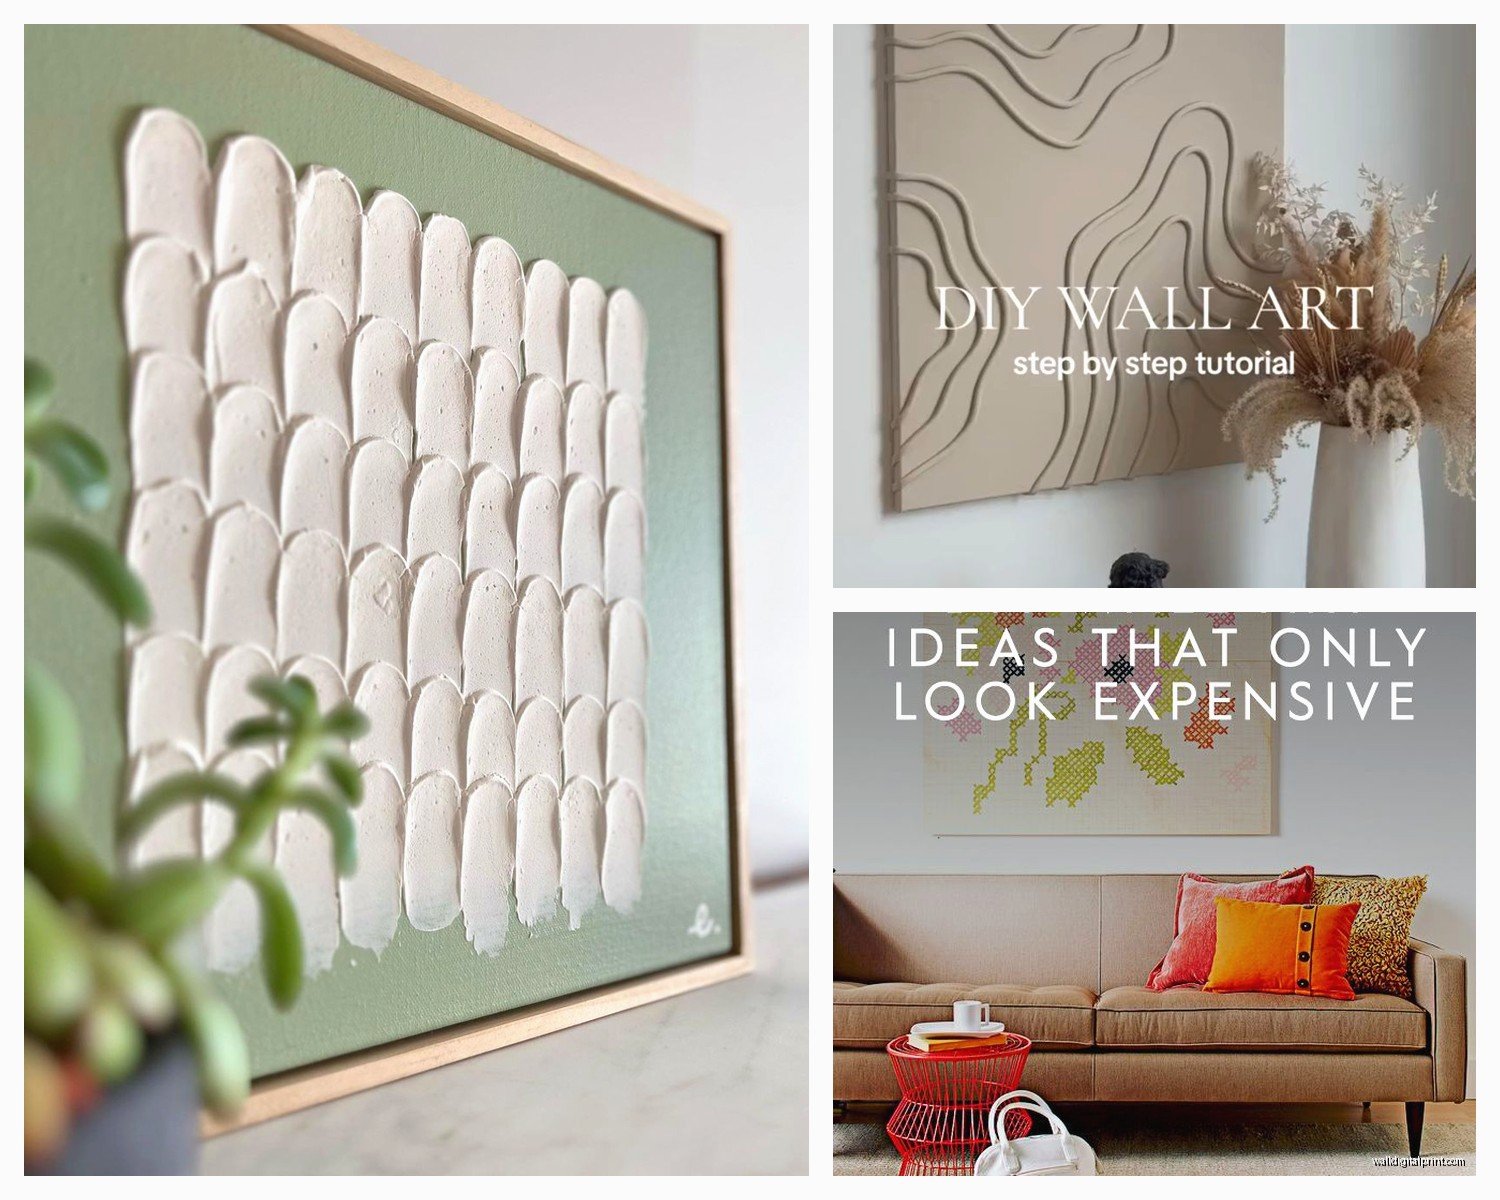
Project Three: Textured Paste Abstracts
This one’s more involved but the color payoff is amazing. You need modeling paste or texture paste (like $8 at craft stores), a canvas, palette knife, and acrylic paints.
Spread the paste on your canvas in whatever pattern – I like doing rough horizontal strokes or random peaks and valleys. Let it dry overnight, it needs to be completely hard.
Now for colors: this technique looks best with a monochromatic scheme, which means different shades of one color. Pick your base color and then mix lighter and darker versions of it.
Say you pick sage green. Mix some with white to get a pale mint. Mix some with a tiny bit of black (seriously, tiny) to get a deep olive. Now you have three greens. Paint them on your textured canvas in a random pattern, letting the texture show through. The different shades catch light differently because of the texture and it looks way more complex than it actually is.
Wait I forgot to mention – you can also do this with neutrals. All different tans and creams and taupes. Sounds boring but it’s actually super sophisticated and goes with everything.
Color Mistakes I Made So You Don’t Have To
Using too much black. Just don’t. Black makes everything muddy and harsh. If you need to darken something, use the darker version of that color or add a complementary color instead. Like to darken red, add a bit of green. Sounds weird but it works.
Matching your paint colors exactly to your room. This makes the art disappear into the wall. You want either a contrast or a slight variation. If your walls are light gray, don’t make light gray art. Go darker gray or add a pop of color that pulls from your pillows or rug.
Not considering undertones. This is huge. Your beige paint might have pink undertones and if you pair it with a beige that has yellow undertones, they’ll look awful together even though they’re both “beige.” Hold your color samples together before you start painting.
Project Four: Pressed Botanical with Color Backing
This is having a moment and it’s so easy. Press flowers and leaves (put them between book pages with parchment paper for like 2 weeks), then arrange them on a colored background and frame under glass.
The background color is everything here. White or cream is safe but kinda boring. I’ve been loving these combinations:
- Dusty blue background with white and pale pink flowers
- Terracotta background with eucalyptus and white flowers
- Charcoal gray with any lighter colored botanicals
- Mustard yellow with deep red leaves
The trick is high contrast. Your botanicals need to stand out from the background. If you’re using green leaves, don’t use a green background unless you want them to blend in for some artistic reason.
I use cardstock for the background because it’s already colored and you don’t have to paint anything. Michael’s has this huge selection of single sheets in every color and they’re like 50 cents each.
Seasonal Color Swaps
Same botanical pieces but swap the background color seasonally. Spring: soft pink or yellow. Summer: bright white or coral. Fall: burnt orange or deep burgundy. Winter: navy or forest green. Your pressed flowers last for years if you keep them out of direct sunlight.
The Neutrals That Aren’t Boring
Okay so neutrals get a bad rap but they’re actually the most versatile for DIY art because they go with everything and you can’t really mess them up.
My favorite “interesting” neutrals:
- Greige (gray + beige, sounds ugly but it’s perfect)
- Warm white with just a hint of peach
- Mushroom brown (softer than regular brown)
- Pale sage (technically green but reads as neutral)
- Dusty mauve (the tiniest bit of purple in your gray)
A whole piece in different shades of one neutral is actually really sophisticated. I did this for a client’s bedroom – five canvases in different sizes, all various shades of taupe from almost-white to deep mushroom. Hung them in a cluster and it looked like expensive gallery art.
Quick Color Formulas That Always Work
When I’m stuck or don’t wanna think too hard, I use these:
Navy + coral + cream. Classic, works in any room, always looks pulled together.
Forest green + gold + ivory. Feels expensive and botanical.
Terracotta + cream + olive green. Very 70s but in a good way, super trendy right now.
Charcoal + blush pink + white. Modern and feminine without being too sweet.
Mustard + teal + tan. Unexpected but works because the tan calms everything down.
Mixing Custom Colors
This is where you can really make your art unique. Start with a base color and add tiny amounts of other colors to shift it. And I mean tiny – dip a toothpick in the second color tiny.
To make colors less intense: add white (makes it lighter), add gray (makes it more muted), or add a tiny bit of the complementary color (makes it more complex).
I keep a color mixing journal which sounds extra but it’s actually super helpful. When I mix a perfect custom color I write down the ratios so I can recreate it. Because there’s nothing worse than running out of your perfect sage green halfway through a project and not being able to match it.
The Metallics Question
Gold and copper accents can elevate any piece but they’re easy to overdo. I use them as like 5% of the total piece max. A thin gold line around the edge of color blocks, or small copper dots scattered across a neutral background, or gold leaf corners on a painted canvas.
The trick with metallics is pairing them with muted colors, not bright ones. Gold + muted pink = elegant. Gold + hot pink = overwhelming. At least in my experience, maybe you can pull off the bright combo but I never could.
Troubleshooting Color Problems
Everything looks too busy: add more neutral space or paint over sections with white/cream to calm it down.
Everything looks flat: you probably need more value contrast, meaning the difference between your lightest and darkest colors isn’t enough. Add some darker accents or brighter highlights.
Colors look muddy: you’re probably mixing complementary colors too much (red + green, blue + orange, yellow + purple). These neutralize each other and create brown/gray which can look great or look muddy depending on proportions.
Piece looks unfinished: add one more small element in your darkest color. Usually fixes it.
I’m literally watching The Great British Baking Show while writing this and now I want to make art that looks like their color palettes – all those soft pastels with pops of berry colors. That’d actually be really pretty for a kitchen…
Anyway the main thing with color is just to test stuff. Buy cheap canvases from the dollar store and experiment. Half of what I make is terrible but that’s how you figure out what works. And honestly some of my “failed” experimental pieces ended up being favorites once I lived with them for a bit. Colors can grow on you or you realize they’re perfect for a different room than you originally intended.