Wall Art Guide, Wall Art Tutoriels
Photo Wall Art: Family Portrait & Memory Display
Mar
So I’ve been down this rabbit hole for like three years now and honestly the biggest mistake people make is thinking any photo looks good giant on a wall. It doesn’t. I learned this the hard way when I blew up this cute beach pic from my phone to 24×36 and it looked like a pixelated mess that cost me $89.
First thing you gotta know is resolution. You need at least 300 DPI at the size you want to print. There’s this calculator I use called pixelcalculator.com or something, you just plug in your image dimensions and it tells you the max print size. Most phone photos are like 3000×4000 pixels which sounds huge but that only gets you a decent 10×13 print, maybe 16×20 if you’re pushing it.
For canvas prints I actually prefer Canvaspop and Nations Photo Lab. Canvaspop has this thing where they’ll enhance your photo for free which saved my butt on some older family photos that were kinda dark. Nations is pricier but their gallery wrap is chef’s kiss, the edges are so clean. I used them for my sister’s wedding portrait and three years later it still looks perfect.
Oh and another thing, framed prints vs canvas is a whole debate. Canvas feels more casual and modern, you don’t need to worry about glare from glass. But framed prints behind glass protect the photo way better longterm. I have this framed print from my grandmother’s collection that’s like 40 years old and still pristine because of the UV glass. My dog knocked over a canvas print last month and it got this weird dent that I cannot fix no matter what I try.
Material Breakdown Because This Actually Matters
Canvas is cotton or polyester blend stretched over wood frames. The poly blend ones last longer and don’t sag. Pure cotton looks richer but you’re gonna see some loosening after a few years especially in humid places. I live near the coast and learned this lesson.
Metal prints are having a moment right now and honestly they’re stunning for the right photos. Anything with vibrant colors or high contrast looks incredible on aluminum. The process is called dye sublimation, the ink becomes part of the metal so it’s super durable. Bay Photo and Adorama are my go-tos for metal. But here’s the thing, they’re reflective so you gotta think about placement. I put one across from a window once and you literally couldn’t see the image during daytime.
Acrylic prints are like the fancy cousin of everything else. It’s a photo print mounted behind thick acrylic glass so you get this depth and the colors just pop. They’re expensive though, like easily $200+ for a medium size. I use them sparingly for statement pieces. There’s this company called Fracture that does smaller acrylic prints that come ready to hang, no frame needed. Got one for my nephew’s baby photo and it sits on a shelf perfectly.
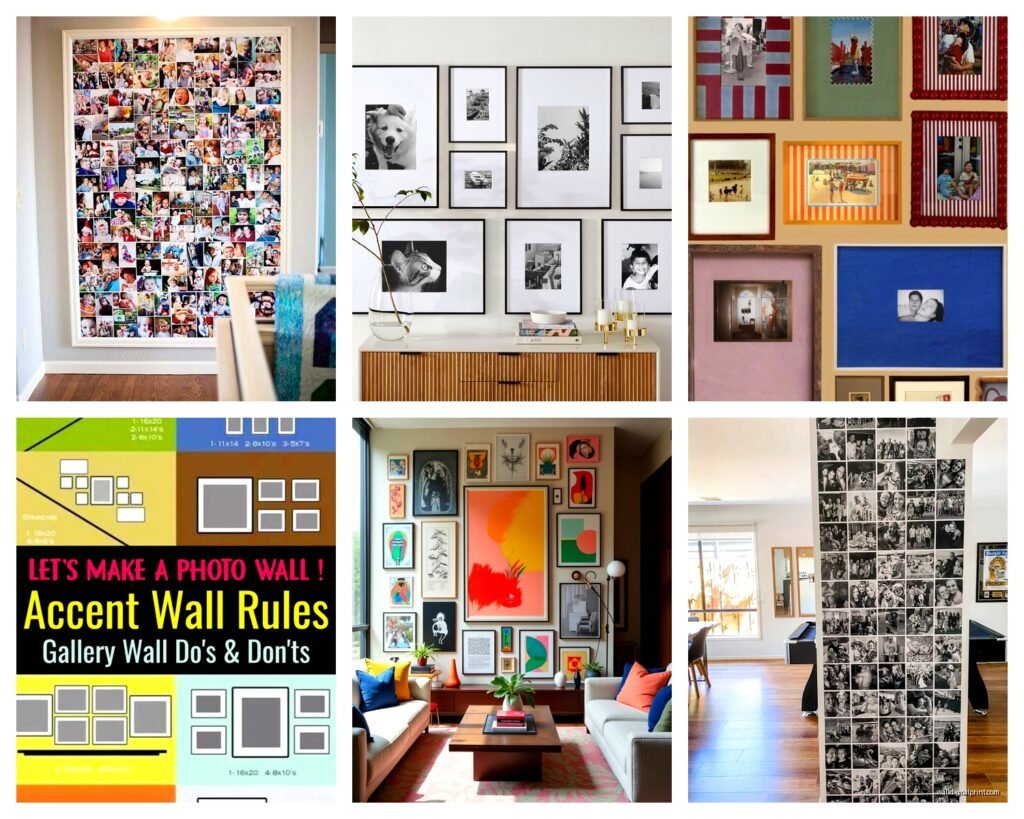
The Gallery Wall Thing Everyone Asks About
Okay so funny story, I was watching this home reno show while planning a gallery wall for a client and they made it look so easy. It’s not. You need to plan this out or you’ll have 47 nail holes in your wall.
Cut out paper templates the exact size of your frames. Tape them to the wall and move stuff around until it looks right. Take a photo of it. Then mark where the hangers go on the paper, nail through the paper, rip it down. This saved me so much grief.
For spacing, 2-3 inches between frames is the sweet spot. Too close looks cluttered, too far apart looks disconnected. I use a measuring tape and painter’s tape to mark my spacing.
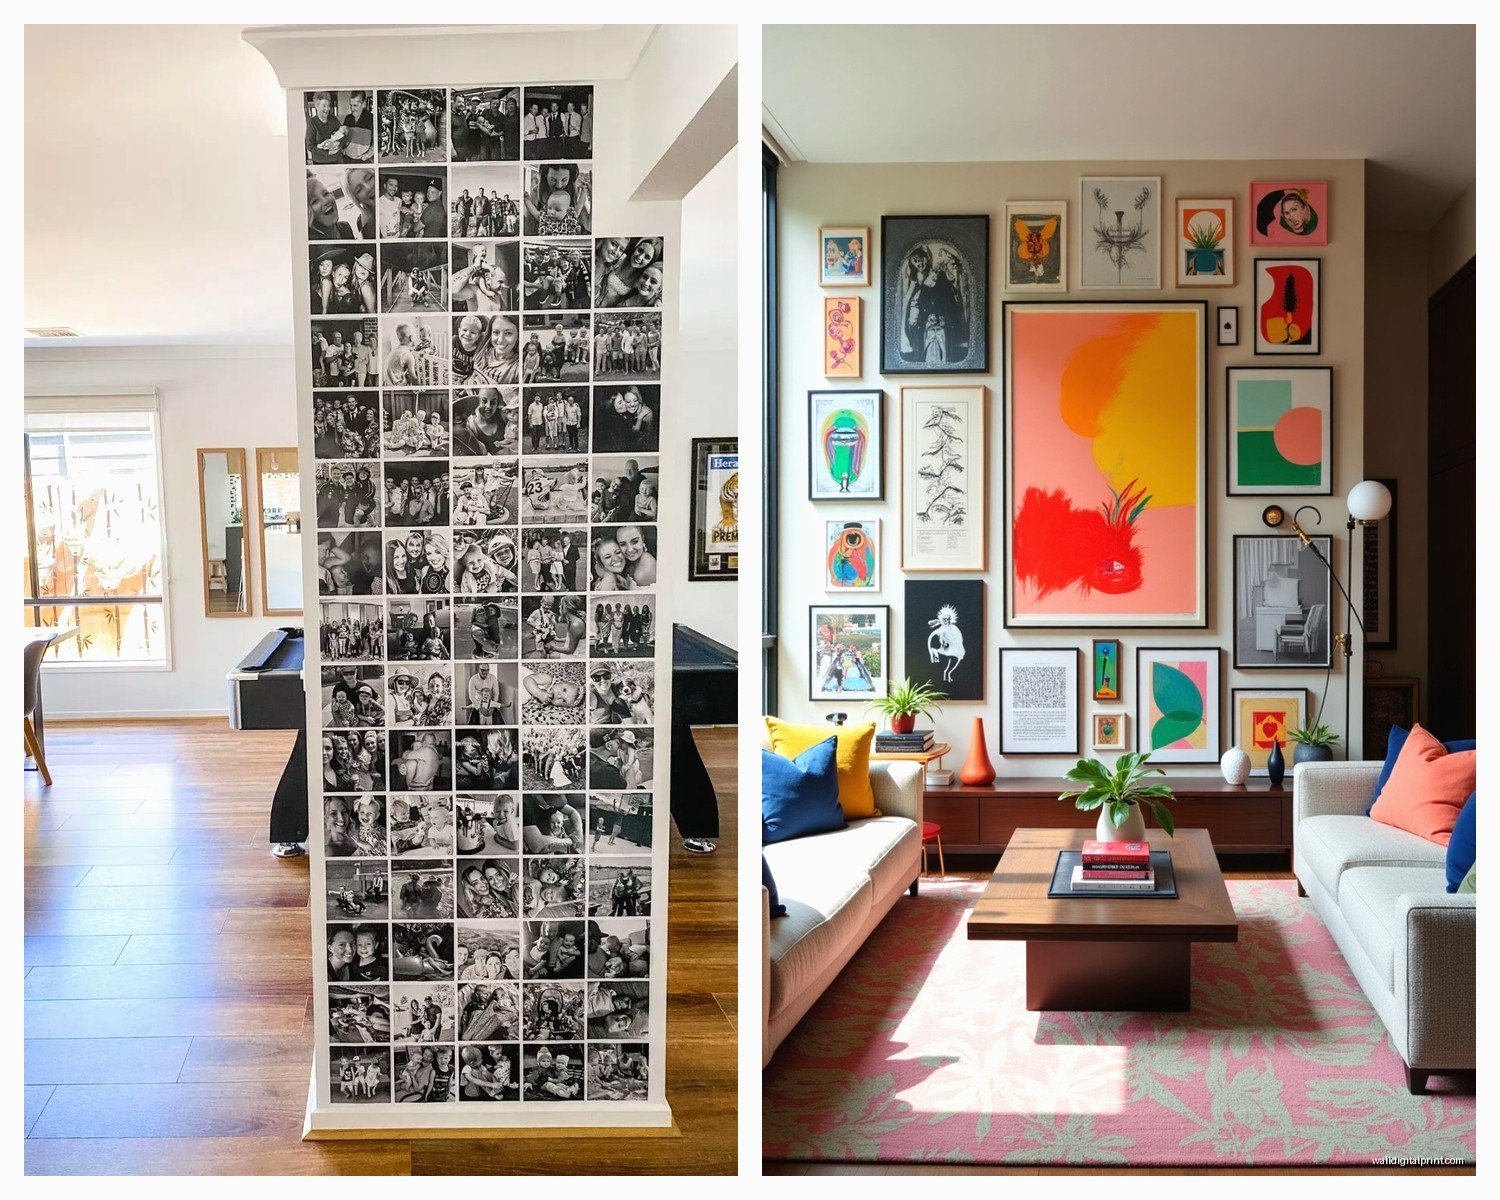
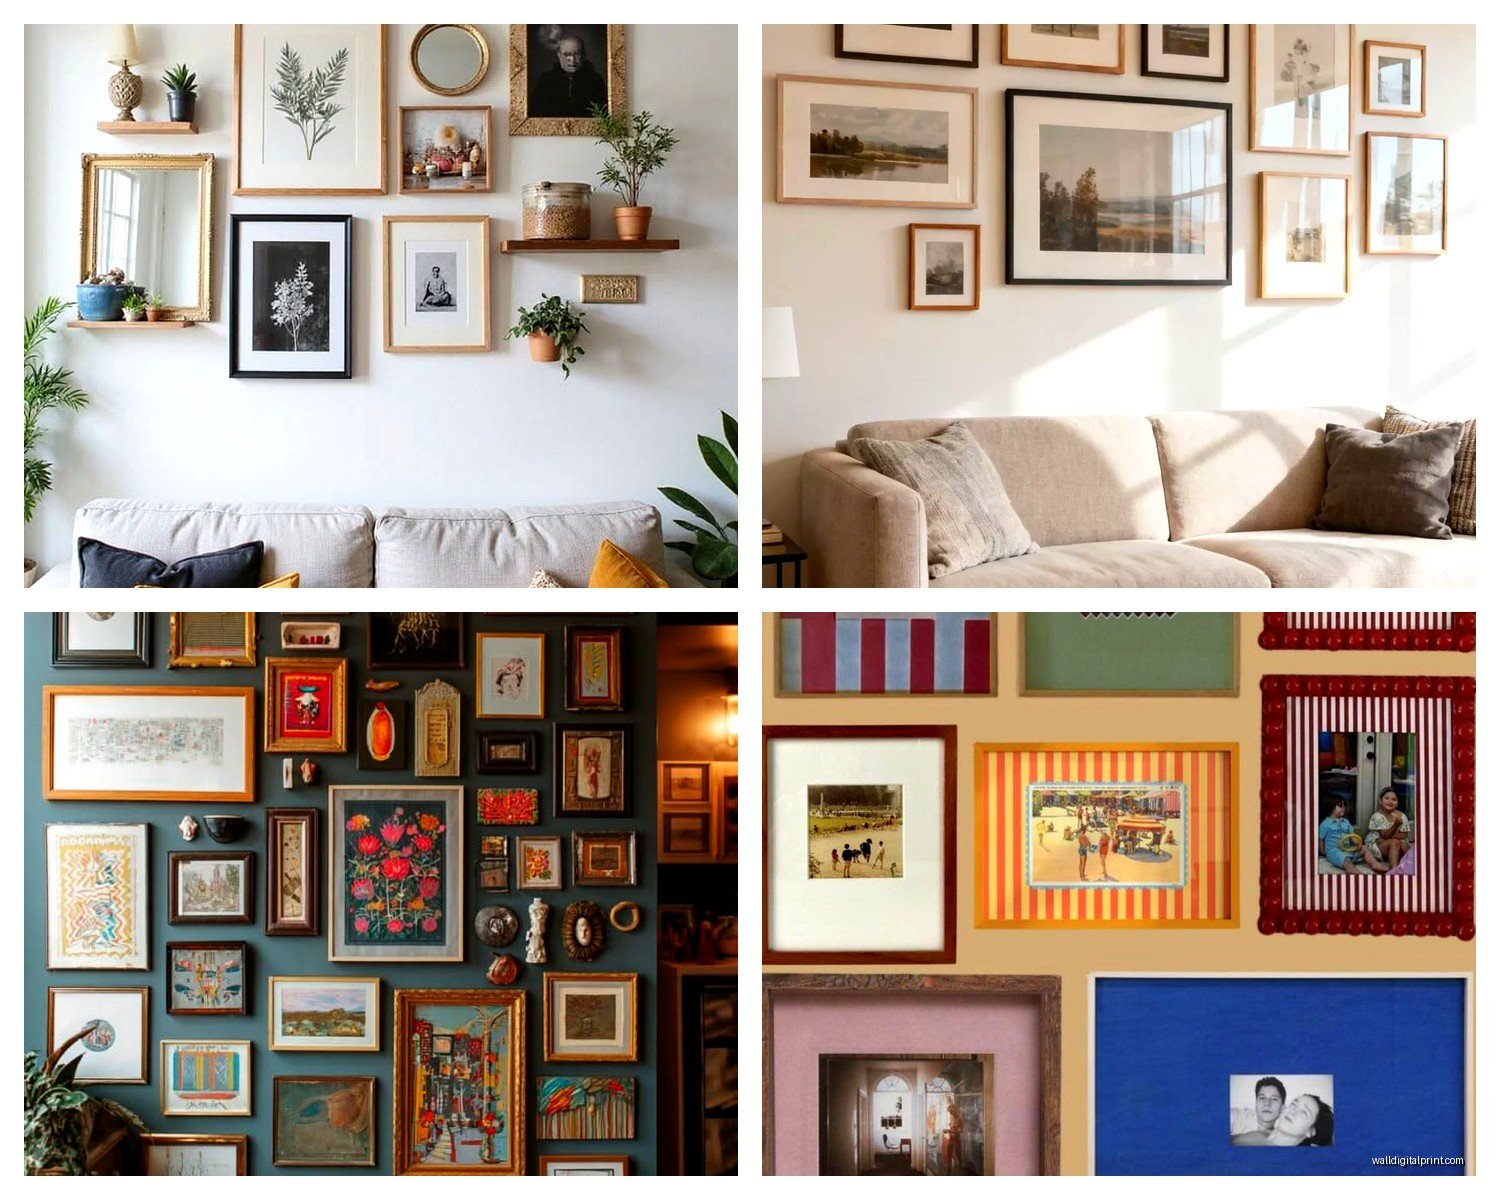
Mix frame sizes but keep the style consistent, like all black frames or all natural wood. Or go matchy-matchy with identical frames in a grid, that works too. What doesn’t work is random different colored frames unless you’re going for that eclectic maximalist vibe which is hard to pull off.
Layout Options That Actually Work
Grid layout is foolproof. Same size frames, equal spacing, done. I did a 3×3 grid of family vacation photos in my dining room and it’s probably my favorite thing in the house.
Salon style is organized chaos, different sizes arranged to fill a space. Start with your largest piece slightly off-center and build around it. The trick is keeping roughly equal spacing between everything even though the frames are different sizes.
Linear/horizontal arrangement is great above sofas or beds. Odd numbers look better, so three or five frames in a row. Keep the center points aligned even if the frames are different heights.
Print Quality Stuff You Can’t Ignore
Glossy vs matte finish is personal preference but here’s what I’ve noticed. Glossy makes colors more vibrant but shows fingerprints and has glare. Matte is more subdued, hides imperfections better, no glare issues. For family photos with people I usually go matte because skin tones look more natural.
Luster finish is the middle ground and honestly my favorite. It’s got a slight sheen but not full glossy. Most pro labs offer this.
Paper weight matters for framed prints. 80lb is standard, fine for smaller prints. For anything over 11×14 I go with 100lb or higher so it doesn’t buckle in the frame over time.
Where to Actually Get This Stuff Printed
Mpix is my everyday workhorse for prints. Their quality is consistent, prices are reasonable, and they’re fast. I’ve ordered probably 200+ prints from them over the years.
Artifact Uprising is gorgeous but expensive. Their layflat photo books are incredible if you wanna go that route instead of wall art. The paper quality is just different, thicker, more luxurious feeling.
Costco and Walgreens are fine for snapshots but I wouldn’t use them for anything you’re gonna frame and display prominently. The color accuracy is hit or miss.
Wait I forgot to mention Printique, they used to be called AdoramaPix. Really good for larger format stuff, their canvas quality is solid and they run sales constantly.
Framing Without Spending Your Entire Paycheck
Custom framing is wildly expensive. Like $200+ for a single frame expensive. I only do it for really special pieces.
Framebridge is the online custom framing option that’s actually decent. You send them your art or photo, they frame it and send it back. It’s still not cheap but way less than a local frame shop. Takes a few weeks though.
Ikea frames are perfectly fine, I’m gonna say it. The Ribba and Hovsta lines are solid. I’ve used them in clients’ homes and mine. They look good, they’re cheap, you can find them easily. The bigger sizes can feel a bit flimsy but for standard 8×10 or 11×14 they’re great.
Michael’s has good sales on frames, like 50-70% off. Their Aaron Brothers house brand is decent quality. Just never pay full price there.
Target’s Threshold line has nice frames that are a step up from Ikea in terms of quality but still affordable.
Matting Makes a Bigger Difference Than You Think
A mat elevates everything. It adds breathing room around the image and makes even a small print look more substantial. Standard mat is 2-3 inches on sides and top, 3-4 inches on bottom because of some visual weight thing.
White and off-white mats are classic and work with everything. Black mats are dramatic and modern. Colored mats are tricky, only use them if they pull a color from the photo.
You can get pre-cut mats from Frame USA or American Frame in basically any size. Way cheaper than custom cutting.
Hanging Hardware That Won’t Fail You
This is gonna sound weird but I have strong feelings about picture hangers. Those sawtooth hangers that come on cheap frames are terrible. They slip, they don’t hold weight evenly, they make frames hang crooked.
D-rings with wire are better for anything over 5 pounds. Attach two D-rings about 1/3 down from the top on each side, string picture wire between them. Use wall anchors or find studs for heavier pieces.
For lightweight stuff under 3 pounds, Command strips actually work great and don’t damage walls. I use them in rentals all the time.
Monkey hooks are genius for drywall, they hold up to 50 pounds and you just press them into the wall at an angle. No anchors needed if you’re not on studs.
Get a level. Seriously. I thought I could eyeball it for years and my walls were full of crooked frames. A small torpedo level changed my life.
Photo Selection Tips From Someone Who’s Seen a Lot of Bad Choices
Not every photo deserves wall space. I know that sounds harsh but it’s true. You want images that make you feel something, not just documentation that a moment happened.
Look for photos with good composition, proper lighting, and genuine emotion. Candid moments usually beat posed shots. That photo of your kid laughing with ice cream on their face is better than the stiff smile school portrait.
Black and white hides a lot of issues with color casts or weird lighting. I convert photos to B&W probably 40% of the time and they look so much better.
Consider the wall color when selecting photos. Light photos on dark walls create drama, dark photos on light walls need good contrast to not disappear.
Edit your photos before printing. Basic stuff like cropping, adjusting exposure and contrast, fixing color balance. I use Lightroom but even the free version of Snapseed on your phone works fine. Just don’t go crazy with filters, you want these to age well.
Maintenance Stuff Nobody Talks About
Dust your frames. Like actually dust them. I use a microfiber cloth every few weeks.
Keep prints out of direct sunlight. UV rays fade photos over time even through glass. I learned this when a beach sunset print turned completely pink after two years in a south-facing window.
Canvas can be vacuumed gently with a brush attachment if it gets dusty. Don’t use cleaning products on it.
Glass can be cleaned with regular glass cleaner but take the frame down first so you don’t get drips behind the glass.
Check wire and hanging hardware yearly on heavy frames. I had a big canvas fall at 3am once and it scared the life out of me, thought someone broke in. The wire had frayed.
Oh and another thing, if you’re doing a rental situation, take photos of your gallery wall layout before you take it down. Makes rehang so much easier in the next place. I have a whole folder on my phone of wall layouts I’ve done that I reference constantly.
The whole thing seems overwhelming but start small. One good print, one nice frame, hang it up. See how you feel. Add more over time. My main gallery wall took like two years to complete because I kept finding photos I wanted to add and rearranging stuff. It doesn’t have to happen all at once.