Wall Art Guide, Wall Art Tutoriels
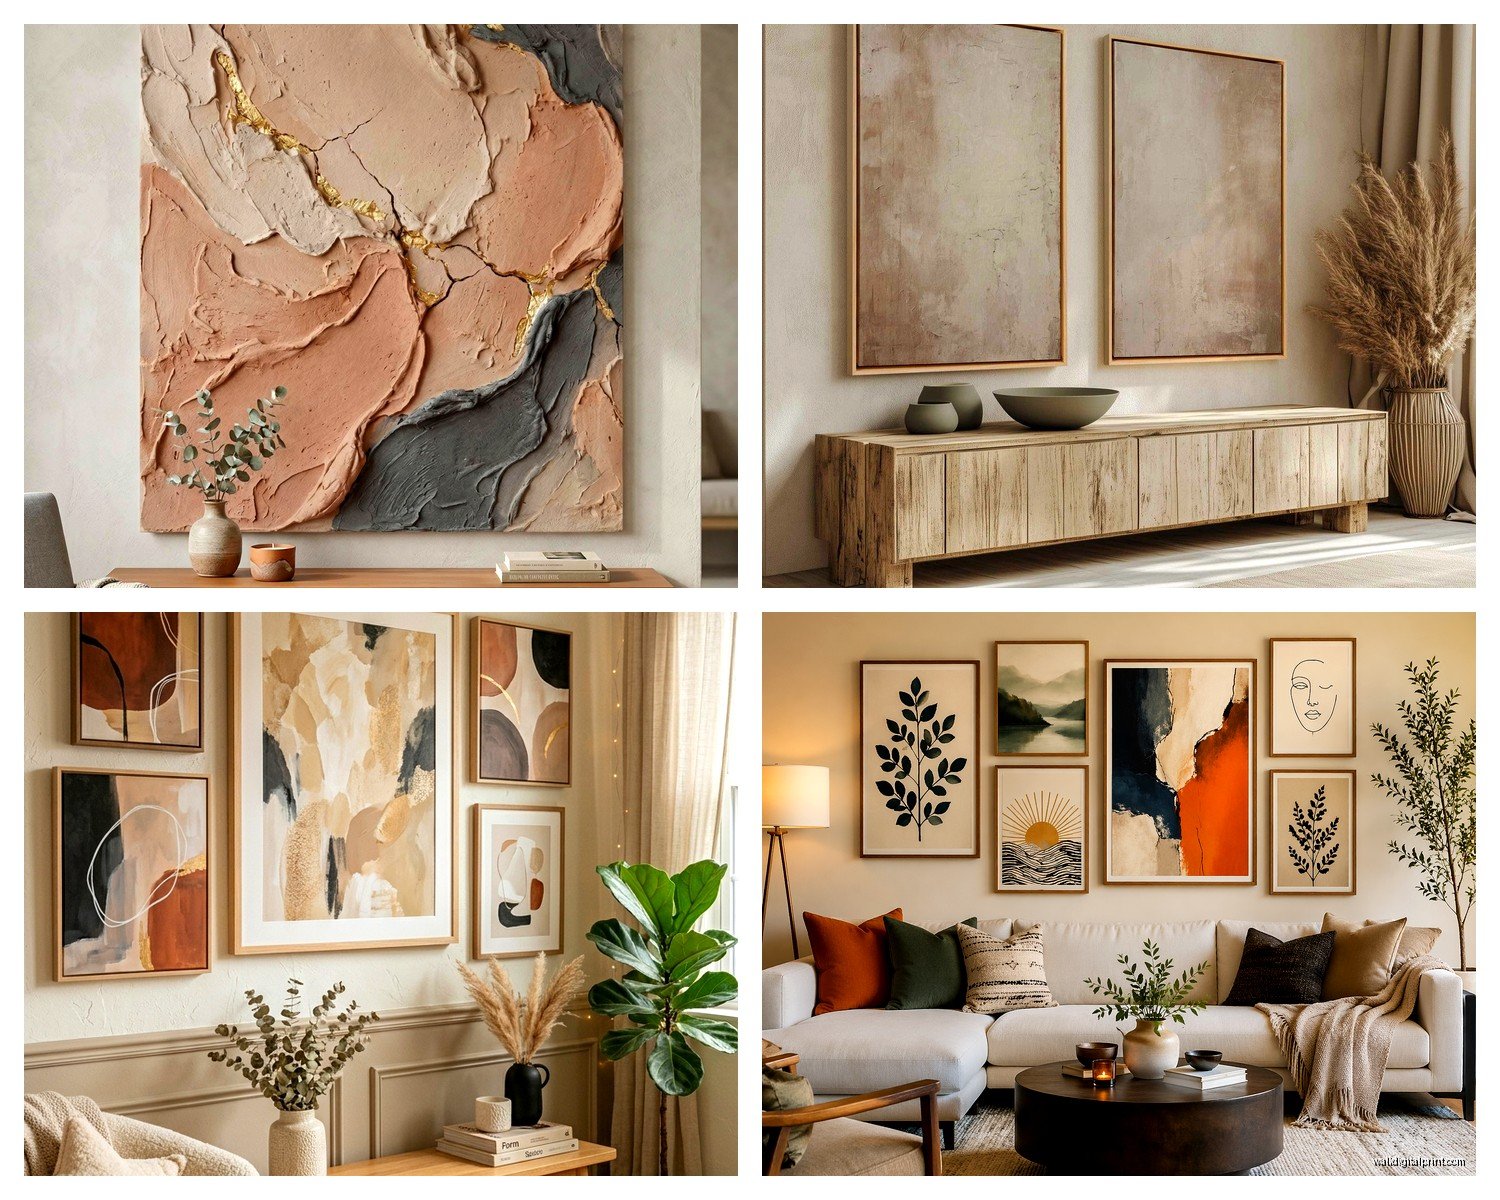
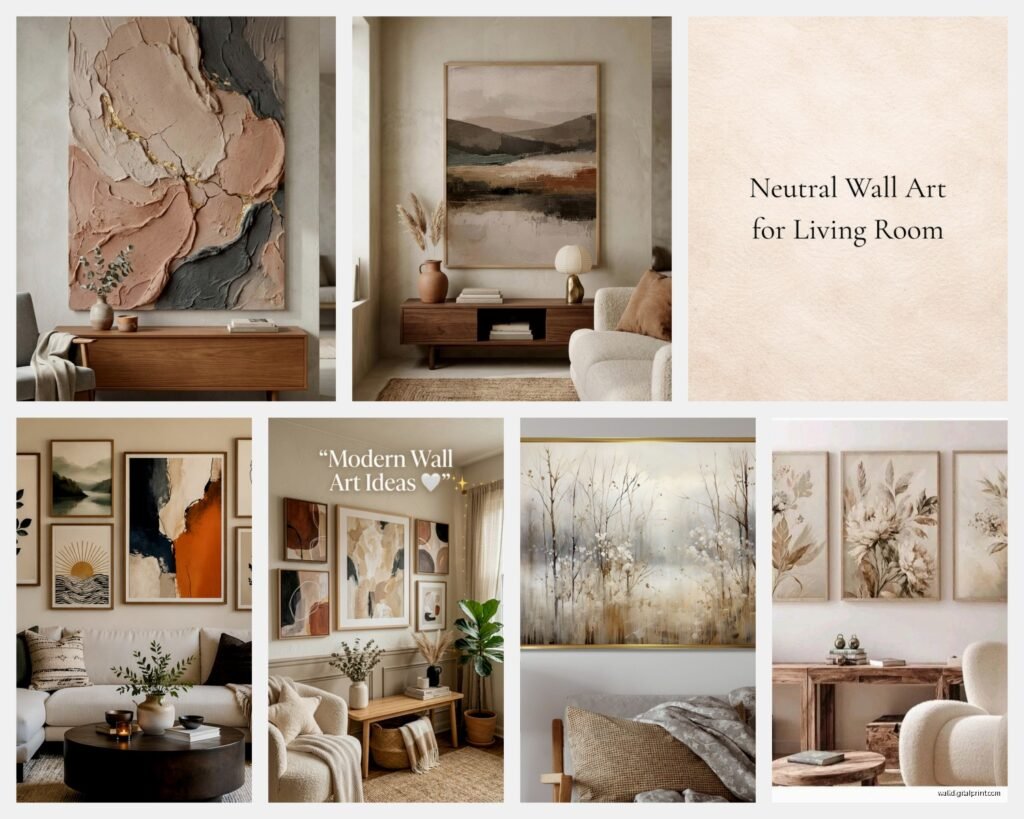
Neutral Wall Art for Living Room: Earth Tone Main Space
Apr
So I’ve been working with earth tone living rooms for like three years now and honestly the wall art thing is where most people completely overthink it or just…give up and buy whatever’s at Target. Which fine, but let me tell you what actually works because I just finished a client’s space last month and we spent way too much time on this.
Start With Your Existing Undertones
Okay so first thing—and I cannot stress this enough—you gotta figure out if your earth tones lean warm or cool. I know that sounds obvious but I’ve seen so many people buy “neutral” art that’s got like gray undertones when their whole room is terracotta and camel, and it just looks…wrong. Hold up your paint samples or fabric swatches next to a pure white piece of paper. If they look peachy or yellow next to it, you’re warm. If they look slightly gray or green, you’re cool.
My living room is all warm—that sandy beige with some rust-colored pillows—and I made the mistake of buying this “abstract landscape” print that was basically gray and sage green. Looked amazing online. Looked like it belonged in someone else’s house when I hung it up.
Warm Earth Tones Need
- Burnt sienna and ochre in the artwork
- Cream or off-white backgrounds, not stark white
- Gold or natural wood frames
- Terracotta or rust accents in the piece
Cool Earth Tones Need
- Sage, olive, or muted greens
- Taupe and mushroom colors
- Black, charcoal, or silver frames
- Hints of slate blue or gray
Size and Scale Without Making It Complicated
The rule everyone tells you is that art should take up like two-thirds to three-quarters of your furniture width. Sure. But in real life, I’ve found you can go smaller if you do a gallery wall or larger if it’s a statement piece. My couch is 84 inches and I have a single 60-inch piece above it that works perfectly fine.
Here’s what I actually measure: stand back like 8-10 feet from where you’re gonna hang it. That’s your viewing distance. The art should feel substantial from there, not like a postage stamp. I use painter’s tape to map out the size on the wall before buying anything because I’ve definitely ordered pieces that seemed huge in the dimensions but looked tiny on my wall.
Oh and another thing—if your ceilings are low (under 8 feet), vertical pieces can help. If they’re high, horizontal pieces ground the space better. I learned this the hard way in my first apartment where I hung everything vertically and it just emphasized how short the ceilings were.
Types of Art That Actually Work
Not all neutral art is created equal and some styles just photograph better than they look in person, which is super annoying when you’re buying online.
Abstract Organic Shapes
These are my go-to. Think blobs and curves in earthy colors—not the geometric stuff. I get mine from this Etsy shop called…wait let me find it…okay I can’t remember the name but search “abstract earth tone canvas” and you’ll find a million. The good ones have texture or at least the appearance of brushstrokes. The bad ones look like someone used the gradient tool in Photoshop.
I bought one from Anthropologie that’s basically just tan and cream organic shapes and it was expensive but the texture is actually painted on, not printed, so it looks way more expensive than it was. Well, it was still $400 so maybe not cheap but you know what I mean.
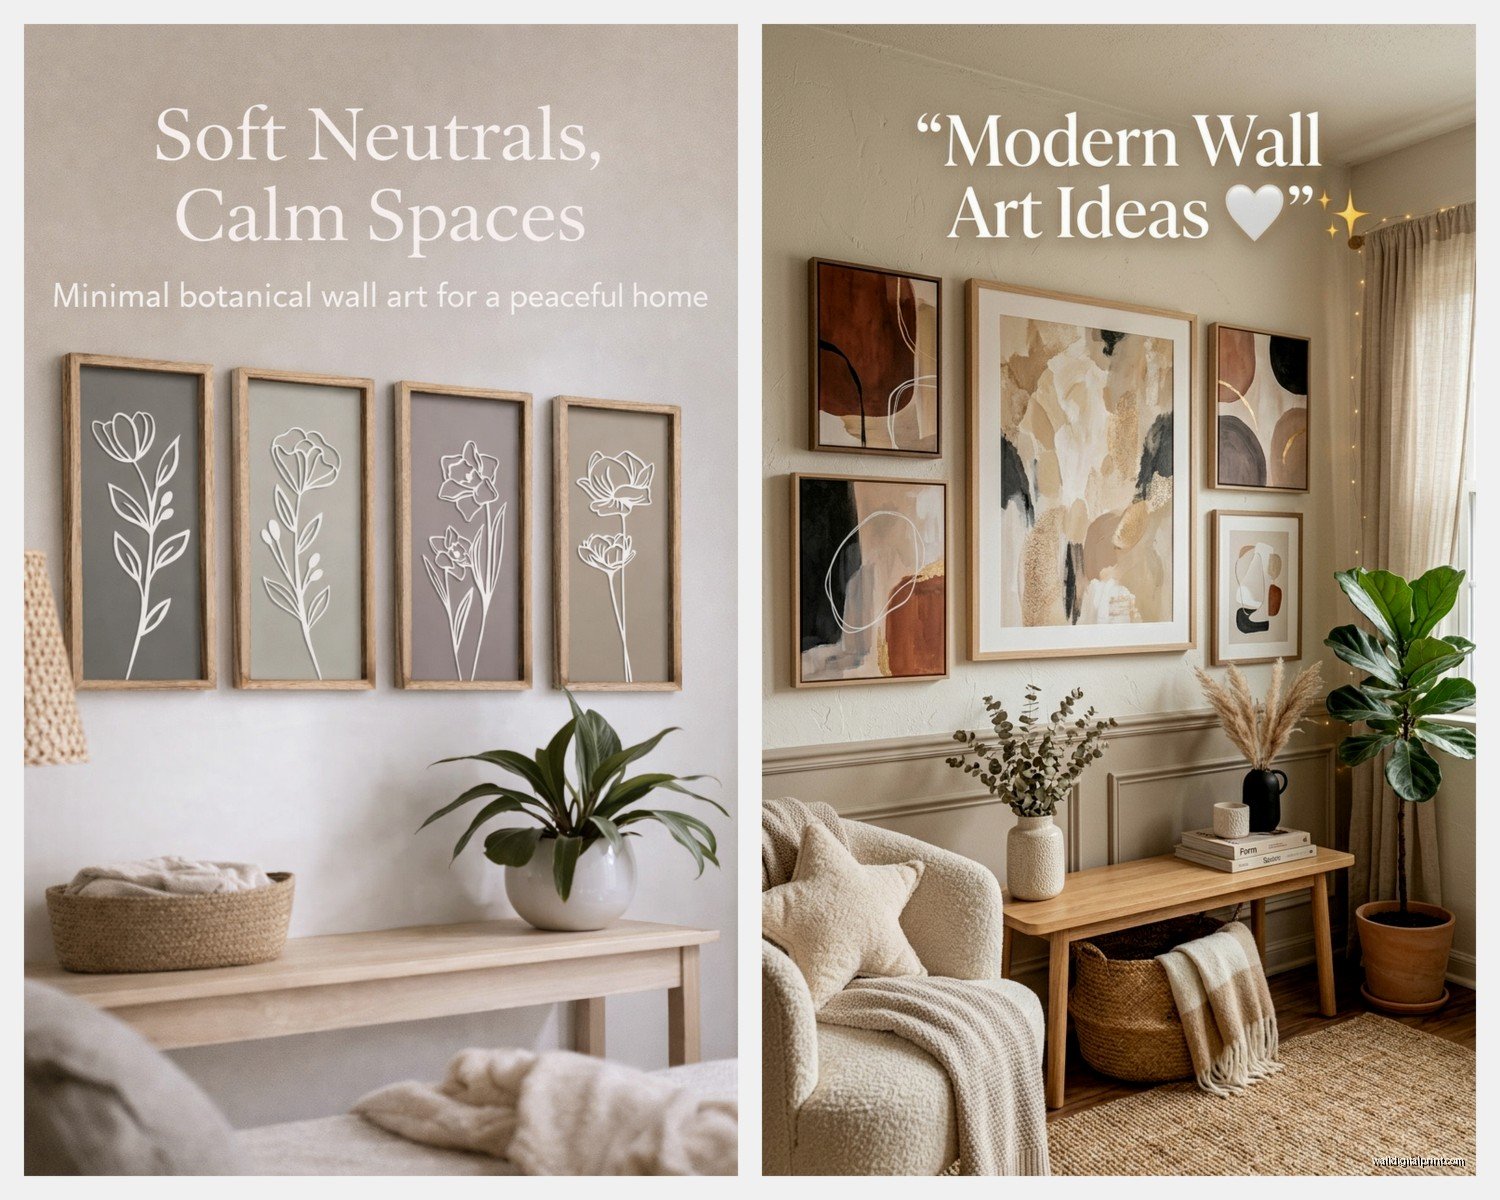
Botanical Line Drawings
Super popular right now but they can go wrong fast. The black and white ones with like pampas grass or eucalyptus? Those work if your earth tones include black or dark brown. If your palette is lighter—all creams and tans—go for the sepia-toned versions instead. I found some vintage-looking botanical prints at an estate sale that were originally from the 70s and they’re perfect because the paper has this aged quality.
You can also print these yourself if you’ve got a decent printer. There’s a ton of public domain botanical illustrations you can download. I did this for a client who didn’t wanna spend much and we printed them at FedEx on nice paper, used thrifted frames, and it looked intentional.
Landscape Photography
Desert scenes, sand dunes, that one photo of Monument Valley everyone has—yeah these work but they’re kinda obvious? I prefer more abstract landscape photography where you can’t quite tell what you’re looking at. There’s this photographer on Society6 who does close-ups of rock formations and they’re just shapes and textures in beige and rust. Way more interesting than another sunset print.
Make sure if you’re getting photography that it’s actually a good quality print though. I ordered something from Amazon once and the resolution was so bad you could see the pixels from like three feet away.
Minimalist Line Art
The one-line face drawings are overdone but single-line landscapes or abstract figures in a brown or terracotta color? Still good. I have one that’s just a continuous line drawing of hills in a rust color and it’s simple enough that it doesn’t compete with anything else in the room.
Framing Makes or Breaks It
Okay so funny story, I bought this perfect piece of art—colors were right, size was right—and put it in a cheap black frame from Ikea and it looked like dorm room decor. Switched it to a natural oak frame and suddenly it looked like I paid someone to curate my space.
For warm earth tones: natural wood frames (oak, maple, light walnut), gold leaf frames if you’re feeling fancy, or even no frame with a wood cleat hanging system.
For cool earth tones: black frames, dark walnut, or those thin metal frames in black or brass.
The mat matters too if you’re using one. Cream or off-white mats for warm spaces, true white or light gray for cool spaces. I usually skip mats entirely for canvas pieces because I think they look more modern without them.
Where to Actually Buy This Stuff
I’m gonna be honest, I’ve bought from everywhere and here’s the real breakdown:
Etsy is hit or miss but when you find a good seller it’s great. Look for shops that show the art in actual rooms, not just the print on a white background. Read reviews that mention color accuracy because monitors lie. I’ve found some amazing stuff but also received things that looked nothing like the photos.
Minted has good quality printing and tons of earth tone options. It’s pricier but their framing service is actually decent. My sister used them for her whole gallery wall and everything arrived ready to hang.
Society6 is where I go for photography and more artistic prints. The quality is consistent and they have sales constantly. Wait for the 20% off ones, they happen like twice a month.
Rejuvenation and Schoolhouse Electric if you want something more curated and are okay spending $300-800 per piece. The quality is noticeably better and they have stuff you won’t see everywhere.
West Elm for framed prints that are actually ready to hang and don’t look like everyone else’s. Their earth tone selection is pretty good and it goes on sale.
Thrift stores and estate sales if you’re patient. I’ve found some incredible vintage landscape paintings and botanical prints this way. You might need to reframe them but you’re getting original art.
Arranging Multiple Pieces
If you’re doing more than one piece, there’s like a thousand gallery wall tutorials out there but here’s what I actually do: lay everything on the floor first in the arrangement you want. Take a photo. Then use that as your guide.
For earth tone spaces, I like asymmetrical arrangements better than the grid thing. It feels more organic. Odd numbers work better—three pieces or five, not four. And vary the sizes but keep the color palette tight.
The spacing should be 2-3 inches between frames. I use a ruler because eyeballing it always ends with uneven gaps. Start with your largest or most important piece and build around it.
Oh wait I forgot to mention—the center of your art should be at eye level, which is usually 57-60 inches from the floor. But if you’re tall or short adjust accordingly. I’m 5’4″ so I hang things slightly lower than the standard recommendation or I’m always looking up at my own art.
My Favorite Combinations
- One large abstract piece (36×48) above the sofa plus two smaller botanicals (11×14) on an adjacent wall
- Three vertical pieces (16×20) in a row, all in the same frame style but different art
- One really large landscape photo (40×60) as the only art in the room—makes a statement
- A collection of five to seven smaller pieces (8×10 to 11×14) in a salon-style arrangement
Color Combinations That Work
Since we’re talking earth tones, here’s what I’ve tested and liked:
Cream + terracotta + olive green—this is my current palette and it’s chef’s kiss. The art I have is mostly cream backgrounds with terracotta shapes and tiny hints of olive.
Beige + rust + ochre—warmer and cozier. Works especially well if you have wood furniture with orange undertones.
Taupe + sage + charcoal—cooler and more modern. I did this in a client’s mid-century modern living room and it was perfect.
Sand + umber + cream—the most neutral of the neutrals. Can’t really go wrong but might feel a bit safe if that’s not your thing.
What Doesn’t Work
Let me save you some money. Pure black and white photography in an earth tone room—too stark unless you have black furniture or accents. Neon or bright colors even as accents—totally throws off the vibe. Really ornate gold frames—they read more traditional than earthy. Anything with pink unless it’s like a dusty rose, and even then it’s tricky. Really glossy prints—the shine reflects light weirdly and looks cheap.
I bought this teal and gold abstract piece once thinking the gold would tie into my warm tones and the teal would be a fun pop of color. It was not. It looked like it belonged in a completely different house. Donated it after two weeks.
Lighting Matters More Than You Think
Your art is gonna look different depending on your lighting situation. If you have warm incandescent bulbs, cool-toned art will look muddy. If you have daylight LEDs, warm-toned art might look too yellow. I switched all my bulbs to 3000K (soft white) which is neutral enough that everything looks accurate.
Also consider getting picture lights for larger pieces. I installed battery-operated LED picture lights above my main piece and it made such a difference. Cost like $30 and totally worth it.
Natural light is great but watch out for direct sunlight because it’ll fade your prints over time. I learned this when my favorite desert landscape print got noticeably lighter on one side after a year next to a west-facing window. UV-protective glass helps but it’s expensive.
DIY Options If You’re Crafty
I’ve made my own art a few times and it’s honestly not that hard if you keep it abstract. Get a canvas, use acrylic paint in your earth tone colors, and just…make shapes. Doesn’t have to be precious. Some of my favorite pieces in my house are ones I made while watching Netflix. My cat knocked one over while it was drying and the smudge actually made it look better so I kept it.
You can also do printing projects—there’s this technique where you paint fabric with watered-down acrylics and then press it onto canvas and it creates these cool organic patterns. I did this with muslin fabric in rust and cream and it turned out way better than expected.
Another option is framing interesting fabric or wallpaper samples. I framed some vintage grasscloth wallpaper I found at an estate sale and people always ask where I got the “art.” Cost me $5 plus the frame.
The Stuff Nobody Tells You
Command strips are your friend for renting or if you’re commitment-phobic about placement. They hold way more weight than you’d think. I have a 20-pound piece up with them.
Buy more art than you need and rotate it seasonally. I have a whole bin of extra pieces and swap them out every few months. Keeps the space feeling fresh without spending more money.
If something isn’t working, move it to a different room before you give up on it. That gray-green piece I mentioned earlier? Looks perfect in my bedroom where the tones are cooler.
Match your art to your permanent fixtures, not your accessories. Your pillows and throws will change but your couch and walls probably won’t, so make sure the art works with those.
Don’t buy everything at once. Live with one piece for a while and see what else you need. I always think I need more art than I actually do and end up returning stuff or having it sit in my closet.
Anyway that’s basically everything I know about neutral wall art for earth tone spaces. It’s really about testing things and not being afraid to return stuff if it doesn’t work. I’ve probably returned 30% of the art I’ve ordered over the years and that’s just part of the process.