Wall Art Guide, Wall Art Tutoriels
Children’s Wall Art: Kids Room Playful Educational Decor
May
So I’ve been doing kids’ rooms for like 15 years now and the wall art thing is honestly where most parents either nail it or end up with a space that looks like a Pinterest board threw up everywhere. Let me just dump everything I know because I literally just finished a 6-year-old’s room yesterday and I’m still thinking about what worked.
The Height Thing Everyone Gets Wrong
Okay so first thing – hang art at the kid’s eye level, not yours. I see this ALL the time where parents hang these beautiful alphabet prints at adult height and the kid can’t even see them properly. For toddlers that’s like 36-40 inches from the floor to the center of the frame. School-age kids maybe 42-48 inches. I know it looks weird to you but you’re not the one staring at it while playing with blocks on the floor.
Actually wait, I should back up because the type of art matters before we even talk about hanging it.
Educational vs Decorative and Why You Need Both
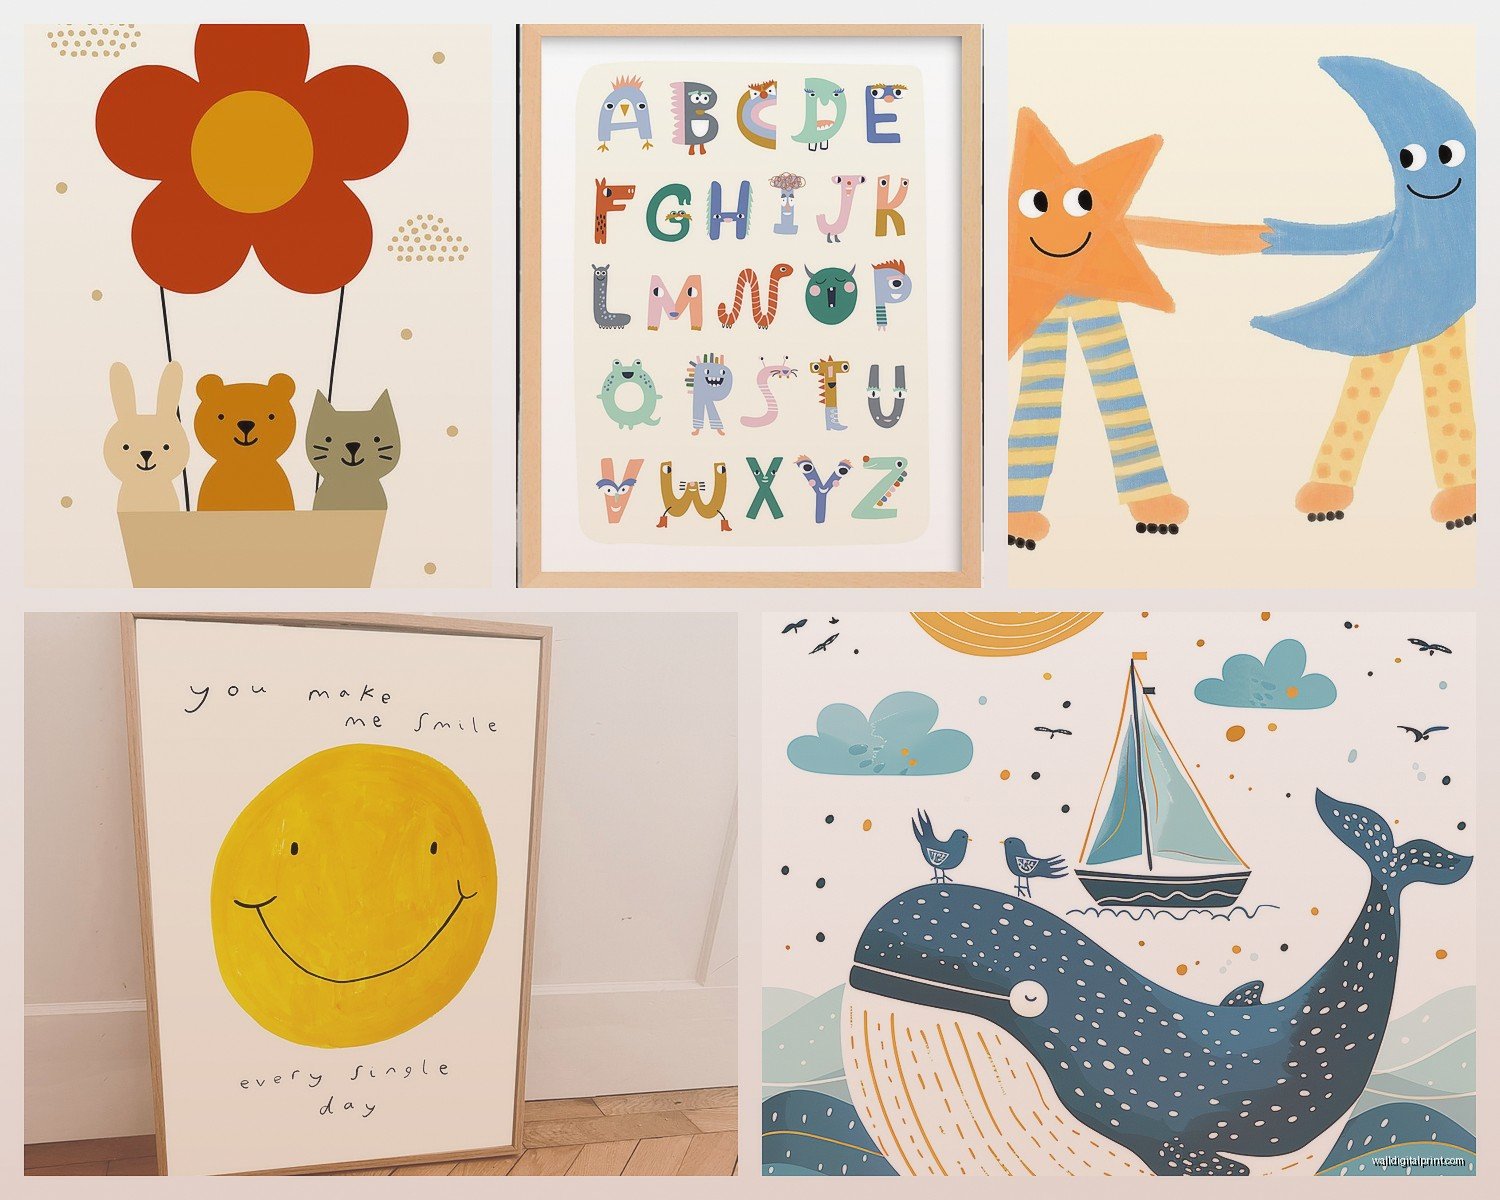
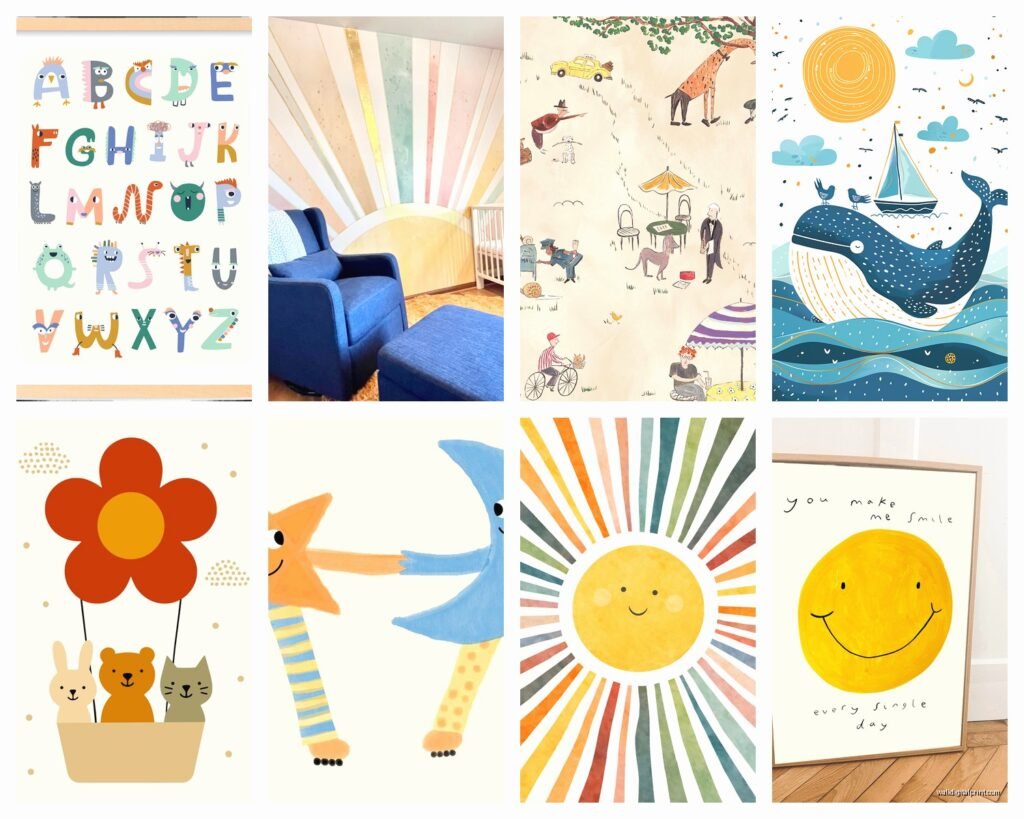
There’s this whole debate about whether kids’ wall art should teach them stuff or just look cute. The answer is both but in different zones of the room. Near the desk or reading nook? That’s where I put the educational pieces – alphabet charts, number lines, world maps, solar system posters. Those Bridget Kids Studio prints on Etsy are really good for this, very clean modern designs that don’t look babyish. My niece had their alphabet print until she was like 9.
But over the bed or on the main focal wall? That’s where you can go more whimsical and decorative. This is gonna sound weird but I actually think the decorative art is more important for their emotional development than we give it credit for. A kid who wakes up looking at a print that makes them happy starts the day differently.
What Actually Holds Up
Canvas prints are honestly overrated for kids rooms. They get dirty, kids touch them with sticky hands, and you can’t really clean them well. I’ve switched almost entirely to recommending framed prints behind glass or acrylic. Yeah there’s the whole “what if the frame breaks” concern but if you use plexiglass instead of regular glass it’s not really an issue.
Target has those Project 62 frames that are like $15-25 and they’re surprisingly sturdy. I’ve used them in probably 30 rooms at this point. The trick is using the 3M picture hanging strips rated for more weight than you need – double up on them even.
The Gallery Wall Approach That Actually Works
Gallery walls in kids rooms are tricky because unlike your living room, this needs to evolve. Here’s what I do and it’s worked really well – create a grid system with 6-9 frames (even numbers look weird, stick with odd), but only fill like 5-6 of them initially. Leave some empty or put in placeholder art that you know you’ll swap out.
I use a combination of:
- 2-3 educational prints (alphabet, numbers, shapes)
- 2-3 prints related to their current interests
- 1-2 spots for their own artwork
- Maybe one motivational quote if they’re old enough to read
Oh and another thing – when you’re doing a gallery wall, lay everything out on the floor first. Take a picture of it. Then measure and mark your wall. I use painters tape to mark where each frame goes before I hammer anything. Sounds excessive but I’ve had to redo exactly ONE gallery wall in the last 5 years using this method.
Frames for the Long Game
If you’re gonna invest anywhere, invest in frames that can transition. Those really juvenile chunky colorful frames? They’re cute until the kid turns 7 and suddenly everything babyish is embarrassing. Simple wood frames in white, natural wood, or black work from age 2 to 18.
IKEA’s RIBBA frames are like the workhorse of kids’ rooms. They’re cheap enough that if one breaks you’re not crying about it, but they look way more expensive than they are.
Peel and Stick Stuff – When It Works and When It Doesn’t
Okay so removable wall decals are having this moment and some of them are genuinely great for renters or commitment-phobes. But here’s the thing nobody tells you – they don’t stick well on textured walls. At all. If you have that orange peel texture, forget it. They’ll be peeling off in like 3 months.
The best ones I’ve found are from a company called Pop & Lolli. They’re pricier than the Amazon ones but they actually restick if you mess up the placement. I was watching The Bear while installing some of their tree decals in my client’s nursery last month and had to move one branch like 4 times – it still stuck fine.
For educational stuff, those alphabet decal sets can be really cool because kids can touch them and trace them. There’s something about the tactile element that helps with learning. Just put them low enough that little hands can reach.
The Magnetic Paint Hack
This is gonna sound random but if you’re painting anyway, consider doing one wall with magnetic primer under your regular paint. Then you can use magnetic frames or just let kids stick magnetic letters and numbers directly on the wall. I did this in my nephew’s room and it’s been two years – still his favorite wall. He’s constantly rearranging stuff and it keeps the floor cleaner because things have a designated spot.
Art That Grows With Them
The biggest mistake I see is buying super age-specific art. Like yes your 3-year-old loves Paw Patrol but do you really want to repaint and redecorate in 18 months? Here’s my strategy:
Pick themes that have staying power:
- Animals (not cartoon ones, more realistic or minimalist illustrations)
- Space and planets
- World maps and geography
- Nature scenes
- Abstract shapes and colors
- Vintage transportation (planes, trains, ships)
There’s this Etsy seller called The Crown Prints that does these gorgeous watercolor animal portraits that work for literally any age. Not sponsored or whatever, I just use their stuff constantly. A watercolor elephant looks good in a nursery and still looks good in a 12-year-old’s room.
The DIY Frame Rotation System
My client canceled last Tuesday so I spent an hour setting up this system for my own goddaughter’s room and it’s genius if I do say so myself. Get some of those IKEA MOSSLANDA picture ledges (the floating shelf ones). Mount them at kid height. Then you can rotate art in and out without putting new holes in the wall.
Keep a bin of different prints organized by theme or season. Kids can help pick what goes up, and you’re not committed to anything permanently. It’s also perfect for displaying their own artwork – just clip it to a hanger and lean it on the shelf.
Actually Educational Pieces That Don’t Look Boring
The problem with most educational wall art is it looks like a classroom threw up. But there are some really beautiful options now:
Alphabet prints that are actually artistic – look for ones where each letter is illustrated with an animal or object. The creativity helps with memory retention way more than just plain letters.
Number charts that incorporate counting objects. I found this print on Society6 that shows numbers 1-20 with corresponding dots in really pretty colors. The kid learns number recognition AND one-to-one correspondence.
World maps that are colorful and illustrated. The Poppik sticker maps are technically a craft project but once they’re done you frame them and they’re legit beautiful. Plus the kid helped make it so they actually care about it.
Color Coordination Without Making It Boring
You don’t have to match everything to your room’s color scheme but it helps if there’s some coordination. I usually pull 2-3 colors from the bedding or rug and make sure the art incorporates at least one of those colors. It creates cohesion without being matchy-matchy.
But also don’t be afraid of an accent color in the art that’s not elsewhere in the room. Sometimes that pop of unexpected color is what makes a space interesting.
The Safety Stuff I Gotta Mention
Yeah yeah everyone talks about anchoring furniture but wall art can be a safety thing too. Nothing heavy above the crib or bed, obviously. Use the right hardware for your wall type – drywall anchors if you’re not hitting a stud. And honestly for anything over like 5 pounds just find the stud, it’s worth the extra effort.
For toddler rooms I avoid anything with glass if it’s within their reach. Plexiglass or just canvas boards. They’re gonna throw something at the wall eventually, might as well plan for it.
Lighting Your Wall Art
Nobody thinks about this but lighting makes such a difference. If you have overhead lighting that casts shadows on your wall art, consider adding a small picture light or even just repositioning a lamp. I’ve seen gorgeous prints look completely washed out because of bad lighting.
Those battery-operated LED picture lights are like $20 on Amazon and you can stick them right to the frame or wall. No electrician needed.
The Rotation Schedule That Actually Makes Sense
I tell parents to plan on refreshing wall art about once a year, maybe twice if the kid is under 5 and their interests are changing rapidly. Keep the frames, just swap the prints. This is why I’m so big on standard frame sizes – 8×10, 11×14, 16×20. You can find prints for these sizes everywhere.
Buy prints on sale throughout the year when you see them. I have a whole folder on my computer of saved Etsy prints I grab during sales. Then when it’s time to refresh a room I’ve got options ready to go.
Incorporating Their Own Artwork
Every kid’s room should have space for displaying their own creations. But here’s the thing – not everything they make needs to go up. I know that sounds harsh but if you put up every drawing and painting you’ll have no wall space left and honestly it starts looking chaotic.
What I do is create a “featured artist” spot with 2-3 rotating frames. The kid picks what goes up and it changes monthly or whenever they make something they’re really proud of. Everything else gets photographed and goes in a portfolio binder or gets stored in a flat file box.
Those wire grid boards (like the IKEA SKADIS) are perfect for this too. Kids can clip up their own art with clothespins and it’s easy to rotate things out.
Budget Breakdown for Real Life
You don’t need to spend a fortune. Here’s what I typically budget for a well-decorated kids room:
- 4-6 frames: $60-120 (mix of IKEA and Target)
- Prints: $40-80 (Etsy, Society6, or downloadable prints you print yourself)
- Hanging supplies: $20
- Optional decals or extras: $30-50
Total you’re looking at like $150-270 for a really well-done wall art situation. You can definitely do it for less if you print your own stuff at home or use free printables.
Where to Actually Buy Good Prints
I’m gonna just list my go-to sources because people always ask:
Etsy – specifically look for downloadable prints. You buy it once, download the file, and can print it at whatever size you need. Way cheaper than buying physical prints.
Society6 – they have sales constantly. Sign up for emails and wait for 30-40% off.
Minted – more expensive but their quality is really good. Watch for sales around holidays.
Your own printer – if you have a decent color printer, buy printable cardstock and print your own. The quality is honestly fine for kids rooms.
Artifact Uprising or Chatbooks – for turning their artwork or family photos into actual gallery-worthy prints.
The Mistakes I See Over and Over
Hanging everything too high – I said this already but I’m saying it again because it’s that important.
Too much going on – more art doesn’t equal better. Sometimes one large statement piece is better than 10 small ones.
Not considering the view from the floor – kids spend a lot of time on the floor. What does the art look like from down there?
Ignoring the other walls – everyone focuses on the wall behind the bed but what about over the dresser? Next to the door? Think about the whole room.
Character stuff everywhere – I get it, they love Elsa or Spider-Man, but maybe contain that to bedding or a few accessories rather than permanent wall art.
Quick Installation Tips
Use a level. Like actually use one, not just your eyeball. I’ve gotten lazy exactly twice and both times regretted it.
Mark your holes with painters tape first, especially if you’re doing multiple frames.
Command strips are your friend for lightweight frames but use more than you think you need.
For heavy frames, locate the stud or use proper drywall anchors rated for the weight.
Keep a touch-up paint pen handy for when you eventually move stuff around.
Oh and one last thing – take photos of the room when you’re done. Kids rooms evolve so fast and it’s nice to have that documentation. Plus if something works really well you’ll remember what you did for the next kid or when you need to redo the room in a few years.
The goal is creating a space that’s visually interesting, supports learning, and actually reflects who your kid is right now. It doesn’t need to be perfect or Instagram-worthy. It just needs to work for your family and make the kid happy when they’re in their space.