Wall Art Guide, Wall Art Tutoriels
Dorm Room Wall Art: College Student Decor Ideas

Apr
So I literally just helped my neighbor’s daughter set up her dorm last weekend and honestly the wall art situation is way easier than everyone makes it out to be, you just gotta know what actually works in those tiny rooms with their weird restrictions.
First Thing – Know What You’re Actually Allowed to Do
Okay so this is gonna sound boring but seriously check your housing rules first because I’ve seen students lose their entire deposit over command strips. Most dorms now are cool with removable adhesive but some older buildings are super strict about it. My friend’s son goes to this school in Boston and they literally only allow poster putty, nothing else. So annoying but whatever, at least you know upfront.
Command strips are your best friend though if they’re allowed. Not the cheap knockoffs from the dollar store – I tested those and they literally fell off the wall at 3am and scared the crap out of my cat. The actual 3M ones hold up way better and don’t take the paint off when you remove them, which is the whole point.
Tapestries Are Having a Moment For a Reason
I know everyone and their mom has a tapestry now but there’s actually a reason they’re so popular in dorms. They cover a MASSIVE amount of wall space for like $15-30, and they hide all those gross cinder block walls or weird stains that were already there.
The best size for a standard dorm is the medium one, usually around 60×80 inches. The huge ones are too much unless you have a corner room or something. I’ve been seeing a lot of students go for the subtle designs instead of those super bright mandala ones from 2016… thank god because those were everywhere for a while.
You can hang them with those tiny command hooks at the corners or honestly just some thumbtacks at the top if your school allows it. The fabric is light enough that it won’t pull down. Oh and another thing – if you get one with a more neutral pattern, you can change up your bedding and other stuff without it clashing. Learned that the hard way when I was curating a client’s daughter’s room and everything was fighting with this bright orange tapestry.
Poster Frames vs Just Hanging Posters
This is gonna sound snobby but bare posters with just tape or thumbtacks look really college-y in a not-great way. Frames make such a difference but here’s the thing – real glass frames are heavy and breakable and kind of a nightmare to pack.
I found these lightweight poster frames at Target (they’re also on Amazon) that are basically just plastic edges that snap around your poster. They’re called poster hangers or magnetic poster frames. Game changer. They come in different finishes – black, wood, gold – and they make even a $5 poster look intentional.
For the magnetic ones, you literally just sandwich your poster between two magnetic bars at the top and bottom. Hang with one command hook. Done. They’re like $12-18 depending on size.
If you’re printing your own art or photos, go for matte prints not glossy. The glossy ones show every fingerprint and get this weird glare from the overhead fluorescent lights that every dorm seems to have.
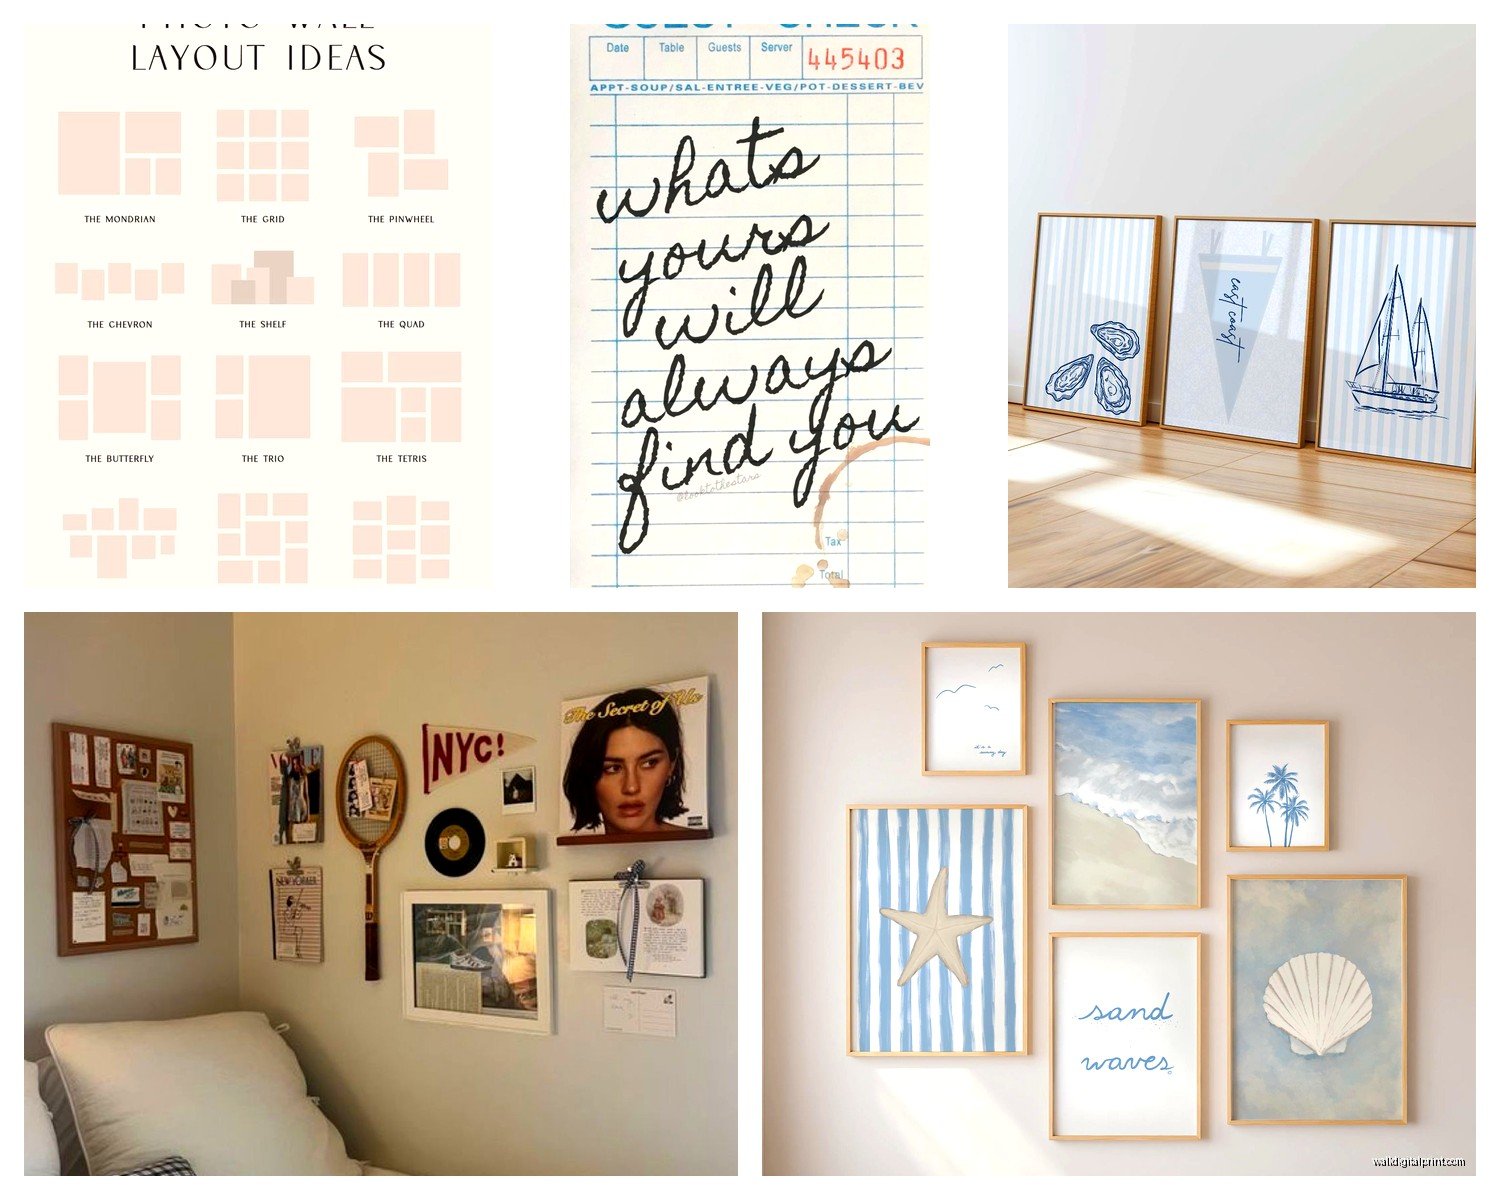
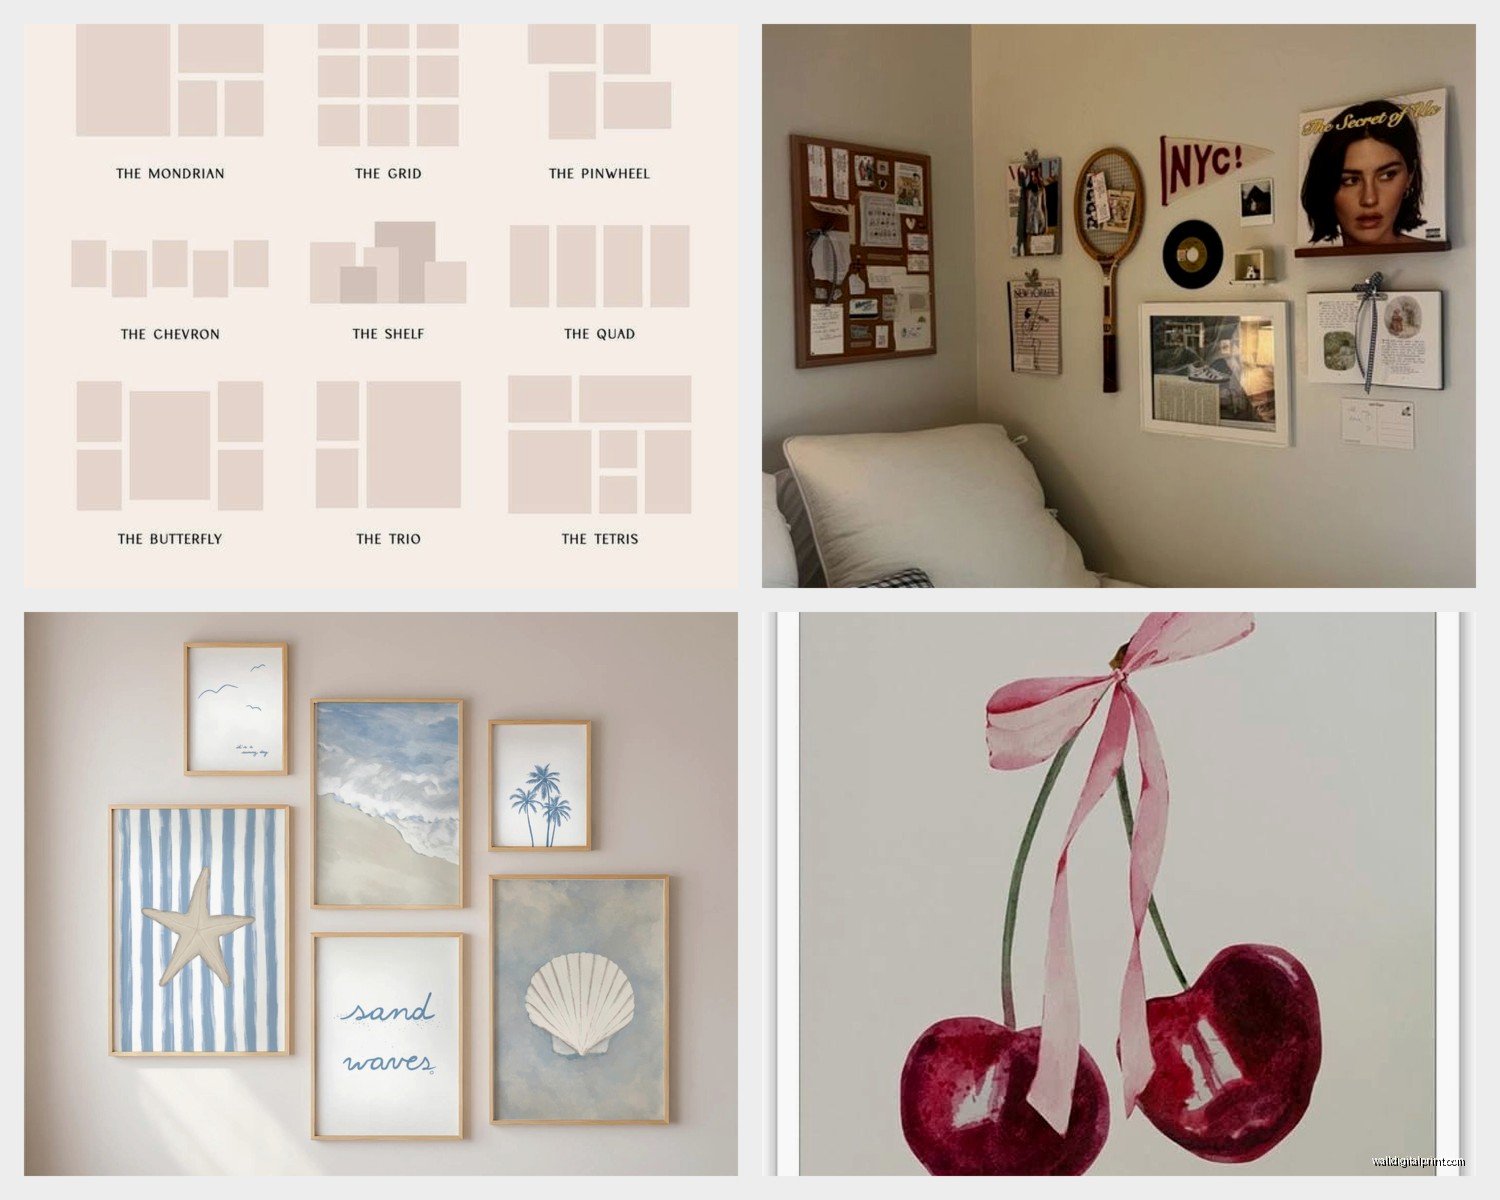
Photo Displays That Don’t Look Messy
Okay so funny story, I was watching this documentary about minimalism while organizing my studio and realized that most dorm photo displays look chaotic because there’s no structure. You don’t need to be minimalist but you do need SOME kind of system.
The string light photo clips thing is cute but it only works if you’re selective. Like 10-15 photos max, not 47 random pictures. I’ve seen it done well with all black and white photos on the string, or all the same size prints. Mixing a bunch of different sizes and colors just looks like a ransom note.
Grid layouts are your friend. If you’re doing a photo wall, get all the same size frames (even cheap ones from IKEA or wherever) and arrange them in a grid. 4×6 prints in matching frames look way better than a random collage of different sized things.
There’s also those wire grid panels you can get – they’re meant for like organizing your desk stuff but they work amazing on walls for photos. You clip photos on with little clips and can rearrange whenever. My neighbor’s daughter did this in rose gold and it actually looked really good.
Peel and Stick Wallpaper Is Actually Worth It
Wait I forgot to mention this earlier but peel and stick wallpaper has gotten SO much better in the past few years. It used to be garbage that would fall off or leave residue but the newer stuff is legit.
You don’t need to do a whole wall necessarily. I’ve been seeing students do just one accent wall behind their bed or even just a section of wall to create a backdrop for their desk area. Makes zoom calls look better too if you’re doing virtual classes or whatever.
The textured ones work better in dorms than the flat printed ones in my experience. Something like a subtle brick pattern or linen texture adds dimension without being too much. And it hides imperfections in the wall better.
Application is pretty straightforward but measure twice because you can’t really reposition it a million times. Cut it slightly larger than you need and trim the excess. Use a credit card or squeegee to smooth out bubbles as you go.
Where to Actually Buy This Stuff
Amazon has a huge selection obviously but the quality is hit or miss. I usually read reviews that have photos because the product photos lie constantly.
Society6 and Redbubble are good for unique art prints and they have tapestries too. Bit more expensive but you’re supporting actual artists which is cool I guess.
Urban Outfitters has dorm stuff on sale constantly. Sign up for their emails because they do additional student discounts pretty often.
Hobby Lobby and Michaels if you want to DIY anything – they have 40-50% off coupons literally every week. Their poster frames are decent quality.
DIY Options That Don’t Require Artistic Talent
If you wanna personalize but can’t draw to save your life (same), there’s workarounds.
Print your own designs from Canva – it’s free and has templates for everything. You can make quote prints, photo collages, whatever. Print at Staples or FedEx for cheap, then frame.
Fabric scraps in embroidery hoops make cool wall art and it’s literally just stretching fabric over the hoop and trimming the excess. You can find fabric remnants at craft stores for like $2. Mix different patterns and sizes.
Paint chip art is free and looks cooler than it should. Go to Home Depot and grab a bunch of paint chips in a color gradient, arrange them in an ombre pattern, and stick them to a poster board. Frame it or just hang the whole board.
String art is pretty easy too if you’re into that aesthetic. You need a wood board, nails, and embroidery thread. There’s tutorials everywhere online but basically you hammer nails in a pattern and wrap thread between them. Takes time but it’s mindless – I did one while binge watching that show about the chess prodigy.
Practical Stuff About Layout
This is gonna sound weird but the biggest mistake I see is hanging everything too high. Art should be at eye level when you’re standing, which is roughly 57-60 inches from the floor to the center of the piece. In a dorm where you’re sitting on your bed a lot, you can go slightly lower.
Leave space between pieces – at least 2-3 inches. Too close together looks cluttered and you lose the impact of individual pieces.
Balance the room. If one wall is covered in stuff, keep the other walls simpler. The goal isn’t to fill every inch of wall space.
Above your desk is prime real estate for motivational quotes or whatever helps you focus. Above your bed is good for bigger statement pieces or photo displays.
Things That Seem Like Good Ideas But Aren’t
Neon signs – they’re trendy right now but they’re expensive, use electricity constantly, and honestly most of them are kinda tacky after the novelty wears off.
Too many mirrors – one mirror is functional and makes the room feel bigger but multiple mirrors gets weird and disorienting.
Anything that requires nails or drilling unless you’re 100% sure it’s allowed and you’re comfortable patching holes later.
Super personal inside joke posters that you’ll cringe at by second semester. Keep some stuff neutral so you don’t hate your room by November.
Heavy wooden frames – just trust me on this, they’re a pain to transport and hang.
The Actual Shopping List for Someone Starting From Zero
If I was setting up a dorm wall from scratch with a reasonable budget:
- One medium tapestry or large canvas print for main wall – $20-40
- Set of 3-4 matching photo frames for desk area – $30
- Two poster hangers for favorite prints – $25
- String lights with photo clips OR wire grid panel – $15-20
- Command strips variety pack – $15
- Optional: small peel and stick wallpaper sample for accent area – $30
That’s like $135-160 total and gives you a bunch of options without going overboard.
Seasonal Rotation Strategy
One thing I tell everyone is don’t commit to one look for the whole year. Bring extra posters or prints and swap them out between semesters. It makes the space feel fresh and you’re not stuck staring at the same stuff for nine months.
Keep the command strips on the wall and just change what’s hanging from them. Way easier than removing and reapplying adhesive.
I usually suggest having a “fall semester” vibe and a “spring semester” vibe. Warmer tones and cozy stuff for fall, brighter or cooler tones for spring when you’re dying for winter to be over.
Working With a Roommate
Oh yeah so if you have a roommate this gets trickier. You gotta coordinate at least a little bit or it looks like two different rooms smashed together.
Pick a neutral color palette you both like and stick to it. Doesn’t mean everything has to match exactly but if one person is all pastels and the other is all neon, it’s gonna be rough.
Divide the wall space clearly – each person gets their own walls to decorate however they want. The shared spaces like above the door or whatever can be collaborative or just left minimal.
My neighbor’s daughter and her roommate both brought tapestries and they actually layered them on one wall which looked surprisingly good because the colors complemented each other. So sometimes accidents work out.
The Stuff I Keep Coming Back To
After helping with like a dozen dorm setups at this point, the things that consistently work:
Black and white photography prints – they go with everything and don’t get old quickly. Nature photos, cityscapes, abstract stuff, whatever matches your vibe.
Simple line art drawings – very trendy right now but also pretty timeless. Faces, plants, abstract shapes. You can find printables on Etsy for cheap.
World maps or city maps – functional if you’re planning travel and they fill a lot of space without being overwhelming.
Your own photography if you’re into that – print your best shots and frame them. It’s personal but not in a way that gets annoying.
Neutral tapestries in cream, gray, or muted colors – way more versatile than bright patterns.
Okay I think that covers most of it. The main thing is just start with a few key pieces and add gradually. You don’t need to have everything perfect on move-in day. Also removable is your friend for literally everything because you’re gonna wanna change stuff anyway and dorm walls are not forgiving when you damage them.