Wall Art Guide, Wall Art Tutoriels
Family Room Wall Art: Den Recreation Casual Space Decor
May
So I’ve been working on family room wall art for like forever now and honestly it’s one of those spaces where people get SO stuck because it needs to work for everyone, right? Like you’re trying to make it look put-together but also your kids are gonna be in there eating goldfish crackers and someone’s dog is probably drooling on the couch.
The biggest mistake I see is people treating family room art like it’s a formal living room. It’s not. This is where life happens and your art should reflect that without looking like you gave up entirely.
Start With the Reality Check
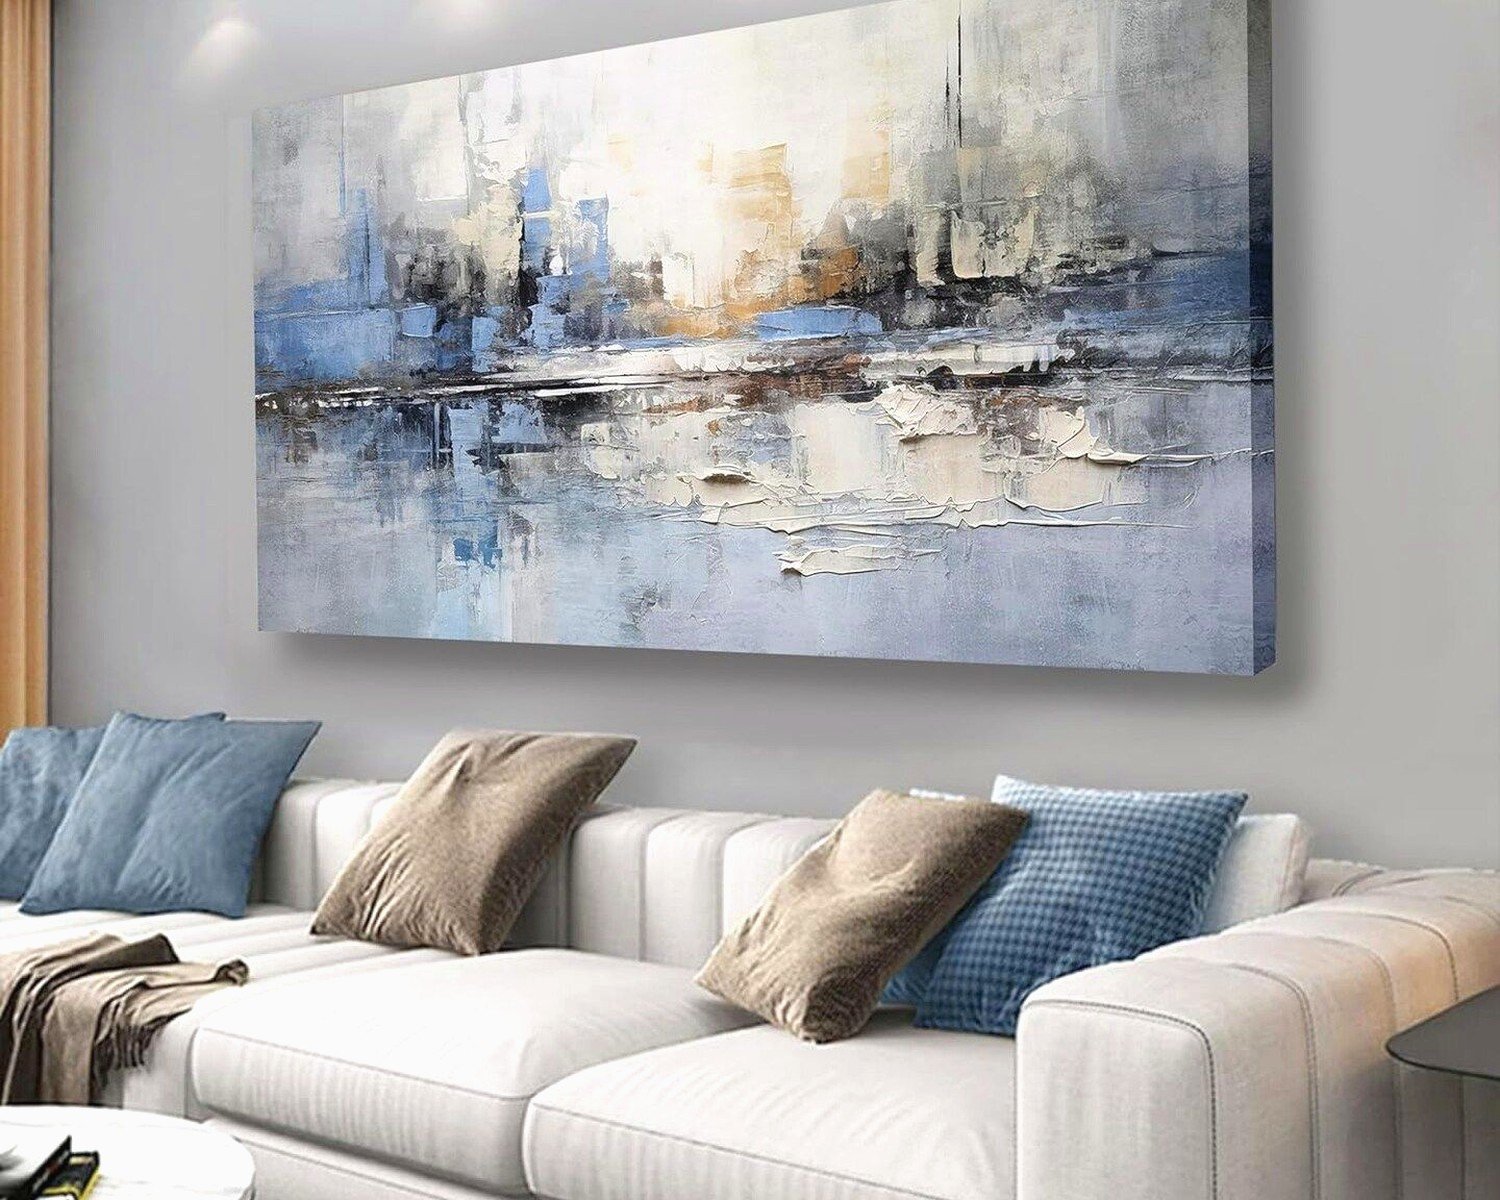
Okay so first thing, look at what’s actually happening in your space. Is this the room where the kids do homework? Gaming setup in the corner? TV mounted on one wall? Because all that matters way more than you think. I had this client last year who bought this gorgeous oversized abstract piece and then realized it was directly behind where people’s heads would be when sitting on the couch, so literally no one could see it except when walking through the room. We ended up moving it but like, measure first.
The scale thing trips everyone up. You want pieces that feel substantial enough to anchor the space but not so massive that they overwhelm. For reference, if you’ve got a standard 8-foot ceiling, you’re looking at art that’s roughly 24-36 inches for a main piece. Over a sofa, go bigger, maybe 48-60 inches wide or do a gallery wall that spans that width.
What Actually Works in Casual Spaces
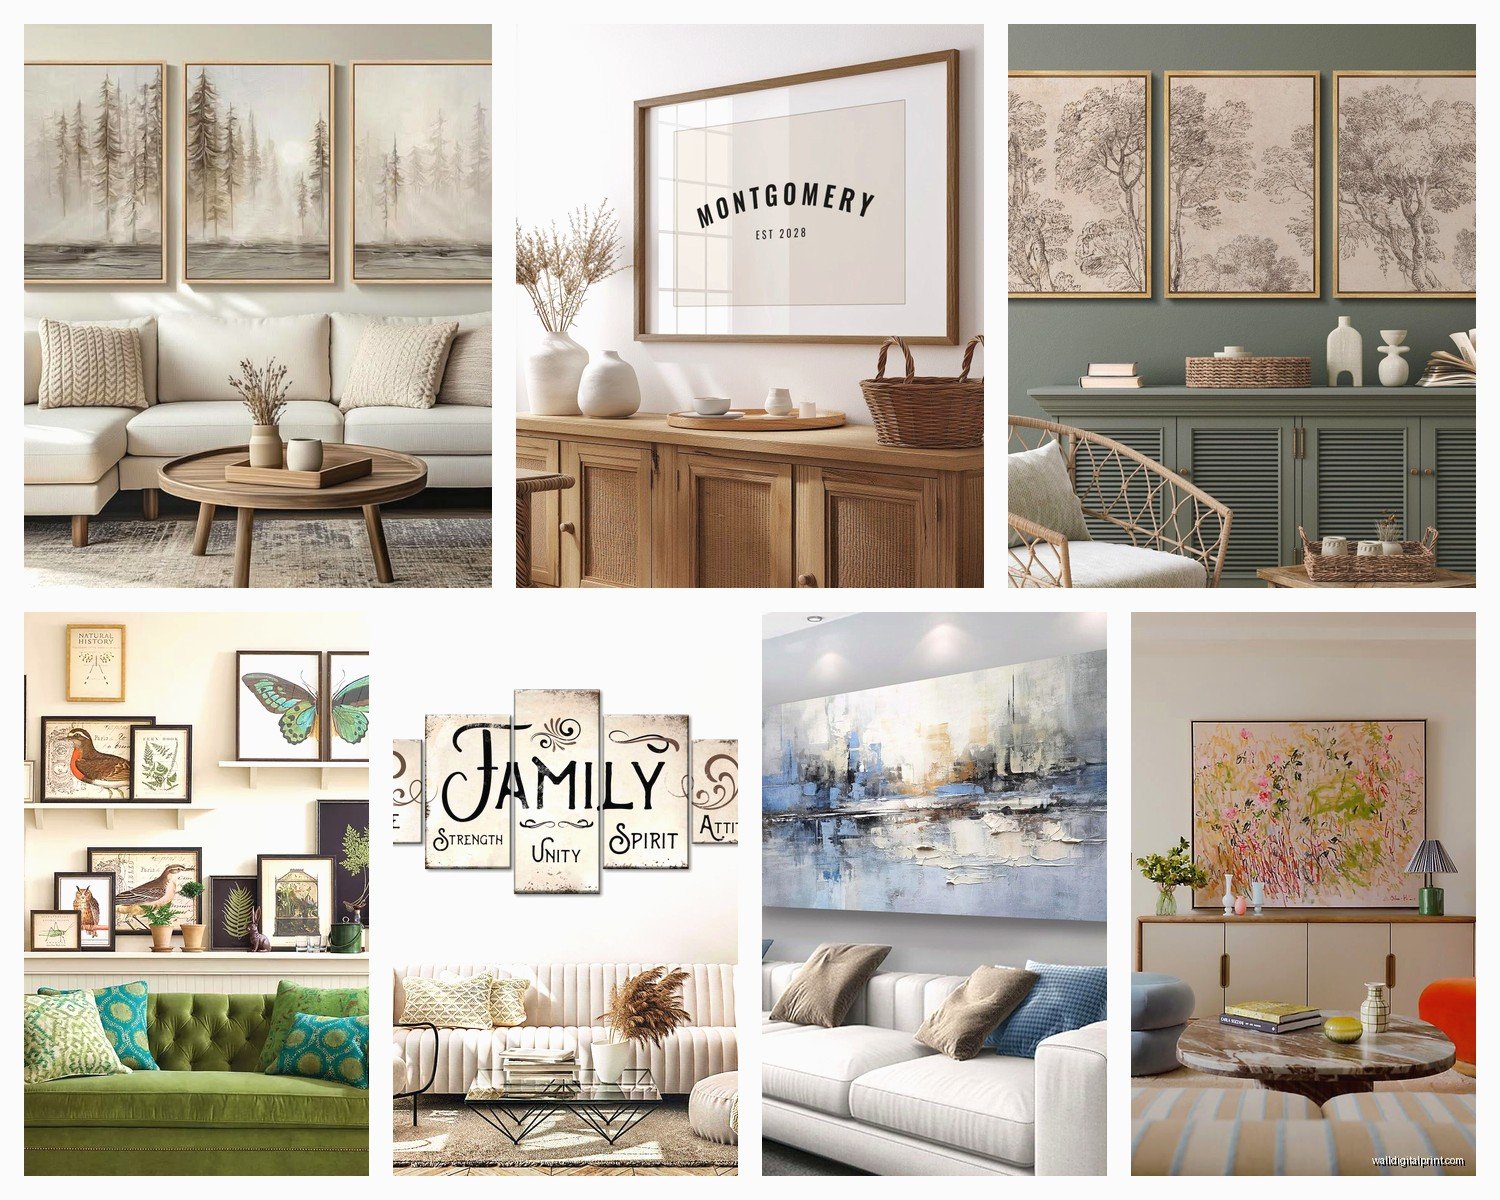
I’m gonna be real with you, some art styles just perform better in family rooms. Here’s what I’ve seen work:
- Photography prints, especially black and white landscapes or architectural shots, they read as sophisticated but not precious
- Abstract pieces with movement, something with energy that doesn’t demand you stop and analyze it
- Vintage travel posters, they add personality without being too serious
- Oversized typography or word art if it’s not cheesy motivational stuff
- Mixed media pieces that have texture, they photograph well for your Instagram but also hold up in person
What doesn’t work as well: super delicate watercolors (they disappear), anything too dark and moody (family rooms need energy), those generic beach sunset canvases from HomeGoods that everyone has.
The Gallery Wall Situation
Okay so funny story, I used to hate gallery walls in family rooms because they felt too fussy. But then I figured out the trick is making them look almost accidental, like you collected these pieces over time. Which maybe you did.
For a family room gallery wall that doesn’t look try-hard:
Keep your frames consistent. I know everyone says mix and match but in a casual space you want SOME structure. Pick one finish, black or natural wood or white, and stick with it. You can vary the frame widths but keep the color same.
Mix your art types though. A few family photos, some art prints, maybe a small mirror, a shadow box with something meaningful. The variety keeps it interesting.
Space them closer than you think. Like 2-3 inches between frames max. When they’re too spread out it looks unfinished.
Start with the largest piece at eye level (that’s about 57 inches to the center) and build around it. Don’t try to plan the whole thing on paper, it never translates. Just use painters tape on the wall to map it out.
My Go-To Layout Formula
I’ve installed probably 40 gallery walls at this point and here’s what I always come back to: one large anchor piece (like 24×36), two medium pieces (16x20ish), and four to six smaller pieces (8×10 or 11×14). That combination just works. You can arrange them however but having those size variations makes it dynamic.
Oh and another thing, don’t hang everything in a perfect grid unless you’re going for that specific look. Let some pieces sit higher or lower. The casual asymmetry actually feels more intentional than a rigid grid in a family space.
Color Strategy That Won’t Make You Crazy
This is where people overthink it. Your family room probably already has a lot going on, color-wise. The art doesn’t need to match your throw pillows exactly. In fact it shouldn’t.
What I do: pull one or two accent colors from your existing space and look for art that has those colors somewhere in it, but not as the dominant color. So if you’ve got navy blue accents, find art with maybe some blue elements but where it’s not an all-blue piece.
Neutrals are your friend here. Black and white photography, sepia tones, pieces with lots of white space, they all work because they complement without competing. My cat literally just knocked over my coffee while I’m writing this but anyway.
If your furniture is neutral (grays, beiges, whites), that’s when you can go bolder with art. Bring in deep teals, burnt orange, forest green, whatever makes you happy. The art becomes the color moment.
Framing Matters More Than You Think
I used to tell people framing doesn’t matter that much and I was wrong. In a family room especially, good framing makes affordable art look expensive and bad framing makes expensive art look cheap.
For casual spaces, I lean toward:
Simple wood frames in natural finishes. They’re warm, they hide dings better than painted frames, they work with basically every style.
Black metal frames for a more modern vibe. They’re clean, they make art pop, and they’re usually cheaper than wood.
Float frames if you’re doing canvas prints or want that gallery look. The art appears to float inside the frame and it’s just got this elevated feel.
Skip the ornate gold frames unless you’re doing something really specific. They read too formal for a family room where someone’s gonna spill juice.
Matting is optional but I almost always use it. White mats make everything look more finished and they give your eye a place to rest. Standard ratio is mat width should be about 10-15% of the smallest dimension of your art.
Where to Actually Buy This Stuff
People always ask me this. Here’s my honest breakdown:
Framebridge or Simply Framed for custom framing that doesn’t cost a million dollars. You upload your art, pick your frame and mat, done. Takes like three weeks but worth it.
Minted for art prints. Their quality is solid and they have that custom framing option. It’s pricier than printing yourself but the convenience factor.
Society6 or Redbubble when you want something more unique or from independent artists. Quality varies so read reviews but I’ve gotten some great pieces this way.
Etsy for vintage prints and downloadable art. You can find amazing vintage botanical prints or maps or whatever for like $8, then print them yourself at a local print shop.
Your own photos but printed large and properly. Not at Walgreens. Use a real print lab. That vacation photo you took can absolutely be family room art if it’s printed at 24×36 with good paper quality.
The DIY Print Route
If you’re gonna print stuff yourself, here’s what you gotta know. Find high-resolution images, we’re talking 300 dpi minimum. Most free downloads online are too low-res for anything bigger than 8×10.
Take your files to a local print shop, not a chain drugstore. Ask for premium matte paper or fine art paper. It costs maybe $15-30 for a large print versus $3 at Walgreens but the difference is night and day.
Then frame it yourself from Target or Amazon. Their frame selection has gotten so much better. Just make sure you’re buying frames that fit standard sizes (8×10, 11×14, 16×20, etc) because custom sizes get expensive fast.
Placement Rules That Actually Matter
Okay so there are rules and then there are RULES. The ones that actually matter:
Center of your art should be at 57-60 inches from the floor. This is eye level for most people. Everyone hangs stuff too high, I promise yours is probably too high right now.
Over furniture, leave 6-8 inches between the furniture top and the bottom of your frame. More than that and it looks disconnected, less and it feels cramped.
Don’t hang tiny art on a huge wall by itself. Either go bigger or group multiple pieces. A single 8×10 frame on a 12-foot wall just looks sad and lost.
Consider your sight lines. Where do people look when they’re actually using the room? That’s where your focal point art should go, not necessarily the biggest wall.
The TV Wall Dilemma
So everyone struggles with this. You’ve got a TV that’s basically a black rectangle and you’re trying to make the wall look intentional. Here’s what works:
Flank it with matching pieces on either side. Two vertical pieces, same size and frame, creates symmetry and makes the TV feel planned.
Do a gallery wall around it but keep everything at least 3-4 inches away from the TV edges. You don’t want it to look cluttered.
Or just embrace it and put your art on other walls. The TV wall can be minimal. One floating shelf below with some small objects, done.
Personally I think trying to make the TV disappear is fighting a losing battle. Just make the whole wall cohesive instead.
Textures and Layers
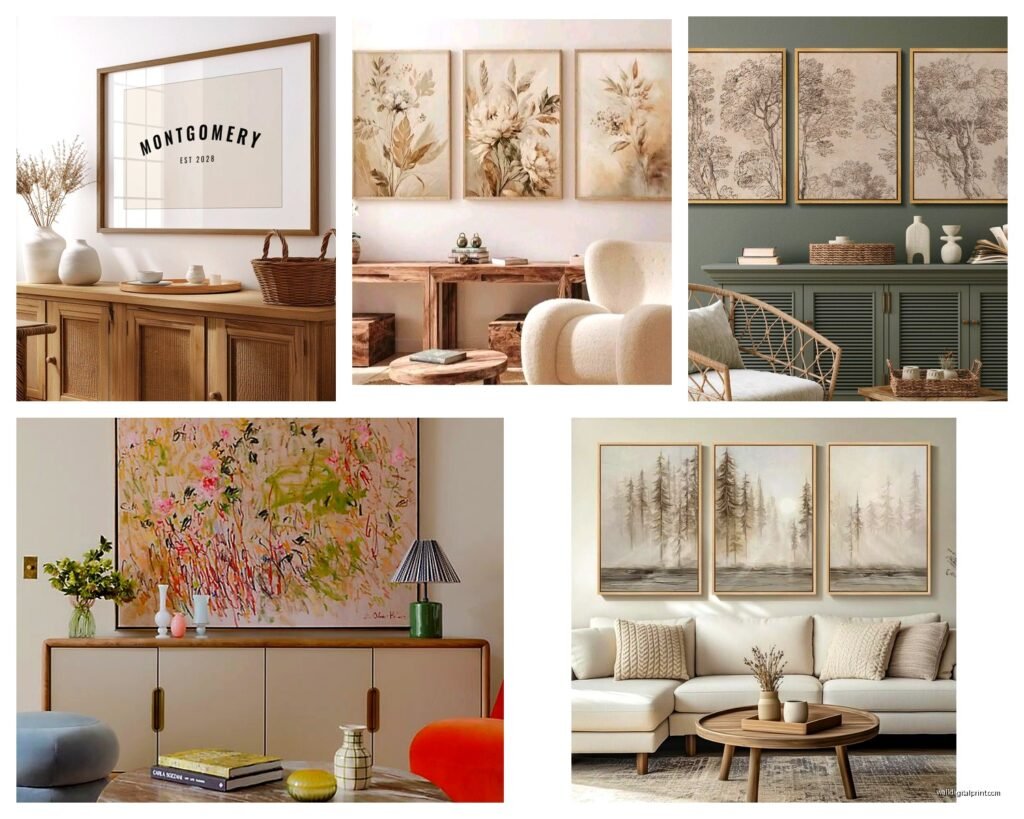
Wait I forgot to mention this earlier but it’s important. Family rooms benefit from dimensional wall decor, not just flat art. Mix in:
- Woven wall hangings or macrame if that’s your style
- Floating shelves with small objects and leaning frames
- Mirrors to bounce light around
- Metal wall sculptures for texture
- Shadow boxes with meaningful stuff
The variation in depth makes the space feel more collected and less “I bought a furniture set.” I’ve got this one client who mixed framed vintage maps with a metal compass rose sculpture and some small floating shelves with travel souvenirs. The whole wall tells a story instead of just looking decorated.
Lighting Your Art
This is gonna sound extra but proper lighting makes a huge difference. If you’ve invested in decent art, light it. Picture lights are classic but they require hardwiring usually. Battery-operated LED picture lights have gotten really good though.
Or just make sure you have good ambient lighting in the room. Table lamps, floor lamps, whatever. Art needs light to be seen properly. Seems obvious but so many family rooms are cave-like.
Track lighting or adjustable can lights aimed at your art walls work great too if you’re doing any electrical work anyway.
Rotation Strategy
Here’s something I started doing that my clients love: treat your family room art as somewhat temporary. Not like changing it monthly but having a rotation system. Keep some pieces stored and swap them out seasonally or when you’re bored.
This works especially well if you have kids’ artwork you want to display. Frame a few pieces nicely, hang them for a few months, then swap in new ones. The kids feel valued and you’re not drowning in finger paintings.
Or do a rotation based on mood. Brighter, energetic pieces for summer. Cozier, deeper tones for fall and winter. It keeps the space feeling fresh without a full redesign.
The key is buying frames that work with multiple pieces so you’re just swapping the art inside, not rehanging everything.
Okay I think that covers most of it. The main thing is just don’t stress too much about making it perfect. Family rooms are supposed to be lived in, and your art should reflect that. Get some stuff on the walls, live with it for a bit, adjust as needed. You’ll figure out what works for your actual life pretty quickly.