Wall Art Guide, Wall Art Tutoriels
Bachelor Pad Wall Art: Single Man Apartment Guy Decor
Jun
So I just finished helping my brother’s roommate fix his apartment walls and honestly, the whole bachelor pad wall art thing is way less complicated than guys make it seem, but also there are definitely ways to screw it up that nobody warns you about.
Start With What Actually Matters to You
Okay so first thing—don’t just buy random “masculine” art because some website told you to get a vintage motorcycle print. Like if you’ve never ridden a motorcycle and don’t care about them, it’s gonna look so fake. I had a client who did this entire aviation theme because he thought it looked “grown up” but the guy was terrified of flying and it just felt weird every time someone asked him about it.
What I tell guys is think about what you actually do or care about. Are you into:
- Music—like actually play an instrument or go to shows
- Sports you watch or play
- Travel places you’ve been
- Movies or TV you’re genuinely into
- Your actual job if it’s visual somehow
- Photography you’ve taken yourself
My brother ended up doing this whole thing with national park maps from places he’d actually hiked and it looks a million times better than the generic stuff he almost bought from Target.
The Size Thing Nobody Gets Right
Guys always buy art that’s too small. I don’t know why this is a universal problem but it is. You walk into a bachelor pad and there’s like a 16×20 print floating on a massive wall and it looks so sad.
Here’s the actual rule—your art should take up about two-thirds to three-quarters of the width of whatever furniture is below it. So if you’ve got a couch that’s 84 inches wide, you want art that’s roughly 56-63 inches across. That can be one big piece or a gallery wall situation, doesn’t matter, but that’s the zone.
For a single piece above a couch, I usually go minimum 40×30 inches, but honestly bigger looks better. Like 48×36 or even 60×40 if the wall can handle it. I know that sounds huge but trust me, when you actually put it up it won’t feel too big.
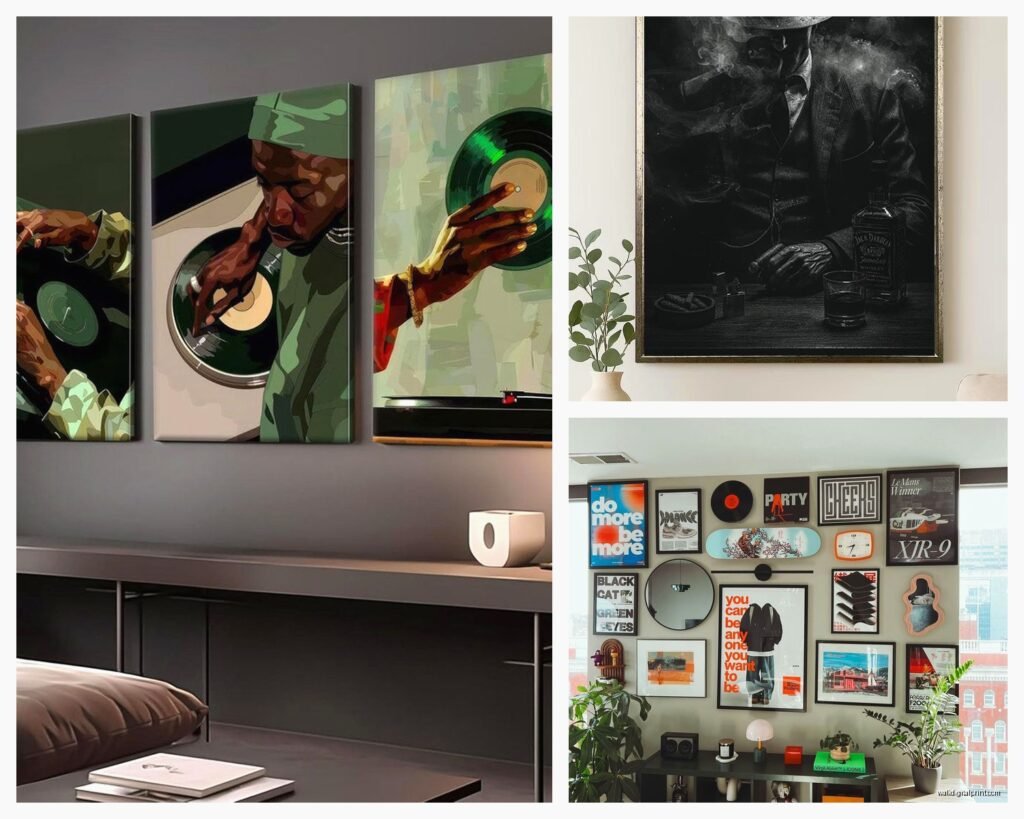
Gallery Wall vs Single Statement Piece
Okay so this depends on your personality honestly. Gallery walls look great but they require you to actually plan it out, and if you’re the kind of person who’s gonna hang two frames and then leave the rest sitting there for eight months…just get one big piece.
I did a gallery wall in my own place last year and it took me three attempts to get the spacing right, and I literally do this for a living. My cat knocked over the level twice which didn’t help but still.
If you DO want a gallery wall, here’s what actually works: get 5-7 pieces in the same color palette but different sizes. Use all black frames or all natural wood—don’t mix metals and woods together unless you really know what you’re doing. Lay them out on the floor first and take a photo from above so you can remember the arrangement.
Where to Actually Buy This Stuff
So everyone’s gonna tell you different things but here’s what I’ve found actually works for different budgets:
If you’ve got money to spend: Minted has really good quality prints and their framing is solid. Saatchi Art if you want actual original pieces. I’ve bought from both and never been disappointed with the quality.
Mid-range that doesn’t look cheap: Society6 for prints, Framebridge for custom framing if you have photos you want to use. Juniper Print Shop has good minimalist stuff. Oh and another thing—Etsy has tons of printable art that you download and then get printed at a local print shop, which is usually way cheaper than buying pre-printed stuff.
Budget friendly: IKEA’s BJÖRKSTA series is actually pretty decent for the price. Target’s Threshold collection has improved a lot. You can also just print your own photos at Costco—their canvas prints are like $30 and look fine from a normal distance.
The Frame Situation
Don’t buy those cheap plastic frames that come in the pack of three from CVS. Just don’t. They look bad and everyone can tell.

Simple black or natural wood frames work for basically everything. If you’re doing modern/minimal stuff, go with thin black metal frames. If you want it warmer, natural oak or walnut frames. That’s it. You don’t need ornate gold frames unless you’re hanging something that’s actually antique.
I usually tell people to spend a bit more on frames than they think they should because you’re gonna be looking at them every day and cheap frames genuinely make nice art look worse.
What Actually Looks Good in Bachelor Pads
Okay so this is gonna sound weird but the stuff that works best is usually either super minimal or has a story. The middle ground of “decorative art” is where things get generic fast.
Stuff that works:
- Black and white photography—cities, landscapes, architecture, sports moments
- Abstract geometric prints in a limited color palette
- Vintage maps especially if they’re places you’ve been
- Music posters from actual concerts you attended
- Line drawings or minimalist illustrations
- Your own photography if it’s decent quality
- Movie posters but the artistic ones not the regular theater versions
Stuff that usually doesn’t:
- Generic motivational quotes in script font
- Mass-produced “Live Laugh Love” type stuff obviously
- Anything that says “Man Cave”
- Those weird collages of random objects
- Art that’s trying too hard to be edgy
The Actual Hanging Process
Wait I forgot to mention—you need the right hardware for this. Don’t just use the little sawtooth hanger that comes with cheap frames. For anything over 15 pounds, use proper picture hanging hooks rated for the weight. For heavy stuff, find the studs and use screws.
The standard height is 57-60 inches from the floor to the center of the artwork. This is the museum standard and it actually does look right in most spaces. Don’t hang stuff way up near the ceiling, it looks wrong.
For stuff above furniture, leave 6-8 inches between the top of the furniture and the bottom of the frame. Not more than 12 inches or it’ll look like it’s floating away.
My client canceled last Tuesday so I spent like an hour comparing those picture hanging strip things. The Command strips work fine for lightweight stuff under 10 pounds, but they can fail in humid environments or if your walls are textured. For anything you actually care about, just put holes in the wall. You can patch them when you move out, it’s not a big deal.
The Layout Options
If you’re doing multiple pieces, here are the arrangements that don’t require an art degree:
Grid layout: Same size frames in a 2×2 or 3×3 grid with equal spacing between them. Spacing should be 2-3 inches between frames. This is the easiest to get right.
Salon style: Different sizes arranged more organically. This is harder but looks less formal. Keep 2-3 inches between all pieces and try to keep the outside edges forming a rough rectangle shape.
Linear: Three to five frames in a horizontal line, all the same size or gradually changing sizes. Works great in hallways or above a console table.
I gotta say the grid is most foolproof if you’re not super confident about this stuff.
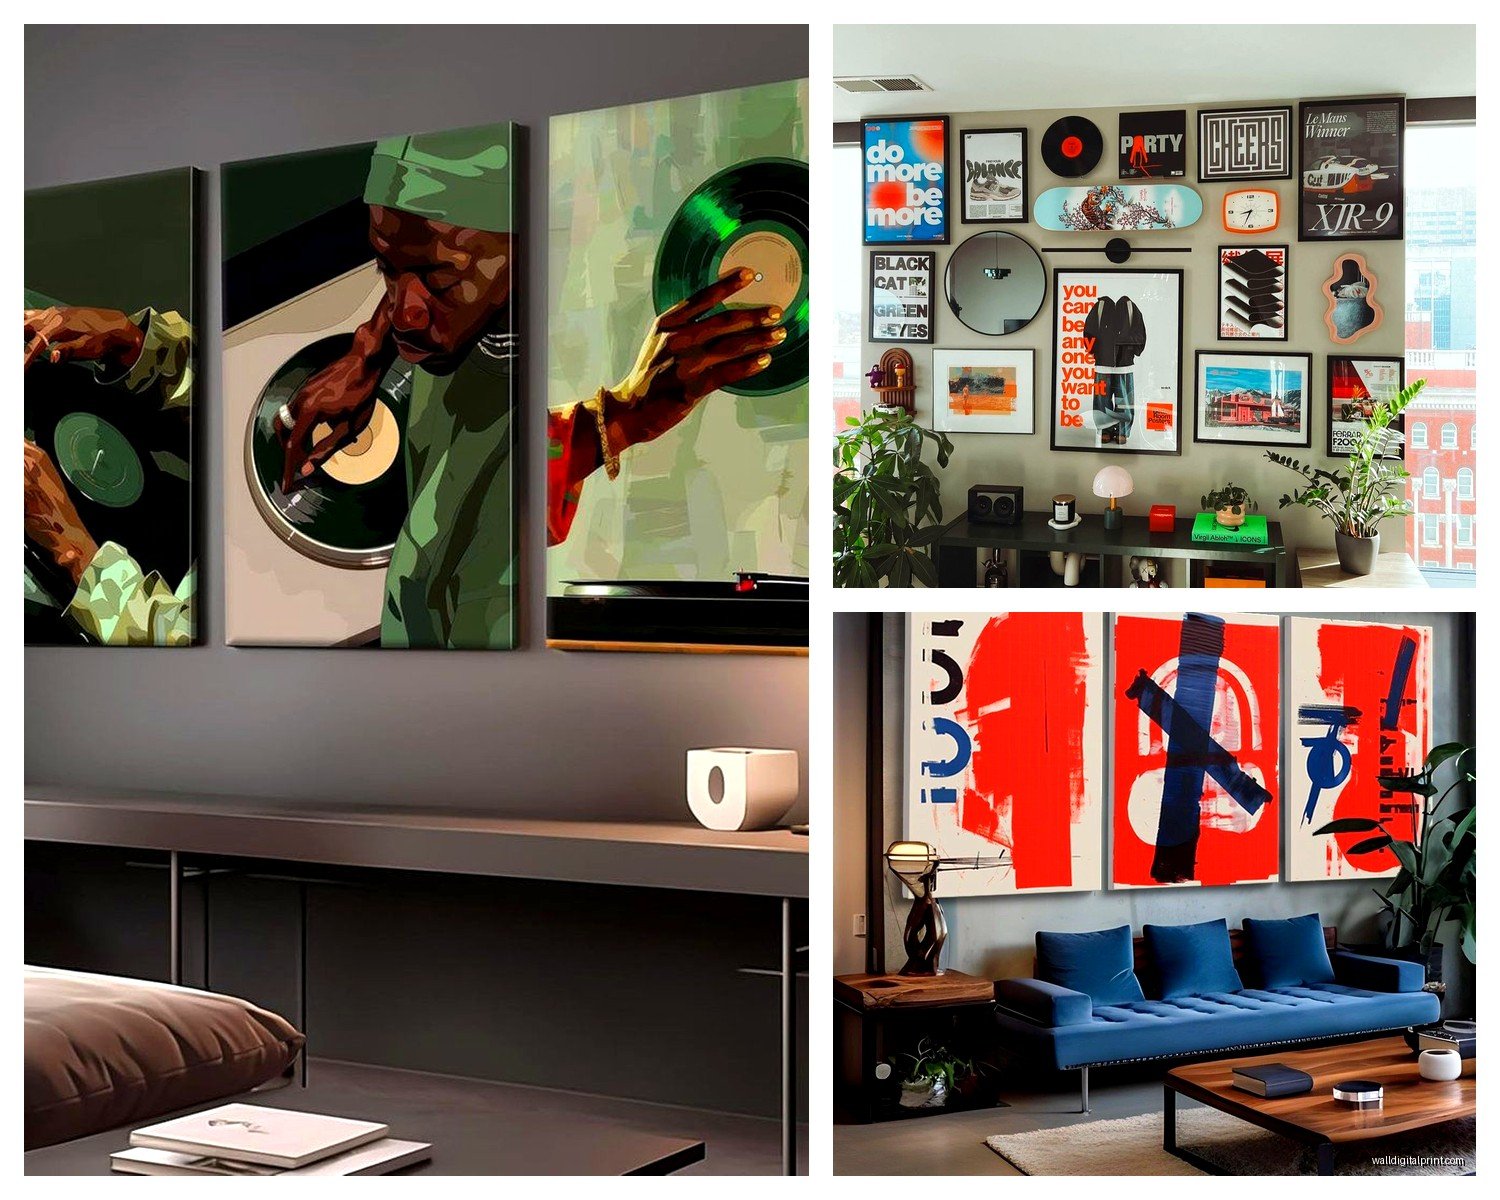
Color Coordination Without Making It Boring
So you don’t want everything to match exactly because that looks like a hotel room, but you also don’t want it to look random. Pick 2-3 main colors that appear in your art and make sure those colors show up in other places in the room—throw pillows, a rug, whatever.
Black and white photography is honestly the cheat code here because it goes with everything. If your walls are white or light gray, black and white art with black frames looks clean and intentional without much effort.
If you want color, stick to one color family. Like all blues and greens, or all warm tones like oranges and browns. Don’t do like rainbow explosion unless that’s specifically your vibe.
Room-Specific Ideas
Living Room
This is where your biggest statement piece should go, probably above the couch. If you have a TV on another wall, don’t try to compete with it—keep that wall simpler. I see guys try to do major art around their TV and it always looks cluttered.
One big piece or a gallery wall above the couch, maybe one medium piece on an adjacent wall, call it done. You don’t need art on every single wall.
Bedroom
Above the bed is the obvious spot but make sure it’s secured properly because having art fall on your head sucks. Keep bedroom art more calm and less visually busy—you’re trying to sleep in here. Black and white landscapes, minimal abstract stuff, that kind of thing.
Don’t put mirrors directly across from your bed, it’s weird waking up and seeing yourself.
Kitchen/Dining Area
Food photography can work here but honestly I think it’s kinda played out. Vintage advertising posters, botanical prints, or abstract stuff works better. Keep it simple since kitchens already have a lot going on visually.
Home Office
This is where you can get away with more personal stuff. Diplomas and awards if you have them, photos from trips, maps, whatever makes you feel productive. Just frame it properly—don’t just tack stuff to the wall with pushpins.
Common Mistakes I See Constantly
Hanging everything too high. Seriously this is like 80% of bachelor pads. The art is up near the ceiling for some reason. It should relate to the furniture below it, not the ceiling.
Buying prints without frames and then never framing them. They just sit there leaning against the wall for years. If you’re gonna buy it, budget for the frame too.
Getting art that doesn’t fit the room’s vibe at all. Like ultra-modern geometric prints in a room with rustic wood furniture—it can work but you gotta know what you’re doing.
Forgetting about lighting. Art needs decent light to look good. If you have a dark corner, either get better lighting or don’t put art there.
Oh and another thing—not considering the wall color. Dark art on dark walls disappears. Light art on white walls can look washed out. You want contrast.
DIY Options That Don’t Look DIY
If you’re crafty at all or want to save money:
Print your own photos at a local print shop and get them mounted on foam board or canvas. Way cheaper than buying pre-made stuff and it’s actually yours.
Buy vintage maps or posters from thrift stores and frame them nicely. I found a 1960s national parks poster at Goodwill for $3 and it’s in a $40 frame and looks amazing.
Make your own abstract art. No seriously, you can do the whole paint-pouring or geometric tape thing and if you use nice colors it actually looks good. YouTube has a million tutorials.
Frame interesting fabric or wallpaper samples. Sounds weird but it works, especially for adding texture.
When to Just Hire Someone
Look if you’ve read all this and you’re still like “I have no idea what I’m doing,” it might be worth hiring someone for a consultation. I do these for like $200-300 and basically just tell you what to buy and where to put it. Sometimes having someone else make the decisions is worth it.
Or ask a friend who has good taste to come over and give honest feedback. Not your mom who thinks everything you do is perfect, but like a friend who’ll tell you if something looks bad.
The main thing is just don’t leave your walls blank because that’s more depressing than getting it slightly wrong. Even okay art that’s properly hung is better than bare walls. Start with one or two pieces you actually like and build from there. You don’t have to do the whole place at once—I’m still adding stuff to my apartment three years later and I supposedly know what I’m doing.