Wall Art Guide, Wall Art Tutoriels
Lippan Wall Art: Indian Mirror Relief Traditional Craft
Aug
So I’ve been totally obsessed with lippan work lately and honestly it’s one of those crafts that looks way more intimidating than it actually is. Like I was scrolling through Pinterest at like midnight last week (my cat knocked over my coffee in the process, whole mess) and just fell down this rabbit hole of traditional Gujarati mirror work and now I can’t stop making these panels.
What You Actually Need to Get Started
Okay so first things first, forget those fancy craft store kits that cost like $80. You need basic stuff and most of it you probably have or can grab cheap. The traditional method uses a mix of clay and camel dung but like, we’re gonna skip that part because finding camel dung in most places is…yeah.
Here’s what I actually use:
- Air-dry clay or joint compound from the hardware store (the joint compound is literally $12 for a huge tub)
- Small mirrors – I get mine from the dollar store or online in bulk, those little circular craft mirrors work perfectly
- A base board – MDF, plywood, or even thick cardboard if you’re just practicing
- White glue mixed with water
- Acrylic paint for finishing
- Basic sculpting tools or honestly just toothpicks and popsicle sticks
The joint compound thing is gonna sound weird but it works SO much better than expensive modeling paste. I learned this from a client who’s actually from Gujarat and she was like “why are you spending so much money” and showed me her grandmother’s technique adapted for modern materials.
Preparing Your Base
Cut your board to whatever size you want. I usually do like 12×12 inches for practice pieces or 18×24 for actual wall art. Sand it down if it’s rough because the clay mixture needs to stick properly.
Then you gotta seal it – I just brush on watered-down white glue, like a 50/50 mix. Let it dry completely, maybe an hour or two. This step is actually important even though I skipped it my first three attempts and everything just cracked and fell off. Learn from my mistakes.
Making the Relief Paste
This is where it gets fun. If you’re using joint compound, you can literally use it straight from the container, maybe add a tiny bit of white glue to make it more adhesive. If you’re using air-dry clay, knead it until it’s soft and pliable, then mix in some glue.
The consistency should be like…thick frosting? You want it to hold shape but still be workable. Too dry and it’ll crack, too wet and your design will just slump. I usually test it by making a small cone shape – if it holds without drooping, you’re good.
Wait I forgot to mention – some people add a bit of chalk powder or marble dust to the mix. It gives it that traditional texture and makes it dry harder. Not necessary but if you want that authentic look, it helps.
Color Options
Traditional lippan is usually white or earth tones, but you can tint your paste with acrylic paint before applying it. I’ve done turquoise, terracotta, even black for a modern look. Just mix the paint in thoroughly so you don’t get streaks.
Creating Your Design
Okay so this is gonna sound scattered but there’s like three ways to approach the actual design part.
Method 1: Freehand
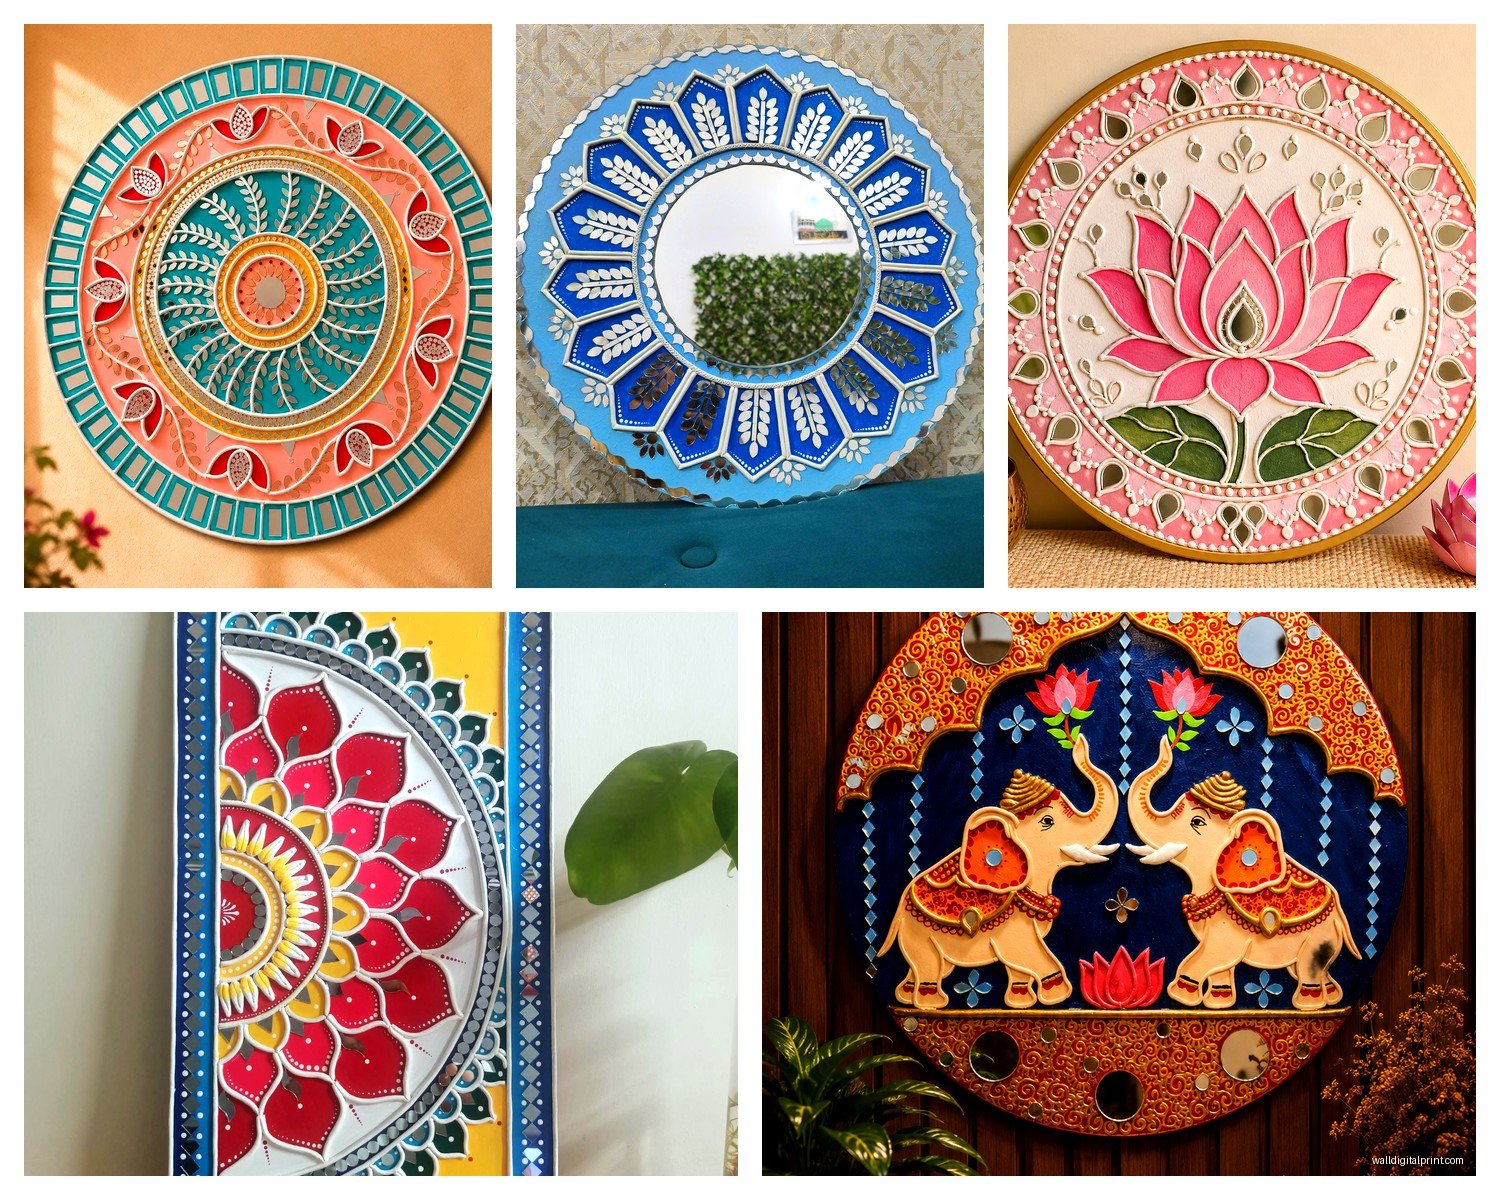
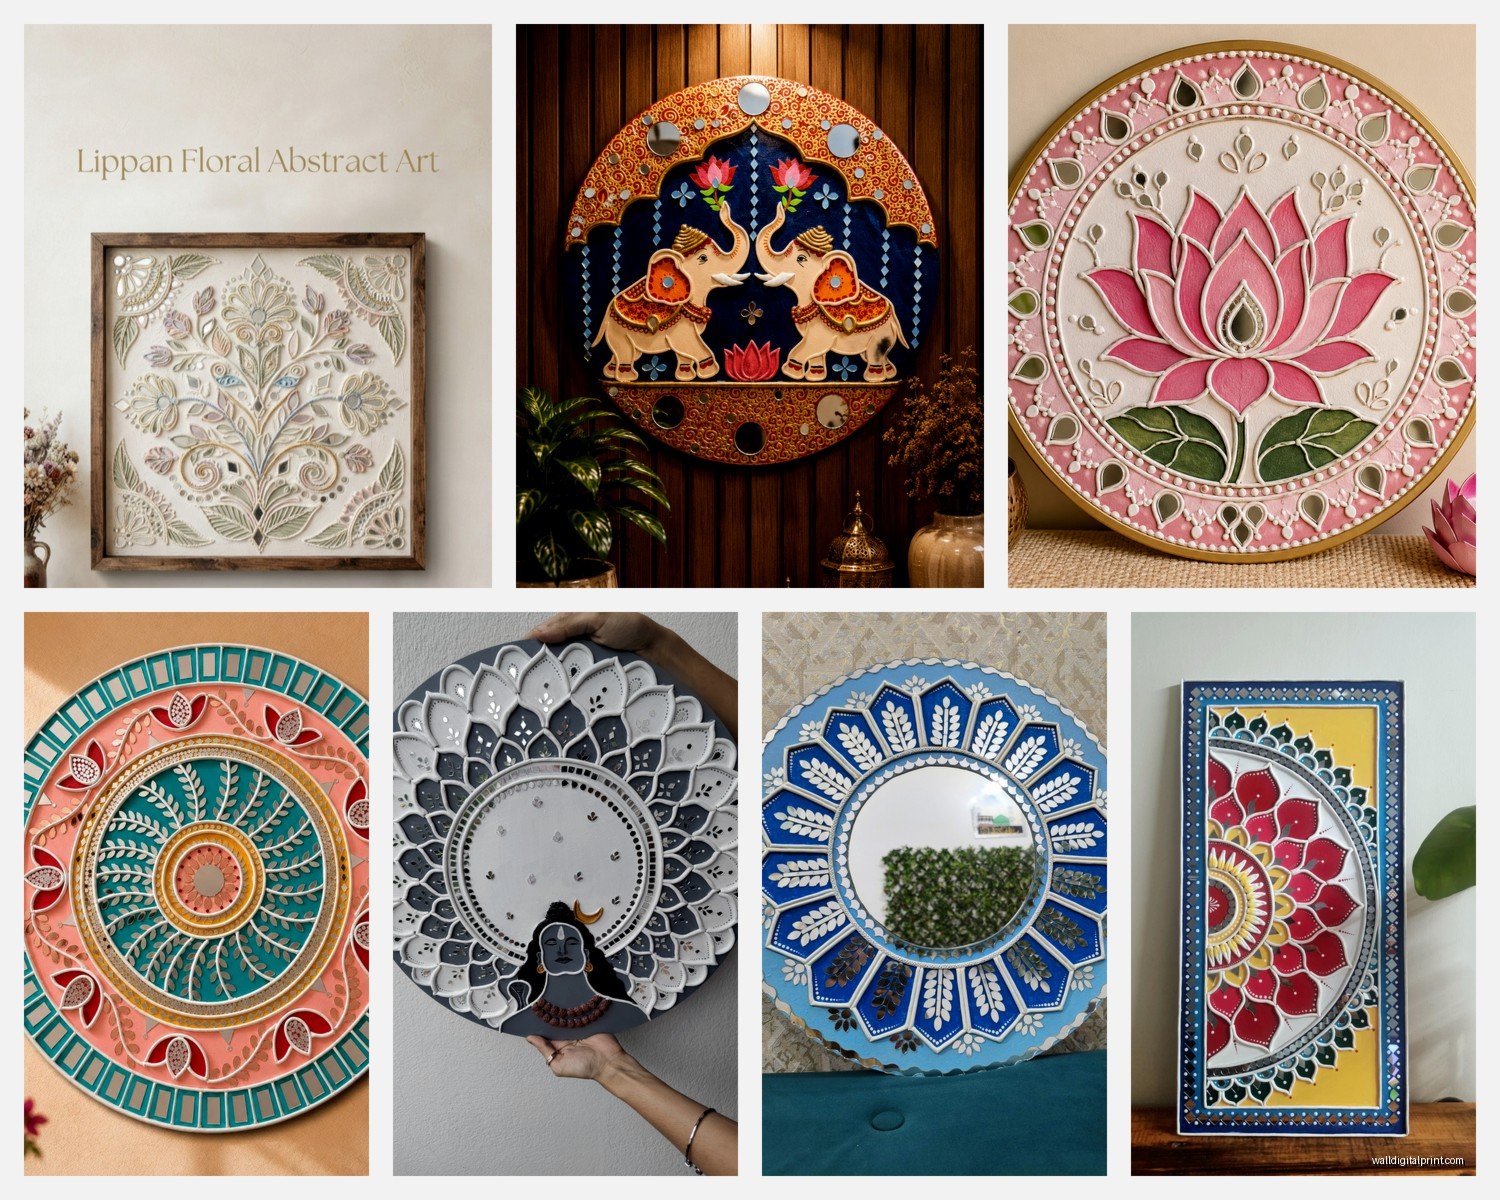
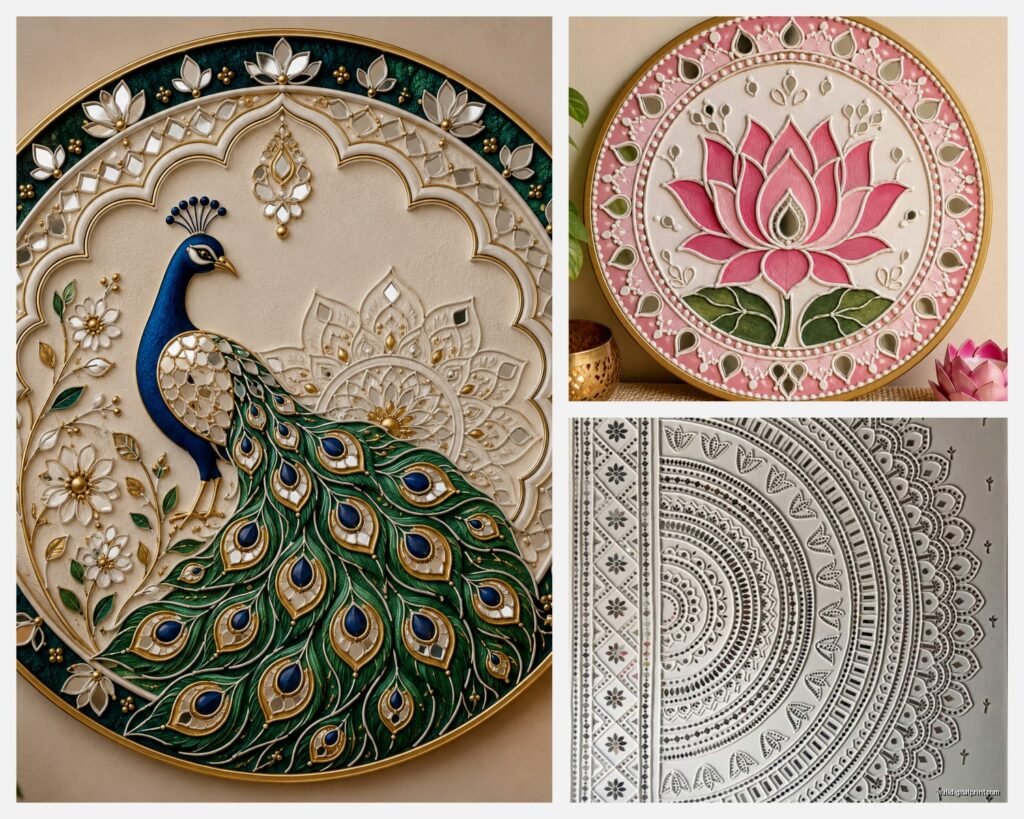
Just start applying the paste directly to your board in whatever pattern feels right. Traditional designs include paisley, florals, peacocks, geometric patterns. I literally keep my phone next to me with reference images pulled up. Start with the outline of your main shapes using a thick rope of paste, then fill in details.
Method 2: Sketch First
Draw your design on the board with pencil, then follow the lines with your paste. This is what I do when I’m making something for a client because I cannot mess it up.
Method 3: Stencils
You can find traditional lippan patterns online, print them, and use them as guides. Trace around them with paste. Less authentic but honestly who cares if it looks good.
The key thing is building up layers. You’re creating relief, so some parts should be raised more than others. I usually do the background elements first, let them dry a bit, then add the foreground details on top.
Placing the Mirrors
Oh and another thing – the mirrors are what make lippan work special, so don’t be shy with them. While your paste is still wet (like within 20 minutes of applying), press your mirrors into it. They should sink in about halfway, with paste coming up around the edges to hold them.
Traditional placement puts mirrors at focal points – centers of flowers, along border patterns, creating symmetry. But I’ve also done random scattered looks for modern pieces and they turned out cool.
Here’s something I learned the hard way: don’t use mirrors that are too heavy. I tried using some thick decorative mirrors once and they just fell out after drying. Stick with thin craft mirrors, the ones that are almost like metallic plastic.
Securing the Mirrors
Press them firmly but not so hard that paste squishes over the entire mirror surface. You want paste around the edges, holding them like a bezel setting. If paste does cover the mirror face, wipe it off gently with a damp cloth before it dries.
For extra security on larger mirrors, I sometimes add a tiny dot of superglue on the back before pressing them in. Probably not traditional but my pieces don’t fall apart so.
Adding Texture and Details
This is where those tools come in handy. While the paste is still workable, you can:
- Create dots and patterns with toothpicks
- Make lines and grooves with popsicle sticks
- Add cross-hatching for texture
- Press in small objects for imprints
- Build up tiny coils or balls of paste for 3D details
I was watching this documentary about traditional crafts (while making one of these actually, multitasking) and the artisans use these metal tools to create super intricate details. You can buy clay sculpting tools for like $10 online but honestly the homemade stuff works fine.
The traditional technique includes making these tiny rope-like strands of paste and applying them in curved patterns. To do this, roll paste between your palms like you’re making a snake out of play-doh, then carefully place it on your design following your pattern. This creates those beautiful raised lines you see in authentic lippan work.
Drying Time
Okay so this part requires patience which I’m terrible at. Depending on thickness and humidity, your piece needs to dry completely. We’re talking 24-48 hours minimum. I usually leave mine for three days just to be safe.
Don’t try to speed it up with a hair dryer or oven – learned that lesson when a piece cracked into like five sections. Just let it air dry naturally. If you notice cracks forming, you can fill them with more paste and smooth them out, but prevention is better – don’t make your layers too thick.
Painting and Finishing
Once everything’s bone dry, you can paint. Traditional lippan is often left natural or painted white, but this is your chance to get creative.
I usually do a base coat of white acrylic paint over everything (avoiding the mirrors obviously). Then I might add metallic gold or copper accents on raised areas. Dry brushing works really well – dip your brush in paint, wipe most of it off, then lightly brush over the textured areas so paint only catches on the high points.
For a more traditional look, earth tones work beautifully. Terracotta, ochre, cream, soft browns. You can also leave sections unpainted to show the natural color of your material.
Antiquing Technique
This is gonna sound weird but if you want that aged look, mix a tiny bit of black or brown paint with water (like really watery) and brush it over the entire piece. Immediately wipe it off with a cloth, leaving color only in the crevices and textured areas. Gives it instant depth and makes it look ancient.
Sealing Your Work
Super important step that I skipped on my first pieces and regretted. Spray or brush on a clear sealer – matte, satin, or gloss depending on your preference. This protects the paint, strengthens the paste, and makes cleaning easier.
I use matte Mod Podge usually, just brush it on in thin layers. Let each layer dry before adding the next. Two or three coats should do it.
Common Problems I’ve Run Into
Cracking: Usually means your paste was too dry or thick, or it dried too fast. Add more glue to your mixture next time, apply thinner layers.
Mirrors falling out: Paste wasn’t thick enough around them, or mirrors were too heavy. Use smaller mirrors and really press them in while paste is wet.
Paste not sticking to base: You didn’t seal the base first, or your mixture is too dry. Always prep your surface.
Design looks flat: Build up more layers. Lippan work should have dimension. Don’t be afraid to make some areas really raised.
Colors look muddy: You’re mixing too many colors or not letting layers dry between applications. Keep it simple, let things dry.
Design Ideas That Actually Work
I’ve made probably like 30 of these now (maybe obsessed is an understatement) and here’s what consistently looks good:
Mandala patterns with mirrors at each petal point – classic and always impressive. Peacock designs with mirrors forming the feathers. Border patterns around a central mirror. Geometric patterns inspired by traditional Gujarati architecture. Floral vines with mirror centers in each bloom.
For modern spaces, I’ve done minimalist geometric designs in white and gold, looks super chic. Also tried an ombre effect going from white to deep blue with scattered mirrors throughout – that one’s hanging in my hallway right now.
Where to Use These
They’re lightweight enough to hang like regular art. I use sawtooth hangers on the back or picture wire. They look amazing in entryways, living rooms, bedrooms. The mirrors catch light and create these beautiful reflections.
I made a series of small 6×6 inch pieces that a client arranged in a grid on their wall, looked incredible. You can also make them as decorative panels for furniture, cabinet inserts, or even large floor pieces if you seal them really well.
Troubleshooting the Learning Curve
Your first one is probably gonna look kinda rough and that’s totally fine. My first attempt looked like a toddler’s craft project, not gonna lie. But by the third or fourth one, you start getting a feel for the paste consistency, how much relief to build, mirror placement.
Practice on small boards first. Don’t start with like a massive wall piece. Get comfortable with the materials and techniques on something 8×8 or 10×10.
Also, watch videos of traditional artisans working if you can find them. There’s something about seeing the hand movements and technique in action that makes it click way better than written instructions.
Oh and keep your workspace covered because this gets messy. I use a plastic tablecloth that I can just wipe down. Have water nearby for cleaning tools and dampening paste if it starts drying out while you work.
The beautiful thing about lippan art is that it’s actually pretty forgiving once you get the basics down. The textured, handmade look is part of its charm, so minor imperfections just add character. That’s what I tell myself anyway when something doesn’t turn out exactly as planned.