Wall Art Guide, Wall Art Tutoriels
Carved Wall Art: Relief Sculpture Dimensional Designs
Jun
So I’ve been completely obsessed with relief sculpture wall art lately and honestly it started because I walked into this gallery opening last month and there was this carved wooden piece that just… it made the whole room feel different, you know? Like it had actual depth instead of just being flat paint and posters.
The Whole Scale Thing Nobody Tells You About
Okay first thing – everyone screws this up including me the first time. Relief sculptures look WAY different in person than online. I ordered this beautiful carved mandala thing off Etsy, thought it was gonna be like 36 inches, turns out it was 18 and looked absolutely ridiculous on my dining room wall. So here’s what I do now: cut out newspaper or tape together printer paper to the exact dimensions and stick it on your wall with painter’s tape. Live with it for like three days. You’ll know pretty quick if it’s right.
For most living rooms you want something between 30-48 inches for a statement piece. Bedrooms can go smaller, like 24-30 inches above a nightstand or dresser. But if you’ve got one of those massive walls, like behind a sofa that’s 8 feet long, you either need to go BIG (48+ inches) or do a grouping of smaller pieces.
Materials and What They Actually Mean for Your Space
The material thing is where it gets interesting because it’s not just about looks, it’s about weight and installation and honestly whether your landlord is gonna kill you.
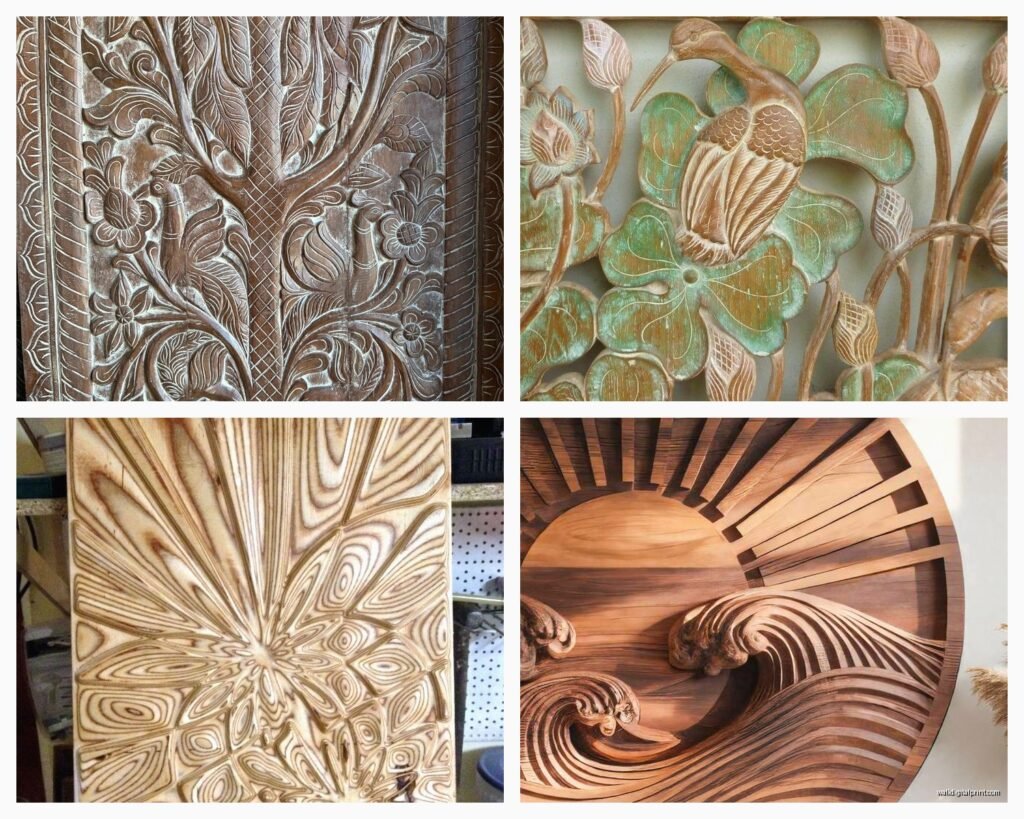
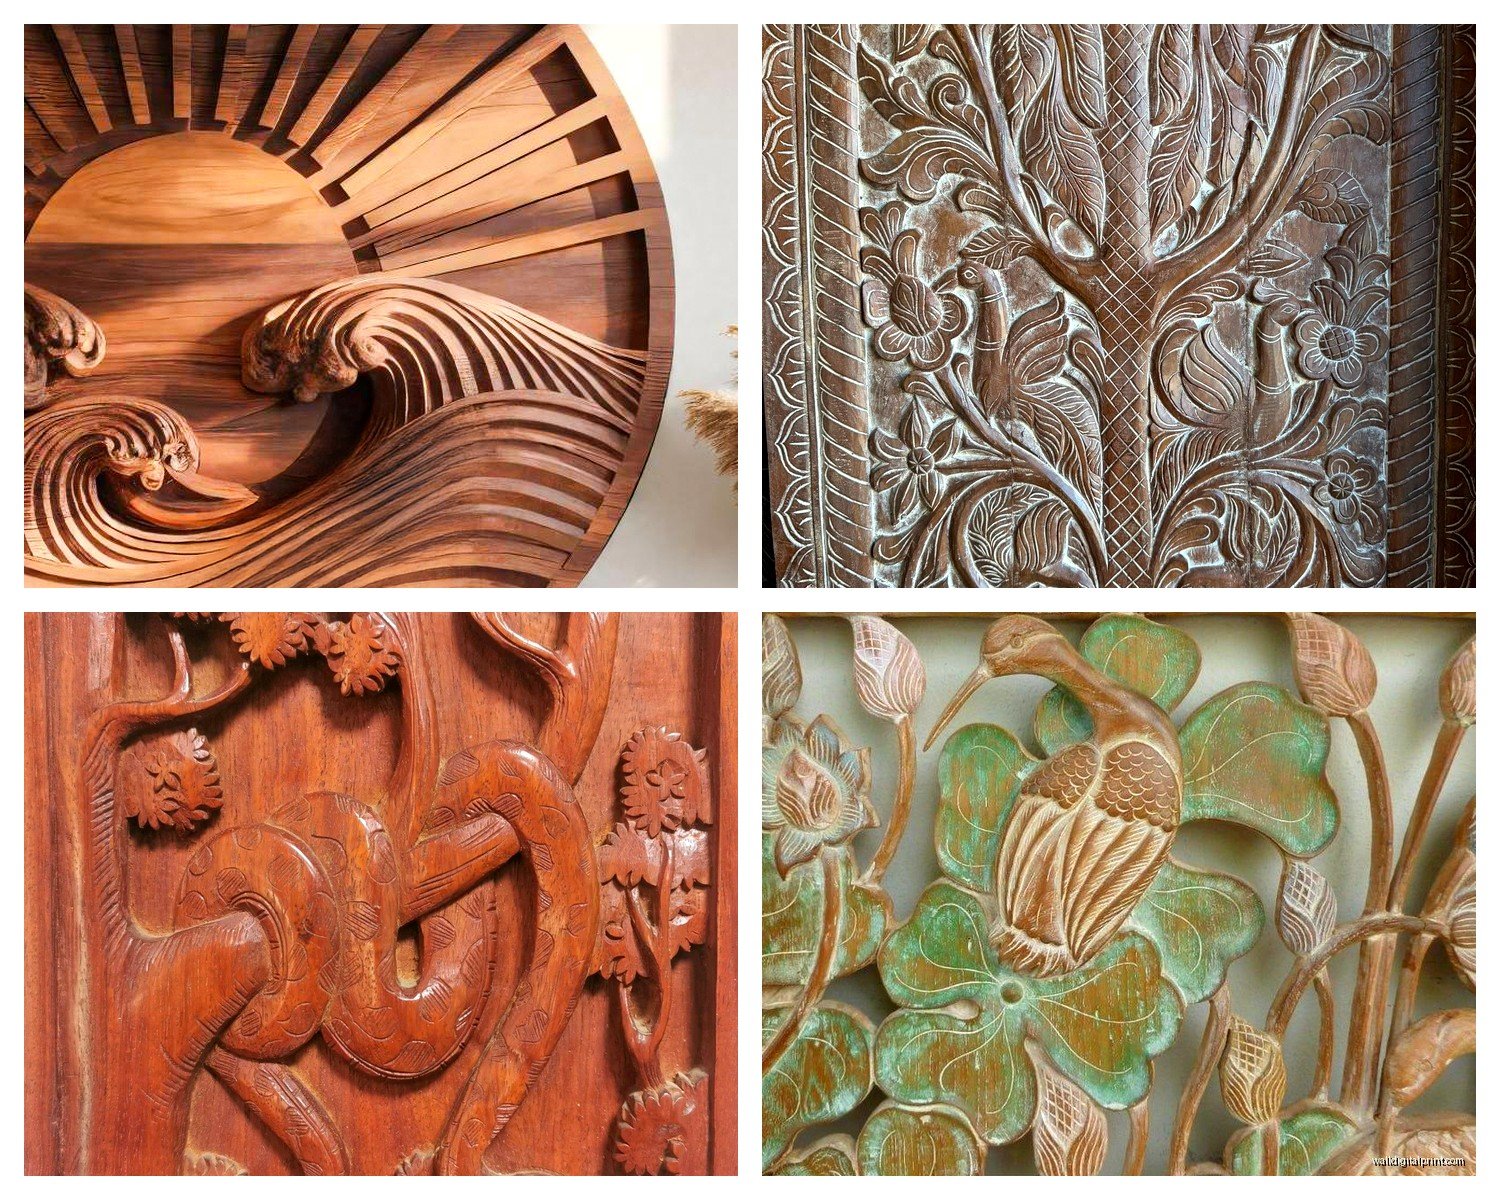
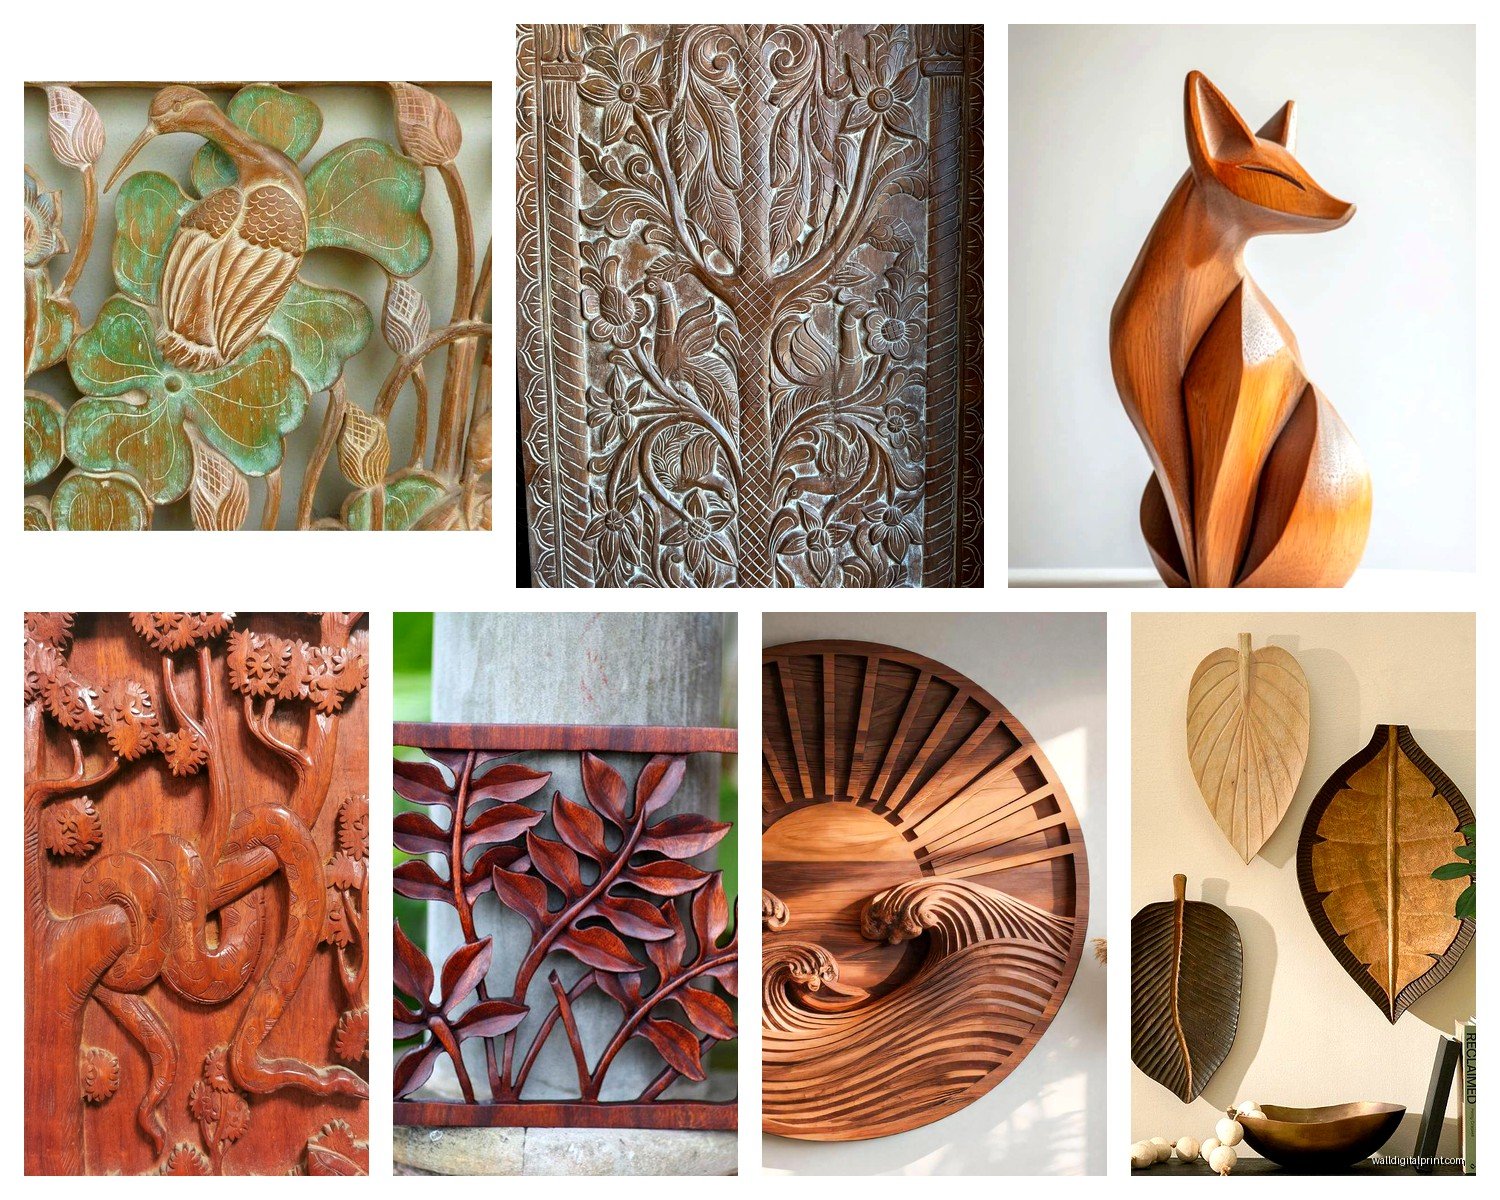
Wood carved relief: This is what I use most with clients. It’s warm, it works with literally everything from mid-century modern to boho to even minimalist spaces if you pick the right design. Teak and mango wood are super popular right now. The thing is, good carved wood is HEAVY. I hung a 40-inch teak piece last year and needed two heavy-duty wall anchors rated for like 75 pounds even though the piece was maybe 25 pounds. Better safe than sorry when you’re talking about something falling on someone’s head.
Plaster and resin: Lighter weight which is great for renters or if you’re nervous about installation. They can look really elegant, very European old-world vibes. I did a whole bedroom around this gorgeous plaster acanthus leaf relief I found at an estate sale. The downside is they’re more fragile – my cat knocked one off a console table once and it just… shattered. Still mad about that honestly.
Metal relief: Usually aluminum or copper. These can be super modern or really ornate depending on the design. I love them for exterior walls or covered patios because they hold up better to humidity. Also great for kitchens because you can actually wipe them down.
Stone and concrete: Heavy as hell but so beautiful. These work best in modern or industrial spaces. I have a client with this amazing concrete geometric relief in their entryway and it sets the whole tone for their loft.
Design Styles That Actually Work
Okay so funny story, I thought I hated traditional carved relief stuff because I only ever saw it in like… stuffy formal spaces. Then I started really looking at what’s out there and there’s SO much range.
Geometric and abstract: These are my go-to for modern spaces. Think circles, hexagons, wave patterns, abstract faces. They add dimension without being too literal or decorative. West Elm and CB2 have decent options but honestly Etsy makers are doing cooler stuff.
Nature motifs: Leaves, trees, florals, animals. This is where carved wood really shines. I just installed this incredible banyan tree relief in someone’s yoga room and it’s like… meditative just looking at it. These work in almost any room but especially bedrooms and bathrooms where you want that calming organic vibe.
Cultural and traditional: Mandala designs, Balinese panels, Indian carved screens, African mudcloth patterns translated into relief. You gotta be thoughtful here about cultural appropriation obviously, but there’s beautiful work by artists from these traditions that’s meant to be shared. I always try to buy directly from artists or fair trade sources.
Typography and symbols: Words, letters, symbols in relief. These can be really cool in offices or creative spaces but they can also read as very 2015 Hobby Lobby if you’re not careful. Proceed with caution.
Where to Actually Put These Things
The behind-the-sofa spot is obvious but it’s also kinda boring at this point? Here’s where I’ve had the most success:
In entryways as the first thing you see – creates immediate impact. I did a narrow vertical relief sculpture in my own hallway that’s only 12 inches wide but like 60 inches tall and everyone comments on it.
Above the bed instead of a traditional headboard. This works especially well if you have a low platform bed. The relief adds that height and interest without needing an actual headboard.
In dining rooms on the wall opposite windows. The natural light hits the carved surface throughout the day and it’s constantly changing how it looks.
Bathroom accent walls – wait this is gonna sound weird but a small carved relief in a bathroom is SO unexpected and luxe. Just make sure it’s sealed properly if it’s wood.
Stairway walls where you need something interesting but it’s hard to hang regular art because of the angles.
The Lighting Situation
This is huge and nobody talks about it enough. Relief sculpture NEEDS proper lighting or it just looks like a flat thing on your wall. The whole point is the shadows and depth.
I always install a picture light above or use adjustable track lighting aimed at an angle. You want the light coming from one side, not straight on. This creates those shadows that make the carving pop. In my living room I have an LED picture light on a dimmer so I can adjust it depending on time of day and mood.
Natural light works too but it changes throughout the day so you gotta think about what it’ll look like at night with artificial light.
Installation Without Destroying Your Walls
Okay so I’ve installed probably 50+ of these at this point and here’s what actually works:
For anything under 10 pounds you can probably get away with heavy-duty picture hanging strips. I use the Scotch ones rated for the weight plus like 5 pounds extra. But honestly I don’t love these for valuable pieces because I’m always nervous.
For most carved pieces you’re looking at:
- Two D-rings or sawtooth hangers on the back of the piece
- Wall anchors if you’re not hitting studs (and you probably won’t be)
- A level because nothing looks worse than a crooked sculpture
- Someone to help you hold it while you mark placement
French cleats are the absolute best method for heavy pieces. It’s a hanging system where one piece attaches to the wall and one to your art, and they interlock. Super secure, you can remove and rehang easily, and the weight distributes evenly. You can buy them or make them from wood.
My client canceled last Thursday so I spent an hour comparing different wall anchor systems at Home Depot like a total nerd, and those toggle bolt ones that flip open behind the drywall are definitely the strongest.
Mixing Relief Sculpture with Other Wall Art
You can totally do this but it takes some planning. I usually keep the relief piece as the focal point and arrange flatter art around it. The key is leaving enough breathing room – at least 6-8 inches between the edge of your relief piece and other art.
One thing I love doing is pairing a carved wood relief with simple black and white photography. The texture contrast is really striking. Or mixing a geometric relief with abstract paintings that pick up the same color tones.
What doesn’t work as well: trying to match the relief sculpture’s style exactly with your other art. Like don’t pair an ornate baroque relief with ornate baroque paintings. It’s too much. You want contrast in style or medium or both.
Color Considerations
Most carved relief comes in natural materials – wood tones, white plaster, metallic finishes. This is actually great because it means they’re pretty neutral and work with lots of color schemes.
Natural wood relief looks amazing against:
- White or cream walls (classic, lets the carving shine)
- Deep colors like navy, forest green, charcoal (creates drama)
- Terracotta or rust tones (very warm and earthy)
White or light plaster relief needs contrast so it doesn’t disappear:
- Medium to dark wall colors
- Or keep walls light but use dramatic lighting to create shadows
You can paint some relief sculptures but honestly I usually don’t recommend it unless it’s specifically designed for that. The whole point is often the material’s natural beauty.
Size and Spacing for Gallery Walls
If you’re doing multiple relief pieces together – which can look incredible by the way – you need way more space between them than regular framed art. Like instead of 2-3 inches, go for 4-6 inches minimum. They need room to breathe because they’re already so dimensional.
I did a set of three square wooden reliefs in different geometric patterns, each 20×20 inches, spaced 6 inches apart horizontally. It runs along a hallway and it’s one of my favorite installations ever.
Odd numbers work better than even – three pieces or five pieces rather than four. And varying the sizes creates more interest than having them all identical unless you’re going for a very specific modern repetitive look.
Maintenance and Cleaning
Wood carved pieces: dust regularly with a soft brush or microfiber cloth. You can use wood cleaner like Murphy’s Oil Soap diluted with water maybe twice a year, but test it on the back first. Some finishes are weird about certain cleaners.
Plaster and resin: gentle dusting only. Sometimes I use a can of compressed air to get dust out of deep crevings. Don’t use water unless it’s specifically sealed for it.
Metal: depends on the finish but usually just wiping with a damp cloth works. Some metals develop patina over time which can be beautiful or annoying depending on your preference.
Budget Real Talk
You can find small carved wood pieces for like $50-100 on Amazon or HomeGoods. They’re fine for testing out the look but the quality is usually meh.
Mid-range Etsy pieces from actual woodworkers run $200-500 for something really nice in the 24-36 inch range. This is my sweet spot for most clients.
High-end gallery pieces or custom work can easily hit $1000+ but they’re legit art investments.
I almost always tell people to save up for one really good piece rather than buying several cheap ones. The quality difference is so noticeable and a beautiful carved relief can literally be a conversation piece for decades.
Where I Actually Shop
Etsy for unique handmade pieces – search terms like “wood relief sculpture” “carved wall panel” “dimensional wall art”
Local artisan markets and craft fairs – you can see stuff in person and talk to makers
Estate sales and antique shops – I’ve found incredible vintage pieces this dirt cheap
West Elm and Anthropologie for more accessible modern options
Bali and Indian import stores if you have them locally – amazing carved panels
oh and another thing – Facebook Marketplace can be amazing for this stuff. I got a huge carved wooden headboard piece for $75 that someone was just getting rid of and it’s now the centerpiece of my guest room.
The thing with relief sculpture is it genuinely changes how a space feels in a way that regular flat art just doesn’t. It catches light, creates shadows, adds this tactile quality even though you’re not touching it. My friend came over last week while I was watching that new cooking show and she just stood staring at the carved piece in my dining room for like two minutes. That’s the effect you’re going for.
Just start with one piece, live with it, see how you feel. You’ll either love it and want more or you’ll realize it’s not your thing, and that’s totally fine too. But yeah, if you’re gonna do it, go bigger than you think and light it properly. Those are the two things that make the biggest difference.