Wall Art Guide, Wall Art Tutoriels
Pampas Wall Art: Boho Dried Grass Arrangements
Jun
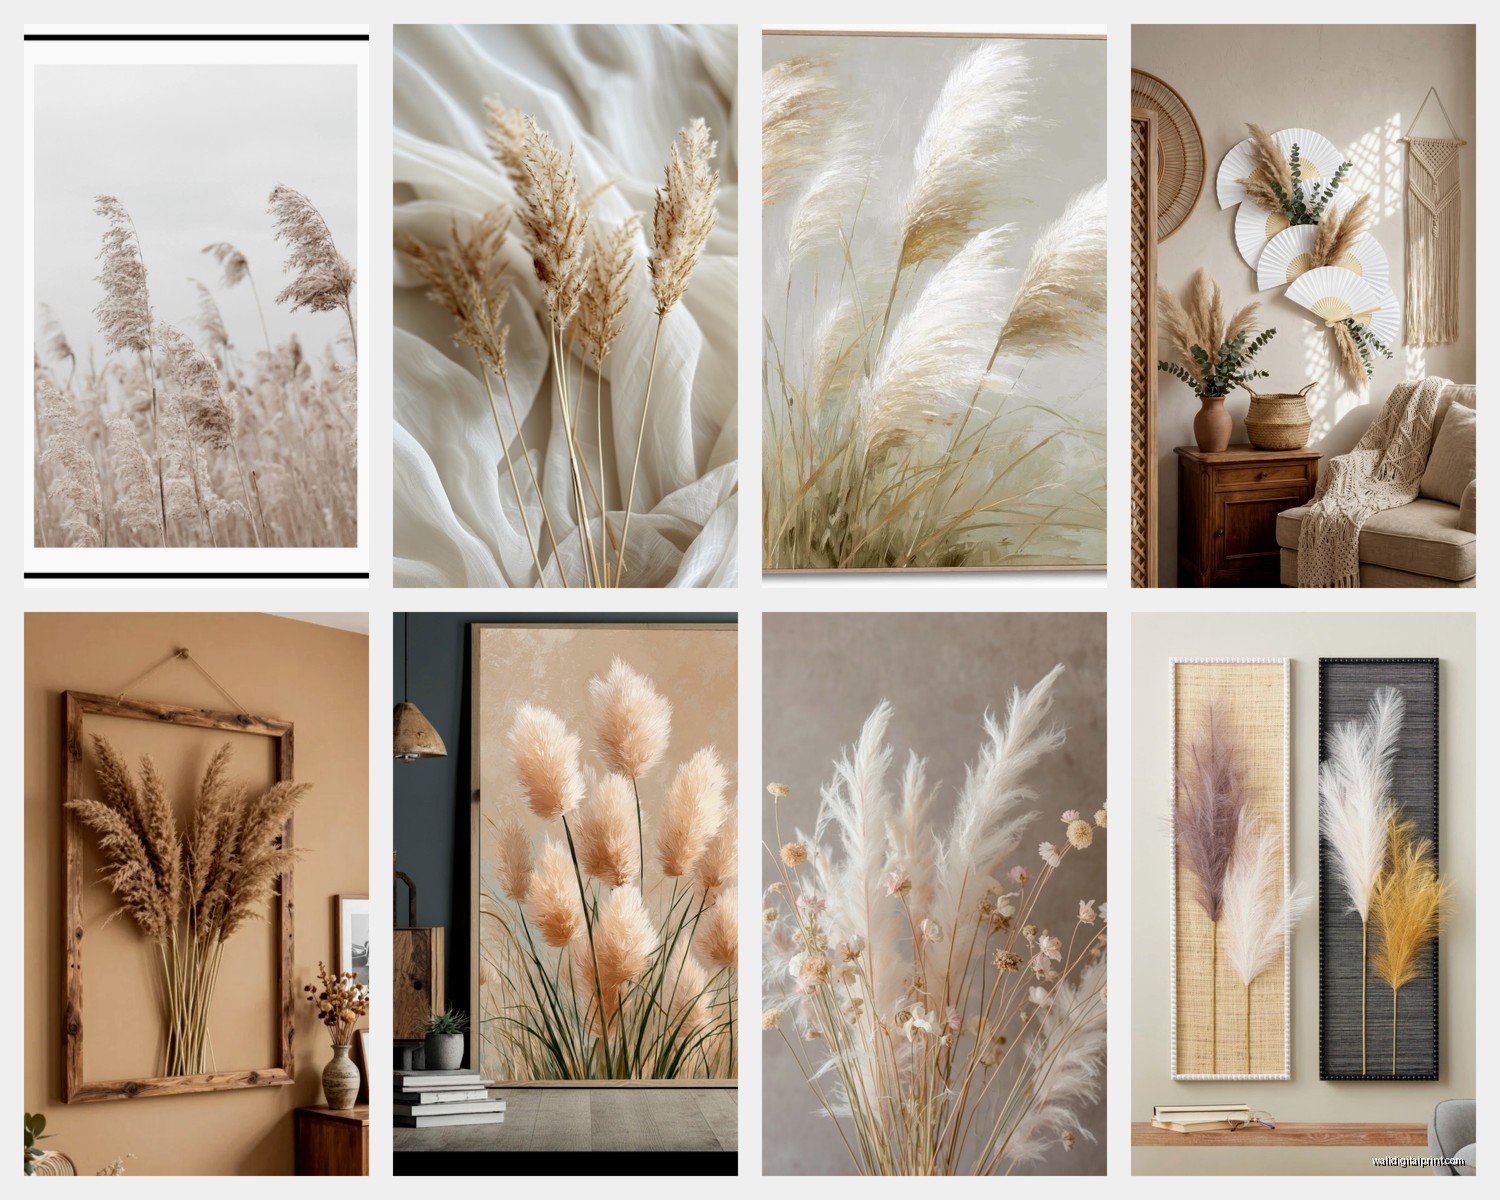
So I’ve been absolutely obsessed with pampas wall art lately and honestly it started because a client asked me to source some for her bedroom and then I fell down this whole rabbit hole of dried grass arrangements. Let me tell you everything I learned because I’ve literally tested like fifteen different ways to do this.
Why Pampas Actually Works (When Other Dried Stuff Doesn’t)
Okay so the thing about pampas is it’s basically indestructible compared to those delicate dried flower arrangements that shed everywhere. I had eucalyptus once that just… disintegrated over my dining table for weeks. But pampas? It stays put. The plumes are sturdy and they don’t drop little bits all over your floor which is crucial if you’re gonna hang something above your bed or couch.
The neutral color is what makes it so versatile too. You can bleach it lighter, dye it terracotta or dusty pink, or leave it natural. I’ve done all three and honestly the natural tan color is still my favorite because it works with literally everything.
Getting the Actual Pampas
You’ve got a few options here and they’re NOT all equal, trust me.
Fresh Cut vs Pre-Dried
If you order fresh pampas stems online (Etsy is where I usually go), they arrive kinda compressed and you gotta fluff them. This is gonna sound weird but I literally take them outside and shake them like I’m mad at them. Gets all the loose bits out at once instead of having them shed inside for days.
Fresh needs to dry for like 2-3 weeks before you arrange it permanently. I just stick mine in a vase with no water in my garage. The garage thing is important because they can get mildewy if there’s too much humidity while drying.
Pre-dried is more expensive but saves you the waiting time. The quality varies WILDLY though. I ordered some from Amazon once that arrived looking like sad feather dusters. The good stuff comes from small sellers who actually grow it themselves.
How Much You Actually Need
For a decent wall arrangement that’s like 2-3 feet wide, you need minimum 10-15 stems. I learned this the hard way after buying 5 stems thinking it would be enough and it looked so sparse and pathetic on my wall.
Stems range from like $2-8 each depending on size and quality. The tall ones (like 4+ feet) are pricier but you can cut them down and use different sections for multiple arrangements which is actually more economical.
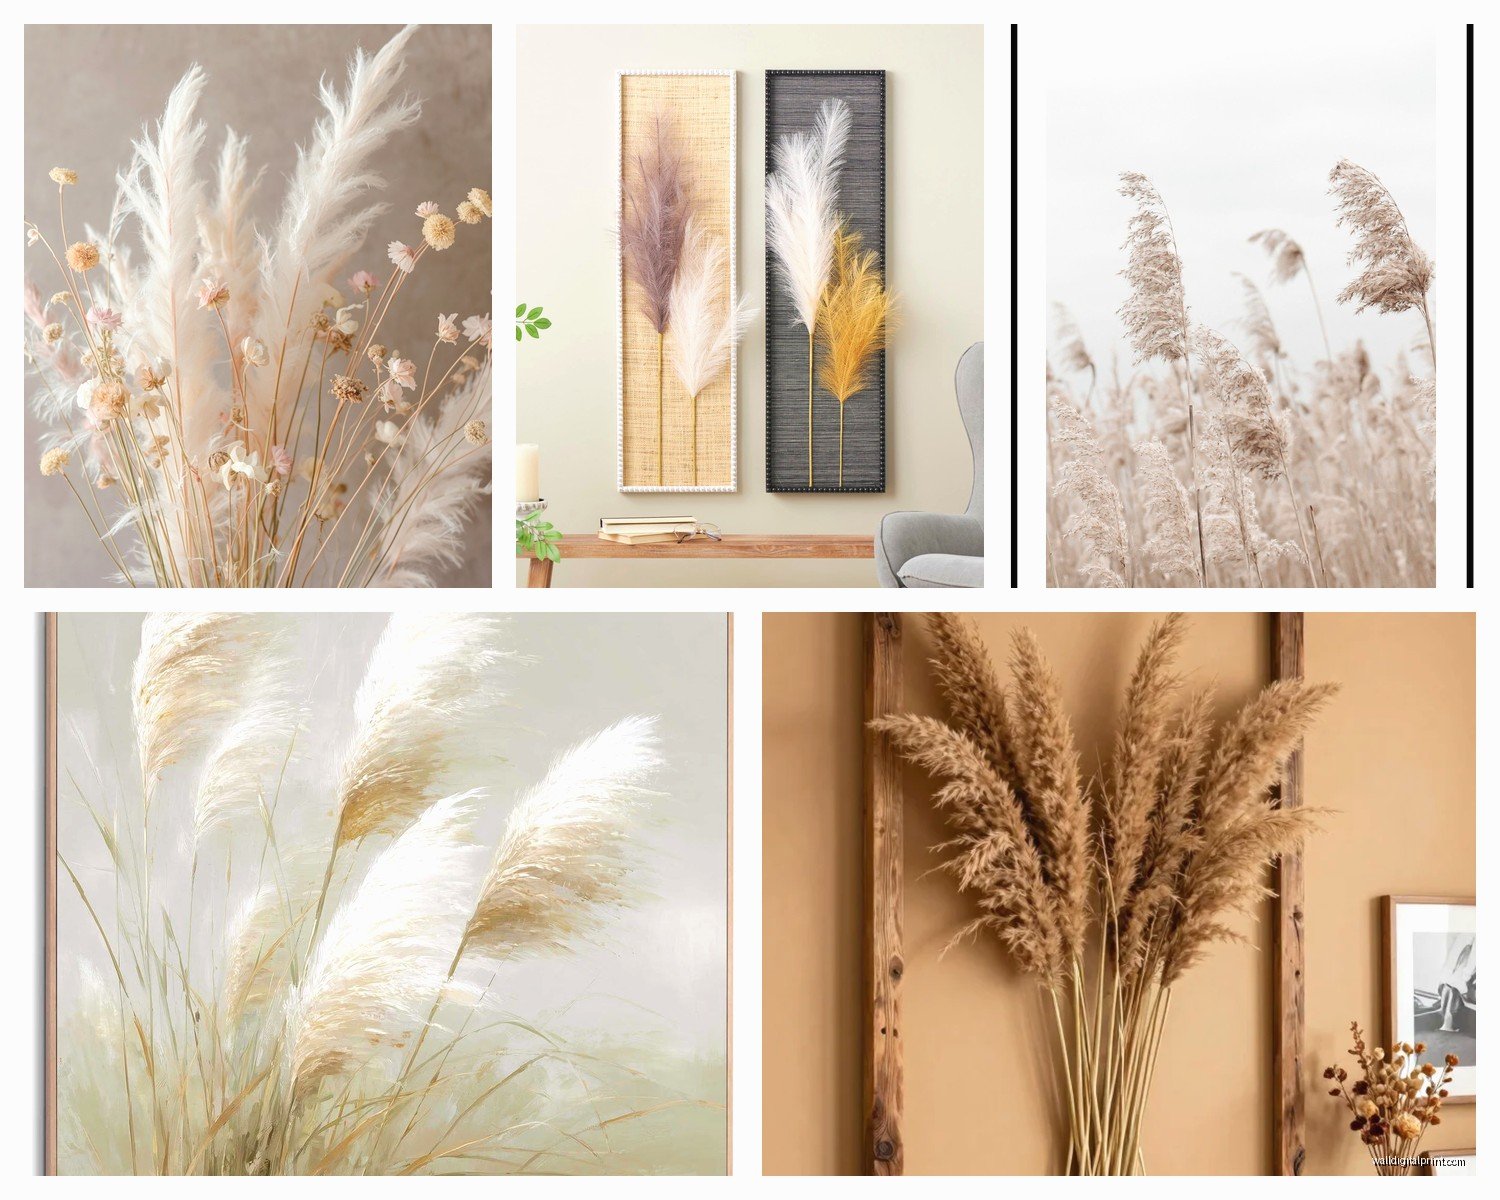
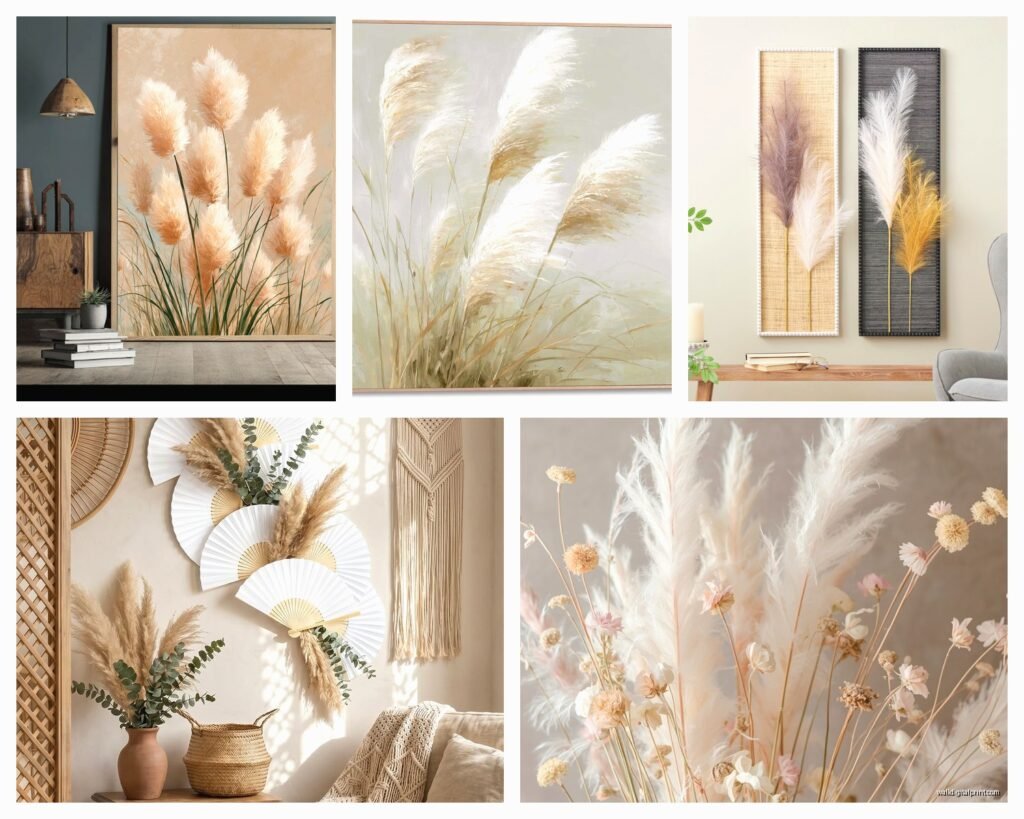
The Arrangement Styles That Don’t Look Terrible
I’ve tried a bunch of different approaches and here’s what actually works:
The Simple Fan Mount
This is the easiest and honestly looks really elegant. You literally just:
- Take 7-11 stems (odd numbers look better)
- Arrange them in a fan shape
- Secure with floral wire or even just twine
- Hang from a single nail or command hook
The trick is varying the heights slightly so they’re not all perfectly even. Nature isn’t perfect and your arrangement shouldn’t be either. I usually make the center stem tallest and have them get progressively shorter toward the edges.
The Asymmetrical Cluster
This one’s more modern boho and less… I dunno, less expected? You group different amounts of pampas at different heights, kinda like they’re growing out of the wall.
I use three separate bundles – one with maybe 5 stems, one with 3, one with 2. Hang them at staggered heights with the largest cluster lowest. It creates this cascading effect that’s really pretty behind a bed or above a console table.
Mixed Dried Arrangement
Okay so this is where I add other dried stuff but keep pampas as the main event. Bunny tails (lagurus) are amazing with pampas because they’re also super durable. Dried palm leaves add a different texture. Maybe some wheat stalks if you want more of a farmhouse vibe.
The ratio I use is like 60% pampas, 40% other stuff. Otherwise it gets too busy and loses that minimalist boho feel.
Actually Mounting This Stuff (The Part Everyone Messes Up)
So here’s where people run into problems. Pampas isn’t heavy but it’s bulky and the balance is weird.
Command Hooks vs Nails
I’ve used both extensively. Command hooks work fine for smaller arrangements (under 10 stems) but anything bigger needs a real nail or screw. The adhesive just gives out eventually, especially in humid climates. Found that out when an arrangement fell on my cat at 3am. She was not pleased.
For the command hook method, use the large ones rated for 5+ pounds and use TWO hooks even if you think you don’t need to. Better safe than having dried grass all over your floor.
The Wire Wrapping Technique
This is what I do now for everything:
- Arrange your stems how you want them
- Use floral wire to wrap tightly about 6 inches from the bottom of the plumes
- Wrap in multiple directions to really secure it
- Create a loop with the wire for hanging OR
- Tie jute twine over the wire wrap and use that for hanging
The twine looks better aesthetically but wire is stronger. I usually do wire first for structure then add decorative twine over it.
Behind Furniture vs Open Wall
If you’re mounting behind a bed or couch, you can get away with simpler mounting because the furniture hides the mechanics. I literally just lean some arrangements between the mattress and wall sometimes and they stay put fine.
Open wall requires more thought. You want the hanging mechanism to either be invisible or intentionally decorative. Natural rope or leather cord hanging from a brass hook looks really good for the latter option.
Styling Tricks I’ve Figured Out
The arrangement itself is only part of it. Where and how you place it matters so much.
Height Placement
Above a bed: Start the arrangement about 6-8 inches above your headboard. Not right against it or it looks cramped.
Above a console or dresser: Leave like 4-6 inches of space. You want it to feel connected to the furniture but not sitting ON it.
Random wall space: Eye level or slightly above. I usually aim for the center of the arrangement to be around 60 inches from the floor.
Combining with Other Wall Decor
This took me forever to figure out. Pampas arrangements look amazing with:
- Woven wall hangings (macrame or tapestries)
- Simple line drawings in thin black frames
- Mirrors with natural wood or rattan frames
- Floating shelves with minimal styling
What doesn’t work: Busy gallery walls, ornate frames, lots of color. The pampas gets lost or it all looks too cluttered.
I usually do pampas as the focal point with maybe one or two other simple elements. Like pampas arrangement above the bed with a small macrame piece on an adjacent wall. That’s it.
Lighting Considerations
Direct sunlight will bleach your pampas over time. Which might be what you want actually – I’ve had natural tan pampas turn this beautiful creamy white after six months in a sunny window. But if you want to maintain the color, keep it out of direct sun.
Backlighting is magical though. If you have a wall sconce or even just natural light from a nearby window, position your arrangement so light can filter through the plumes. Creates this gorgeous silhouette effect.
The Maintenance Situation
People always ask if pampas is high maintenance and honestly? It’s the lowest maintenance decor I’ve ever had.
Dusting
Yeah you gotta dust it occasionally. I use a feather duster or literally just take it outside and shake it every few months. Some people use a hair dryer on cool setting to blow dust off but that seems like overkill to me.
Shedding
If your pampas is shedding a lot, it either wasn’t dried properly or you bought cheap stuff. Good quality pampas that’s been properly dried should barely shed at all. When I first hang an arrangement I might get a few loose bits for a day or two but then it stops.
You can spray it with hairspray or a clear acrylic sealer to lock everything in place. I’ve done this for arrangements I’m shipping to clients but for my own house I don’t bother.
Lifespan
I’ve had pampas arrangements last literally years. The color might fade a bit and they might get dustier but the structure stays intact. Way better investment than fresh flowers obviously, and even better than most faux stuff which can look dated or cheap.
Color Options Beyond Natural
Okay so if you wanna get creative with color, here’s what I’ve tested:
Bleaching
Mix 1 part bleach to 3 parts water in a bucket. Submerge your pampas for 4-6 hours. Rinse thoroughly and let dry completely. This gives you that white/cream Instagram-worthy look.
Warning: bleach weakens the stems a bit so be gentler when arranging. And do this outside or in a well-ventilated area because the fumes are no joke.
Dyeing
RIT dye works great. I’ve done dusty pink, terracotta, sage green, and even black (which looked surprisingly cool in a moody bedroom).
Use hot water and way more dye than you think you need – pampas doesn’t absorb color as easily as fabric. Let it sit for at least an hour, longer for deeper color. Rinse until water runs clear then dry completely before arranging.
The dyed pampas will be slightly stiffer than natural which actually makes it easier to arrange sometimes.
Painted Tips
This is more of an accent thing but you can dip just the tips in diluted acrylic paint. I’ve done gold for a glam look and black for modern edge. Super subtle but adds a custom touch.
Common Mistakes I Made (So You Don’t Have To)
Not fluffing enough. Seriously, pampas needs aggressive fluffing. I was too gentle at first and my arrangements looked sad and flat.
Buying stems that were too short. The 2-foot stems seem cheaper but you can’t do much with them. Get the 3-4 foot ones and cut them down if needed.
Overcrowding. More isn’t always better. I made this massive arrangement once with like 30 stems and it just looked like a beige blob. Less is more with pampas.
Ignoring the natural curve of the stems. They have a natural bend and if you try to force them straight it looks weird and they might break. Work with the curves.
Not considering the room’s ceiling height. In a room with 8-foot ceilings, those super dramatic floor-to-ceiling pampas displays look overwhelming. Scale matters.
Where to Actually Buy Quality Pampas
Etsy sellers who grow their own – search for terms like “farm fresh pampas” or “naturally dried”
Local flower markets if you’re in a bigger city – often cheaper than online
Facebook Marketplace weirdly enough – people who grow it in their yards often sell bundles
Avoid: craft stores unless it’s on major sale, Amazon unless the seller has tons of reviews with photos, those pop-up Instagram ads (learned that lesson the expensive way)
Quick Room-Specific Tips
Bedroom: Above the bed is classic but also try flanking a dresser mirror with two asymmetrical arrangements
Living room: Above the couch or on a large empty wall opposite the seating area. Creates a focal point without being too formal
Dining room: I’ve done pampas horizontally along the wall behind a dining table and it’s stunning. Use multiple smaller arrangements in a row instead of one big one
Entryway: A tall dramatic arrangement in a corner makes such a statement when people walk in
Bathroom: Okay this is gonna sound weird but small pampas arrangements in bathrooms are gorgeous. Just make sure you have good ventilation so humidity doesn’t damage them
Wait I forgot to mention – you can also do ceiling installations where pampas hangs down from the ceiling, especially cool above a dining table or in a corner. Requires more involved mounting but the effect is really unique.
Anyway, that’s basically everything I’ve learned through way too much trial and error. Start simple with a basic fan arrangement and see how you like it before getting all experimental with dyes and complex installations. And buy more stems than you think you need because you’ll probably want to make multiple arrangements once you see how good the first one looks.