Wall Art Guide, Wall Art Tutoriels
Large 3D Wall Art: Oversized Dimensional Relief Designs
May
So I just finished installing this massive 3D relief piece in my living room and honestly, I’m still staring at it like… did I really just mount a 6-foot metal sculpture on my wall? But yeah, let me tell you everything I learned because I made SO many mistakes with my first oversized dimensional piece.
The Size Thing Nobody Tells You About
Okay first thing—and I cannot stress this enough—what looks “large” online is completely different in person. I ordered what I thought was a huge piece, like 48 inches, and when it arrived I literally laughed because it looked like a postage stamp on my 14-foot wall. The rule I use now with clients is measure your wall, then multiply whatever size you’re thinking by 1.5. Sounds excessive but trust me.
For standard 8-foot ceilings, you want pieces that are at least 40-50 inches in one direction. For those trendy high ceilings everyone’s got now, you’re looking at 60+ inches or you need to do a grouping. I learned this the hard way when I bought three “large” pieces that ended up looking like a sad little cluster in the corner.
Weight Is Gonna Be Your Main Problem
This is where it gets real. Most oversized 3D wall art weighs between 20-60 pounds. The metal relief designs I work with? Some hit 80+ pounds. Your standard picture hanging kit from Target is NOT gonna cut it.
Here’s what actually works:
- French cleats for anything over 30 pounds—they distribute weight horizontally and you can adjust positioning
- Heavy duty wall anchors rated for at least 3x the weight of your piece
- Stud finders that actually work (I like the Zircon MultiScanner, my old one kept lying to me)
- A second person because trying to hold a 50-pound metal sculpture while drilling is how I almost died last Tuesday
I usually mount directly into studs whenever possible. For pieces between studs, I use toggle bolts rated for drywall—the SnapToggle ones hold like 265 pounds each which seems insane but dimensional art has weird weight distribution.
Material Choices That Actually Matter
Metal relief designs are having a moment right now and I get why. The way light hits brushed aluminum or copper throughout the day is just… *chef’s kiss*. But they’re heavy and expensive and honestly kind of a pain to hang.
Resin-based dimensional art is lighter—like dramatically lighter. I installed a 5-foot resin piece last month that weighed maybe 15 pounds versus a similar-sized metal piece at 45 pounds. The texture isn’t quite as crisp but from 5 feet away you literally cannot tell. Plus resin takes color better if you want something beyond metallic finishes.
Wood relief carvings are gorgeous but you gotta think about your environment. My client in Florida had moisture issues that warped a beautiful teak piece within 6 months. Sealed wood in climate-controlled spaces? Perfect. Anywhere humid or with temperature swings? Maybe skip it.
Oh and another thing—those trendy paper mache or cardboard-based dimensional pieces? They photograph beautifully for Instagram but in person they look… cheap. Like craft project cheap. I had one client insist on ordering from this Etsy shop and when it arrived we both just stared at it in silence for a full minute.
Lighting Makes or Breaks These Pieces
You can have the most incredible dimensional relief sculpture and if your lighting sucks, it’ll look flat. The whole POINT is shadows and depth and texture, which means you need directional lighting.
I always install picture lights or track lighting positioned at a 30-45 degree angle. Front-on lighting kills all the dimension—you need side lighting or angled overhead to catch those reliefs. LED strip lights tucked behind the piece can create this amazing halo effect too, especially with abstract geometric designs.
Natural light is tricky because it changes throughout the day. I’ve got this copper relief piece that looks completely different at 8am versus 3pm versus sunset. Which is cool but you gotta plan for it. Don’t position dimensional art where harsh afternoon sun hits directly because some finishes will show every fingerprint and dust speck.
The Installation Process Nobody Warns You About
Alright so you’ve got your massive 3D artwork and you’re ready to hang it. Here’s the actual process that works:
First, make a paper template. Seriously. Use craft paper or taped-together newspaper to create a full-size outline. Tape it to your wall and live with it for like a day or two. Move furniture around. Sit on your couch and stare at it. I cannot tell you how many times I’ve had clients who were SURE about placement and then after the template went up they realized it blocked a window or hung too low or whatever.
Mark your stud locations before you commit. I use painter’s tape to mark studs because pencil marks sometimes show around the edges of pieces. Measure from the floor up, not the ceiling down, because ceilings are never level and you’ll end up with a crooked installation.
For the actual mounting—this is gonna sound weird but—I always do a practice run without the artwork. Drill your pilot holes, install your hardware, check it’s level with like three different levels because paranoia, then take a break. Come back with fresh eyes and double-check everything before you actually hang the piece.
The moment of truth is always terrifying. My dog literally hides in the other room when I’m installing large pieces because I get so stressed about it crashing down.
Styles That Work in Real Rooms
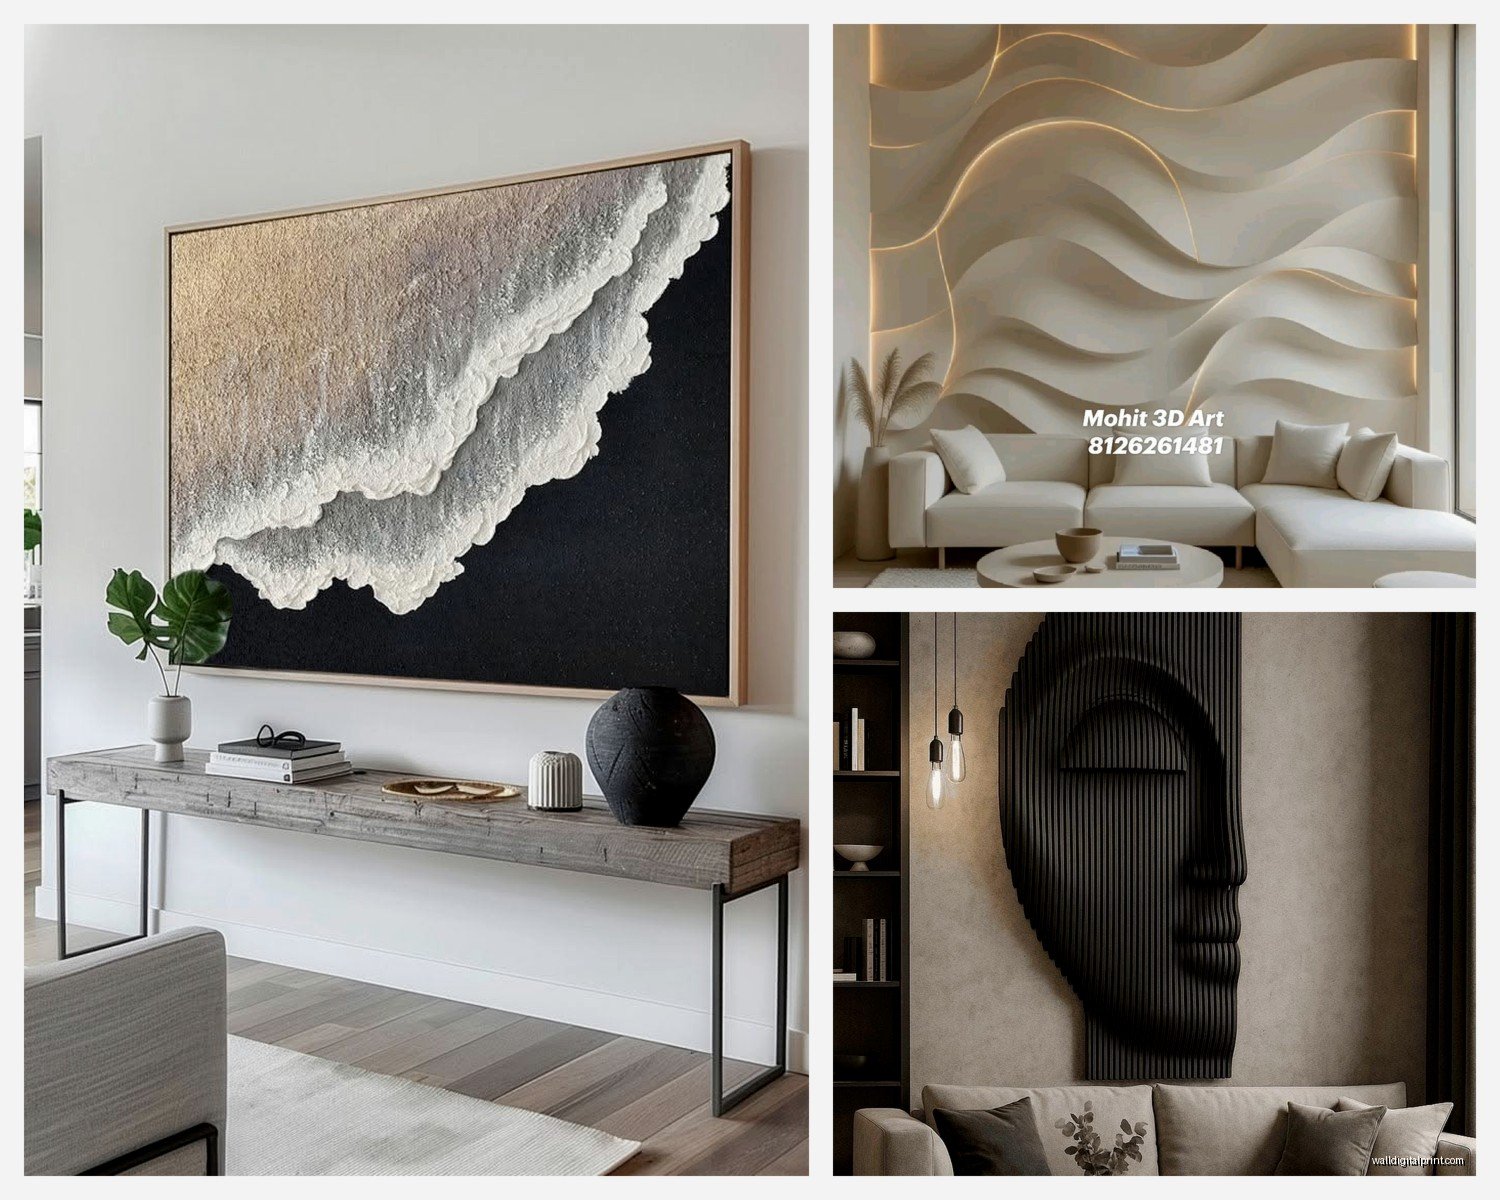
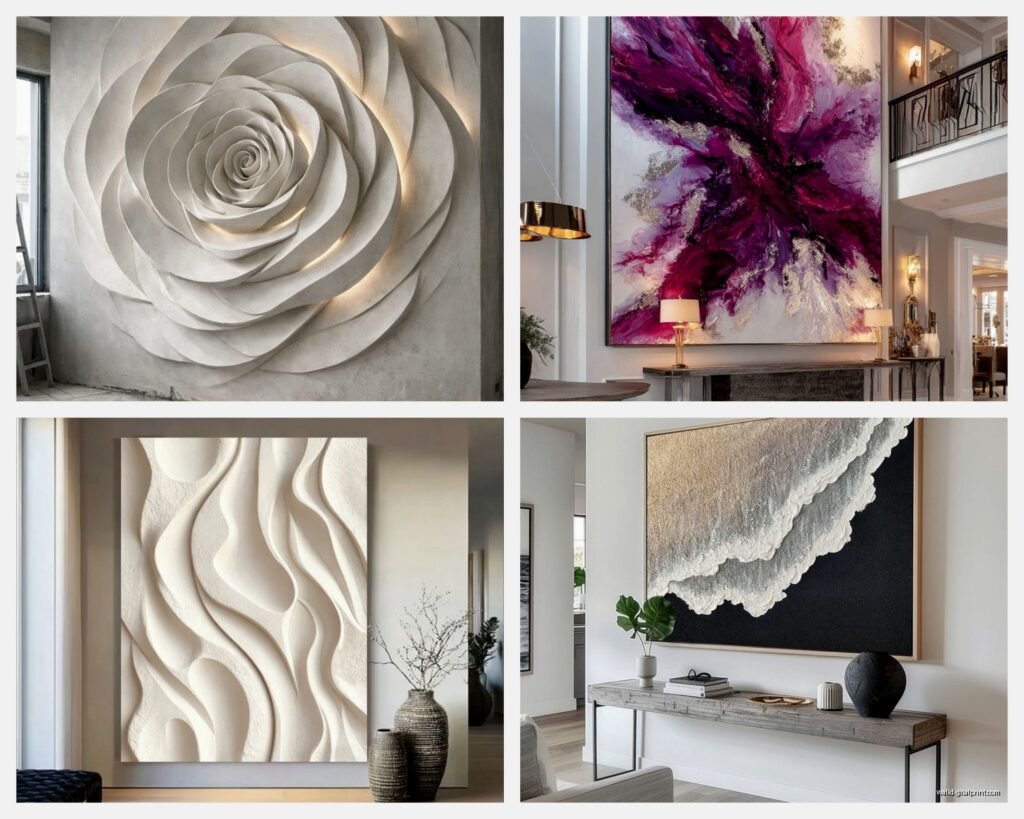
Abstract geometric relief is probably the easiest to work with because it doesn’t compete with other decor. Those multilayered square or circle compositions in metallic finishes go with basically everything. I use them constantly in modern and transitional spaces.
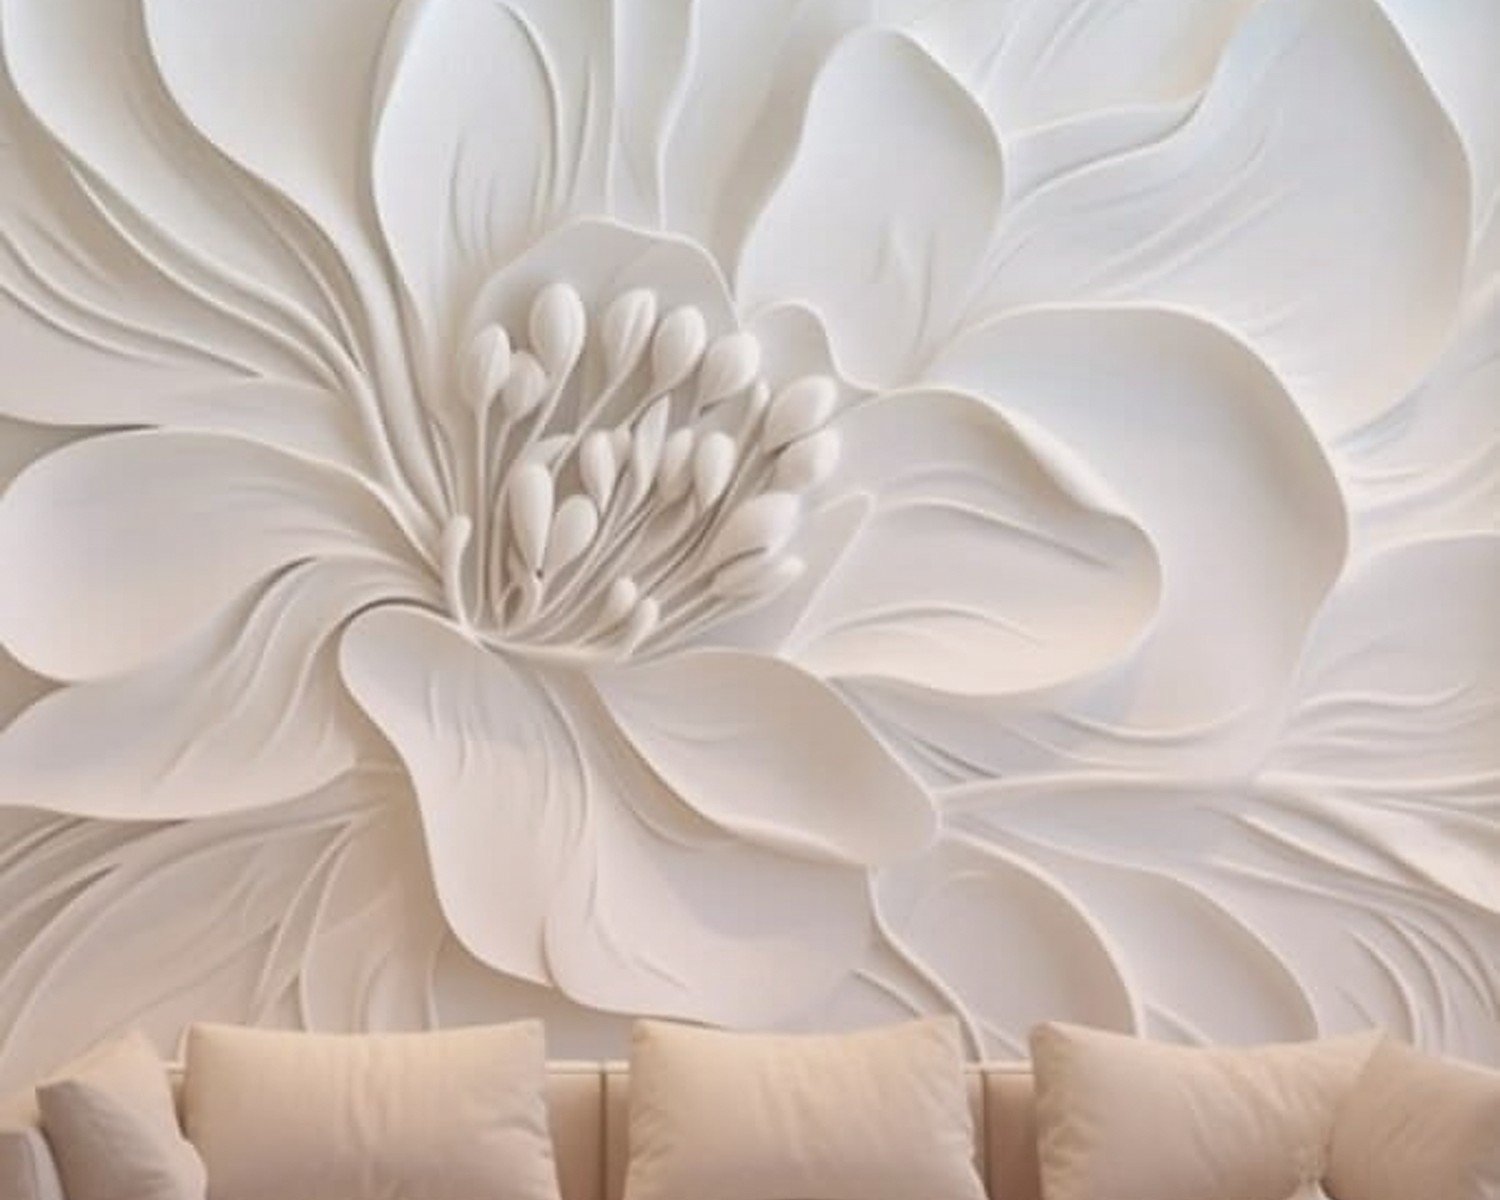
Organic flowing designs—like waves or botanical relief patterns—are gorgeous but they need the right context. They work best in rooms with other natural elements. I installed this incredible 70-inch wave relief in a coastal-style living room and it was perfect, but that same piece would’ve looked totally out of place in an industrial loft.
Dimensional typography is having a weird renaissance right now. Like oversized 3D words or phrases. They can be cool in the right space—home offices, creative studios—but most living rooms don’t need a 4-foot metal word looming over the sofa, you know?
Architectural relief pieces that mimic building facades or structural elements are really interesting for modern spaces. I’ve got one client with this amazing brutalist-inspired concrete relief that’s basically a tiny building facade mounted as art. Sounds strange but it works because their whole aesthetic is architectural.
Color and Finish Considerations
Metallic finishes are classic for a reason—brass, copper, bronze, silver, all work beautifully. But they show EVERYTHING. Dust, fingerprints, smudges from installation. I always seal metallic pieces with a clear matte finish to reduce maintenance.
Painted dimensional art needs to complement your existing palette without matching exactly. I learned this when I tried to match a relief piece to wall color and it just disappeared. You want contrast but not clash. A charcoal piece on light gray walls, white dimensional art on navy, that kind of thing.
Multi-colored relief designs are risky. They can look amazing or absolutely chaotic depending on execution. I only use them in relatively neutral spaces where they can be THE focal point without competing with busy furniture or rugs.
Raw materials like unfinished wood or concrete have this organic appeal but they’re high maintenance. Concrete dust, wood oils bleeding through… my client with the live-edge wood relief has to condition it every few months or it dries out and cracks.
Placement Strategy for Maximum Impact
Above the sofa is classic but you gotta get the scale right. The piece should be roughly 2/3 to 3/4 the width of your sofa. Anything smaller looks dinky, anything larger overwhelms the furniture. Height-wise, center the piece about 8-10 inches above the sofa back.
Dining room walls are actually perfect for oversized dimensional art because you’re usually sitting and looking at the walls. I installed a 6-foot horizontal relief piece behind a dining table last month and it completely transformed the space. The key is making sure it doesn’t extend past the table edges—keeps things visually balanced.
Entryways and hallways can handle dramatic dimensional pieces because you’re experiencing them while moving through the space. I love using vertical relief designs in narrow hallways, maybe 20-24 inches wide but 60+ inches tall. Creates this cool gallery effect.
Wait I forgot to mention—stairway walls are criminally underused for large 3D art. That awkward diagonal wall going upstairs? Perfect for an oversized dimensional piece. You view it from multiple angles as you go up and down which really shows off the relief details.
Maintenance Reality Check
Dimensional art collects dust in ways flat art never could. All those nooks and crevices and raised surfaces? Dust magnets. I use a soft paintbrush or microfiber duster weekly. For metal pieces, occasional wipe-down with appropriate metal cleaner.
Some finishes patina over time which can be gorgeous or annoying depending on your preference. Copper and brass will darken and develop that aged look. If you want to prevent it, you gotta seal it. If you like the patina, just let it happen naturally.
Resin pieces can yellow with UV exposure so keep them out of direct sunlight or use UV-protective coatings. I had a white resin relief turn cream-colored after two years in a sun-drenched room and the client was not thrilled.
Budget Real Talk
Quality oversized dimensional art is expensive, I’m not gonna sugarcoat it. You’re looking at $300-800 for decent resin pieces, $600-2000+ for metal relief designs, and custom work can easily hit $3000-5000 depending on size and artist.
That said, there are ways to get the look for less. Large-scale DIY dimensional pieces using layered wood or foam board can be surprisingly effective. I’ve seen people create stunning geometric relief art with painted MDF boards from Home Depot. Takes time and some basic tools but totally doable.
The other option is going with lesser-known artists on platforms like Saatchi Art or Artsy. You can find incredible dimensional work from emerging artists at like 40% less than established names. I’ve found some of my favorite pieces this way, honestly.
Groupings of smaller dimensional pieces can create impact similar to one large piece for less money. Three 24-inch relief squares arranged together reads as one 72-inch installation but costs significantly less. Just make sure they’re actually designed to work together, not random pieces you’re forcing into a grouping.
Common Mistakes I See All The Time
Hanging dimensional art too high is probably the biggest issue. People treat it like a painting and hang at traditional gallery height but dimensional pieces need to be lower so you can actually see the relief details. I usually center pieces at 55-58 inches from the floor rather than the standard 60 inches.
Not considering viewing distance is another one. Dimensional art needs space to breathe—you should be able to step back 6-8 feet to appreciate the full effect. Installing a massive relief piece in a tiny room where you’re always standing 3 feet from it defeats the purpose.
Mixing too many dimensional pieces in one space creates visual chaos. One large statement piece per room, maybe two if the space is huge and they’re in different zones. Your eye needs somewhere to rest.
Ignoring the weight distribution—I’ve seen people use two mounting points for a 60-pound piece and just… no. That’s how art falls off walls at 3am and gives you a heart attack. Use proper mounting hardware for the actual weight, not what you hope it weighs.
Oh and not testing the lighting before permanent installation. I always hang pieces temporarily with removable hooks first, then play with lighting for a few days before committing to the final mounting. Has saved me from so many regrettable installations.
So yeah, that’s basically everything I’ve learned about oversized dimensional relief art through trial and error and client work and that one time I almost destroyed a $2000 sculpture trying to hang it alone. The pieces themselves are stunning when done right but getting there requires actual planning and proper hardware and accepting that you’re probably gonna need help with installation unless you’re way more coordinated than I am.