Wall Art Guide, Wall Art Tutoriels
Over the Bed Wall Art: Master Bedroom Focal Point
Jun
So I’ve been obsessing over bedroom wall art lately because honestly, the space above your bed is like… it’s THE thing people see when they walk into a master bedroom and getting it wrong is so obvious but getting it right completely transforms the whole room.
Okay first thing – size matters way more than you think. I cannot tell you how many times I’ve walked into someone’s bedroom and they’ve got this tiny little 16×20 print floating above a king bed and it just looks sad. The general rule I always use is your art should take up about two-thirds to three-quarters of your bed width. So if you’ve got a queen bed that’s 60 inches wide, you’re looking at art that’s roughly 40-50 inches across. King bed? You need something substantial, like 50-60 inches minimum.
But here’s where it gets tricky – you don’t have to do one single piece. Actually some of my favorite installations are gallery walls or diptychs/triptychs because they feel more collected and less… I dunno, hotel-ish? I did this whole thing in my own bedroom last year where I used three 24×36 prints in matching frames and honestly it looks way more expensive than it was.
Spacing and Placement That Actually Works
The height thing trips everyone up. You want the center of your artwork to be at eye level, which is typically 57-60 inches from the floor. BUT – and this is important – when it’s over a bed, you’re usually viewing it while lying down or sitting, so the rules shift a bit. I generally hang art so the bottom edge sits 8-12 inches above the headboard. Any lower and it feels like it’s gonna fall on your head, any higher and it’s floating in outer space.
My client Sarah (the one with the three cats who kept photobombing our install pics) had this massive upholstered headboard and we had to go with the 12-inch spacing because anything closer just looked crowded. But her sister had a low-profile platform bed and we did 8 inches and it was perfect. You gotta eyeball it based on your specific setup.
Oh and another thing – if you don’t have a headboard at all, treat the top of your mattress as your baseline and go up from there. I’d probably start around 10-12 inches above the mattress in that case.
What Actually Looks Good Style-Wise
This is gonna sound weird but I think people overthink the “meaning” of bedroom art. Like, it doesn’t have to be super romantic or calming or whatever. I’ve got this abstract piece above my bed that’s actually pretty energetic with oranges and teals and I love waking up to it.
That said, here’s what I’ve seen work consistently:
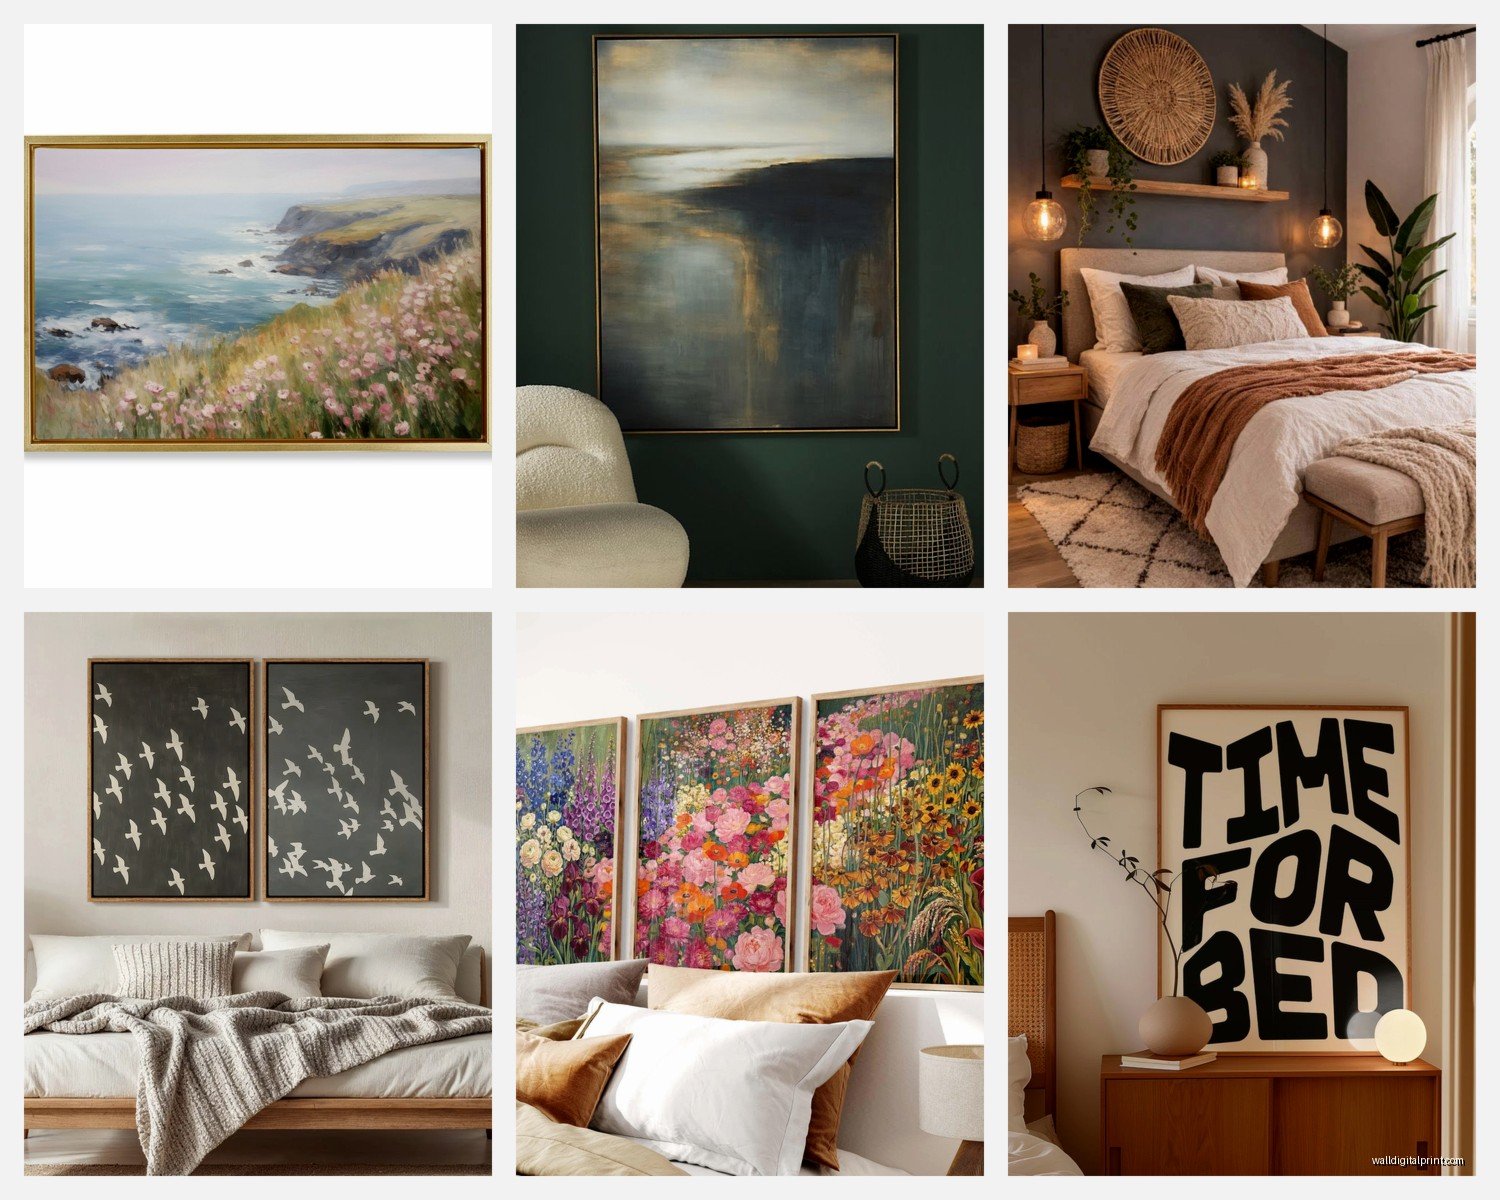
- Large-scale abstracts in colors that pull from your bedding or walls – this creates cohesion without being matchy-matchy
- Black and white photography, especially oversized prints – feels sophisticated and works with literally any decor style
- Botanical prints or landscapes if you want something more traditional but not boring
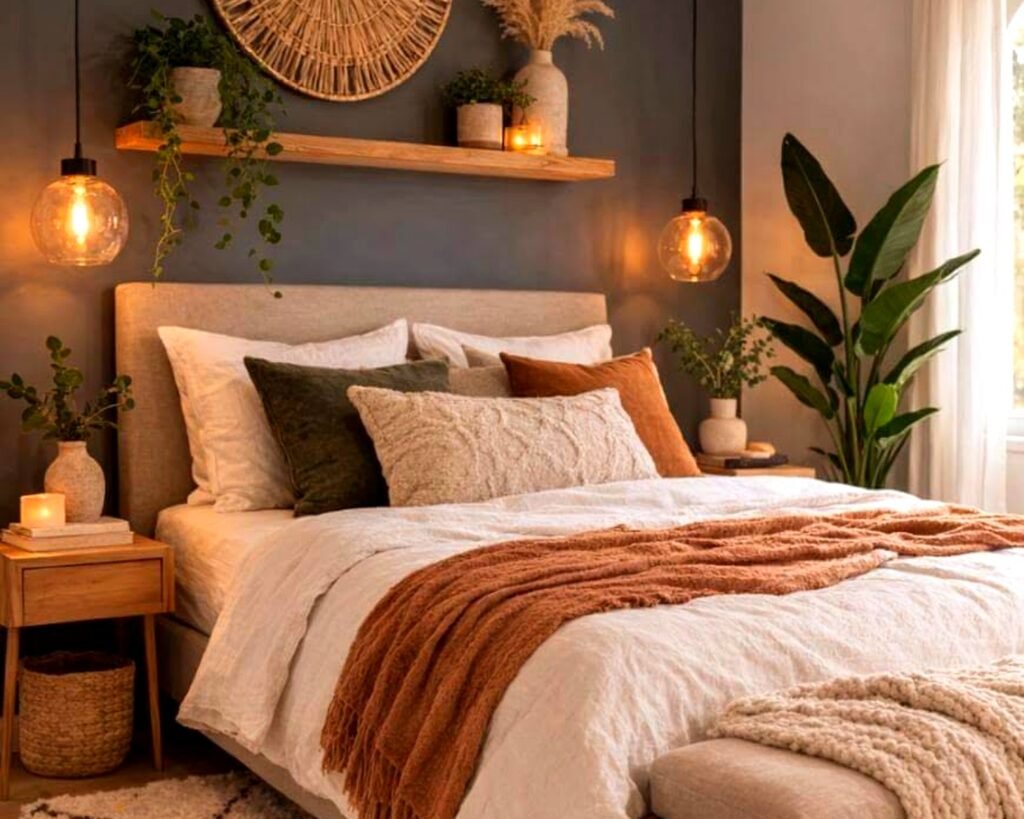
- Textural pieces like woven wall hangings or macramé if you’re going for that organic modern vibe
- Triptychs of related images – could be three ocean scenes, three architectural photos, whatever
What doesn’t usually work: anything too literal or cutesy (those “love” and “dream” word art things feel dated now), super bright primary colors unless your whole room is colorful, anything with too much visual complexity that’ll keep your brain active when you’re trying to sleep.
Frame or No Frame
Okay so funny story – I used to be a frame snob and only did custom framing for everything. Then I discovered that canvas prints or prints mounted on wood panels can look incredibly current and save you SO much money.
For a bedroom specifically, I actually think the relaxed vibe of an unframed canvas or a simple float frame works better than ornate traditional framing. It’s less formal. But if you’re going for classic or traditional decor, then yeah, you want proper frames with mats.
If you do frame, keep these in mind:
– Black frames: modern, crisp, works with everything
– Natural wood: warm, organic, great for bohemian or Scandinavian styles
– White/cream: soft, traditional, can feel bridal if you’re not careful
– Gold/brass: only if your room already has warm metallics elsewhere
I mixed gold and black frames in a gallery wall once and my photographer friend said it looked “intentionally eclectic” which I’m pretty sure was a compliment? It worked because the art itself was cohesive even though the frames weren’t.
Gallery Wall Configuration
If you’re doing multiple pieces, the layout matters. I usually sketch it out on paper first or use that trick where you trace your frames on kraft paper and tape the paper to the wall to visualize it. Saved me so many nail holes.
Common layouts that work:
– Grid: super clean and modern, all pieces same size, equal spacing (I use 2-3 inches between frames)
– Symmetrical: two or three pieces in a horizontal line, centered over the bed
– Salon style: different sizes arranged organically but balanced – this one’s harder to pull off
Wait I forgot to mention – measure everything before you commit. I use painter’s tape to mark out where frames will go and live with it for a day or two. You’d be surprised how often I end up shifting things once I see it taped out.
The Template Method
For gallery walls, I cut out paper templates of each frame size, arrange them on the floor until it looks right, then recreate that on the wall. Number each template and corresponding frame. Sounds extra but it’s way better than guessing and making seventeen unnecessary holes in your wall.
Art Types and Where to Source Them
I’m not gonna lie, original art is expensive and not always necessary for a bedroom. Here’s what I actually use:
Prints from online shops – Etsy, Minted, Desenio, Society6. You can get really beautiful digital downloads for like $10-20 and print them yourself at a local print shop or Costco (their photo center is surprisingly good). Just make sure you’re downloading high-resolution files, minimum 300 dpi.
Vintage finds – estate sales and antique malls have amazing old prints and paintings. I found this gorgeous landscape oil painting for $40 last month and just had it cleaned up. Cost another $60 but still way cheaper than buying new.
Your own photography – if you’ve traveled anywhere scenic, blow up your favorite shot. It’s personal and you already own the rights to it. I did this with a photo I took in Portugal and people always ask where I bought it.
Commission local artists – sometimes this is more affordable than you think, especially if you’re working with emerging artists. I commissioned an abstract piece from a local artist for $300 and it’s literally my favorite thing in my house.
Color Coordination Without Being Boring
You want your art to relate to your room colors but not match exactly. That’s the difference between sophisticated and… I dunno, kindergarten classroom vibes?
If your room is mostly neutrals (grays, whites, beiges), you can go bolder with your art – this is where jewel tones or rich colors really pop. If your room already has color, pull 1-2 colors from your bedding or curtains into the art, but let the art introduce at least one new accent color too.
I did a bedroom last year that was all soft grays and whites, and we hung this massive abstract with navy, rust, and cream. The rust was totally new to the room but it tied into a throw pillow and suddenly the whole space felt curated instead of bland.
Lighting Your Art
This is something people skip and it drives me crazy because good lighting makes even affordable art look expensive. You’ve got options:
Picture lights mounted above the frame – classic and elegant but requires hardwiring unless you get the plug-in kind. I like the brass swing-arm ones for a traditional look.
Track lighting or adjustable can lights – if you’re doing a reno or have existing ceiling fixtures, aim them at the art. Makes such a difference at night.
Wall sconces on either side – this works if your art is narrower, creates a really balanced symmetrical look. Plus you get ambient lighting for reading in bed.
My bedroom has terrible overhead lighting so I added two plug-in sconces flanking my art and it completely changed how the room feels at night. Got them from Target for like $35 each.
Common Mistakes I See Constantly
Too small – already mentioned this but seriously, go bigger than you think
Hanging it too high – it should relate to the bed, not float near the ceiling
Choosing art last – pick your art earlier in the design process so you can pull colors from it
All matching everything – your art doesn’t need to match your duvet exactly, that’s not how design works
Ignoring scale of the room – a 10×10 bedroom needs different art than a 16×18 master suite
Also, and this might be controversial, but I think those metal word signs that say like “blessed” or whatever are pretty much over? They had their moment around 2016. If you love them cool, but they’re not giving the elevated look most people want now.
Budget Breakdown
Since you’re probably wondering what this actually costs:
Budget option ($50-150): Digital download prints, IKEA frames or Amazon frames, DIY installation. Totally doable and can look great if you choose good art.
Mid-range ($200-500): Larger framed prints from Minted or Framebridge, canvas prints from professional printers, maybe one statement piece with custom framing.
Investment ($500+): Original art, custom framing, professional installation, gallery-quality pieces. Worth it if this is your forever home and you’re gonna be staring at it for years.
I usually tell people to invest more in the art itself than the frame when you’re on a budget. A great print in a simple frame beats mediocre art in an expensive frame every time.
My Actual Bedroom Setup
Since I’m giving all this advice, here’s what I actually did: Three 24×36 abstract prints in matching black frames arranged horizontally. Total cost was about $280 including printing and framing. Hung them 10 inches above my upholstered headboard, centered on the wall. Added two brass sconces on either side. The whole thing took maybe two hours to install once I had all the pieces.
The art itself is this really moody navy and gold abstract situation that I found on Etsy from a digital artist. Printed them at a local print shop on premium matte paper. Frames are from Michael’s with a 50% off coupon because I’m not above that.
It’s been up for eight months and I still love it which is rare for me because I usually get bored and want to change things up. The key was choosing something with enough visual interest that it doesn’t feel static but not so busy that it’s distracting.
Oh and make sure whatever you hang is actually secured properly – use proper wall anchors if you’re not hitting studs. My friend’s massive canvas fell off the wall at 3am once and she thought someone broke in. Use the right hardware for your wall type and the weight of your art. Most frame packages underestimate what you need.
One more thing – if you’re renting and can’t put a ton of holes in the wall, consider a large-scale piece that only needs 2-3 hanging points, or lean a really oversized piece on a shelf or ledge mounted behind the bed. I’ve done this in several spaces and it actually looks really cool and editorial, plus you can swap it out easily when you get bored.