Wall Art Guide, Wall Art Tutoriels
String Wall Art: Yarn Thread Nail Line Art Technique
Jun
So I’ve been doing this string art thing for about three years now and honestly it’s one of those projects that looks way more complicated than it actually is. Like my neighbor saw the geometric fox I made and thought I paid someone hundreds of dollars for it but the whole thing cost me maybe $25 and a Netflix binge.
What You Actually Need to Get Started
Okay so first thing – don’t go buying some expensive kit from those craft stores. I made that mistake with my first project and half the nails were bent and the “pattern” was basically illegible. Here’s what you actually need:
The Board – I use pine boards from the hardware store, usually around 12×16 inches to start. They’re like $8. Make sure it’s at least half an inch thick because thin boards will split when you’re hammering. I learned this the hard way when my “masterpiece” cracked down the middle at 11pm the night before I needed to gift it.
Nails – This is where people get weird but trust me on this. Get 1-inch wire nails or veneer pins. The ones with the tiny heads work best because the thread doesn’t slip off as easily. I buy them in bulk now from Amazon because I got tired of running to the hardware store every other project. You’ll need anywhere from 50 to 200 depending on your design complexity.
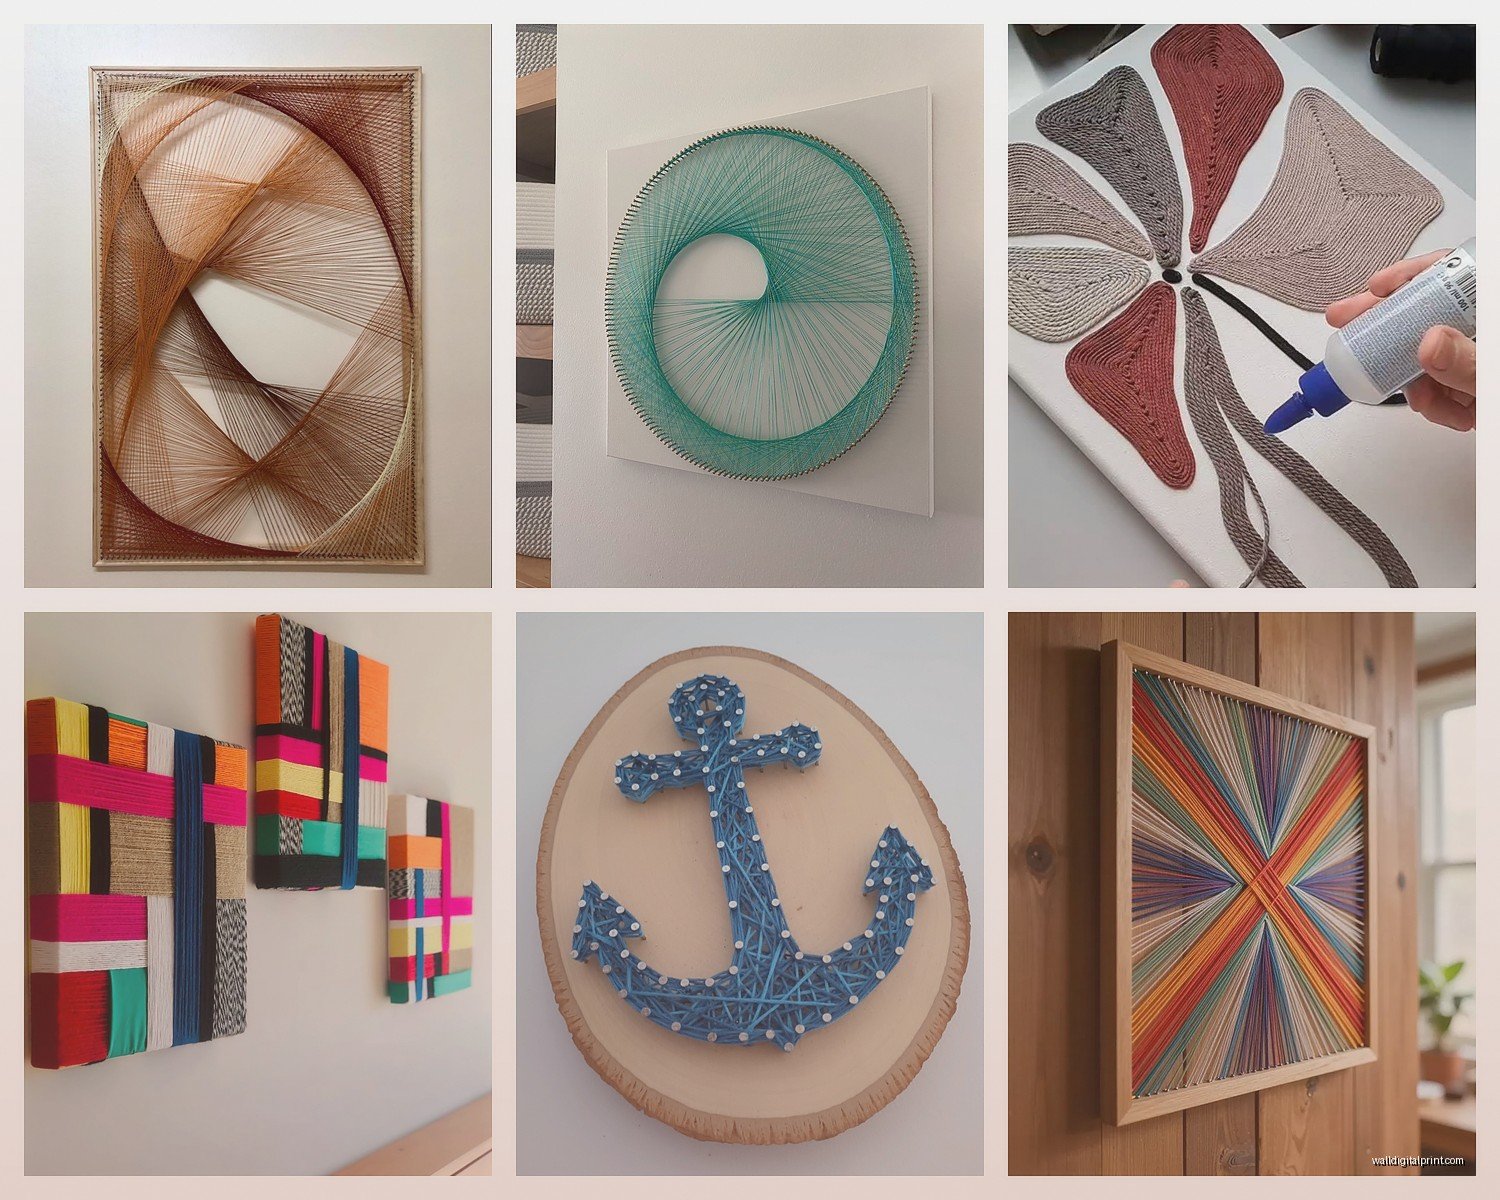
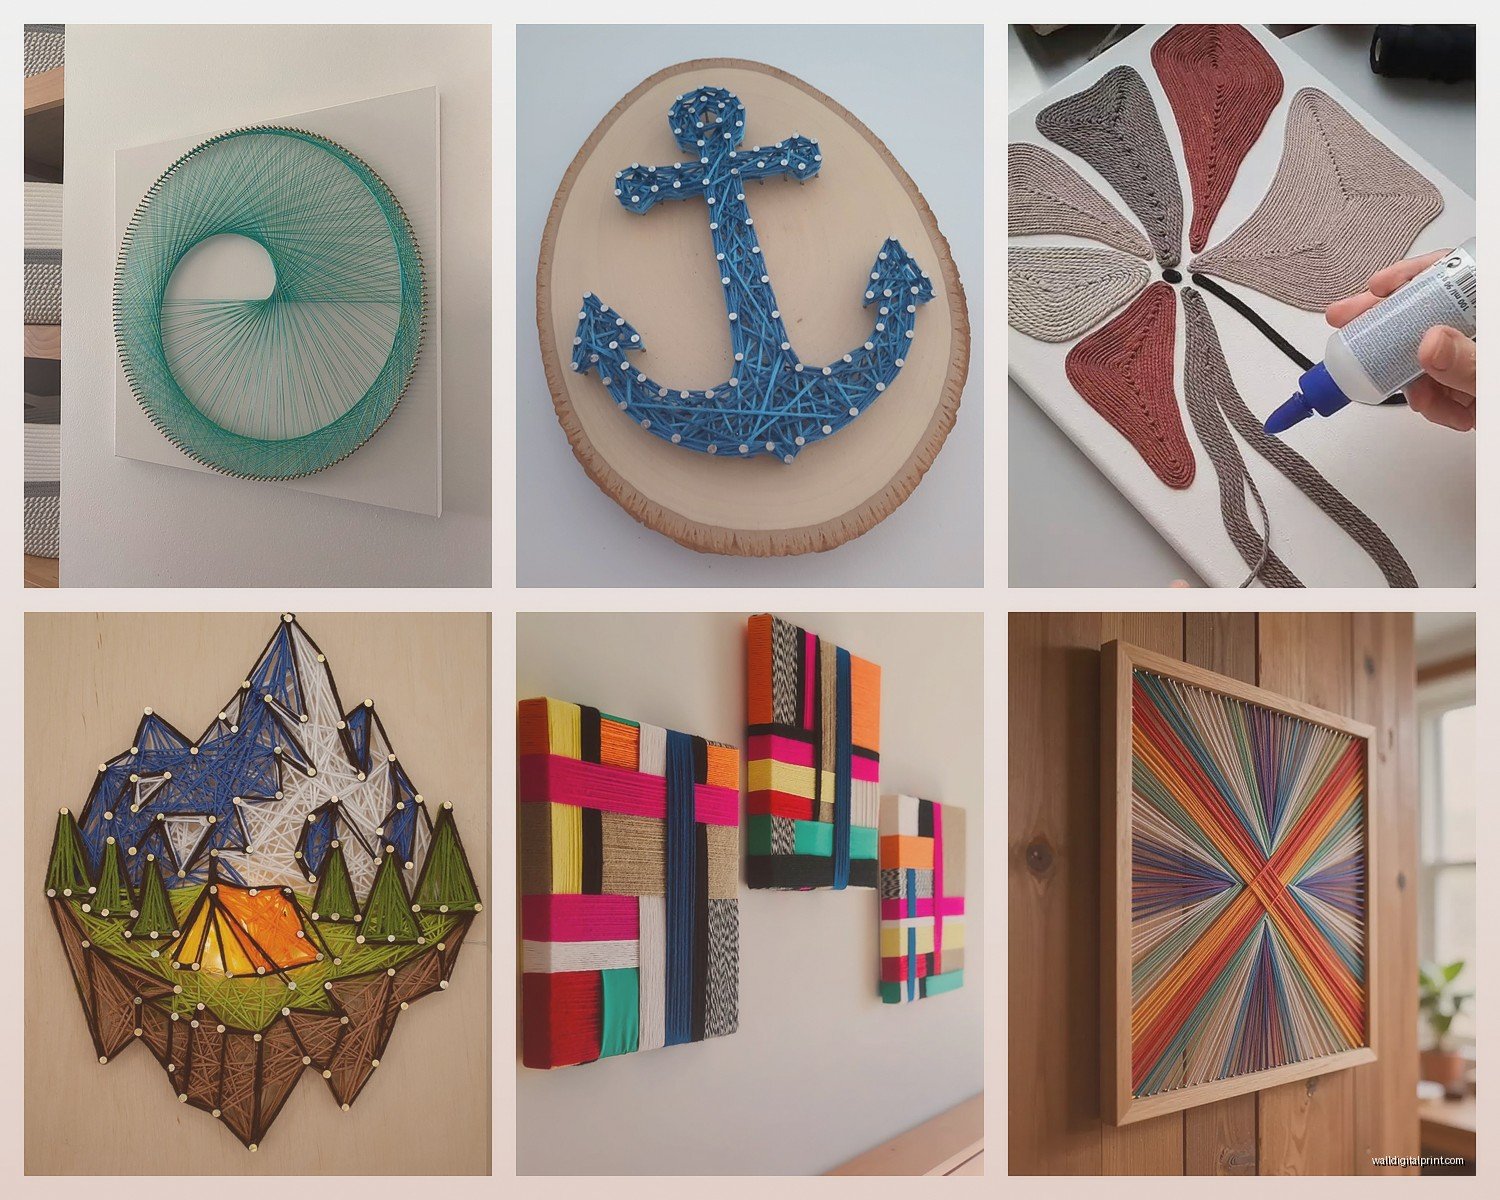
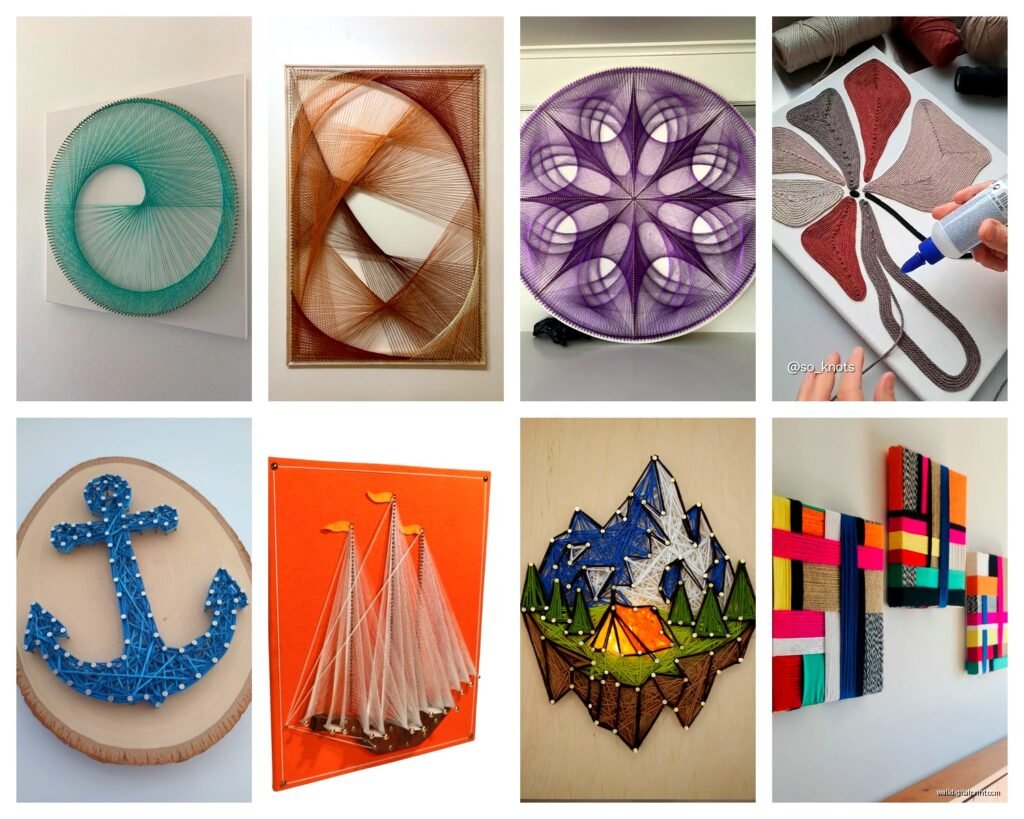
Thread or Yarn – Okay so here’s where it gets interesting. Embroidery floss gives you the most precise lines and comes in a million colors. Crochet thread is also amazing for detailed work. But if you want something chunkier and more textured, go with thin yarn. I’ve used all three and honestly my favorite is perle cotton thread because it has this slight sheen that catches light really nicely.
Other Stuff – Small hammer (not your regular one, get a tack hammer), needle-nose pliers for when you inevitably bend a nail, sandpaper, painter’s tape, and printed pattern or template.
Prepping Your Board Because This Part Actually Matters
Sand that board down. Like really sand it. I skipped this once because I was impatient and got a splinter under my nail that hurt for days. Start with 80-grit sandpaper to smooth out rough spots, then finish with 120-grit. Wipe it down with a slightly damp cloth after.
If you want to stain or paint your board, do it now. I usually do a dark walnut stain because it makes lighter colored thread pop, but I’ve also done white painted boards with navy thread that looked super modern. Let it dry completely – and I mean completely. I once started nailing into a board that felt dry but wasn’t and the stain got all over my hands and thread.
Getting Your Pattern On There
Print your design to the exact size you want. You can find free patterns online or honestly just Google image search something simple like “geometric string art pattern” and trace it. I’ve done state outlines, animals, words, mandalas… the possibilities are kind of endless.
Tape the pattern to your board with painter’s tape. Make sure it’s centered and straight because you can’t really fix this later. Then here’s the part that feels satisfying – hammer a nail through every point marked on your pattern. Space them about half an inch apart for most designs, closer if you want more detail.
The Hammering Part That’ll Wake Up Your Roommate
So this is gonna be loud. Fair warning. I try to do this part during reasonable hours now after my downstairs neighbor left a passive aggressive note on my door.
Hammer each nail about halfway into the board. They should all be the same height – this is actually important for the final look. I eyeball it mostly but if you’re a perfectionist you can mark a line on your hammer with tape as a guide.
The nails should feel secure but not be driven in so deep that there’s no room for thread. I usually test by trying to wiggle one – if it moves easily, hammer it in more. If you can barely get thread around it, you went too deep and gotta pull it out and try again.
Once all your nails are in, carefully tear away the paper pattern. Sometimes bits get stuck under the nail heads – use tweezers or just leave them, honestly no one will notice once the thread is on.
Stringing It Up and Where the Magic Happens
Okay so this is where everyone has their own method but I’m gonna tell you what works for me. Tie your thread to a starting nail with a double knot. Don’t cut the thread from the spool yet – you want to work directly from it so you don’t run out mid-project.
The basic technique is wrapping the thread around each nail, creating lines that form your image. For solid shapes, you basically connect every nail to every other nail in a pattern. It sounds confusing but once you start you’ll see it.
For geometric designs: I usually go around the perimeter first, then start creating internal lines. The pattern emerges as you layer the thread. You’re not following a specific sequence necessarily, just wrapping and creating density where you want darker areas.
For gradient effects: Start with one color, wrap until you’ve covered about a third of your design, then tie off and switch colors. The overlapping creates this cool ombre thing that my sister loved so much I had to make her three different pieces.
The thread tension matters more than you’d think. Too loose and it looks sloppy. Too tight and you risk pulling nails out (yes, this happens). I aim for firm but not taut – like it shouldn’t sag but shouldn’t feel like it’s straining either.
Different Techniques I’ve Tried
The State/Outline Method: This is probably the easiest to start with. Hammer nails around the outline of your shape, then create a “negative space” design by stringing from the outer border to the shape outline. So like, if you’re doing a heart, you put nails around a square border and around the heart shape, then string from border to heart. The heart stays empty and the background fills in.
Layered Color Technique: Use multiple colors of thread on the same design. I did a sunset scene where I layered orange, pink, and purple thread and it turned out way better than expected. You just complete one color, tie it off, then start the next color on top.
Text and Words: These are trickier because letters have curves and you need more nails to make them readable. I space nails about a quarter inch apart for text. Cursive is actually easier than print letters because the flowing lines are more forgiving.
Problem Solving Because Things Will Go Wrong
Bent nails: Pull them out with pliers and try again. If you’ve bent more than three you’re probably hammering at an angle.
Thread breaking: This happened to me constantly at first. Usually means your nails are too sharp or have burrs. I lightly file the tops of nails now with an emery board – sounds weird but it works.
Running out of thread mid-project: Tie off where you are, start a new piece by tying it to a nail that already has thread on it. The knot will hide in the layers.
Not liking how it looks halfway through: Keep going. Seriously, every single piece I’ve made looked terrible and chaotic at the midpoint. The design doesn’t really emerge until you’re like 75% done. I almost threw out my favorite piece because I thought it looked awful but my girlfriend convinced me to finish it.
Time and Patience and Your Cat Trying to Help
A simple design takes me about 2-3 hours. Complex ones with multiple colors or lots of detail can take 6-8 hours. I usually spread it over a couple days because my hands cramp up from the repetitive motion. Also my cat thinks the moving thread is a toy and has attacked my work in progress more times than I can count.
You’re gonna space out and wrap randomly sometimes. That’s fine. The beauty of string art is that there’s no real “wrong” way to string it. Even “mistakes” usually just add to the texture and dimension.
Making It Look Professional
Once you’re done stringing, tie off the thread securely and trim excess. I dab a tiny bit of clear nail polish on the knots to keep them from unraveling – learned that trick from a YouTube video at like 2am when I couldn’t sleep.
For hanging, attach D-rings or sawtooth hangers to the back. Make sure they’re positioned so the piece hangs level. I use a level app on my phone because I don’t own an actual level and honestly it works fine.
Some people spray their finished pieces with a clear acrylic sealer. I’ve done this on pieces that’ll be in humid areas like bathrooms but mostly I skip it. The thread doesn’t really need protection unless you’re putting it outside or something.
Design Ideas That Actually Work
Starting out, try a simple geometric shape – circle, triangle, diamond. These teach you the basic technique without being overwhelming. I did a circle for my first real project and it’s still hanging in my office.
State outlines are popular for a reason – they’re easy and people love getting their home state as a gift. I’ve made probably fifteen of these at this point.
Animals work great if you keep them simple. Geometric-style animals (think origami-looking) are easier than realistic ones. That fox I mentioned earlier? It’s just triangular shapes that form a fox silhouette.
Words and phrases are meaningful but again, plan for lots of nails and patience. I made one that says “home” in cursive for my parents’ anniversary and my mom cried so apparently I did something right.
Where I Get Pattern Ideas
Pinterest obviously. But also I’ve traced images from Google, used Canva to create designs, and honestly sometimes just freehand sketch something on paper and nail along my sketch lines. The string art community on Instagram has tons of inspiration too – people are doing incredibly complex stuff with like six colors and 500 nails that makes my work look basic but whatever, we all start somewhere.
The thing nobody tells you is that the “mistakes” often end up being the most interesting parts. I had a piece where I misjudged the spacing and had to add extra nails in weird spots and it ended up creating this cool radiating effect I’ve tried to replicate since.
Cost Breakdown Because I Know You’re Wondering
My average project costs:
– Board: $8
– Nails: $5 (buying in bulk)
– Thread: $3-6 depending on quality
– Stain or paint if using: $10 (but one can lasts for many projects)
So you’re looking at $15-20 per piece once you have basic supplies. Compare that to buying string art online which runs $50-200 and yeah, worth learning to DIY.
Oh and another thing – this makes genuinely good gifts. I’ve given string art for weddings, housewarmings, birthdays. People are always impressed and it feels more personal than buying something generic from a store. Just start it way earlier than you think you need to because it takes longer than you expect.