Wall Art Guide, Wall Art Tutoriels
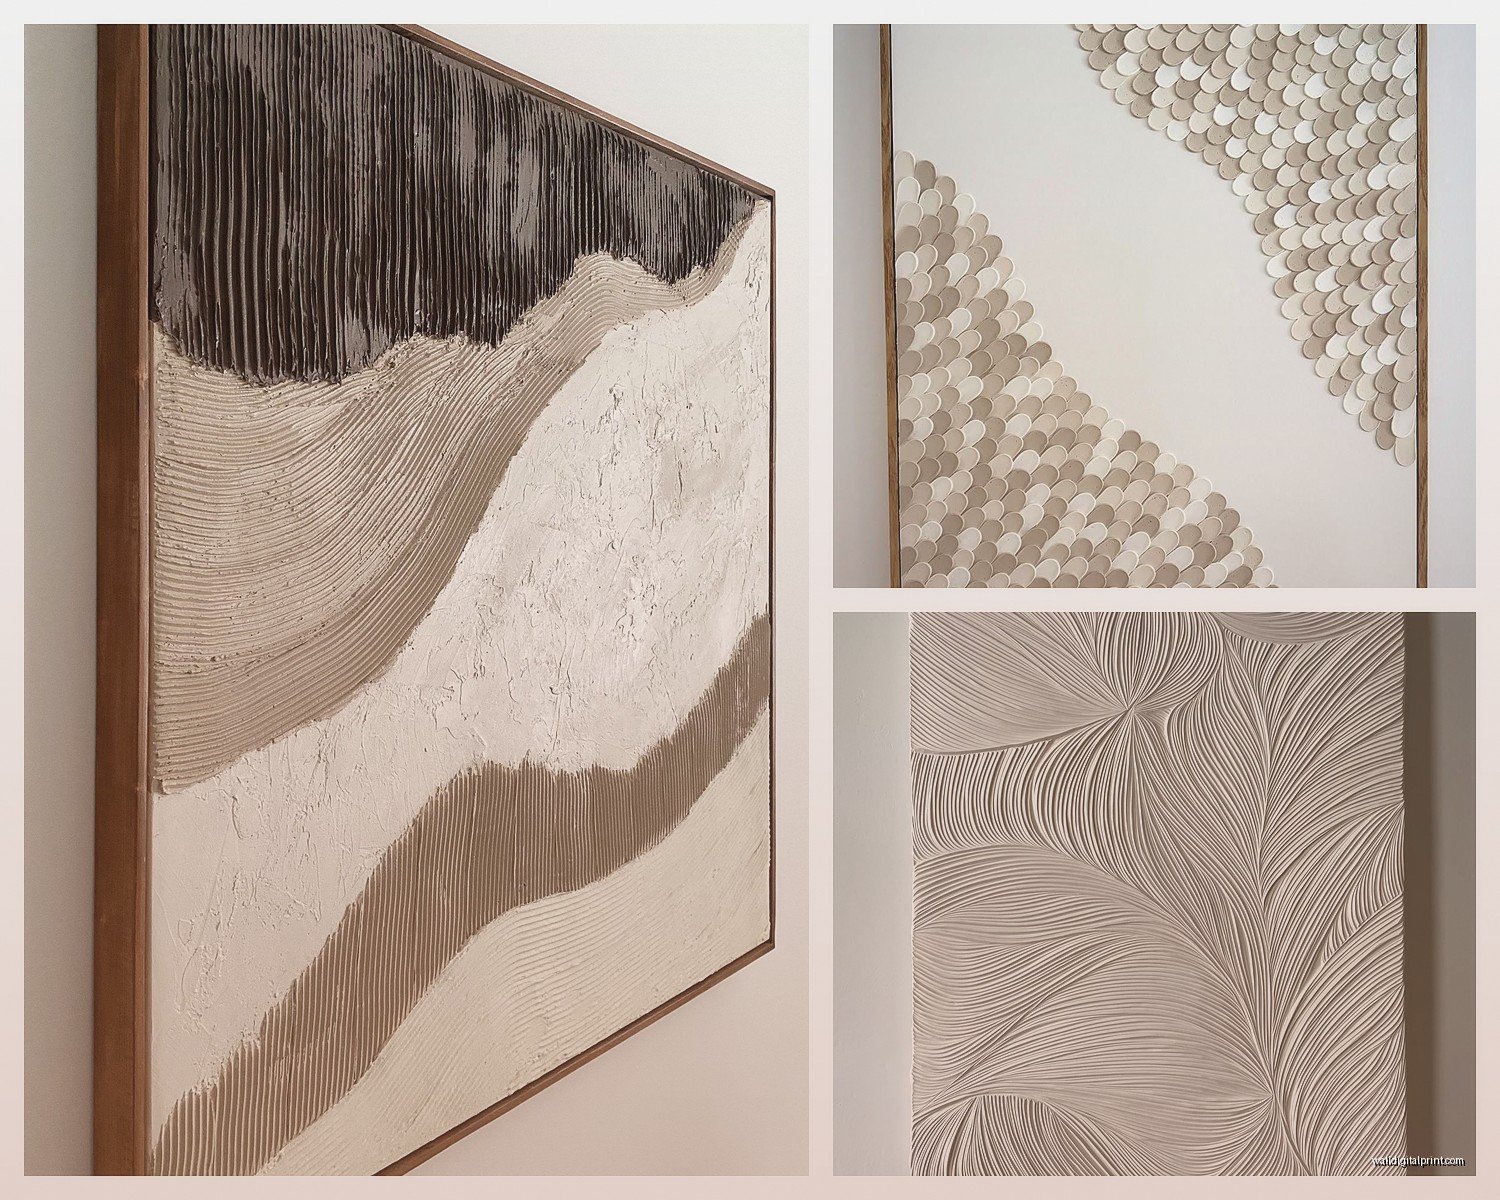
Spackle Wall Art: Textured Plaster Relief Technique
Jun
So I’ve been totally obsessed with spackle wall art lately and honestly it’s one of those things that sounds way more complicated than it actually is. Like I was watching this restoration show last week and they were doing plaster relief work and I thought wait, I can do a version of this with just basic spackle from the hardware store.
The main thing you need is lightweight spackle, not the pre-mixed kind in the tiny tub but like the bigger containers. I use DAP or the Lowe’s brand, whatever’s on sale honestly. You want the lightweight stuff because it’s easier to build up layers and it doesn’t crack as much when it dries. I learned this the hard way when I used regular spackle on my first attempt and it literally cracked down the middle after like three days.
What You Actually Need
Okay so here’s your shopping list and don’t skip stuff because I tried shortcuts and they don’t work:
- Lightweight spackle (at least a quart, you’ll use more than you think)
- Palette knives in different sizes – I got a set of like 5 on Amazon for $12
- A couple cheap paintbrushes
- Canvas boards or you can go straight on the wall if you’re brave
- Acrylic paint for finishing
- Sandpaper in 120 and 220 grit
- A spray bottle with water
- Drop cloths because this gets messy
The palette knives are key. Like you can’t do this with a regular putty knife, the flexibility is totally different. I use the bigger ones for broad strokes and the tiny ones for detail work.
Prepping Your Surface
If you’re doing this on canvas which I recommend for your first try, you don’t need to do much. Maybe give it a light sand if it’s super glossy but honestly I usually skip this step. If you’re going directly on a wall you gotta make sure it’s clean and not glossy. I did one in my guest bathroom over semi-gloss paint and it just slid around, wouldn’t stick properly at all.
Some people say to prime everything first but I’ve found that the spackle adheres fine to most surfaces. The only time I prime is if I’m working on something super smooth like a piece of wood or metal.
Getting the Consistency Right
This is gonna sound weird but the consistency of your spackle matters SO much. Right out of the container it’s usually too thick for anything detailed. I scoop some into a plastic container and add water literally one teaspoon at a time, mixing it up. For base layers you want it like…thick yogurt maybe? For finer details it should be more like sour cream.
My dog knocked over my water container once and I had to remix everything and honestly it made me realize how much the texture changes the final result. Thicker spackle gives you these really dramatic ridges, thinner stuff is better for subtle texture.
Building Up Your Layers
Okay so funny story, my first attempt I tried to do everything in one layer and it was a disaster. You gotta build this up gradually or it just looks like you smeared joint compound on a wall.
Start with a base layer that’s pretty smooth. I use a wide palette knife and spread it maybe an eighth of an inch thick. This gives you something to work into later. Let this dry completely and I mean COMPLETELY. It’ll look dry after an hour but wait at least 4-6 hours. I usually do my base layer at night and come back the next morning.
Creating the Relief Pattern
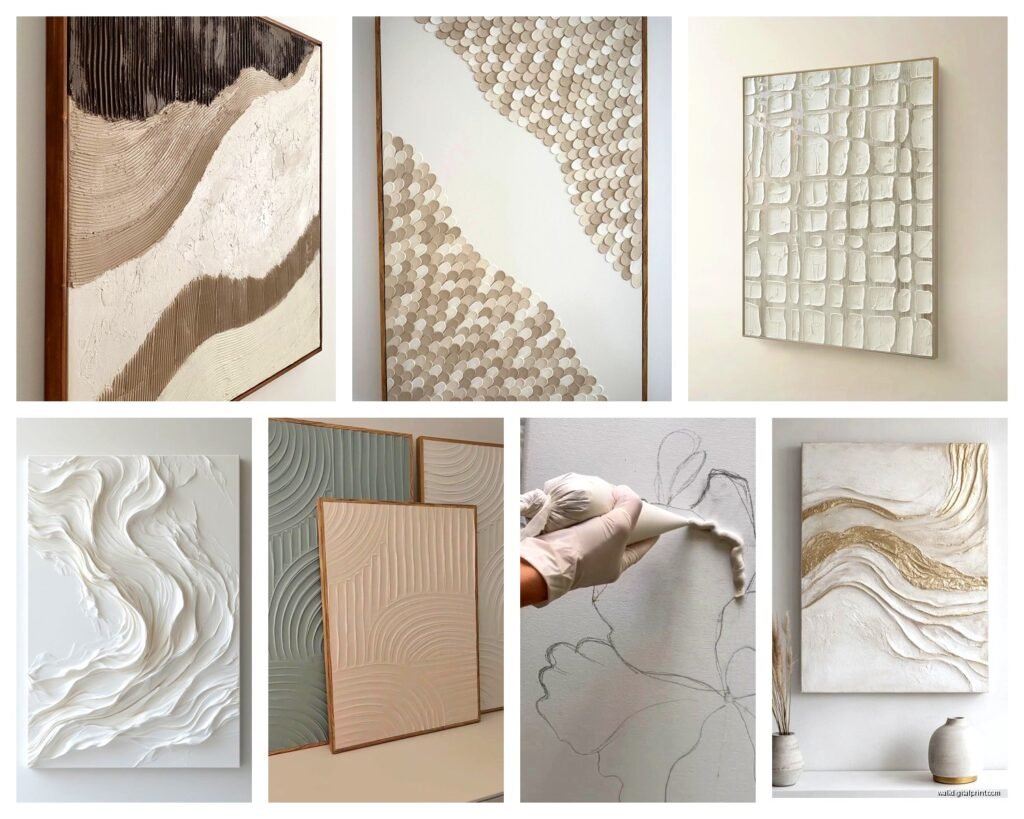
This is where it gets fun. You can go abstract or do actual designs. I’ve done everything from geometric patterns to florals to just random organic shapes. For your first one I’d say go abstract because you can’t really mess it up.
Take your medium palette knife and load it up with spackle. Hold it at like a 45-degree angle and drag it across your base layer. The angle matters because it creates these peaks and valleys. If you hold it flat you just get smooth coverage which isn’t what we want.
I like to work in sections maybe 6 inches square at a time. Build up some areas higher than others. The contrast between thick and thin areas is what makes the whole thing interesting. Some spots on mine are probably half an inch thick, other areas you can still see the base layer through the texture.
Tools and Techniques That Actually Work
Wait I forgot to mention you can use other stuff besides palette knives. I’ve used:
- Old credit cards for straight lines
- Combs for parallel ridges
- Crumpled plastic wrap pressed into wet spackle
- The edge of a rubber spatula for curves
- My fingers honestly, wear gloves though
The plastic wrap thing creates this really cool organic texture. You press it into the wet spackle and peel it off before it dries. Creates these random patterns that look way more professional than they are.
Fixing Mistakes
You’re gonna mess up and that’s fine. If the spackle is still wet just scrape it off and start over. If it’s dry you have two options – sand it down or build over it. I usually build over mistakes because sanding creates so much dust and it gets everywhere. Like I was finding dust in my kitchen cabinets for weeks after my first project.
If you get a crack as it dries don’t panic. Mix up some spackle slightly thinner than usual and work it into the crack with a small palette knife. Smooth it out and let it dry. You probably won’t even see it after you paint.
Drying Time Real Talk
The packaging says 2-4 hours but that’s a lie if you’ve built up any real texture. Thick areas can take 24 hours to fully cure. You’ll know it’s dry when it’s completely white with no gray or pink tones. Touch it lightly – if it feels cool to the touch it’s still drying.
I made the mistake of painting over stuff that wasn’t fully dry and the paint just sank into the wet spackle and created this weird mottled effect. Had to sand it all off and start over.
Sanding Between Layers
You don’t have to sand between every layer but I usually do a light sand after the base layer and before painting. Use 220 grit and just knock down any weird bumps or sharp edges. Wear a mask because the dust is nasty.
Some people go crazy with sanding to get everything smooth but I think that defeats the purpose. You want texture. I just sand enough to make sure nothing’s gonna poke you if you touch it.
Painting and Finishing
This is where your relief work really comes alive. I use acrylic paint because it’s easy and dries fast. My go-to technique is to paint a base color all over, let it dry, then dry brush a lighter color over the raised areas.
The dry brush technique is super easy. Dip your brush in paint, wipe most of it off on a paper towel, then lightly brush over the surface. The paint only catches on the high points and creates this dimensional effect that makes the texture pop.
Color Combinations That Work
I’ve tried a bunch of different color schemes. Here’s what actually looks good:
- Dark base with metallic gold or silver highlights
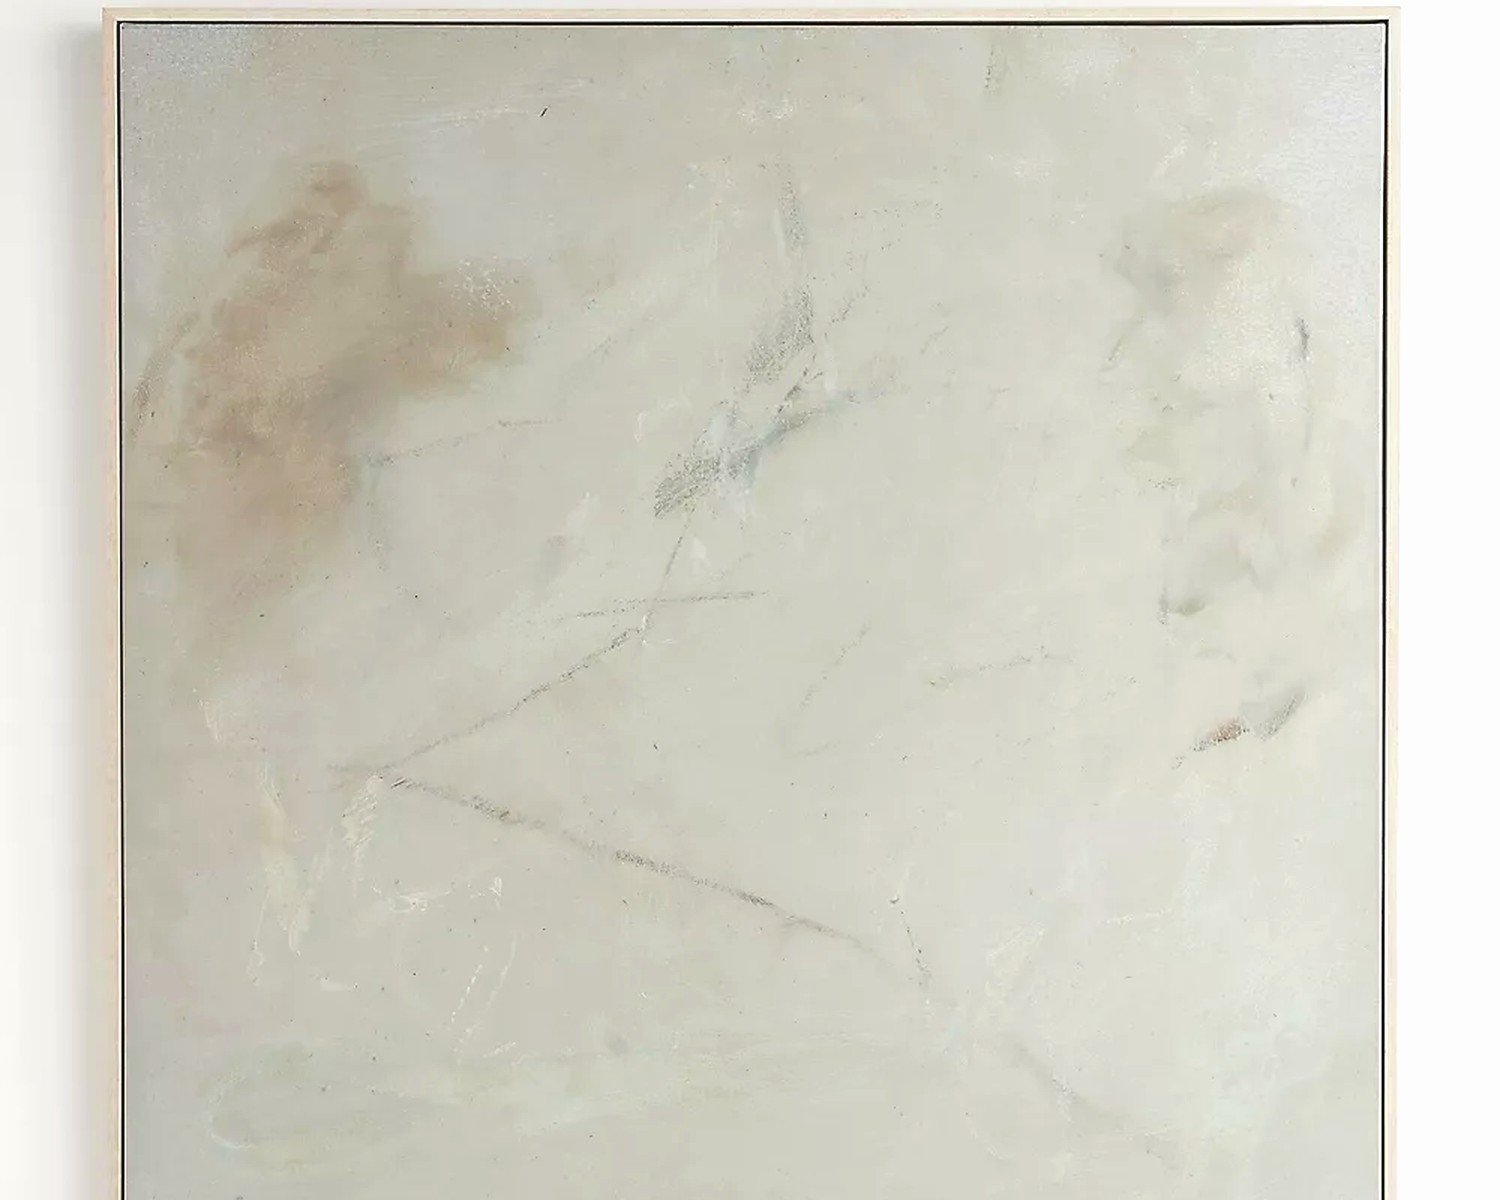
- White on white with different sheens (matte base, glossy highlights)
- Navy base with light blue highlights
- Terracotta base with cream highlights
- Black base with any metallic really
The white on white thing sounds boring but it’s actually my favorite. You get all the texture and shadow without competing colors. Very sculptural looking.
Oh and another thing, if you want a really dramatic look, paint the whole thing one color then use a contrasting color in the recessed areas. Like paint everything white, then use a small brush to get dark gray paint into all the valleys. Creates insane depth.
Sealing Your Work
You gotta seal this stuff especially if it’s going in a bathroom or anywhere humid. I use a clear acrylic sealer, usually matte finish. Glossy sealer can look weird on textured surfaces, makes it look plasticky.
Spray sealers work better than brush-on for textured surfaces. You need like 2-3 light coats. Wait 30 minutes between coats. I learned this after brushing on sealer and getting weird streaks that I couldn’t fix.
Going Big on Walls
If you wanna do this directly on your wall instead of canvas, same basic process but you need to think about a few things. First, you’re committed once you start. I mean you can remove it but it’s a pain involving sanding and possibly repainting the whole wall.
I did a feature wall in my home office and it took me three weekends. Not because it’s hard but because you gotta let layers dry and I could only work on it for a few hours at a time. My client actually asked me about doing one in their entryway after seeing mine.
Sketching Your Design
For walls I definitely recommend sketching your design first. Use a pencil directly on the wall or use painter’s tape to mark out sections. I did a geometric design with triangles and rectangles. The tape helped keep my lines clean while the spackle was wet.
You can pull the tape off before the spackle fully dries or wait until it’s dry. Both work but if you wait you might get some crumbling along the edge. Just go over it with a little extra spackle if that happens.
Troubleshooting Common Issues
Okay so things that went wrong for me that might happen to you:
The spackle won’t stick – Your surface is too glossy or dirty. Sand it or clean it better.
Everything’s cracking – You went too thick too fast or you’re using regular spackle instead of lightweight. Build thinner layers.
It’s taking forever to dry – You probably applied it too thick. Point a fan at it or just wait longer. Don’t try to speed it up with a hair dryer, I tried this and it made the surface crack.
The texture looks flat after painting – You probably used too much paint or didn’t do the dry brush technique. You can add another layer of highlights to bring back the dimension.
There are air bubbles in the surface – Mix your spackle more gently. If you stir it really vigorously you trap air. Also sometimes the spackle just has bubbles, pop them with a pin before it dries.
Ideas Beyond Basic Relief
Once you get comfortable with the basic technique you can do more complex stuff. I’ve been experimenting with:
- Embedding objects like shells or stones in the wet spackle
- Creating actual dimensional shapes that stick out from the wall
- Combining spackle texture with smooth painted areas
- Using stencils for repeated patterns
- Carving into dried spackle for intaglio effects
The stencil thing is pretty cool. You tape a stencil down, apply spackle over it, pull the stencil off while it’s still wet. You get these really crisp shapes with textured fill.
Cost Breakdown
This is actually a pretty affordable project. My first piece probably cost me:
- Spackle: $8
- Palette knives: $12
- Canvas board: $6
- Paint: $5 (already had some)
- Sealer: $8
So like $40 total and I had enough spackle left over for two more pieces. Way cheaper than buying textured wall art which runs like $200+ for anything decent sized.
The thing that makes this technique so good is it looks way more expensive and difficult than it actually is. People see the texture and dimension and assume it took special skills or materials. Nope, just spackle and patience really.
I’m working on one right now that’s like 3 feet by 4 feet with this wave pattern and honestly the hardest part is just the physical work of spreading all that spackle. My arm gets tired. But the actual technique is straightforward once you do it a few times.
Just start small, maybe an 8×10 canvas board, and experiment with different tools and techniques. You’ll figure out pretty quickly what kind of texture you like and what works for your space.